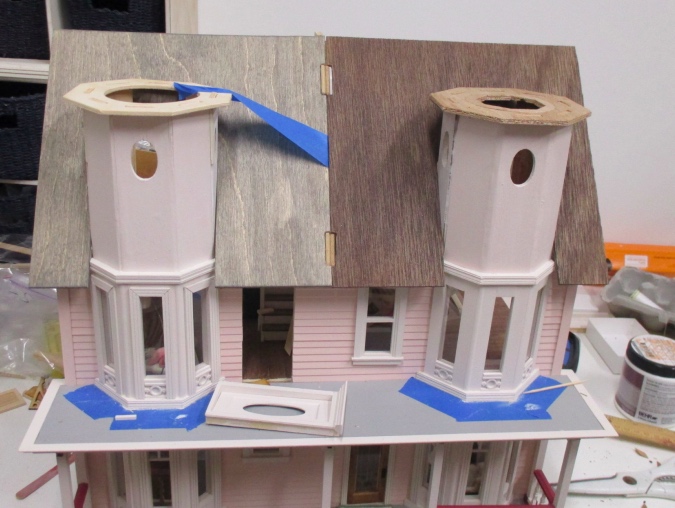
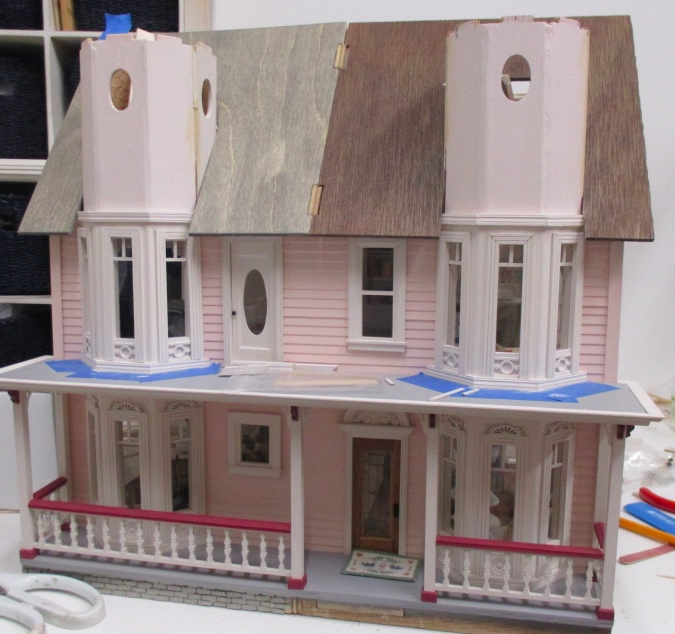
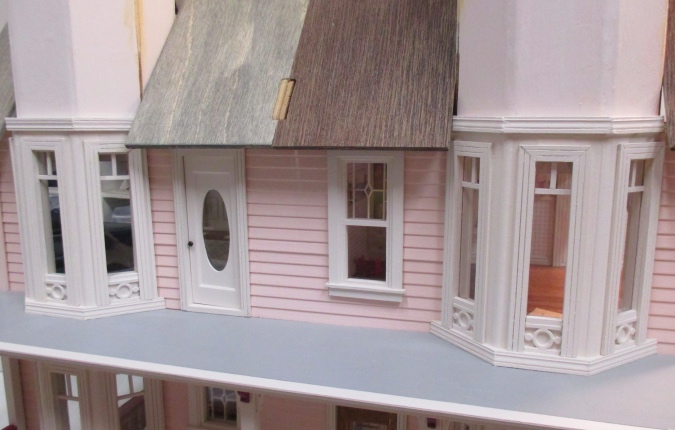
Last July, I got started on the Victorianna’s exterior bay windows. I finished them in September and moved on to the second floor bays in March. Those have sat unfinished until now. They’re not particularly difficult, they’re just boring — lots of cutting and fitting and painting small pieces, which are not my favorite things to do. But this weekend I was hit by a new wave of motivation and I’ve finally finished the upstairs bay windows. Go me!
I totally deviated from the kit for the bay windows and made my own trim out of basswood. The last time I stopped working on them, I had added all of the basswood to both sides and had added casing to the windows on the left side.
All that remained to do was cut/paint/glue the casing for the right side, add wood filler to the cracks at the corners of the casing and repaint, and add muntins. What took me so long?!
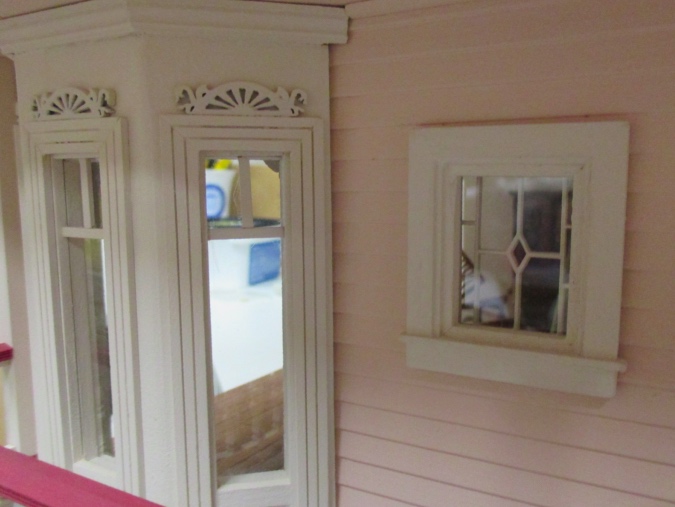
The Victorianna’s front door has a pretty laser cut insert that I bought off eBay. It’s made by Laser Creations. I’ve never seen these anywhere else besides this particular eBay store.
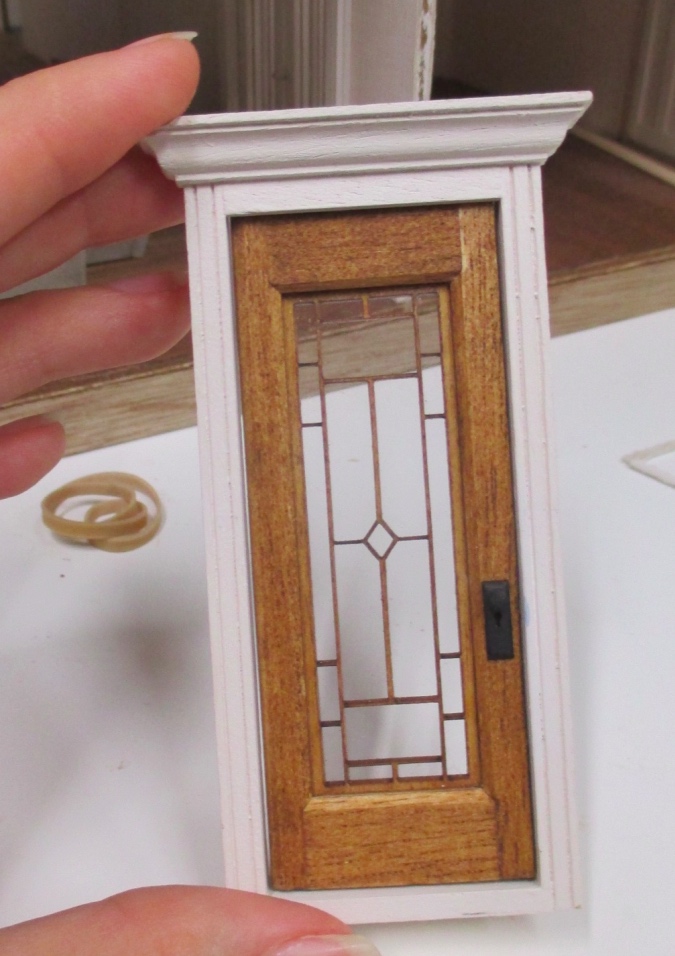
(The eBay listing calls this a “mullion”, but Wikipedia says that muntins separate the panes of glass, while mullions are the strips of wood that separate windows sharing the same hole. I’ve often heard muntins referred to as mullions… trying to be accurate, here, but muntin still sounds wrong to me!)
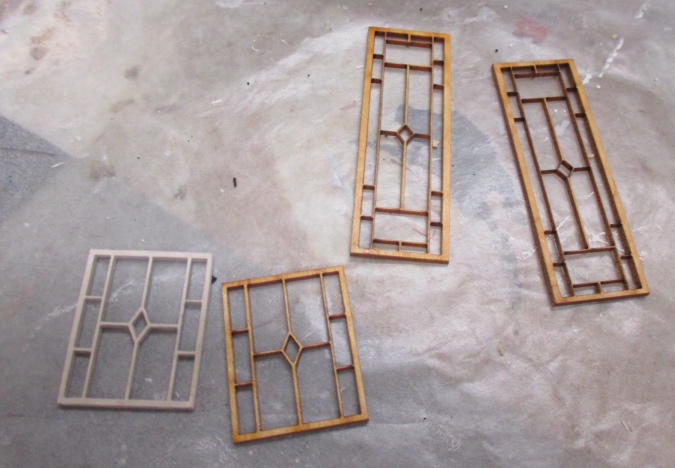
Anyway — whether it’s a mullion or a muntin — I was excited when the same seller recently started carrying a 1:24 window version of the same design. I bought two of them for the front of the Victorianna, along with two more door inserts to use in the doors leading to the third story tower rooms.
The windows are already glued in, so adding the inserts was a bit challenging. I had added a sash to the window in the little girl’s room. I popped this off and then wedged the muntin up into a small gap between the upper trim and the window frame. The insert was slightly too wide — I carefully sanded the sides using the band sander until it fit. Then I added a smaller sash underneath so it doesn’t look like the insert is just hanging there.

Here’s the exterior view. This is a Houseworks window. I would have liked to add these to the double window in the other little girl’s room as well, but that one’s a Carlson’s window and the dimensions are slightly different.
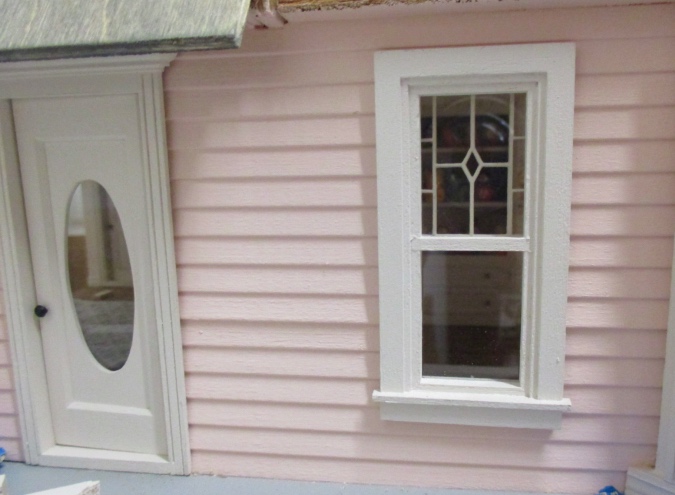
The downstairs window is also a Houseworks window that I cut down. The trim around this window hangs slightly over the hole. (I don’t think I did that on purpose — it’s so deep inside the house, it was hard to see what I was doing!) Again, after sanding the edges, I was able to twist and pop the window into place. There’s a slight bit of space at the top and bottom but it doesn’t look bad.

Considering I made this window long before I had the idea of adding these things, it’s amazing it worked out so well!
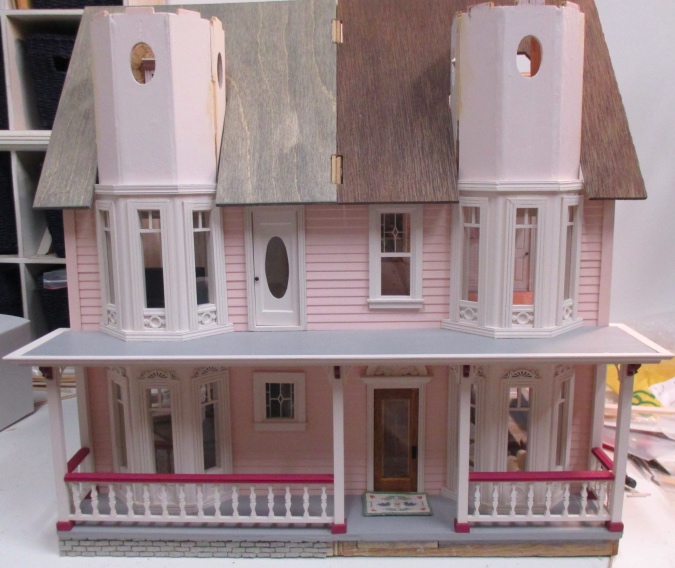
So, one year later, the exterior bays are finished! Well, almost. There’s one more bay window on the back side of the house. Maybe I’ll get around to it *next* July.
The next step for the exterior will be the upstairs porch railing, and then I’ll glue in the front roof pieces and get to work on the top third of the towers, which will have fishscale shingles. First I need to make sure I’ve done everything in the master bedroom and nursery that requires having the roof off.
 Emily is a freelance writer, miniaturist, and adventure game enthusiast.


Love the detail and it all fits so well with the trim you’ve chosen for the exterior.
Great discovery to find those muntins and they are a really pretty addition to the windows and doors.
That trim really adds a nice touch. Thanks for the link!