My first experience using Gallery Glass was in the Oak Shadow roombox, in a Guys from Texas class a million years ago. This was a 1:12, Craftsman style window with a very simple design, and we used silver tape to create the lead lines. I never got around to creating a gallery for this roombox, but here are a couple of pics.

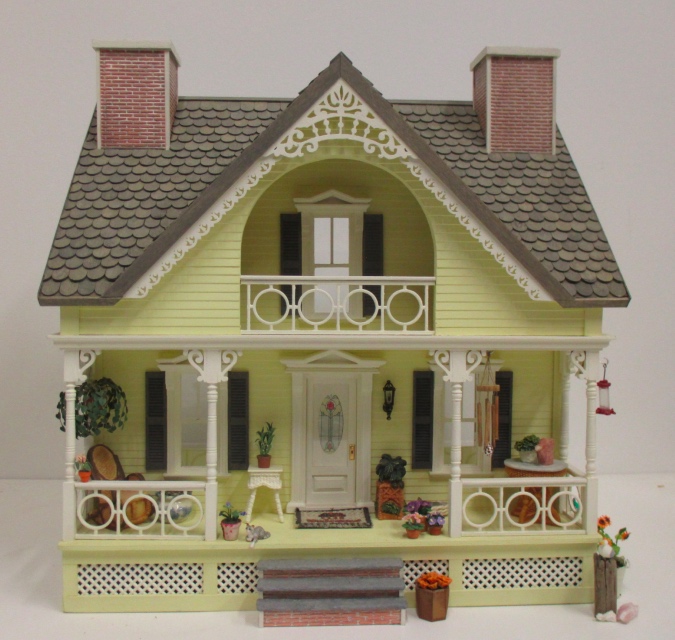
Since then, I’ve had these bottles of Gallery Glass on my shelf (plus a few more I picked up on clearance at Michaels), all sad and neglected. Now that I’m working on the oval windows in the Victorianna’s towers, I decided to give them a chance to shine.
In theory, making a stained glass window is easy — you just lay down the lead lines and then spread Gallery Glass paint between the lines. But the lines are where I get tripped up. The Gallery Glass tape or lead tape you can buy is too thick for miniature lead lines, so it would need to be cut into thin strips, and I don’t exactly have a steady hand when it comes to cutting straight lines. Also I’m not sure how to use the tape to create curves. I’ve seen beautiful results that other people have done with tape, I just don’t have the skill to achieve it myself.
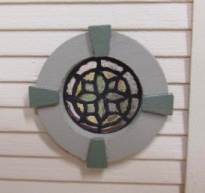 Last year I invested in some Gallery Glass Liquid Lead, thinking that would work better than tape for the lines. I tried making stained glass windows for the two round windows in the Queen Anne Rowhouse. The result was… not great. But practice makes perfect, right? (Well, maybe if you actually *practice* it does…)
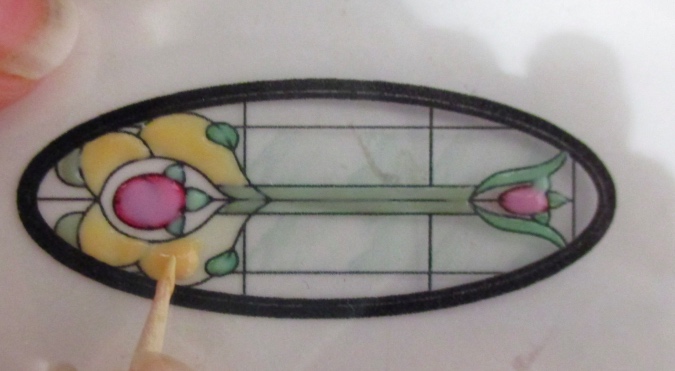
For the Victorianna, I found a simple pattern online and scaled it to fit in the oval windows. Here’s what I managed to do with the Liquid Lead, which I spread with the tip of a toothpick.
Um, no, that’s not gonna fly. Nice try, though.
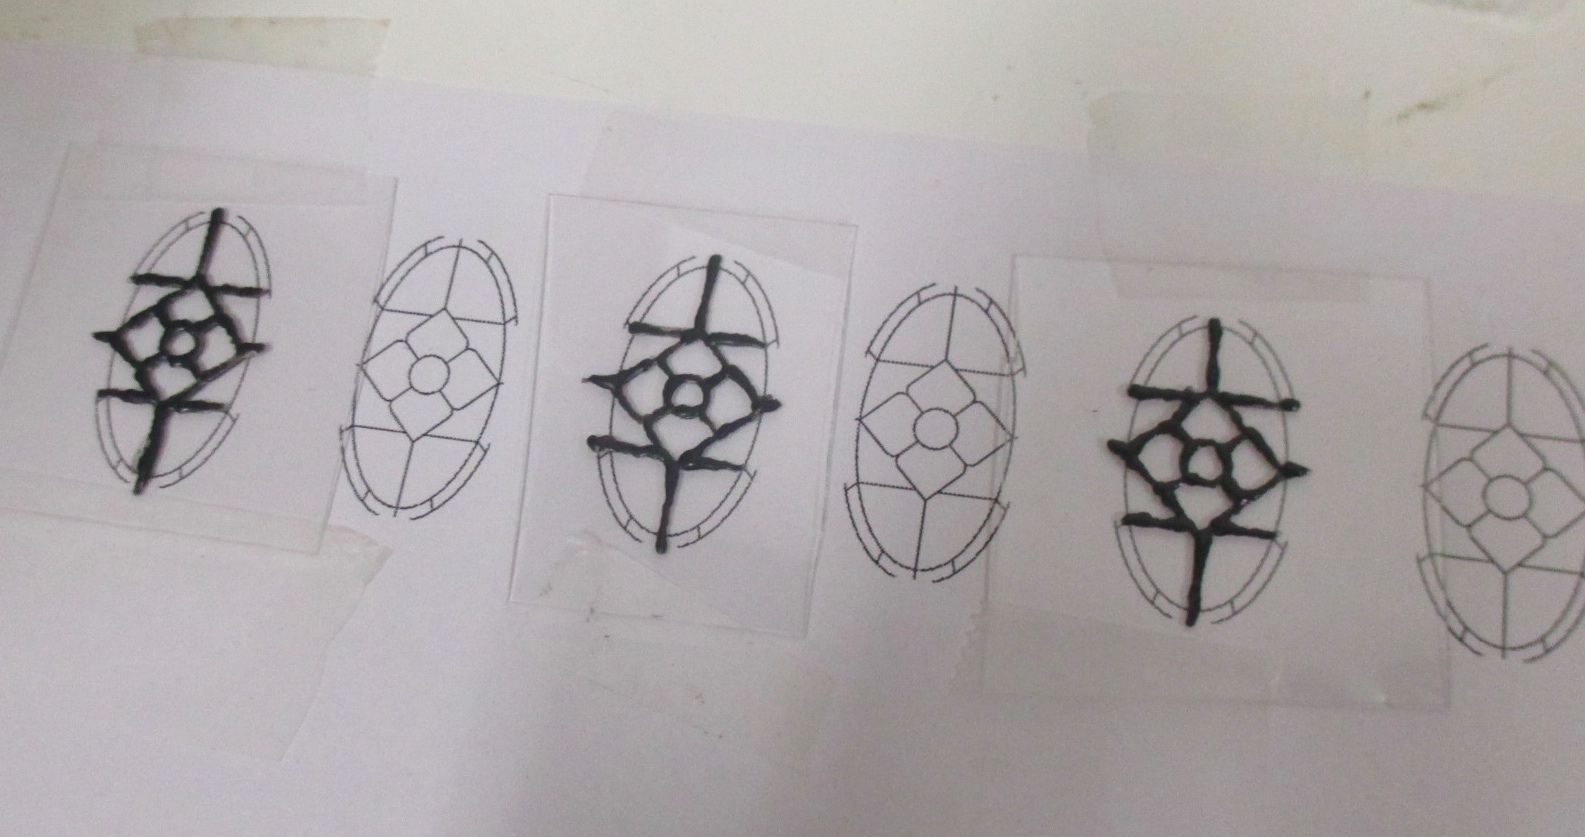
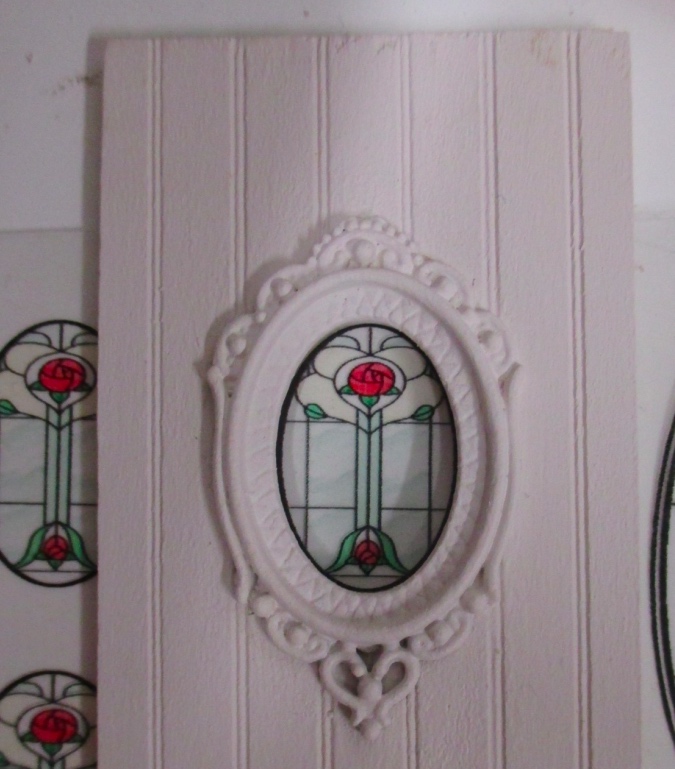
I was just about ready to nix the stained glass window idea and put the Gallery Glass bottles back on the shelf for another 10+ years when this eBay listing for stained glass inserts showed up. (Hi, karma! *waves* Thanks for stopping by!) These inserts are printed on acetate — something I’d opted not to do myself due to the expense of buying the special ink jet printer transparency sheets and replenishing my color printer ink and finding an appropriate design. I contacted the seller, Carol, and she agreed to a custom order for six window inserts, plus a larger panel for the oval door on the second floor.
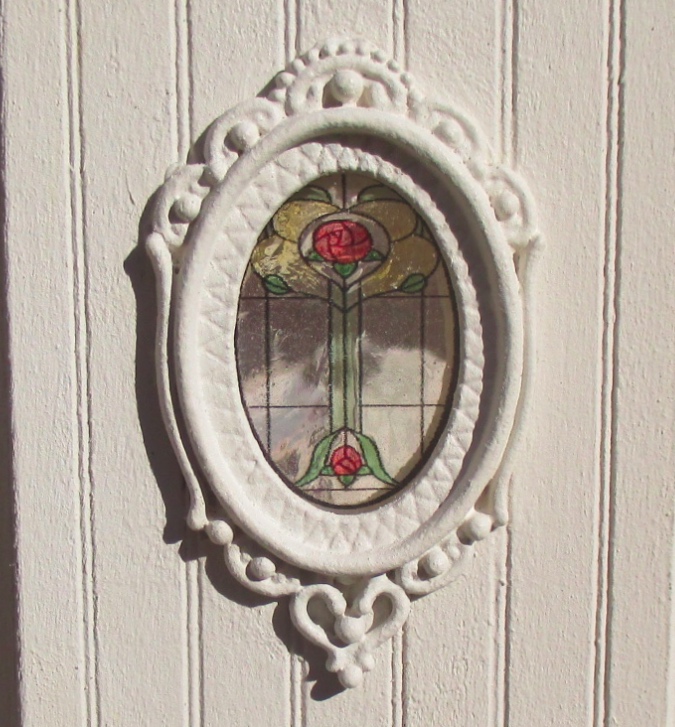
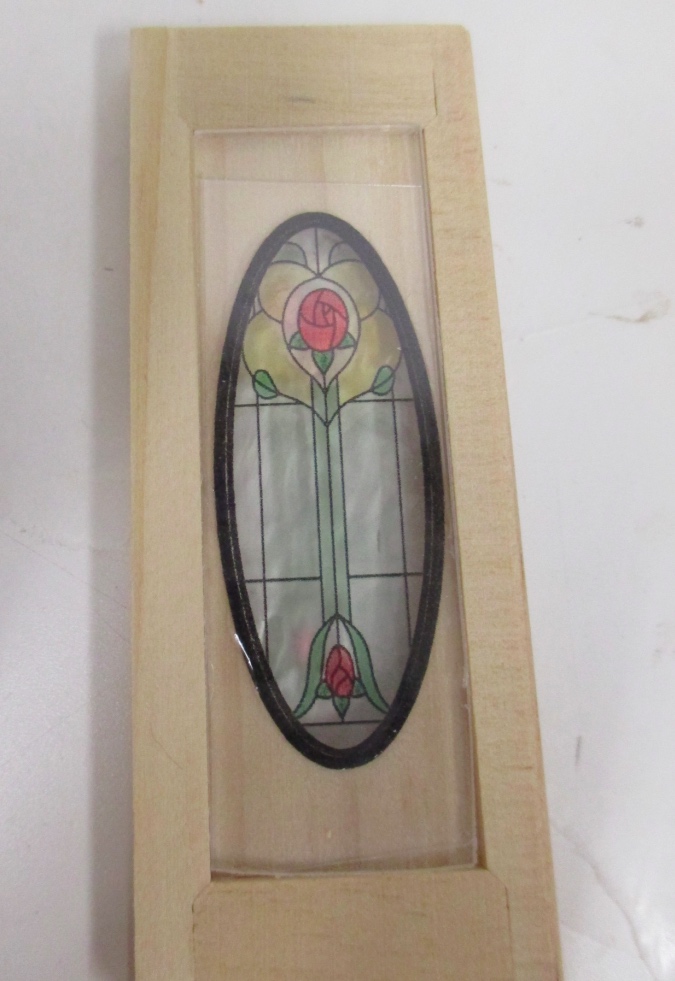
Here’s how the transparency looks in the window frame. The size is perfect, and I like the design. The color is a bit “thin” though (even more so when it doesn’t have a white background behind it), and it definitely has the flatness of a printed design rather than the thick, wavy texture of stained glass.
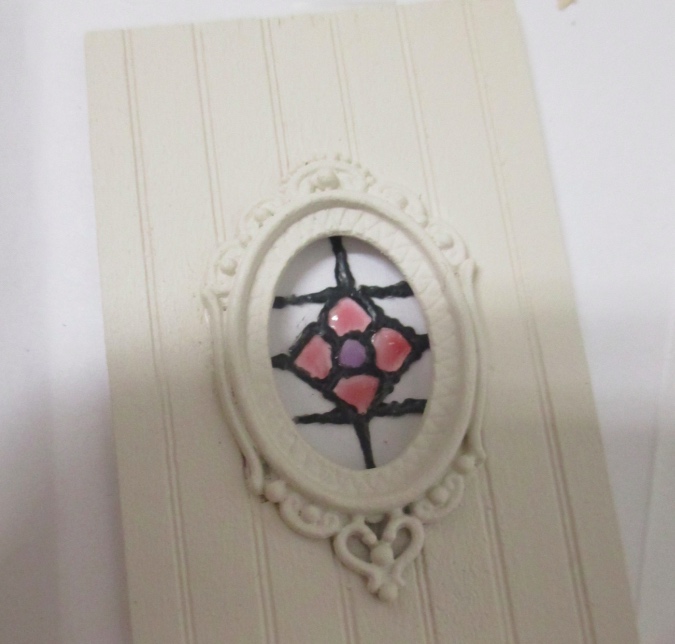
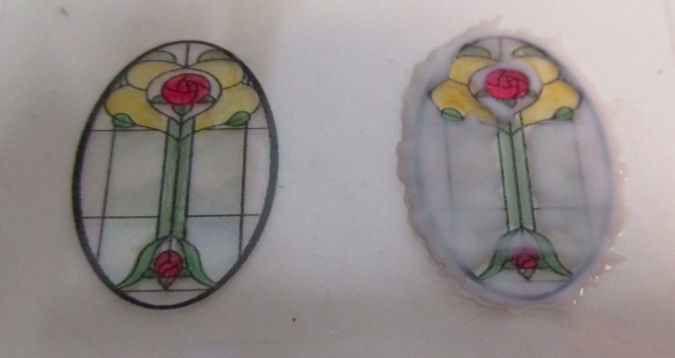
So that got me thinking… what about using Gallery Glass on the transparency? I wasn’t sure if it would mess up the ink or the acetate somehow, but a quick search on the Greenleaf forum revealed that Gallery Glass on printed acetate is indeed an acceptable practice. Hey, I may not be able to make straight lead lines, but I can paint by number!
Gallery Glass has a thick consistency that makes it easy to spread around with a toothpick. I was concerned that not having the raised lead lines would make it hard to stay in the lines, but that wasn’t a problem. Since the paint dries transparent, even when I did go over the lines, the black shows through once the paint is dry.
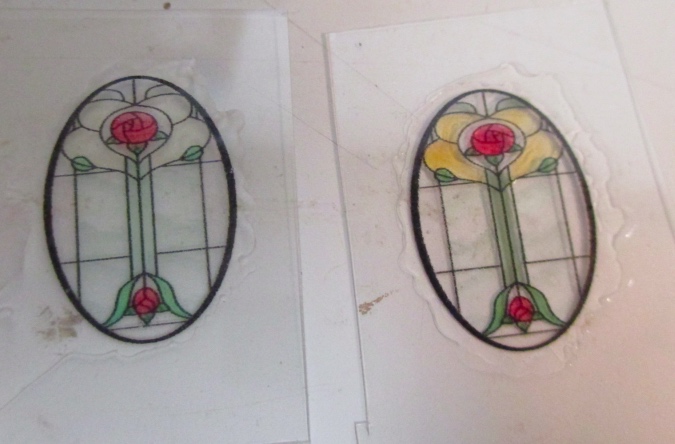
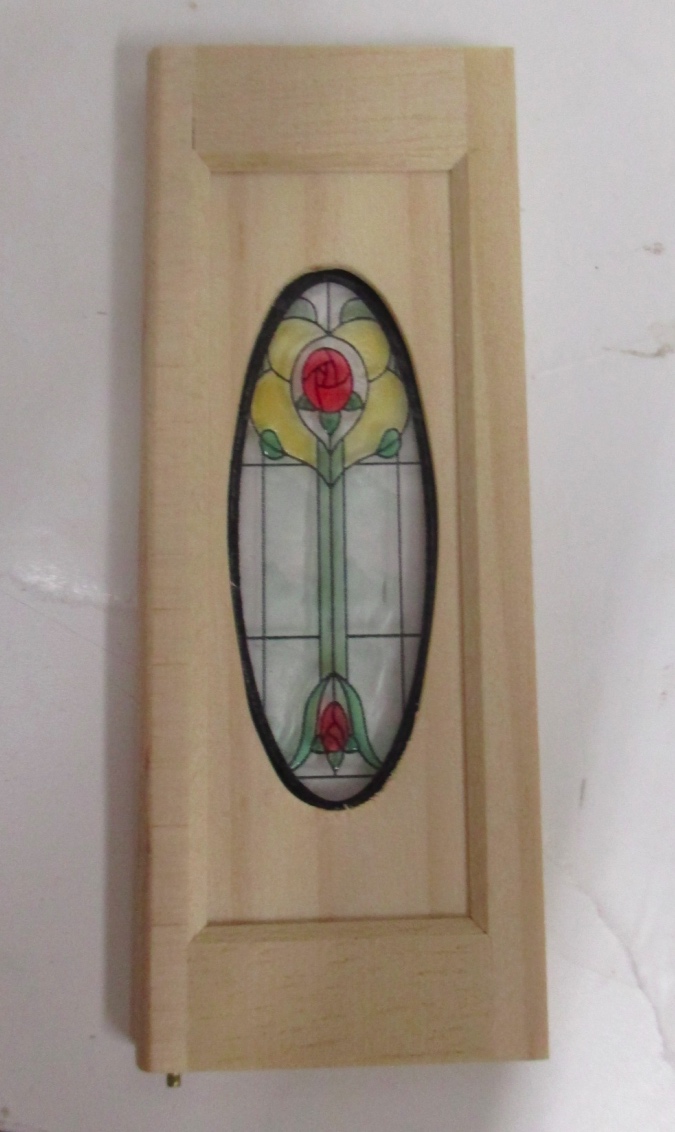
The colors I used are Rosy Pink, Light Green (leaves), Celedon Green (stem), and Amber. Once the colored paint dried, I filled in the rest with Crystal Clear.
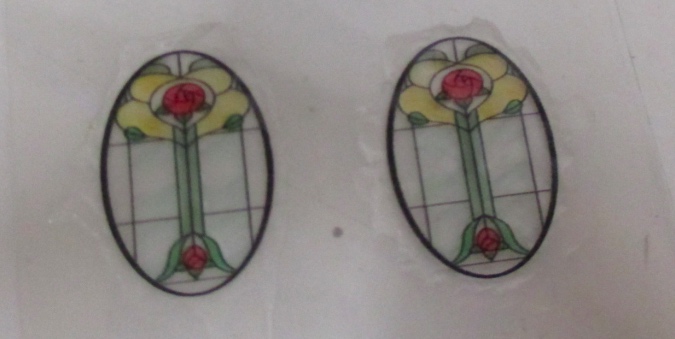
Once that had dried, I flipped over the window and coated the other side with Crystal Clear as well. That may have been overkill, but I wanted to the texture to be obvious on both sides.
Here you can see a transparency that only has a coat of clear, next to one that has the added colors. The paint makes the design much more vibrant, especially the yellow and green at the top which were so faint they were almost nonexistent. It changes the look of the window a little, but in a good way.
I glued the windows to the back of the siding pieces, using just a dab of Quick Grip in each of the four corners so the glue wouldn’t smudge into the window area.

Then I glued the siding pieces to the tower walls.
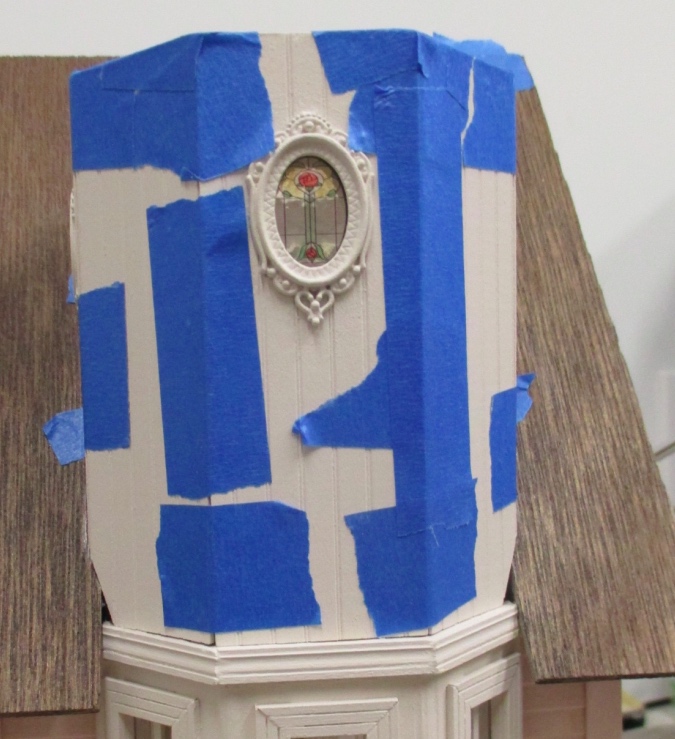
Once that glue was dry, I filled in the seams with wood filler.
And then painted over the wood filler.
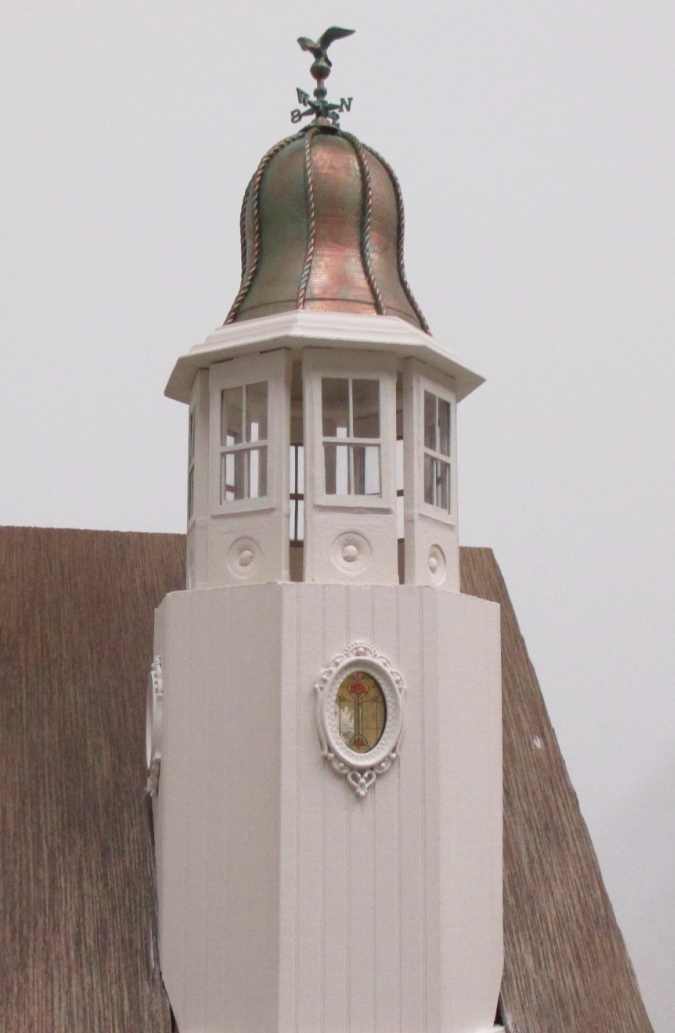
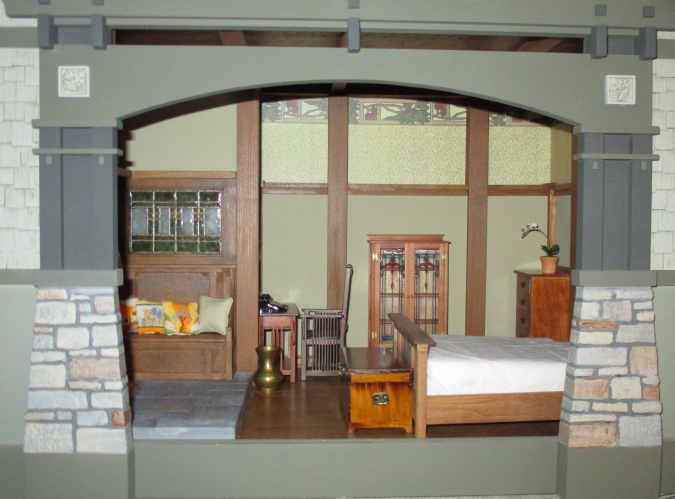
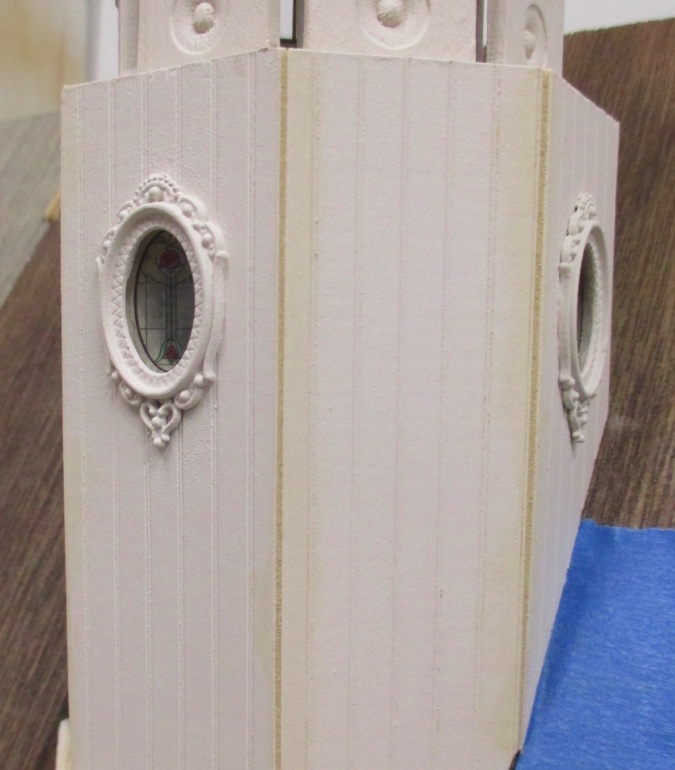
Unfortunately you can only see the design when light shines through, and the tower rooms are naturally dark. In hindsight this might not have been the best place to put stained glass windows. I took the house outdoors in the sunlight to get this picture.
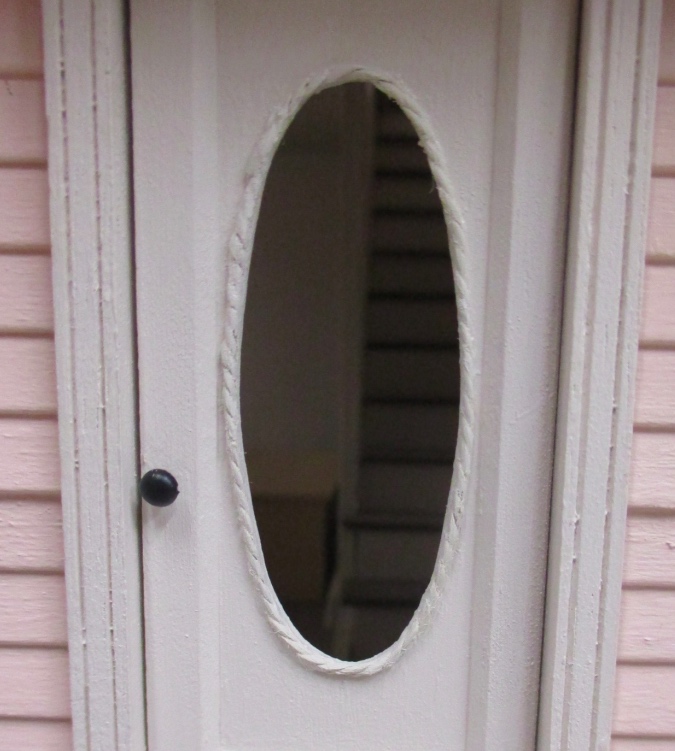
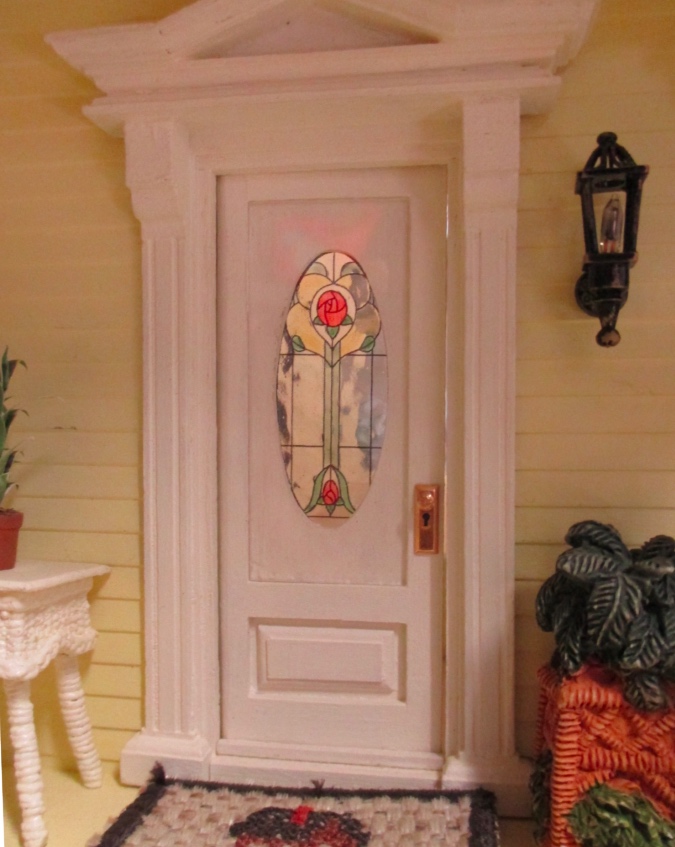
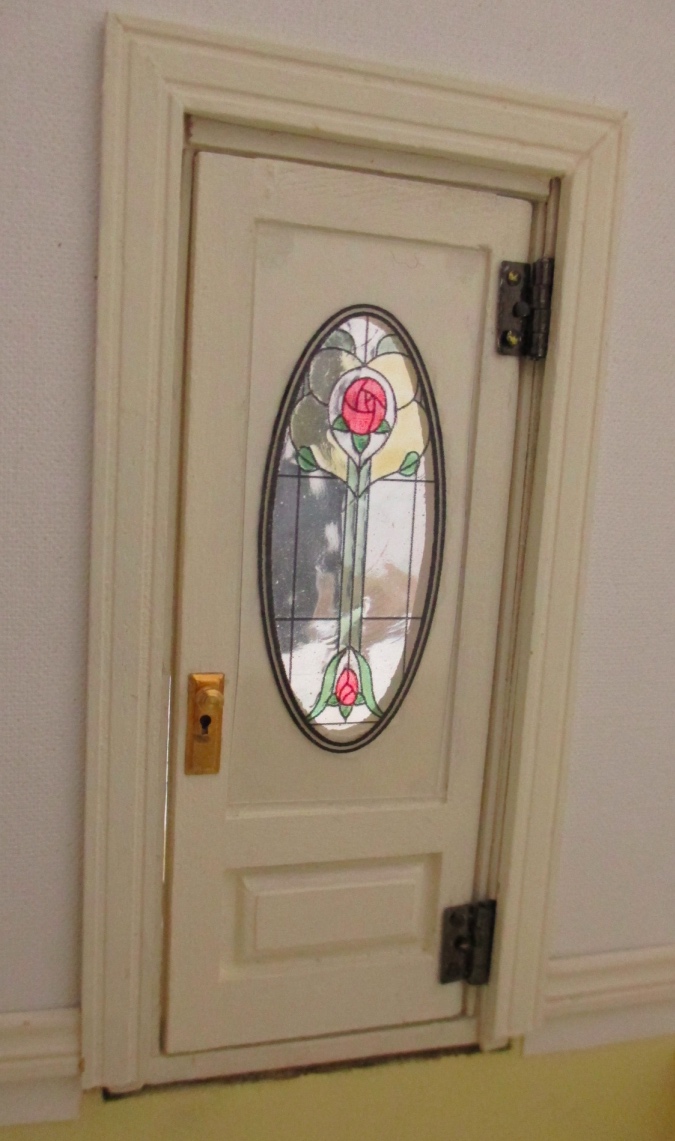
Carol sent me a few size options with different borders for the porch door. The one with the thickest border wouldn’t have been my first choice, but it fit best within the oval. (The door in the next two pics is the same type of door I’m using on the Victorianna, but not the same exact door, since that’s already painted and glued into the dollhouse. I like to do things the hard way.)
This is the back side with the stained glass panel in first, then the plastic that came with the door behind it. The acetate around the stained glass isn’t quite big enough to fit in this recess, so you can see the edges at the top and bottom. Luckily, because the door is tucked way back into the house, they’ll be virtually invisible.
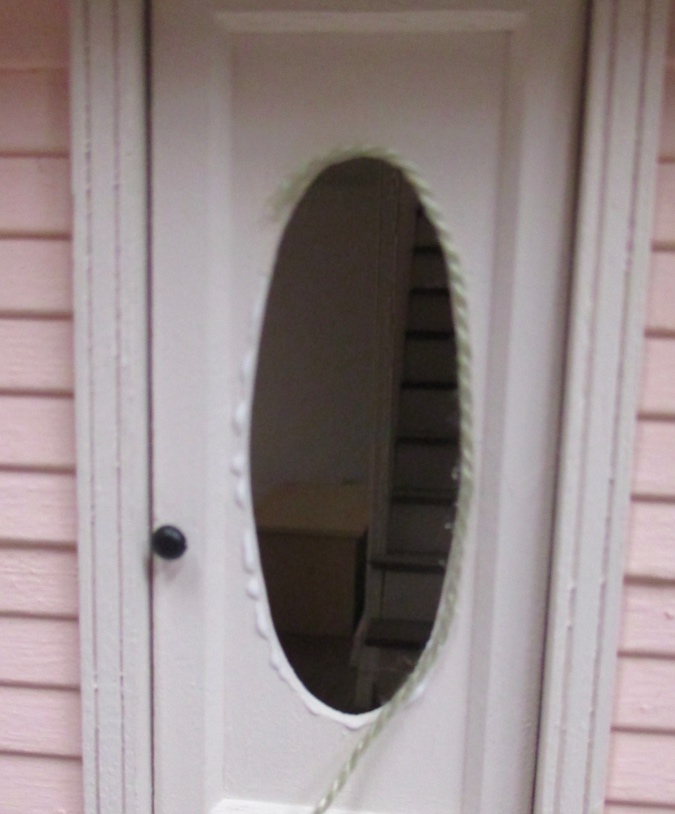
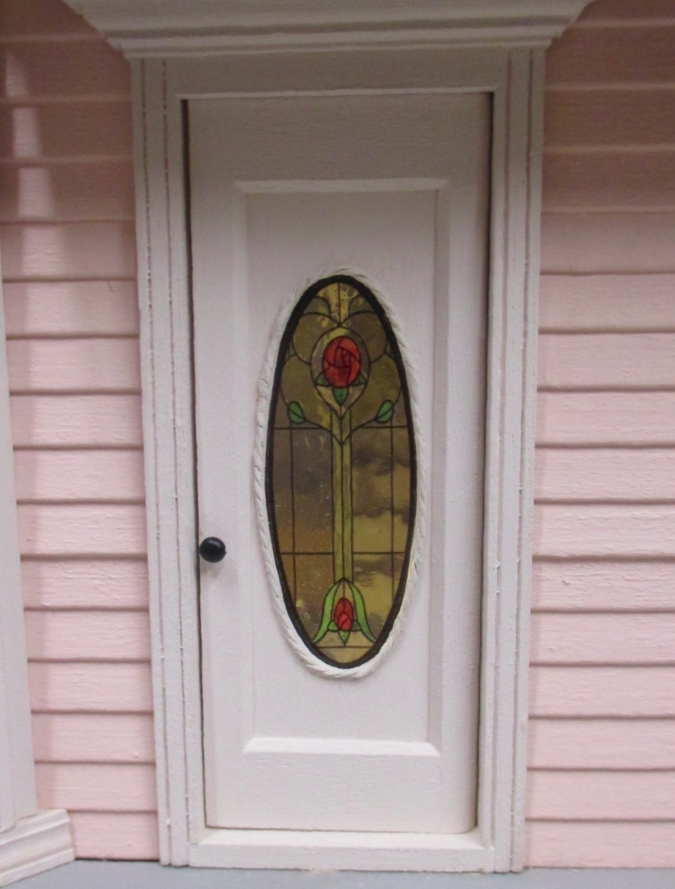
I referred to the spare door to cut the acetate down to size, then held the panel up in the real door. The black outline calls attention to imperfections in the oval. This was unacceptable to my inner perfectionist.

The oval is basically a window hole that doesn’t have any trim on it. It looks rough and unfinished compared to the elegant window trim. I would never put up with an untrimmed window, so why put up with an untrimmed door? Some DMC Flower thread happened to be sitting on the desk, inches away from my hand, and of course the best way to deal with a problem like this is to impulsively experiment with an unproven solution that would be hard to fix if it didn’t work out. What could go wrong?!
I dabbed tacky glue around the oval and glued a piece of floss around it. I actually had to do this twice because the first piece was cut too short. So that did go wrong, but it turned out okay.
Then I painted the floss to match the door. This oval isn’t perfect either, but I think it draws your eye away from the cutout’s unevenness. Maybe? Maybe.
Again using dots of Quick Grip in the corners, I glued in the panel, then glued the door’s original plastic back in on top of the panel using a very small amount of tacky glue around the edges. Here’s how it looks from the front.
Here’s the other side. The flash went off when I took this, calling attention to the edges of the plastic. Normally the rectangular piece of plastic isn’t lit up like that and the edges of the stained glass panel blend right in.
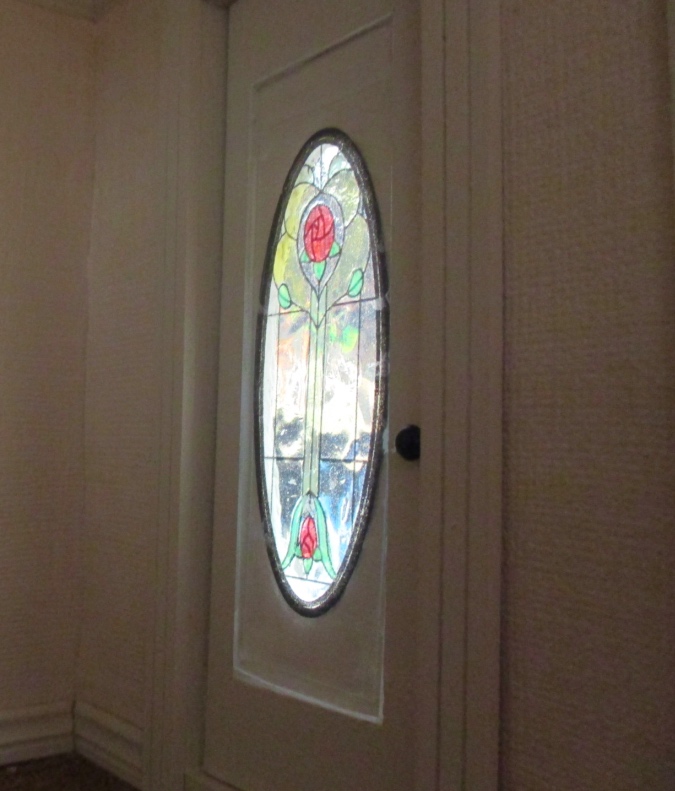
Again, it’s not easy to see unless the light is just right, but I do love that wavy glass.
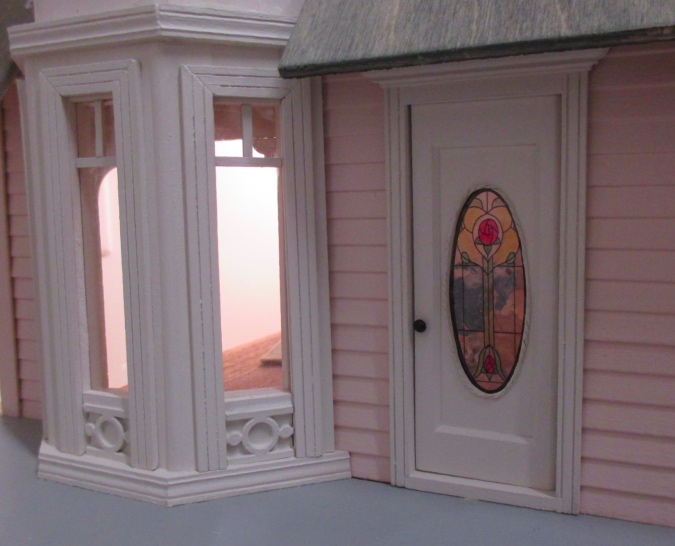
Looking at my windows and getting frustrated over the fact that you can’t see the stained glass at all without special lighting, I started musing that the house I really should have done stained glass on is the fully enclosed and electrified Gull Bay, which looks gorgeous when it’s all lit up. And hey, that house has an oval door too!
I tried some of the extra door ovals Carol had sent me on the Gull Bay’s door and found that one was a very close match.
(The weird pink glare at the top in that photo is due to the plastic that came with this door being installed on the outside. More details about this door and all the angst that came with it are here.)
Here’s how it looks inside. I don’t mind that the wood of the door is visible on the inside of the border, because you’ll never see the door from this angle in this fully enclosed house.
I was really excited to slide the house back together and get a picture with it all lit up, but sometime between when I last turned it on and now, the electricity broke itself. (Oh yeah, THAT’s why I don’t electrify dollhouses anymore…) The living room light wouldn’t work, and of course that’s the one I needed to shine through the door for the stained glass to be visible. The outlet still works, so it might just be a burned-out bulb — I didn’t have another of that type of bulb to test — but how does a bulb that’s hardly ever been used burn out when it’s just sitting there turned off?
The kitchen light also isn’t working, and I did have a spare bulb to test that one, which also didn’t work. So that one appears to be something wrong with the fixture. I have no idea why this happened when the house has been virtually untouched for the last year and a half. I’m never electrifying a dollhouse again. *sob*
Anyway. Until I can get those problems fixed (if I even bother), here’s a photo with the back of the house off, so light shines through the door.
(*sob*)
 Emily is a freelance writer, miniaturist, and adventure game enthusiast.


Looks wonderful! I might have to try this and see if it works for making mini Tiffany lamps.
Yes, I think it would work well for that! In the Oak Shadow roombox there’s a hutch with stained glass doors, I bought that at a show and I can’t remember who made it, but I think those panels are also Gallery Glass.
Your solutions for the stained glass are all SO RIGHT! I have attempted them in the past and agree that the application of the leading is the most difficult. Using the preprinted acetate was a Marvelous Plan B which really looks really good in your half scale projects.
I have also made wavy glass by just using regular white glue, which gives a nice texture to the acetate yet still allows the light to pass through.
But as far as your lights not working after the fact for WHATEVER the reason; unfortunately it’s an all to familiar situation which repeats itself far too often, regardless of the size of the project, which is why so many miniaturist are going LED, even so; I “sob” with you!
Hi Emily,
I had the same issues with led lines as well. I ended up printing on a transparency too. I did see a tip where a crafter used Glaze pens to outline the led. I tried it, and it was much easier to control. This is a link to some pens, I bought mine at a craft store.
https://www.staples.com/Sakura-Gelly-Roll-Glaze-Pens-Assorted-Set-Of-6-Pack-Of-2/product_2133315?cid=PS:GooglePLAs:2133315&ci_src=17588969&ci_sku=2133315&KPID=2133315&cvosrc=PLA.google-SALES.Office%20Supplies&cvo_crid=225705505433&cvo_campaign=950175562&gclid=EAIaIQobChMI4MruoZew1wIVg5N-Ch1d3gQZEAQYAiABEgKcZ_D_BwE&gclsrc=aw.ds
Thank you, that looks like a good option! I’ll give those a try.
Hi Emily,
I a so, so new to this whole miniature ‘thing’. Your blog was one of the first I stumbled upon and I am loving reading both new and older posts. I love your leadlights and will keep the solution in mind if ever get as far as actually building a house.
Before today’s post I had come across this website http://arjenspinhoven.nl/index.php?route=product/product&path=66_70&product_id=199 and thought about your house when I found the leadlight cutouts. I have no idea if they work but.
Anna
Thanks! I’ve been to that site before but always looking at 1:24 stuff, so I don’t think I’ve seen those before. (Your link didn’t work for me, but I found the cutouts here: http://arjenspinhoven.nl/index.php?route=product/category&path=66_70)
I’ll have to look more closely at the measurements to see if any of those would work in half scale. I really like the idea of stick-on lead lines.
I admire your willpower to get on with the project, well done !