I bought the bar that will go inside the Blackbird Bar for $15 at a miniature flea market. It has a label on the back that says “Handmade by the Mini Wizards” – I don’t know who these wizards are and haven’t been able to find any details online. If you’ve heard of them, please tell me!
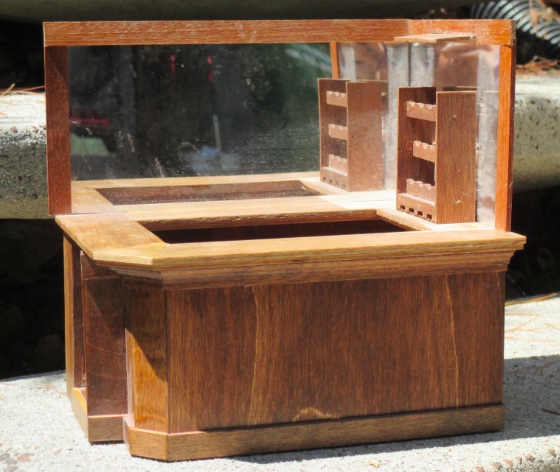
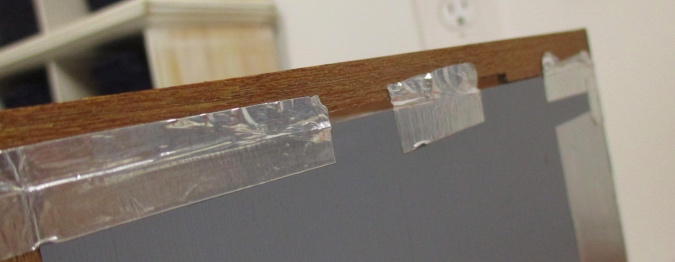
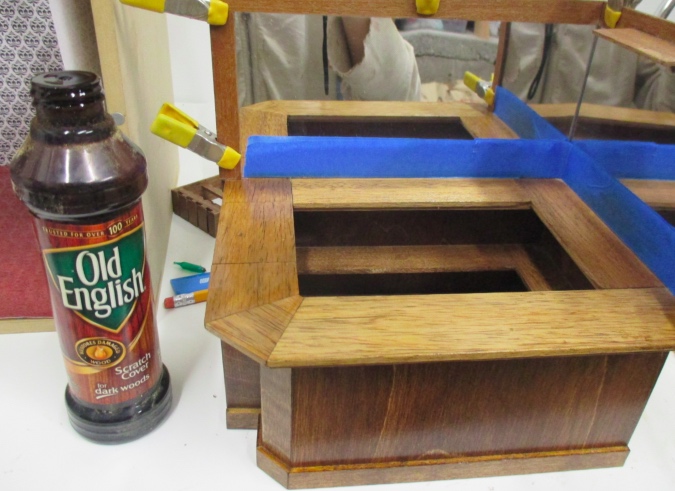
The bar needs shelves to hold the glasses and liquor bottles, but first I had to give the thing a good dusting and make some minor repairs. The trim around the mirrors had come unglued and was only being held in by silver tape on the backs.
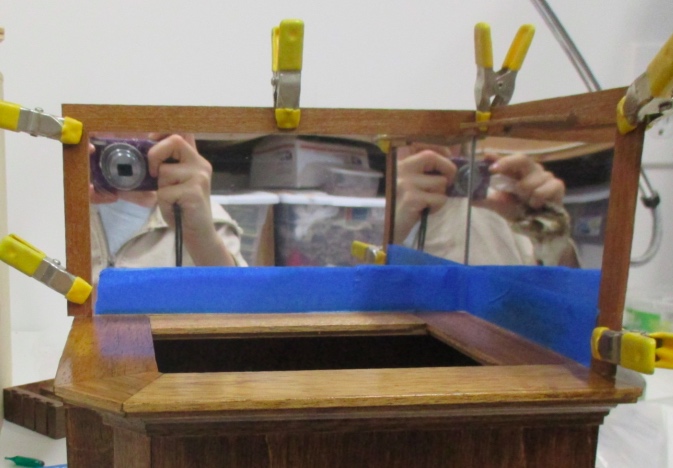
I folded the trim pieces back into place and used tacky glue to resecure them to the mirrors.
The wood was kind of dingy and I wanted to darken it up, but the bar is polyurethaned and has a lot of corners and hard-to-reach spots, so painting or re-staining seemed like it would be difficult. I had this jar of Old English scratch cleaner left over from my old house, where we used it to cover up scratches in our kitchen cabinets. A coat of this helped spruce it up.
This wine rack was disconnected when I bought the bar, and I was torn about whether to glue it back in. I like the idea of glasses hanging down off the wine rack, but it takes up a lot of space and doesn’t have the elegance I’m going for.
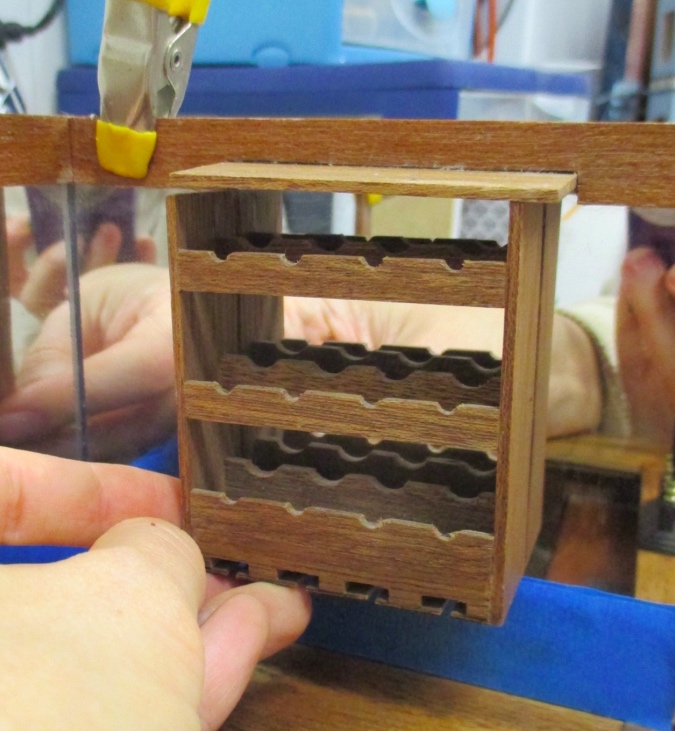
I started thinking about adding a wine rack to one of the shelves under the bar and went as far to search for one with the right dimensions, when it occurred to me that I could cut down the one that came with it.
A perfect fit! In this location you’ll still be able to see it, without having it dominate one whole side of the bar.
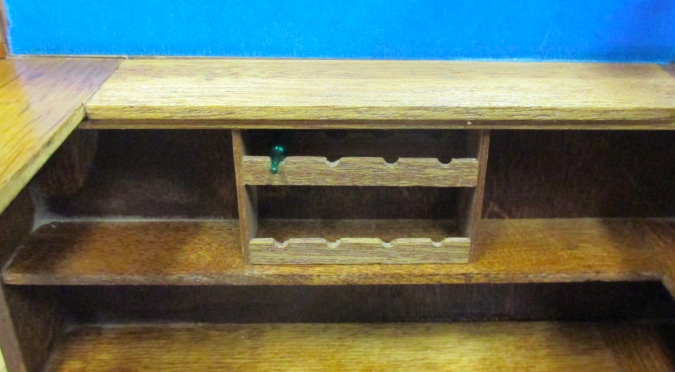
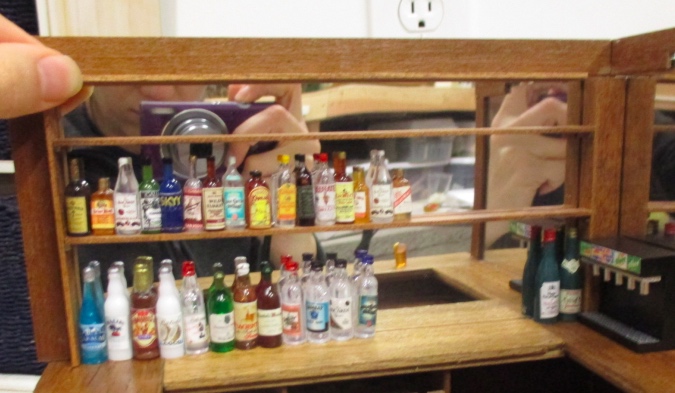
I’m planning to put bottles on the large side and glassware and the cash register on the small side. The trim is notched to accommodate the top of the wine rack, so I couldn’t just remove that piece. I thought about hanging a television off of it.
As I planned the shelves, though, I realized this area can be covered up, so I nixed the TV idea and removed the top part of the wine rack. It was also held in by the silver tape, which made pulling it out easy.
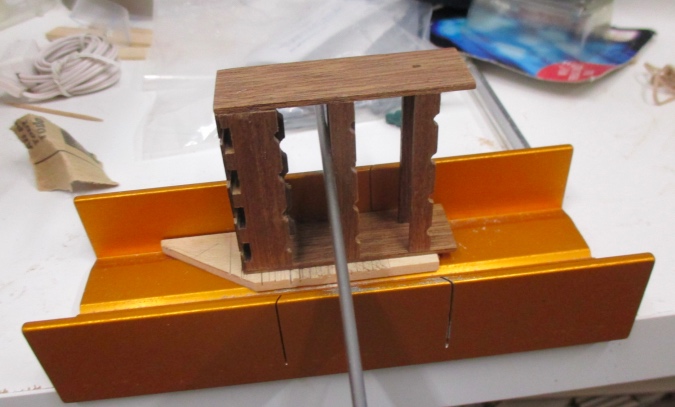
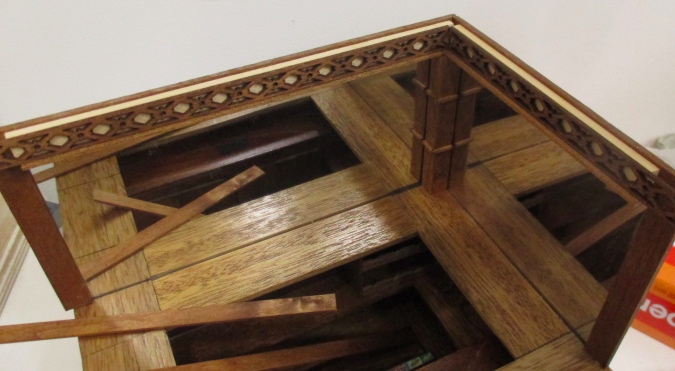
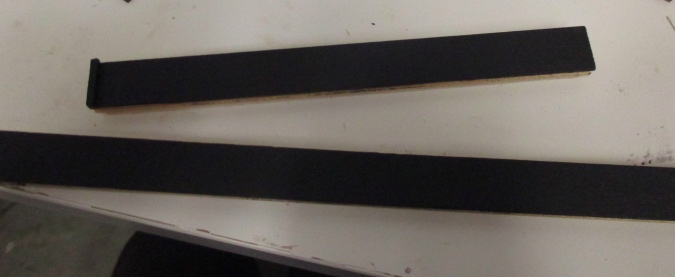
On to the shelves. I made these using 3/8″ x 1/16″ strip wood I got on clearance from Dollhouses Trains and More. It’s nicer than basswood – possibly maple? – that I think was a package of flooring that they used a few pieces of and then sold off the rest. ACE Early American stain brings the color close to the existing finish.
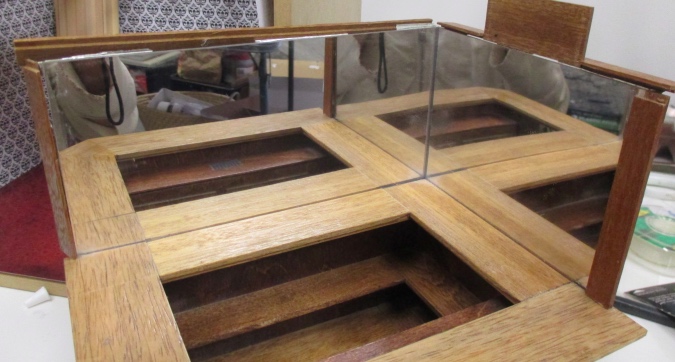
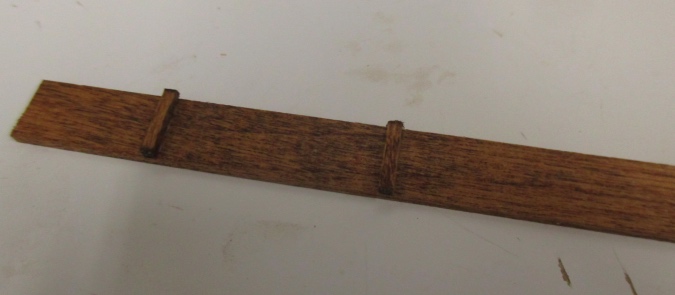
I started by making a center post to gp where the two sets of shelves meet. This is made from two pieces of the 3/8″ strip wood glued over a piece of rectangular basswood.
This piece sits flush against the mirrors, with a 1/16″ gap at the top to accommodate a top shelf piece underneath the trim. I cut two side pieces to the same height.
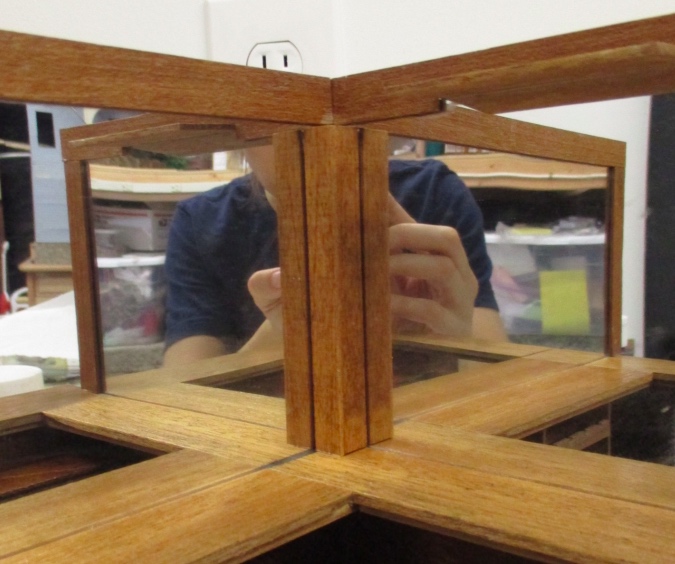
Next I figured out the spacing for two shelves and glued shelf supports onto the center and side pieces.
I wanted to make sure the bottom shelf left room for the tallest bottles, but this left the top shelf too small for even the smallest bottles. I picked off the supports and reglued them slightly lower.
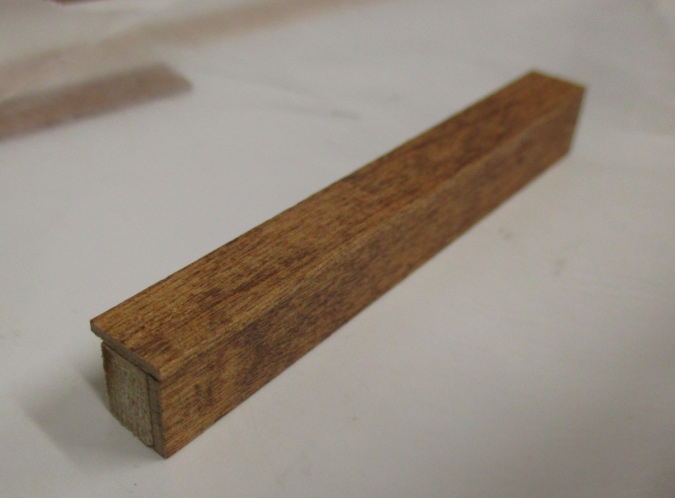
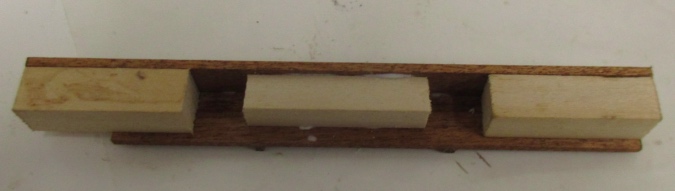
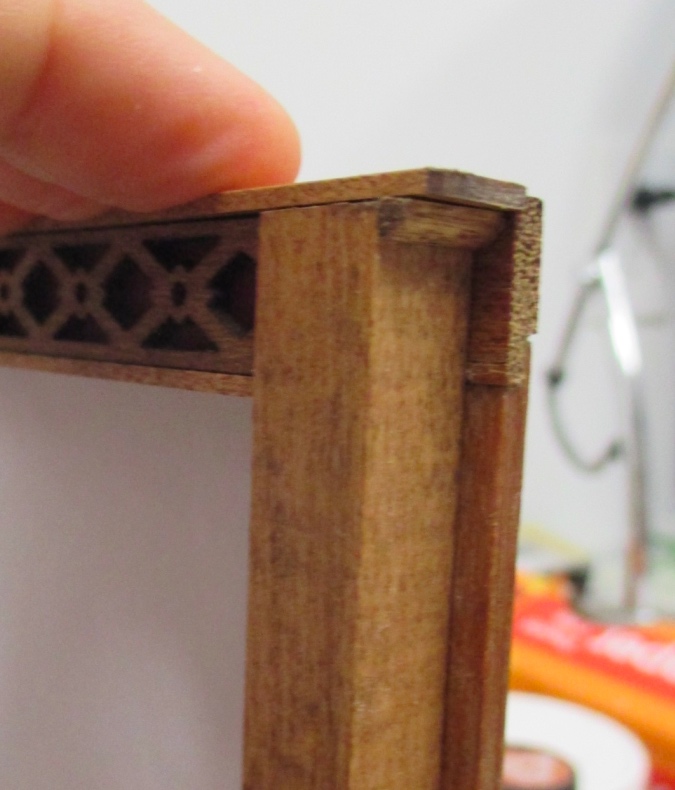
Next I turned the side pieces into posts similar to the center post. The 3/8″ x 1/16″ strips are glued over a 7/16″ dowel. The side against the mirror is flush with the mirror, and then each corner has a 1/16″ overhang that allows the perpendicular piece to neatly butt up against it.

The piece of 7/16″ dowel I had wasn’t big enough to make two posts so I cut it up and used it at the tops and bottoms, with a smaller dowel in the center for added stability.
The top of the top shelf fits snugly under the existing trim.

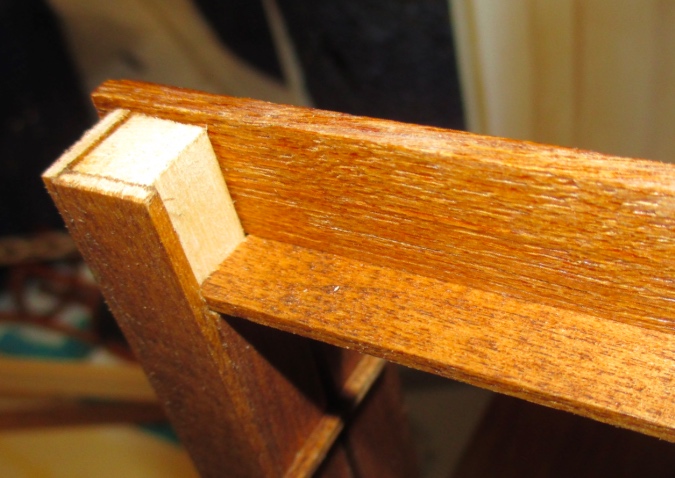
This creates a cavity to hold the decorative trim at the top. This laser cut trim is from Heritage Laserworks, left over from another project.
Behind the decorative trim are pieces of basswood. I added a 1/16″ square strip at the corner so the two decorative pieces can meet without needing a mitered edge, and painted the basswood copper to complement the copper ceiling.
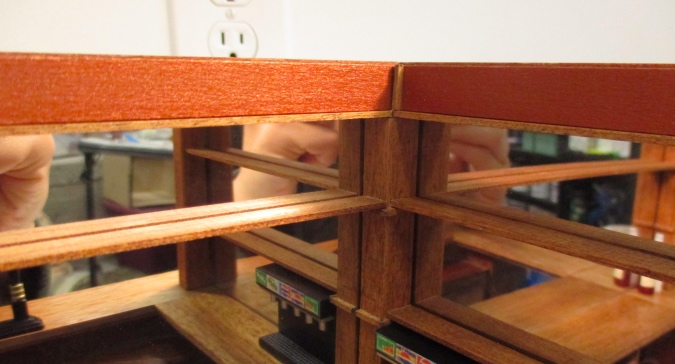
I also added shims behind the basswood pieces so they’d be the correct depth to push the decorative trim to the front of the cavity.
I didn’t like how the copper looked against the wood. Also the stained corner strip is too conspicuous.
I tried painting the pieces black instead.
This has a nice contrast, and it matches the stools and the beer taps. But when I put it in place in the roombox, I felt like the black design competed too much with the black and white wallpaper.
(About halfway through this process it occurred to me that putting paper over the mirrors makes for better photos…)
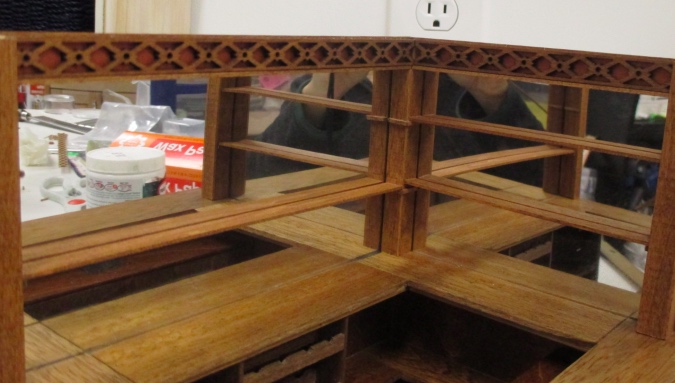
My final attempt was a color named Barn Red, and I just did one coat so the black sort of bleeds through. I like how it looks with the charred edges of the decorative trim.

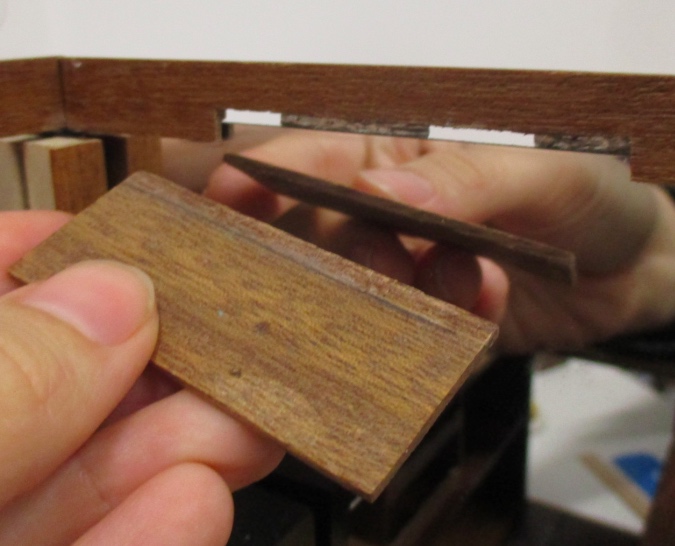
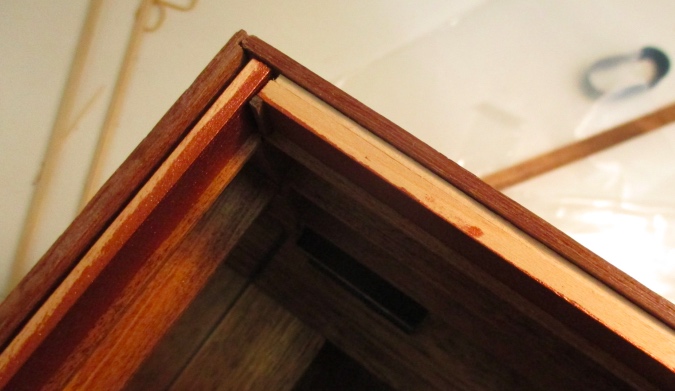
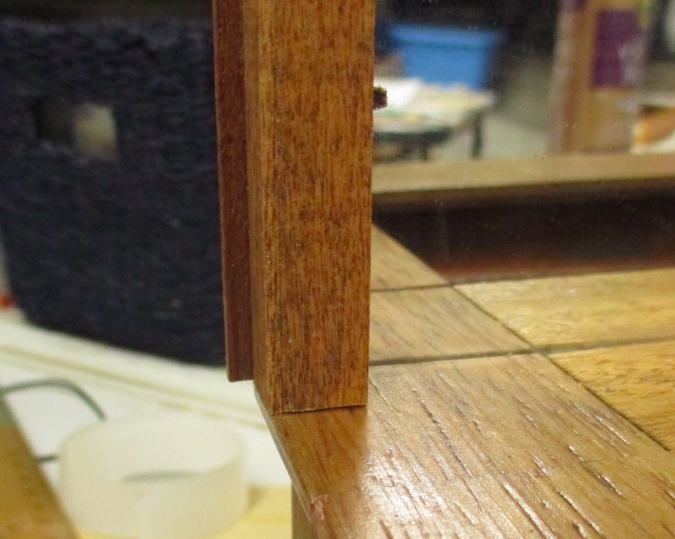
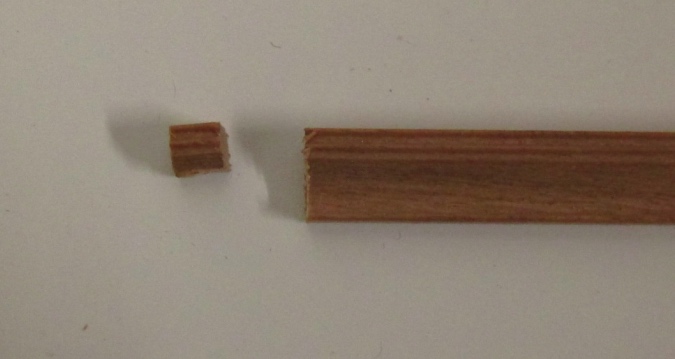
I cut top pieces to reach all the way to the side trim, and then added quarter round underneath the part that overhangs.
One more little tweak: on the left side of the bar the side trim is hanging in space. That looked weird to me.
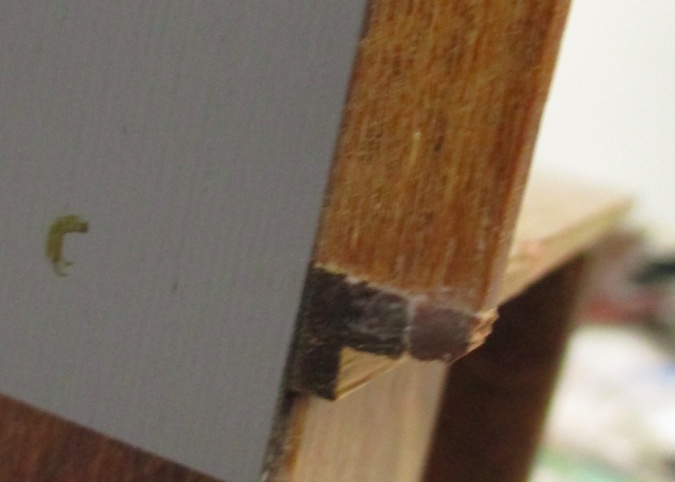
I modified a piece of crown molding to create a little corner that fits into the space under the trim.
I don’t know if this is going to stay put, but here’s hoping! In addition to gluing it to the bar, I spread glue over the seams on the back side for good measure.
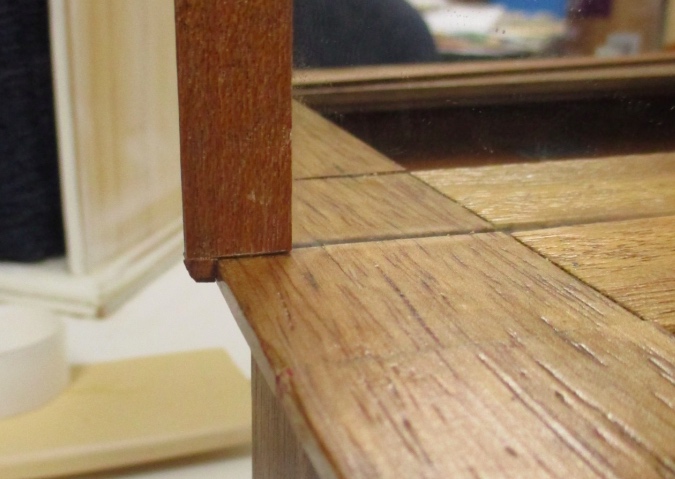
Here’s how it looks from the front. Almost like it was there all along!
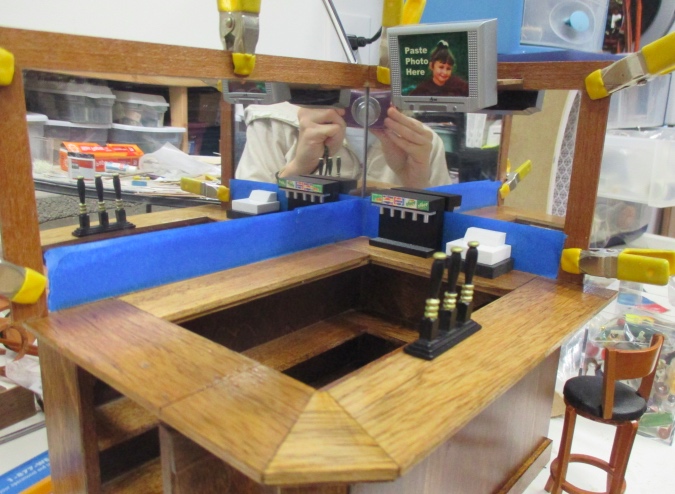
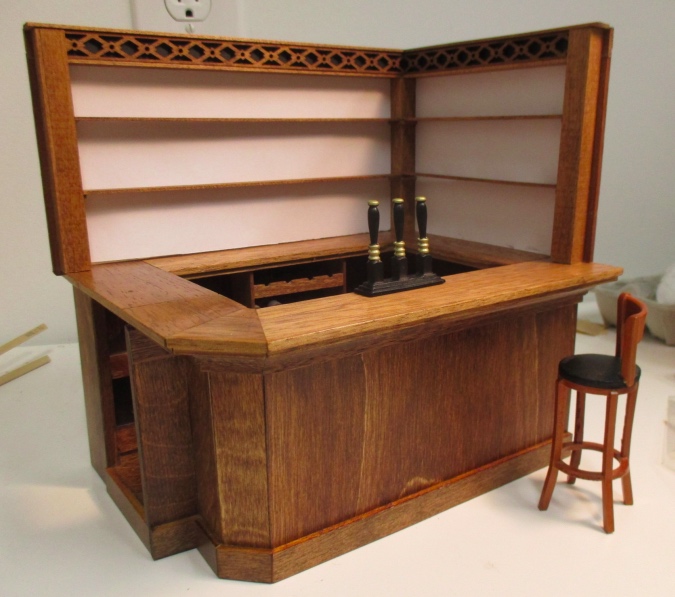
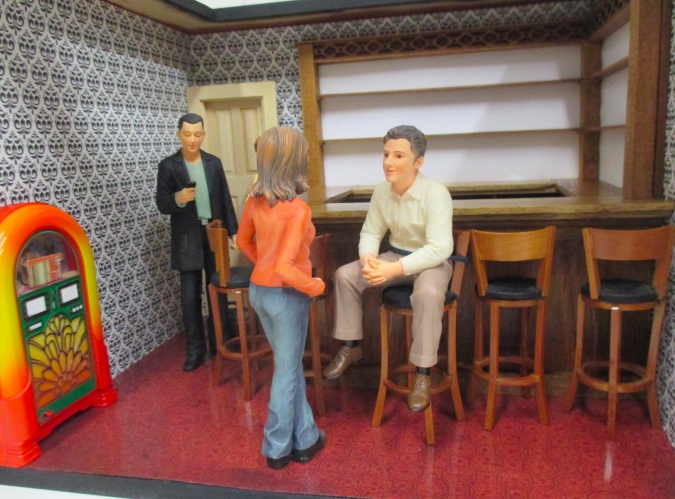
Here’s how the bar looks all put together. I haven’t glued in any of these pieces yet. I’m thinking of mounting sconces on the side posts and running the wires through to the back of the bar, which will be much easier to do before the posts get attached. Also, I plan to glue the bottles and glasses to the shelves before I glue the shelves in permanently (or I may end up only gluing the frame and leaving the shelves removable).
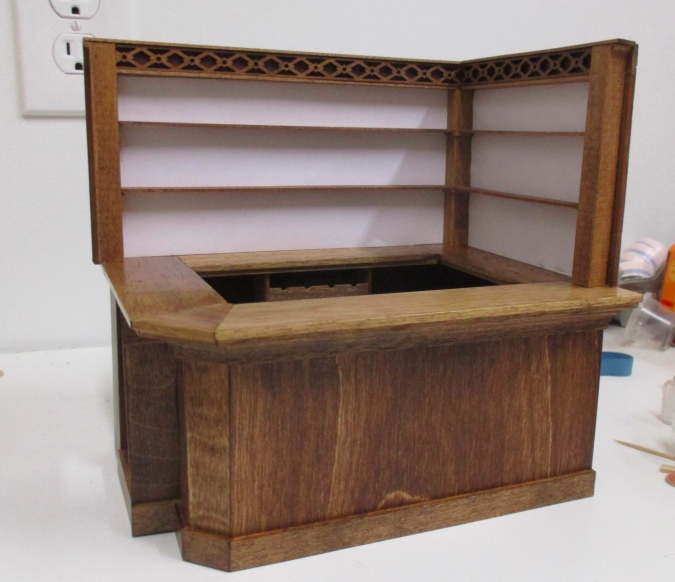
I’m really happy with how this turned out! Can’t wait to start filling it up.
 Emily is a freelance writer, miniaturist, and adventure game enthusiast.


You’ve done an amazing restoration project on a piece that many would have passed up….love all the detail work you have done to create a bar that has lots of character but will be very suitable to its purpose…well done!
Looks sharp! Love how the bar turned out.
Your refurbished bar looks Great!
I thought the bar was rather lovely when I first saw it, but after seeing the work you put into it, it now looks really amazing!This is going to be a wonderful scene.