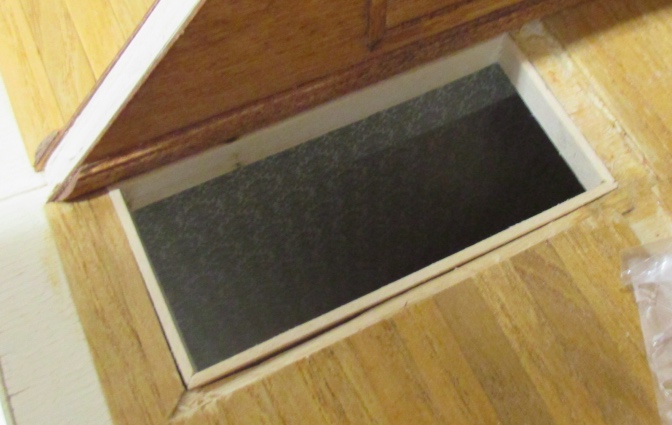
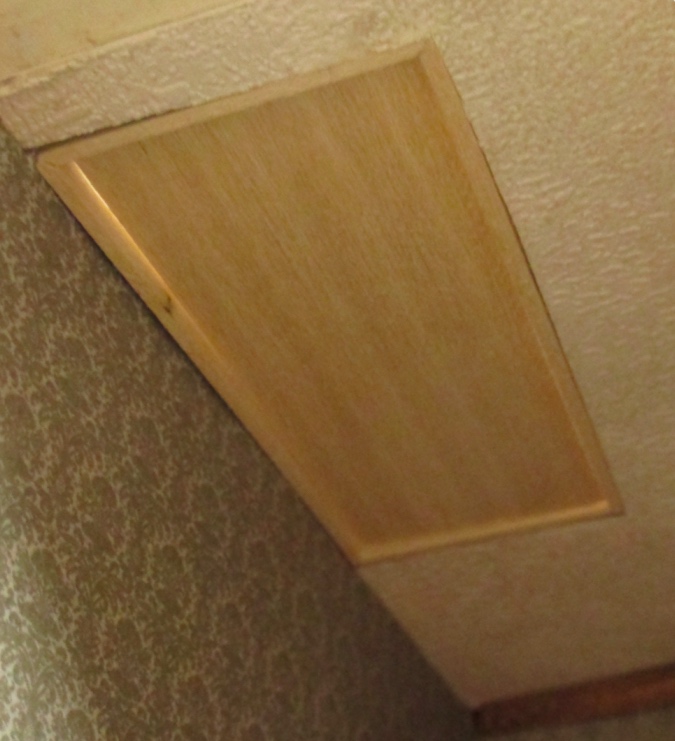
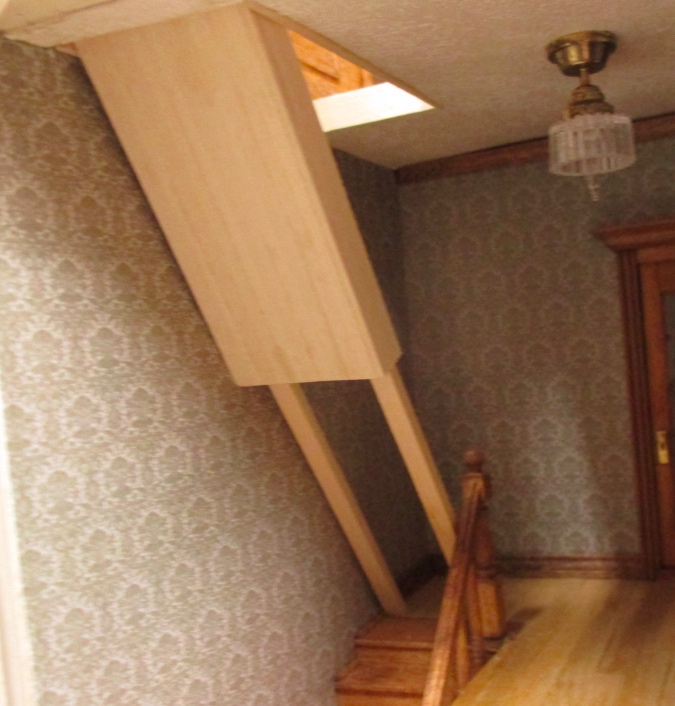
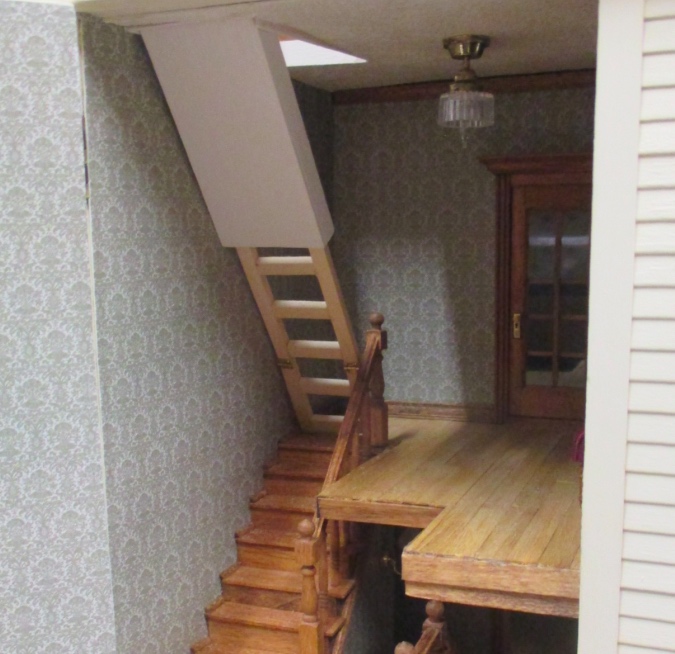
When I took apart the Rowhouse’s stair rooms so I could fix the wallpaper, I made an executive decision not to put back the staircase between the second and third floors. It just blocked too much of the room.
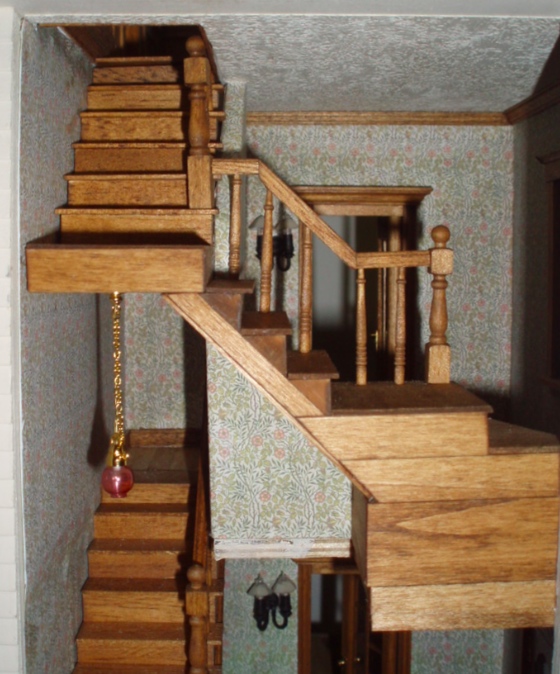
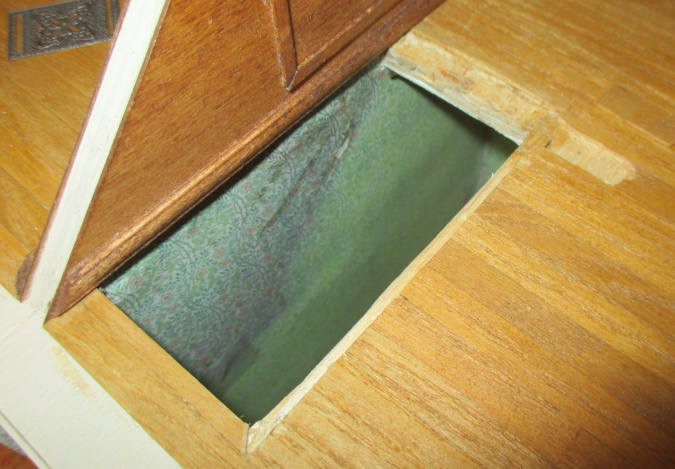
I thought about filling in the hole and having no staircase leading up to the third floor — that doesn’t bother me in dollhouses — but I didn’t have enough of the hardwood flooring pieces to patch that big of a hole.
While I was pondering this, I remembered I had a set of folding attic stairs in my stash that I bought on eBay several years ago. This set was made by Datim Miniatures, who appear to be out of business. I was unfolding the ladder, trying to figure out if it would be long enough to reach the floor, when the stairs started falling apart in my hands.
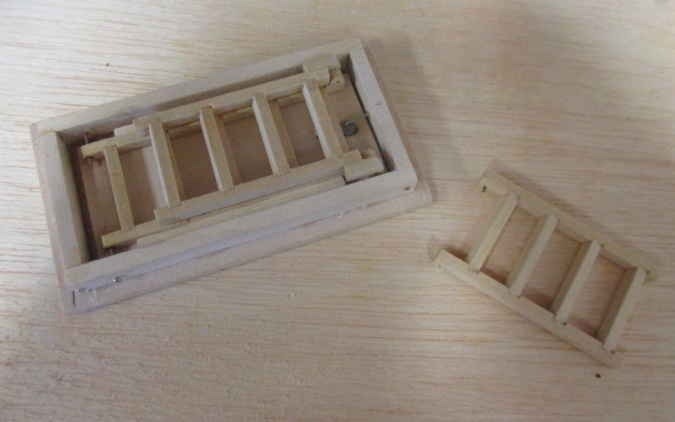
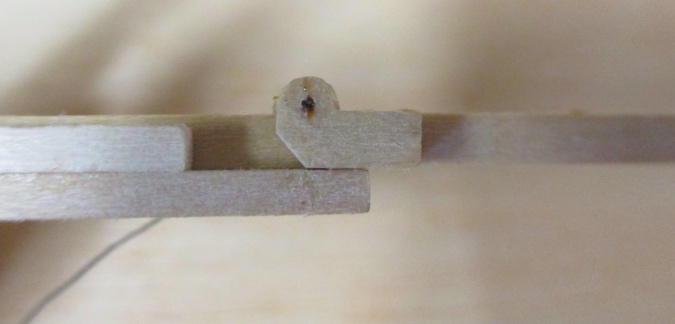
These stairs are pin hinged both at the top and at all the joints where the ladder pieces meet, and all the pins had rusted and were breaking off as I manipulated it. I managed to replace some of them, but the pins that hold the ladder pieces together were inserted into little wood blocks glued to the sides of the ladders, and one of these (not the one pictured below) split in half when I inserted a new pin. And then as I was messing with it the rungs started popping out. It just couldn’t be saved.
So that was pretty disappointing. (I think I spent around $30 on that staircase!) Timberbrook makes a nice set of folding attic stairs in 1:12 scale — I actually used them in my first dollhouse and have another set in my stash that I bought at a flea market — but they don’t come in 1:24 scale. Alessio makes a set in half scale that cost $40. I’d so fallen in love with the idea of fold-out stairs I was willing to pay that much, but I did the math and found they would be too short for my 5″ ceiling — they’re designed for a 4.5″ ceiling and wouldn’t reach all the way to the floor.
So I did what any self-respecting miniaturist would do… I made my own! (Instructions follow, see the bottom of the post for a list of supplies needed.)
I started with a piece of 5/16″ x 1/16″ basswood to create a frame around the inside of the stair hole. I cut four pieces with mitered corners to fit inside the hole.
My floor is 1/4″ thick, so the 5/16″ wood covers that and protrudes slightly to be flush with the floorboards. These pieces are a snug fit, which turned out to be important since I needed to keep testing the staircase before I was ready to glue in the pieces.
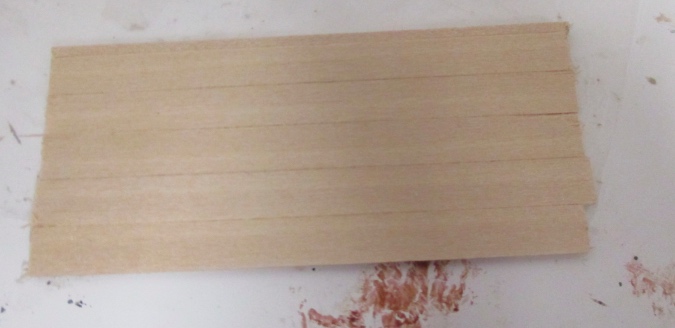
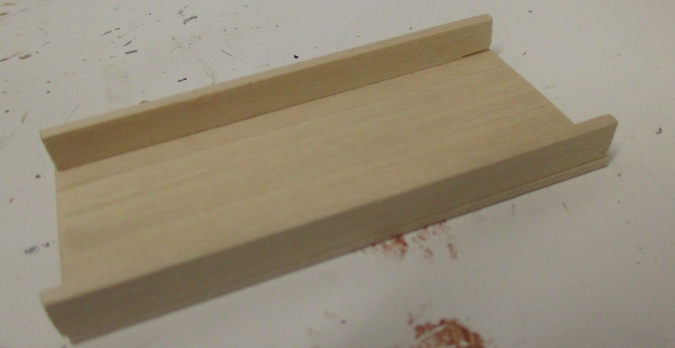
My stair hole is just over 1.25″ wide. I cut five pieces of 1/4″ x 1/16″ basswood to create the door.
I glued the five pieces together using The Ultimate glue, but Tacky glue would work too (it might take longer to dry). When this was dry I tested the fit in the hole, and it wasn’t quite wide enough, so I added a strip of 1/16″ x 1/16″ basswood to one end.
With the disc sander, I sanded the ends of the door until it just fit within the frame.
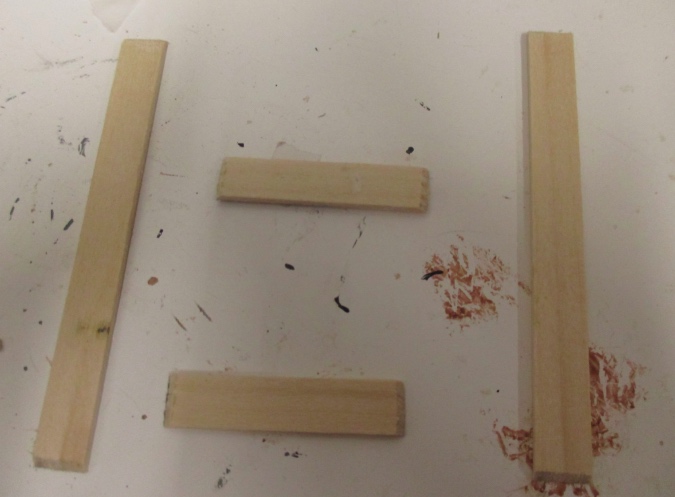
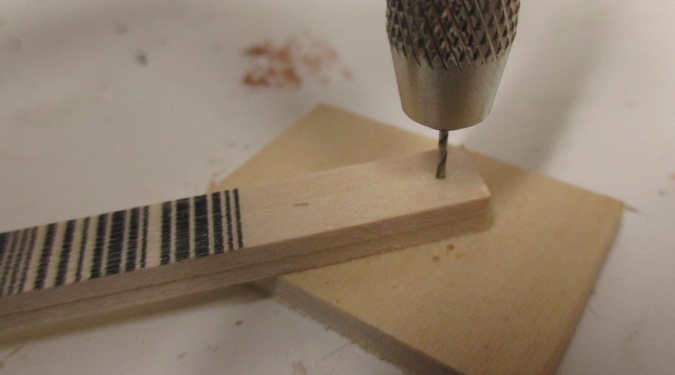
Next I cut side rails out of 1/4″ x 1/16″ basswood.
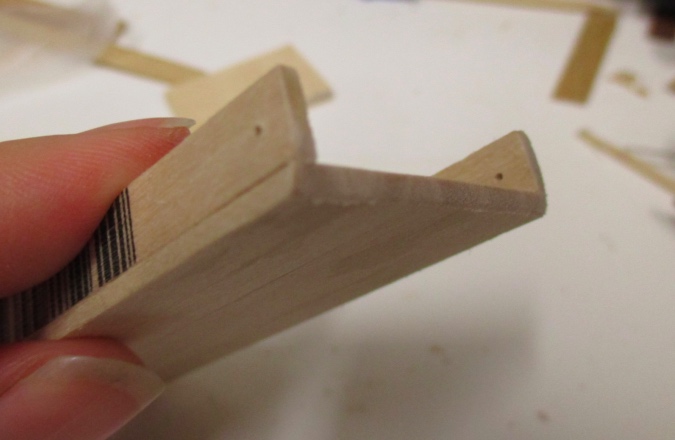
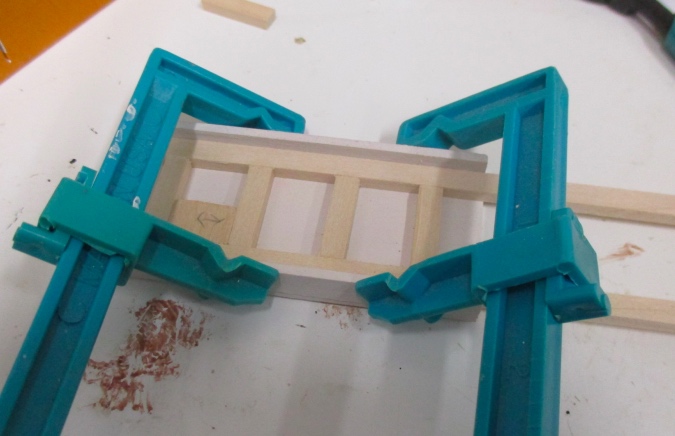
Before gluing them on, I stacked them and used the micro drill to drill a hole the diameter of a pin near one end of the rails. This is for the pin hinges that will allow the door to swing open. By stacking them, I ensured the hole was in the same place on both pieces. Then I glued the rails onto the door and let it dry.
Next I set the door inside the frame and poked a pin through each of the holes I’d drilled, to mark the spots on the frame pieces that needed to be drilled. Then I removed everything, drilled those holes, and inserted cut-down pins through the side frame pieces and into the door rails. The pin head is on the back side (wedged against the wall on one side and the edge of the stair hole on the other side), so they can’t fall out once the staircase is glued in.
This didn’t work quite as intended. The back of the door bumped into the back of the frame, preventing it from swinging open.

I removed it and rounded the back with the belt sander.
That helped. It was still bumping, but I decided to work on the ladder next and see how everything fit together before sanding any more.
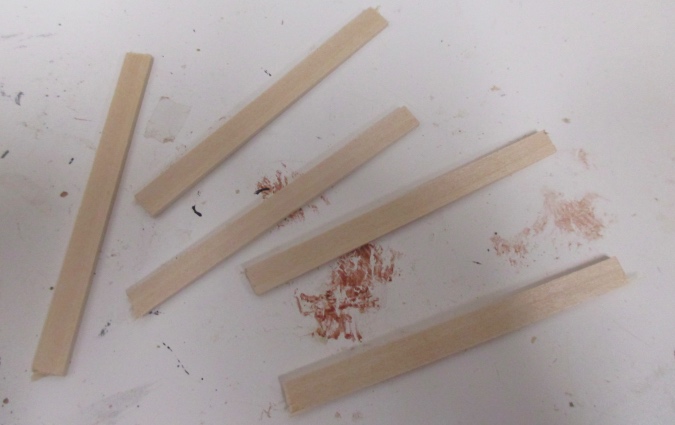
Next I cut side rails for the ladder out of 3/16″ x 1/8″ strip wood. The ends that hit the floor are cut at a 60-degree angle, and they’re long enough to almost reach the top of the door. I just eyeballed this but you can use a triangle calculator if you don’t remember geometry (which I don’t).
To make the ladder, I set the side pieces on the door with the ends pushed up against the edge of my miter box to make sure they were lined up. I glued in 3/4″ rungs, again cut from 3/16″ x 1/8″ strip wood, using a spacer to set them 1/2″ apart from each other. Make sure to leave some space between the bottom rung in this section and the bottom of the door, since that part will be hinged (the hinged part can’t run through one of the rungs).
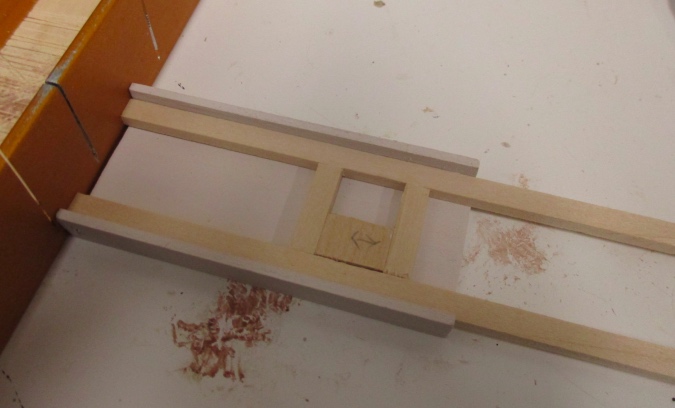
The door doubles as a gluing jig. I clamped it and let the glue dry.
When that part of the ladder was dry, I slid it down and added more rungs.
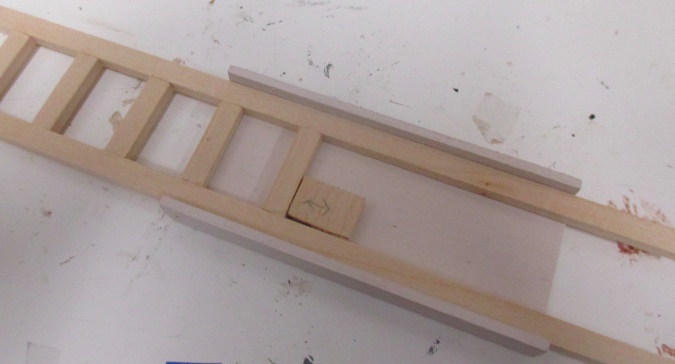
When all the rungs were glued in, I slid the finished ladder into place to make sure the length was good.
Then I put it in the miter box and sawed it into three pieces, each slightly smaller than the last. The largest one will be glued to the door and the other two will be hinged so they fold up on top of the first piece.
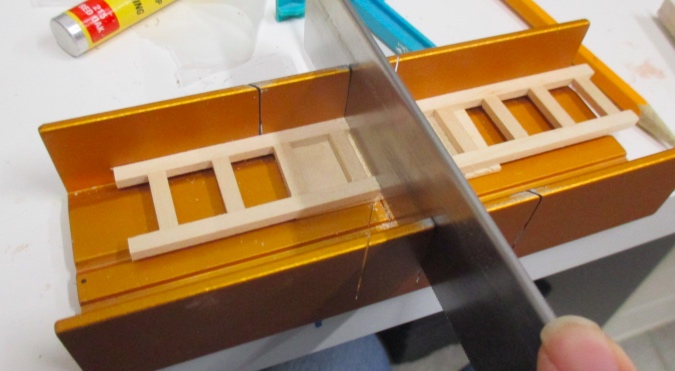
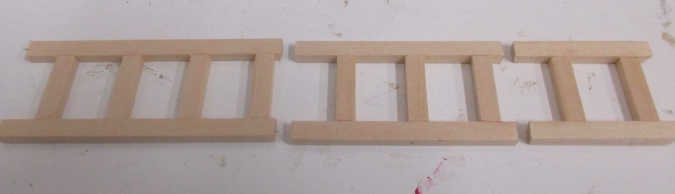
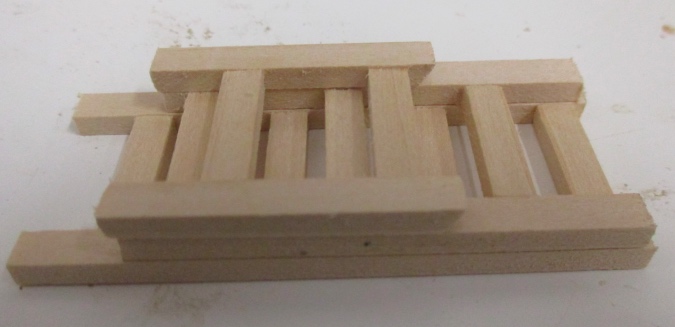
The ladder will look like this when it’s folded up.
The hinges I used are 3/16″ across, which Miniatures.com says are “one of the smallest on the market.” (This is why I used 3/16″ strip wood for the ladder.) The first joint gets hinged on the front side of the ladder. To attach them, I poked a pin through one of the holes, then got the tip of the nail lined up with the pinprick in the hole, and finally pushed in the nail head with a flat screwdriver head. This took a long time and a lot of patience! (At this point I was starting to understand why those Alessio stairs cost $40…)
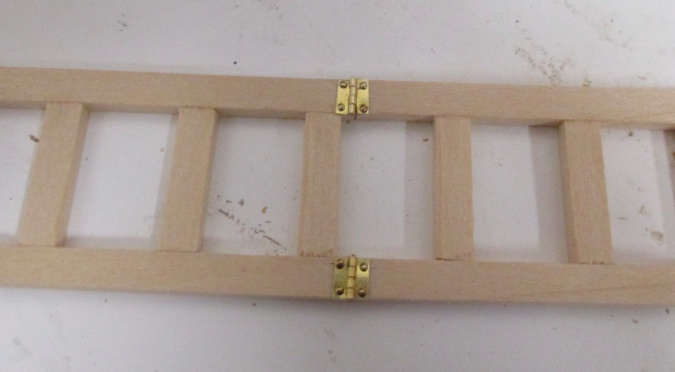
With the first two hinges finished, I flipped over the ladder and hinged the bottom segment on the back side. (Remember to make sure the angled ends of the legs are facing the right way before attaching these hinges!) Some of the nails weren’t grabbing the wood — they pulled out when the hinge was bent — so I reinforced them with glue.
Here’s how it looks folded up. My hinges aren’t perfectly aligned so the ladder folds up a bit crooked, but it works.
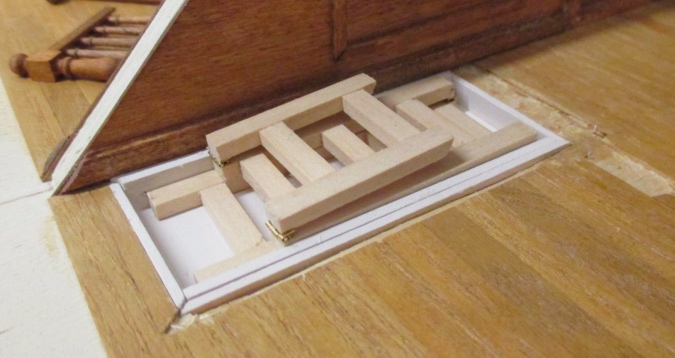
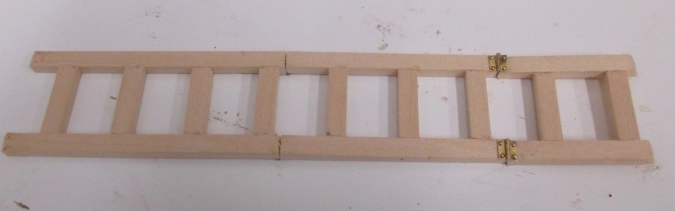
And here it is unfolded.
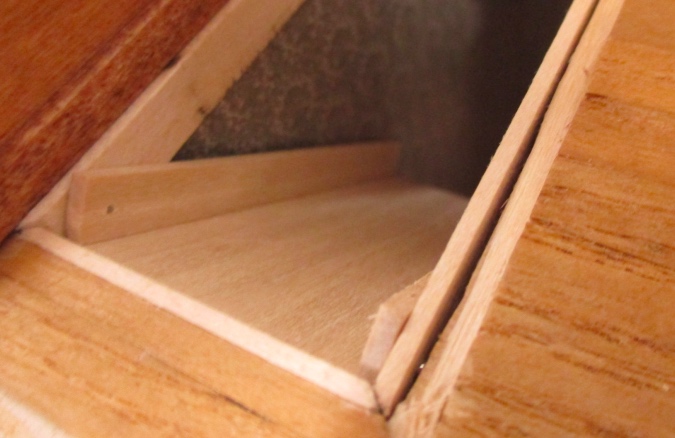
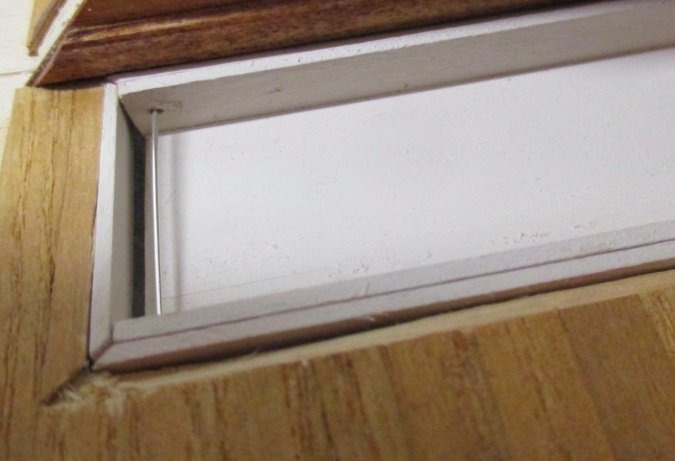
I was hesitant to glue it in because I was still having trouble with the door. For it to open at a big enough angle to unfold the ladder, the frame pieces were sliding out of position near the pin hinges (you can see this in the photo above). I worried I either wouldn’t be able to open it once everything was glued in, or that the wallpaper would tear from the glued frame piece trying to move.
I messed around with the pin hinges, thinking that was the problem. I tried enlarging the holes slightly, using different pins (with a flat head instead of a rounded head), and longer pins that stuck out above the ladder, and pins that were inserted from the other direction with the heads facing out. Finally I inserted one long head pin that goes all the way across instead of having two separate pins. None of this fixed the problem, and I was starting to think I should remake the door and the frame with the pin holes closer to the edge.
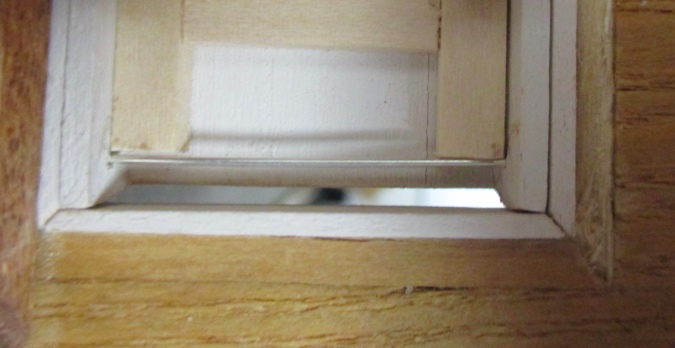
As I was playing with it, I let go of the door when I didn’t have the piece that goes behind it in place and, voila, it swung all the way open! Only then did it occur to me that the door was still bumping into the frame — I hadn’t sanded off enough wood when I rounded the edge. Duh.
I sanded some more and now it opens much better. I don’t like how big that gap is, but I’m not sure there’s a way around it. Maybe if I had hinged it closer to the edge it could be a little smaller, but I don’t care enough to test that theory to start over from the beginning!
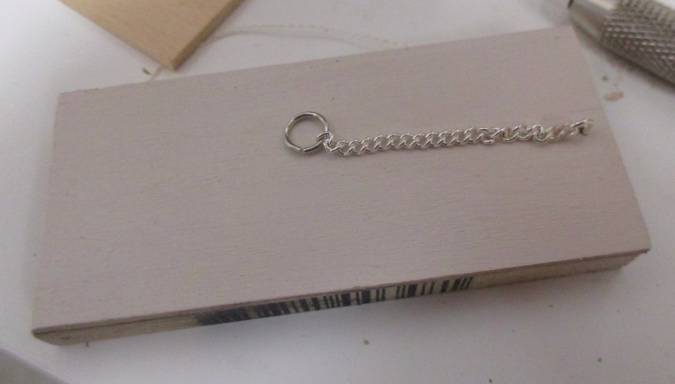
Finally I made a handle for the door out of an eye hook, a piece of chain, and a jump ring.
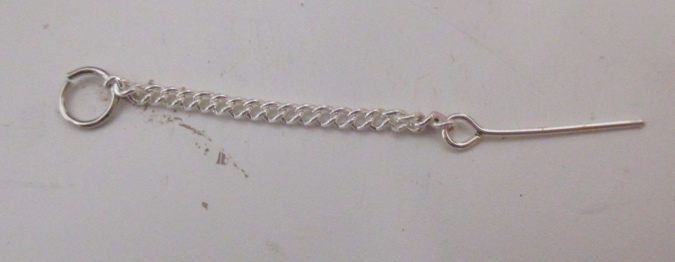
I drilled a hole through the door, inserted the eye hook into the hole, and cut it off on the other side, then added glue to the hole so it will stay put.
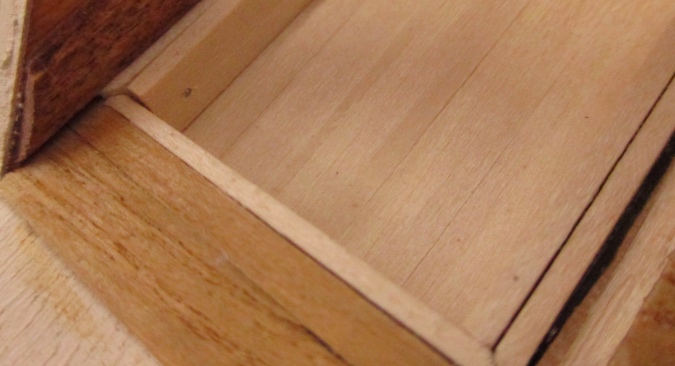
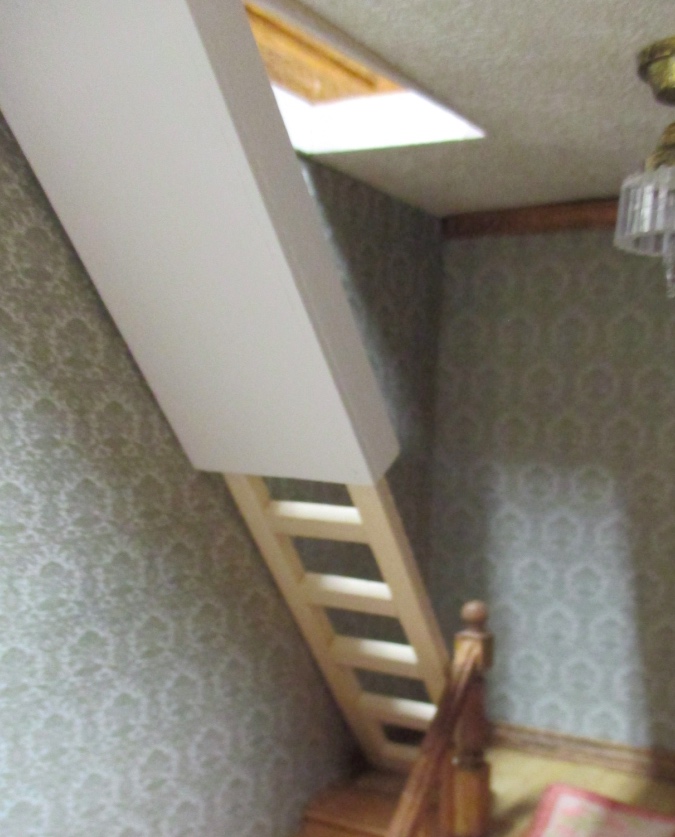
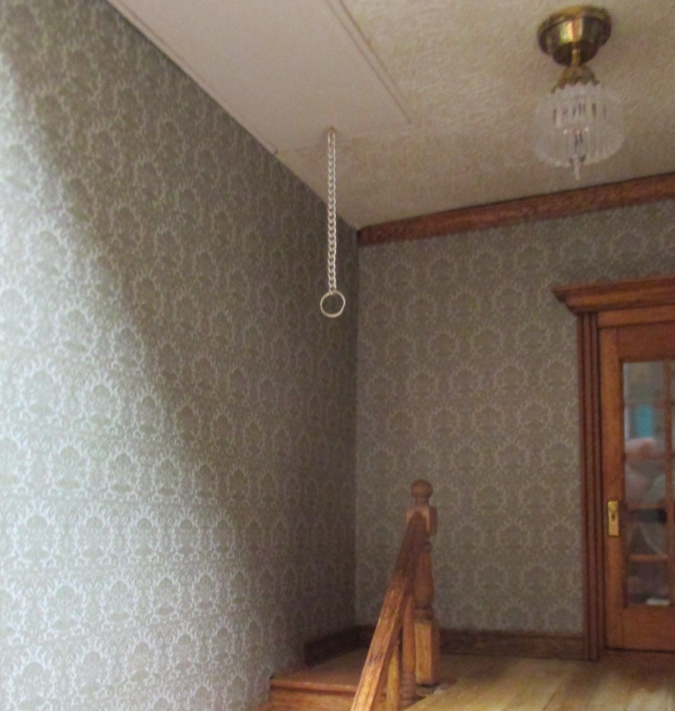
Here’s how it looks with the staircase closed.
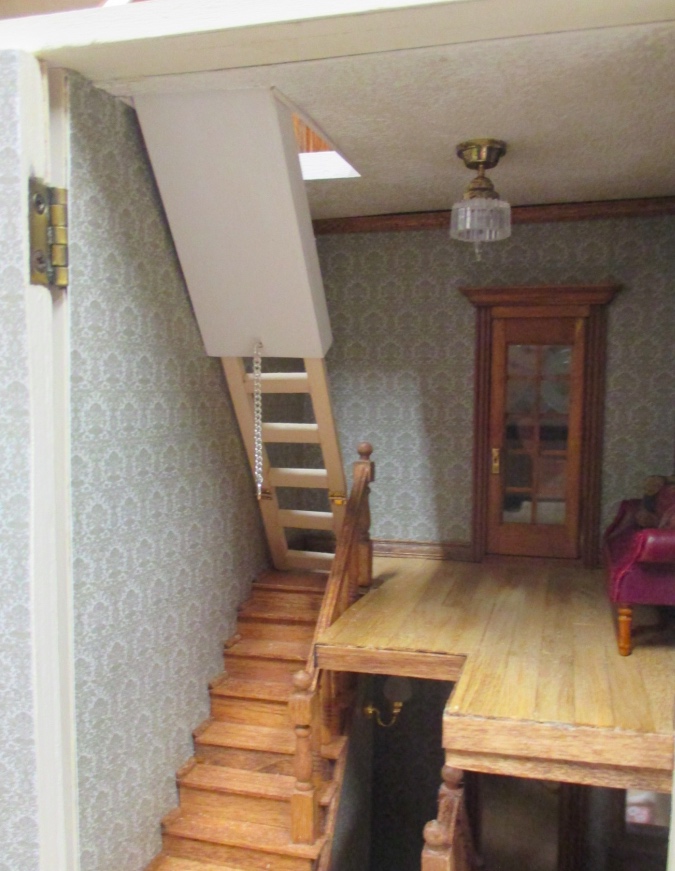
And here it is open. The ladder is pretty chunky — I wish I could have used skinnier strip wood, but it needed to be this size because of the hinges. Then again, if the wood had been skinnier the rungs might have been harder to glue in, since there would be less of a surface to glue.
I still haven’t glued in the frame and door. I need to touch up the paint, and I think I should play with it a bit more to be sure that I’m really happy with how the pin hinge is working. I might leave the ladder unglued so I can easily remove it if the hinges ever need to be fixed.
Supplies needed to make miniature folding attic stairs in 1:24 scale:
- 5/16″ x 1/16″ strip wood for the frame
- 1/4″ x 1/16″ strip wood for the door
- 1/16″ x 1/16″ strip wood for the door (may or may not be necessary depending on the width of your stair hole)
- 3/16″ x 1/8″ strip wood for the ladder
- Four 3/16″ square hinges and extra nails (I lost a bunch while I was trying to get the hinges on!)
- Sewing pins or headpins for pin hinging
- Eye pin, chain, and jump ring for the handle
- Micro drill, glue, clamps, wire cutters, and saw with miter box
Use different sizes of strip wood as needed to work in your dollhouse. To convert this project to 1:12 scale, I recommend keeping the 3/16″ x 1/8″ strip wood and 3/16″ hinges for the ladder (it will be more to scale than it is in 1:24), and increasing the other wood sizes to accommodate your measurements.
 Emily is a freelance writer, miniaturist, and adventure game enthusiast.


Oh wow! That looks amazing! Love your idea of making the ladder in one piece and then cutting it down.
Yeah, I think that made it much easier. Otherwise I would have had to worry about the spacing of the top/bottom rungs in each section, and doing it in one piece made it easy to visualize how large each section needed to be.
They came out great! Thanks for sharing your tutorial.
Your ingenuity continues to astound!
I love this, thanks for sharing!
That is so awesome! Thanks so much for sharing all the details.
Anna
Thanks for sharing this!
The sliding stairs is quite a project that you handled with such ingenuity and then wrote instructions so that other could create their own stairs. Sometimes attic stairs really get in the way and to leave them out makes the house look unfinished, so I appreciate the idea of building pull down stairs. Thanks for sharing.
Geometry: Your mother (the math teacher) requests that I remind you that it was said: “This will be on the test and some day you will need to know this.” That day has arrived!
Haha, I almost put (Sorry Mom!) in the post but thought it would be confusing to everyone but our family.