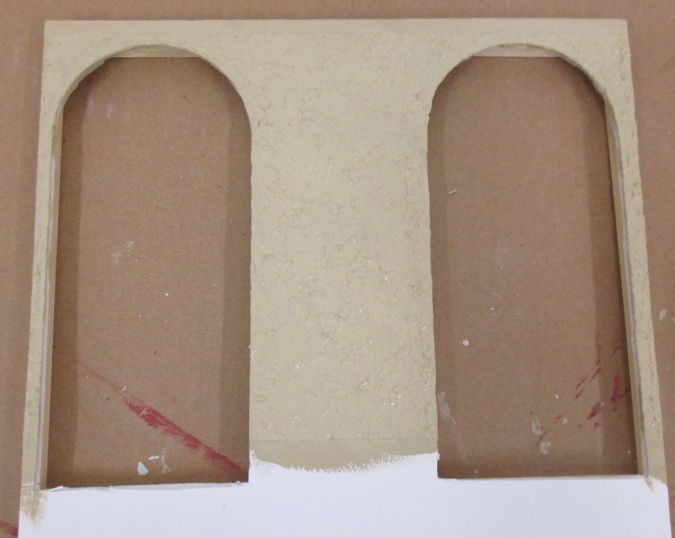
The windows and doors in the Sam & Max roombox will need to be placed in the holes before the false walls are glued in. For this reason I needed to stucco and paint the false walls outside of the roombox. (Normally I like to assemble first, then decorate.)
I was concerned about the center wall not having a lot of support behind it, especially around the windows, so I added spacers around the window holes.
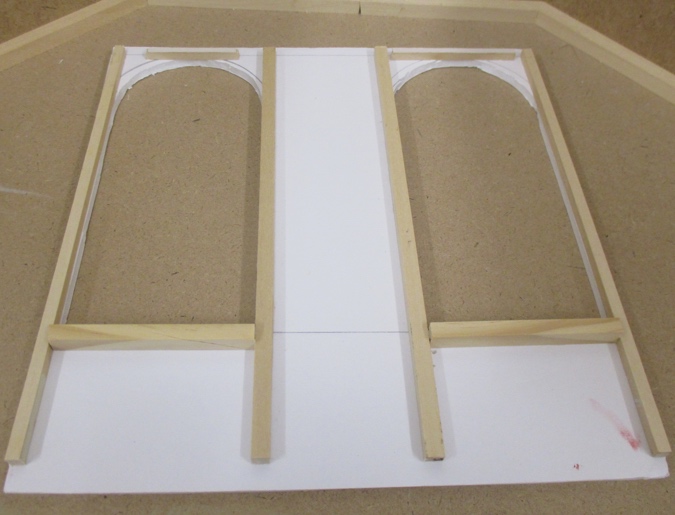
These will stabilize the wall and will also enable me to glue the windows to the false wall before I glue in the wall, which I think will work better than trying to glue them in the exact right position on the outer wall (potentially smearing glue all over the graphics in the process).
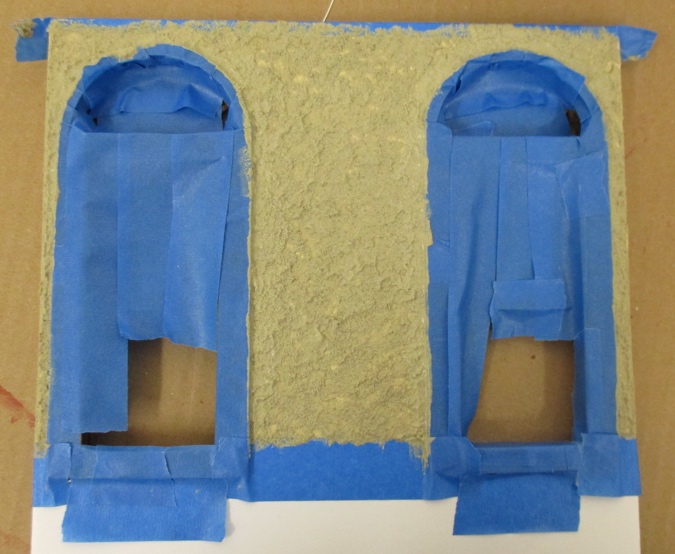
The bottom portion of the wall will be covered by wainscot that I’ll make out of 3″ basswood. I drew a pencil line over the top edge so I’d know how far down the wall to stucco.
I taped off where the wainscot will start and also the top 1/4″ of the wall, where the molding will go.
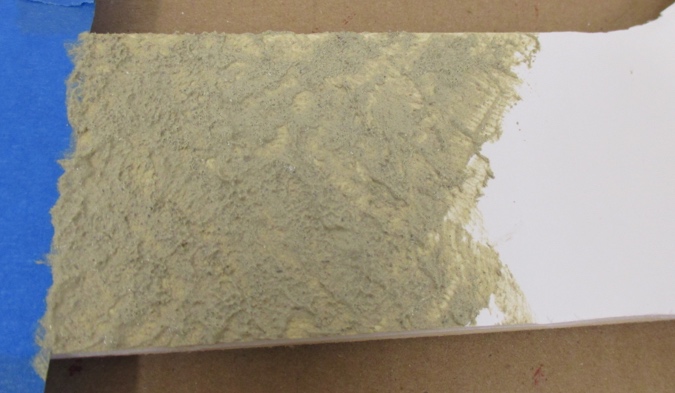
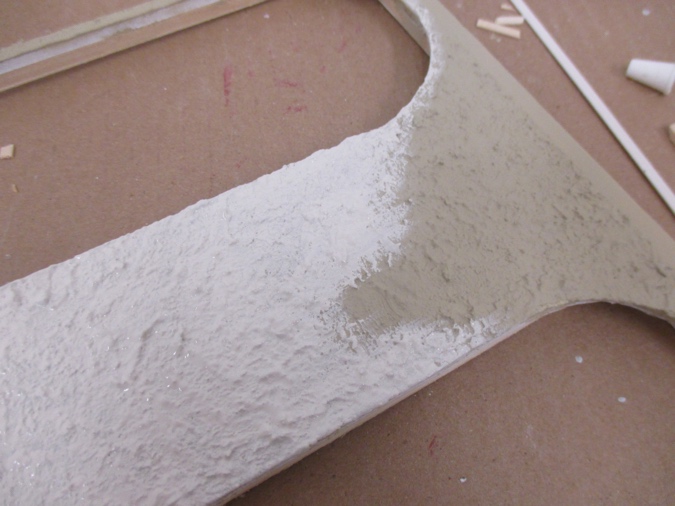
The stucco is watered down wood filler, spread and textured with a sponge brush. You can read more about this technique here and here.
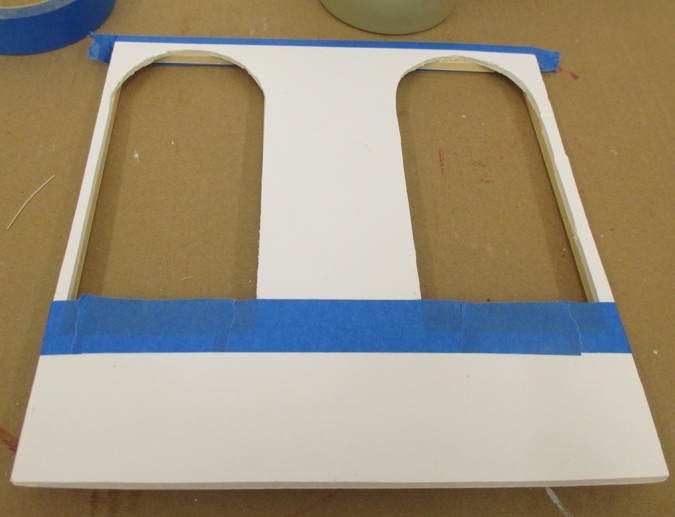
Once the whole wall was stuccoed, I covered the windows with tape to protect the stained wood and inserted them in the holes.
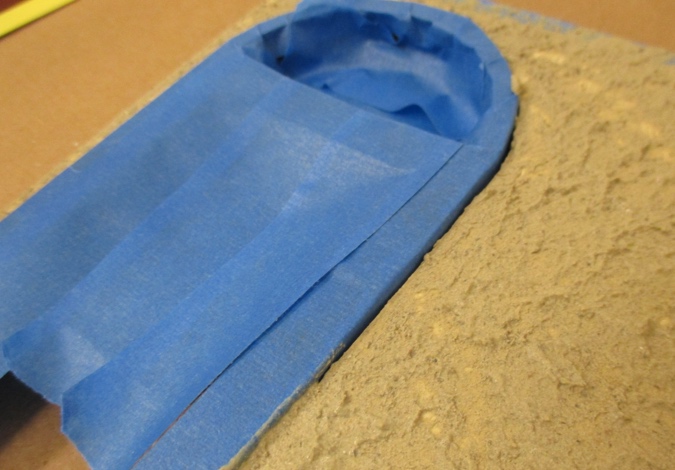
Then I added more stucco around the window edges to fill in the gaps.
I let that dry for about 15 minutes, then popped the windows out while the stucco was still wet and let them dry overnight. The area around the windows looks much better than it did pre-stucco!
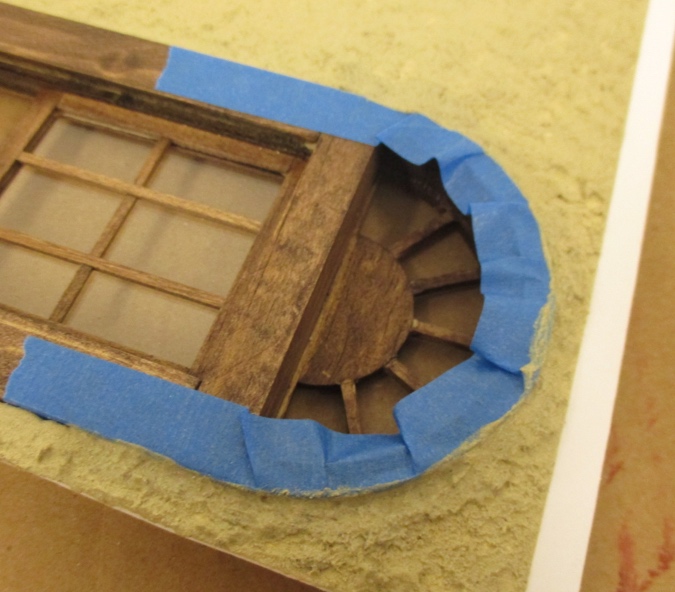
A few gaps around the curves were still bugging me, so I put the windows back in and did a second coat of stucco around the tops.

Once that dried, I painted the wall with Harvest Brown, the same color I used for the base of the roombox.
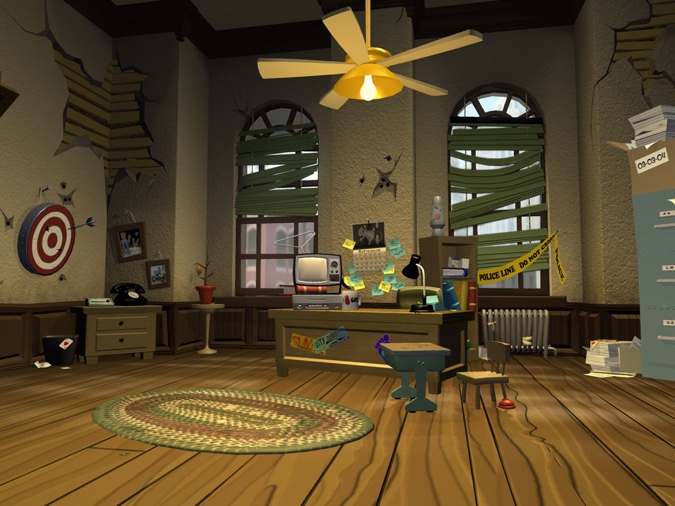
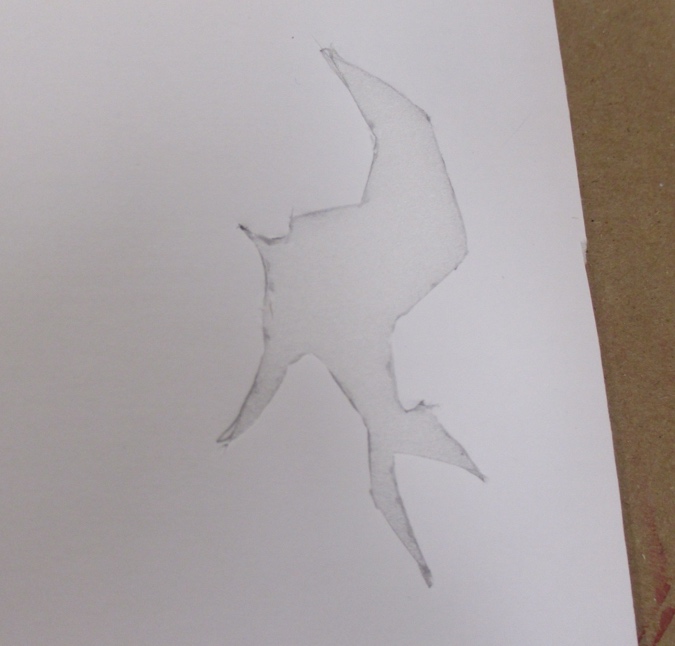
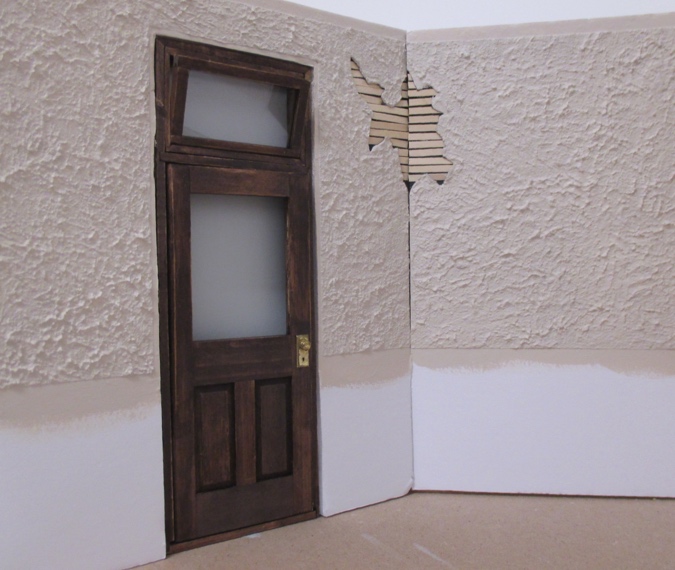
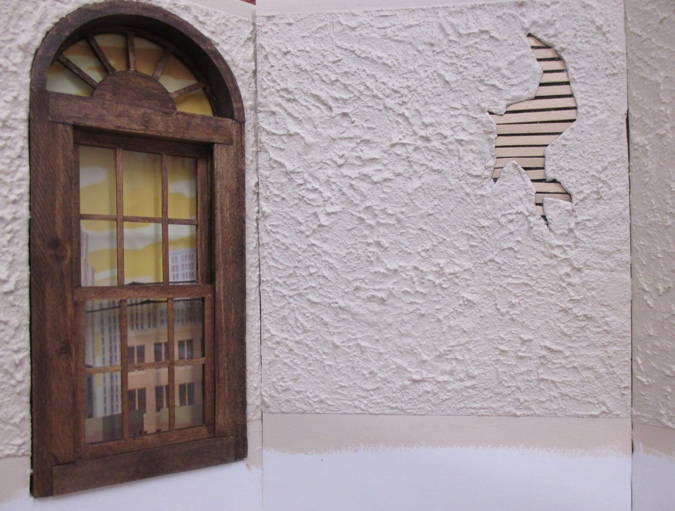
In the games, Sam & Max’s office walls have some large cracked areas where the plaster is missing and you can see the lath underneath.
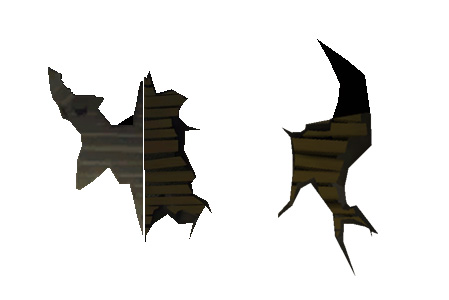
I’m not good enough with a pen to draw these freehand. Using a texture file that I extracted with Telltale Explorer and a couple of screenshots manipulated in Photoshop, I came up with these:
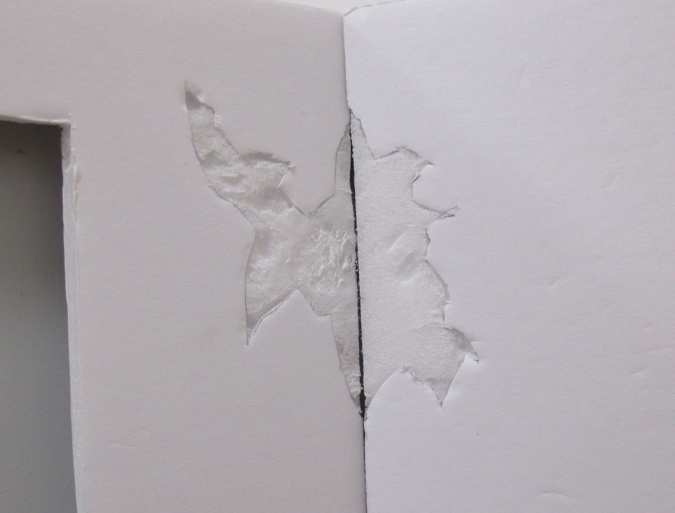
I laid the printout over the foam core wall and traced around the perimeter with a sharp pencil. This created an indent in the foam core, that I then went over in pencil.
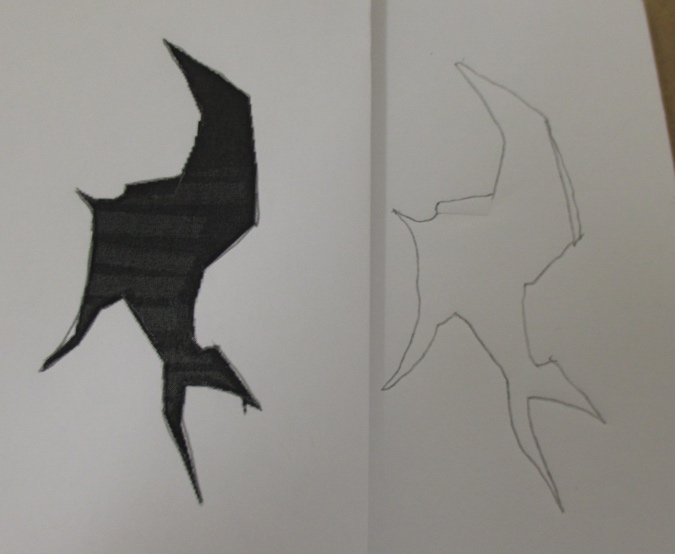
I cut around the perimeter with a utility knife and peeled off the paper layer to expose the foam.
Here’s how the other two meet up.
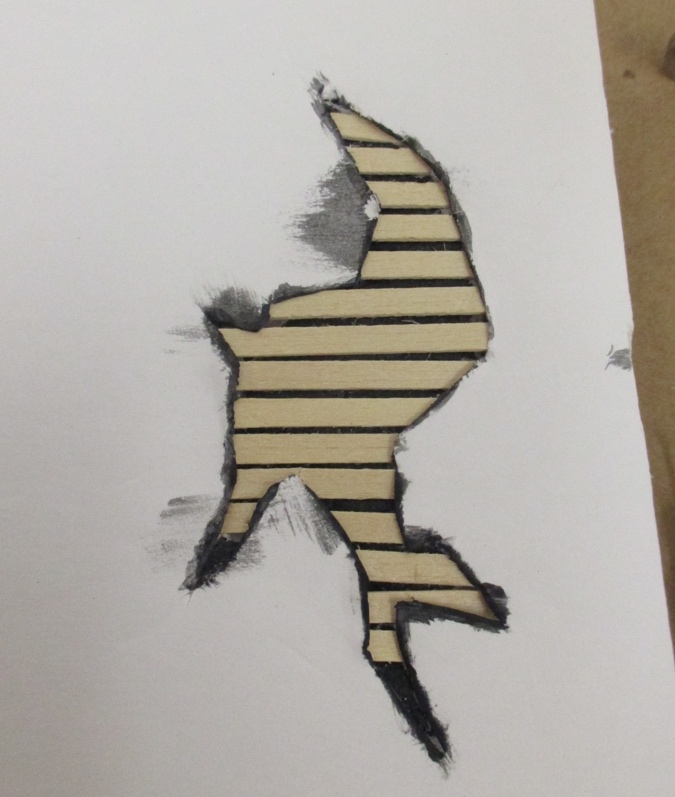
Next I painted the foam black.
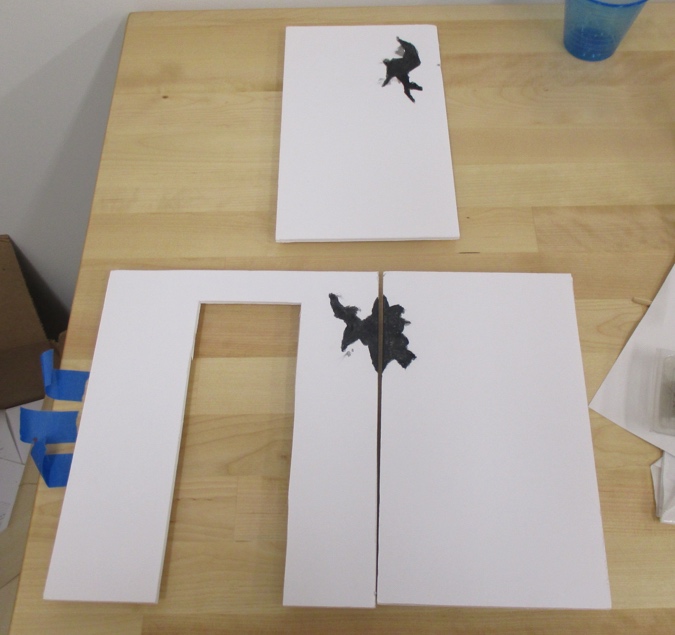
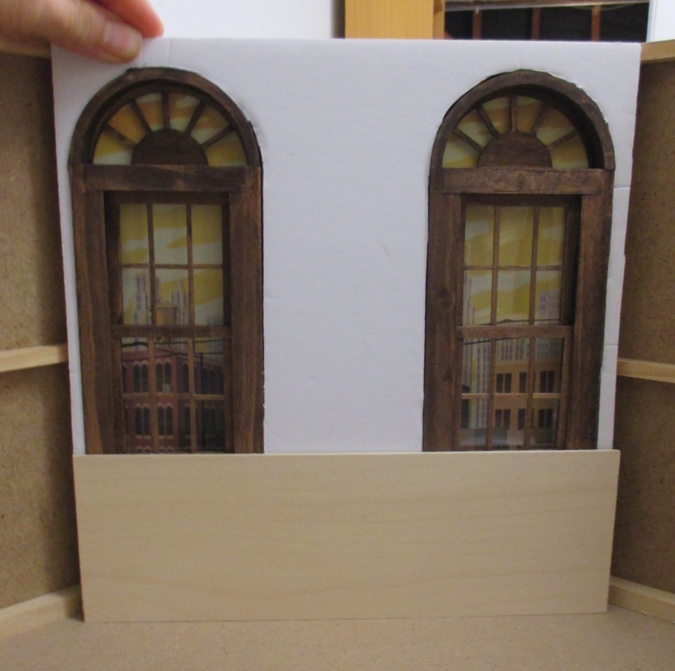
Here’s how they’ll look in the roombox.
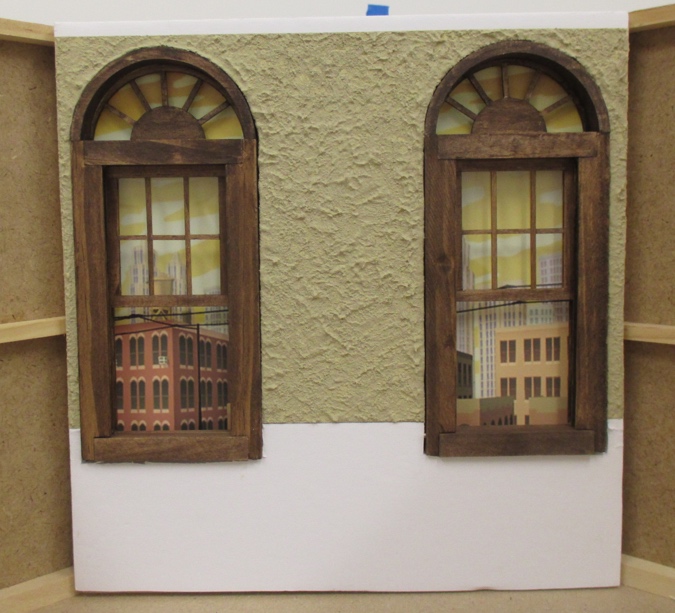
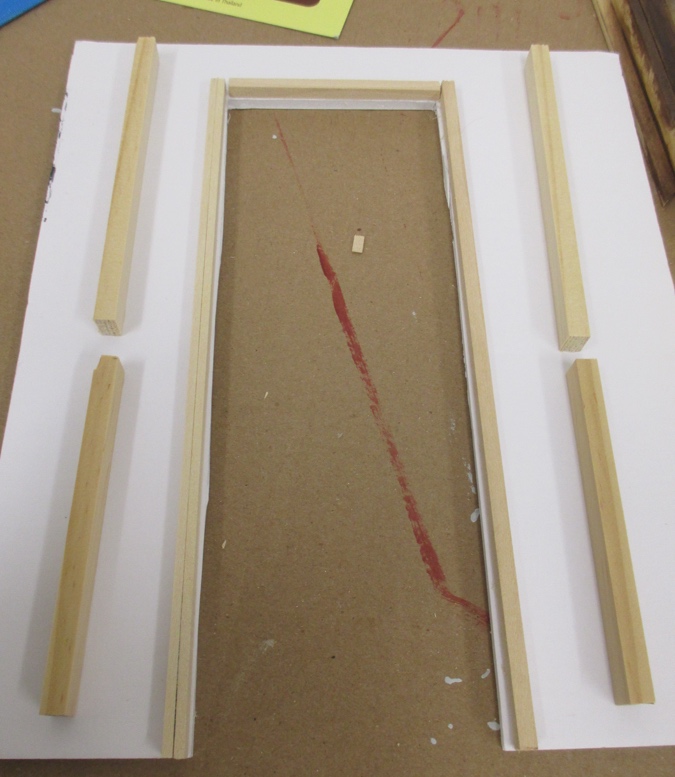
Looking at the false walls in place, I noticed two things. One, the Harvest Brown wall color (as seen on the center wall) feels too dark. And two, the closet door wall is warped from the watered-down wood filler. I didn’t have that problem with the center wall because of the strip wood I’d added to the back.
So I picked out a lighter color for the walls — this is Behr Haze. It’s a brownish off-white.
And I added pieces of wood to the backs of the other walls, including around the door hole. Unfortunately, since I’d previously added spacer wood to the centers of the outer walls, I couldn’t put one piece down the whole length of the false wall (which is what I think kept the center wall from curling). But this is hopefully better than nothing.
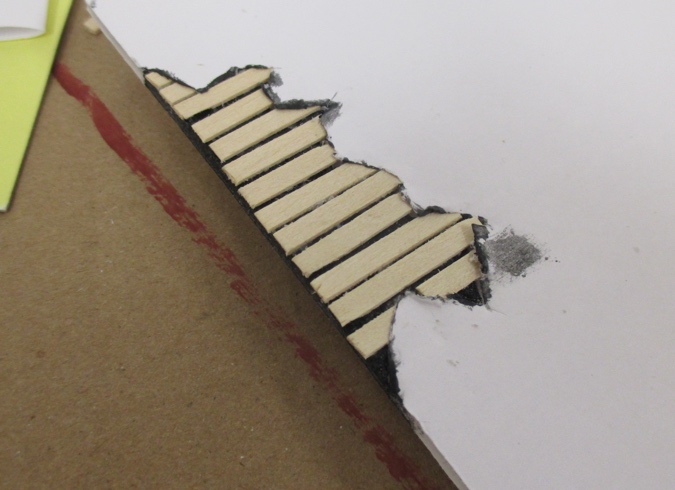
Back to the cracks. I wedged skinny pieces of basswood (1/8″ x 1/32″) under the paper layer.
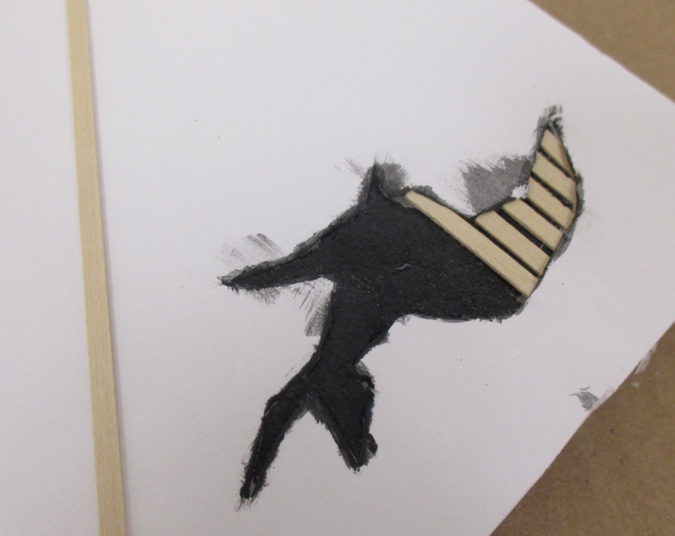
This got difficult in the skinny parts near the bottom and I gave up one or two boards early.
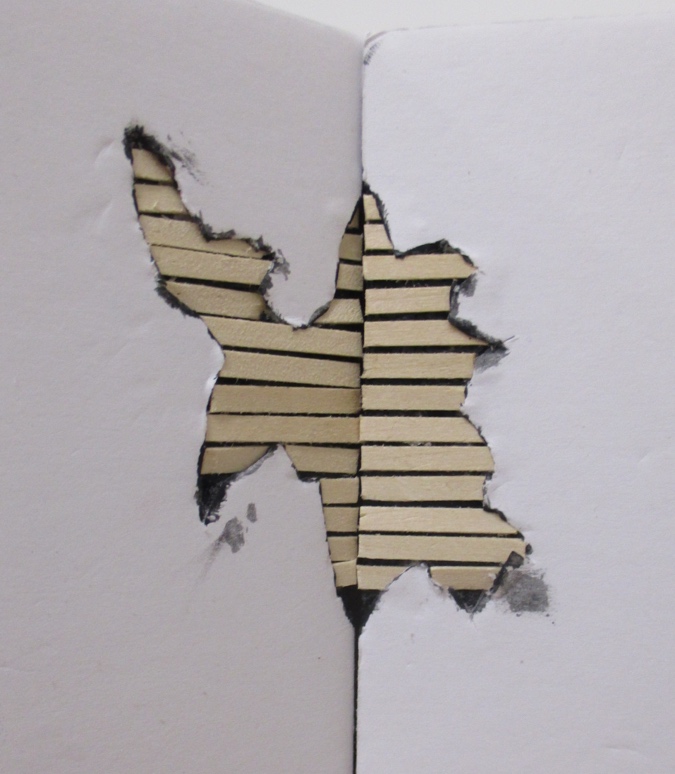
The other two walls were easier to insert, because only one edge is under the paper layer, but the other ends needed to be glued down to sit flat.
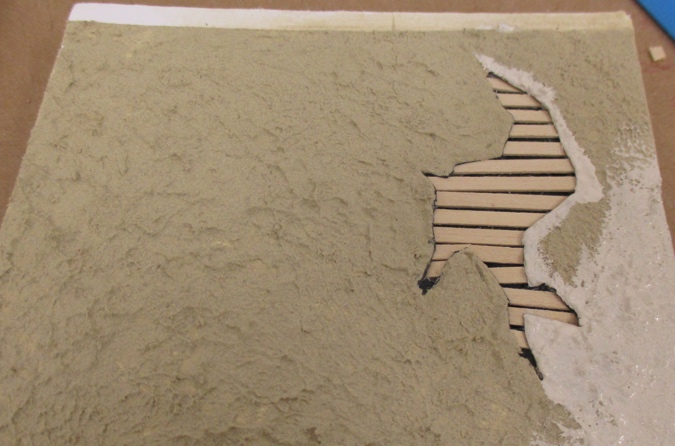
The foam on these walls is a bit lumpy — the paper layer didn’t pull up as nicely on these two walls as it did on the first one — so these aren’t as neat as I wanted. I hope when I glue in the walls I’ll be able to manipulate the lath a bit to get a nicer fit, but this might just have to be good enough.
Next I used whatever this thing is to spread wood filler around the edges of the lath. (It came with a variety pack of paintbrushes but it looks like something you’d use to apply eye shadow.)

Once I’d gone around the perimeter with the small brush thingie, I did the rest of the wall with the sponge brush.
And when it came time to paint, I repeated that process by going around the edge with a smaller brush before filling in the rest.
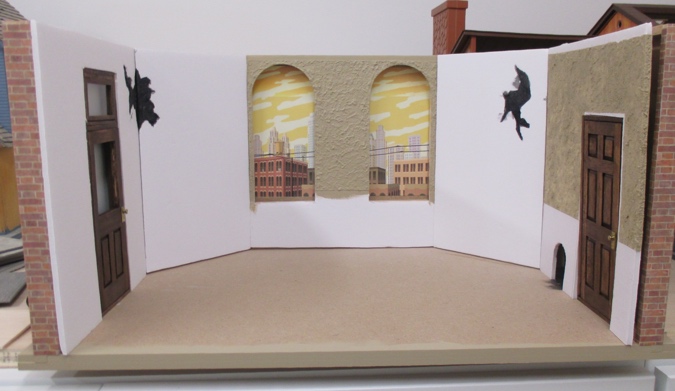
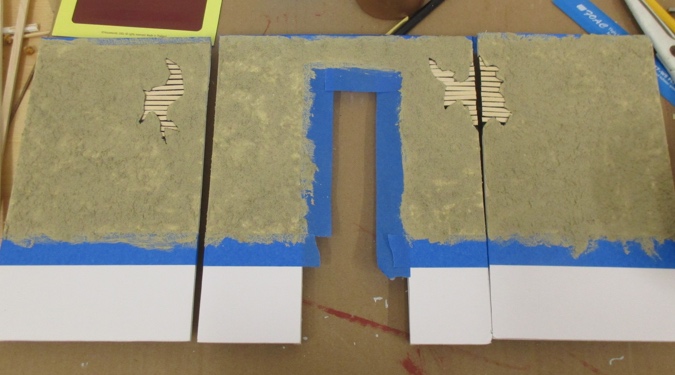
Here’s the roombox with all of the walls stuccoed and painted.
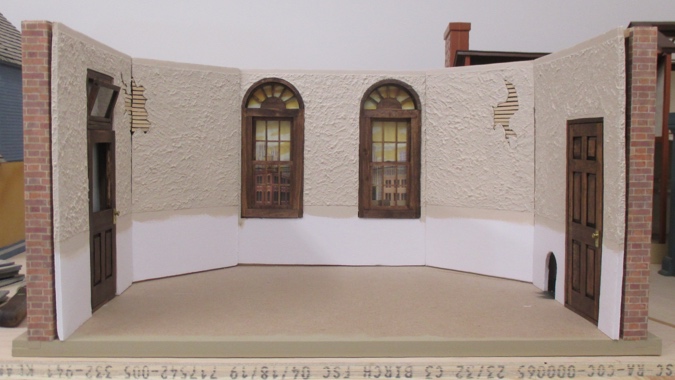
I just noticed that I taped off for the wainscot a little too high on this wall. I might need to touch that up. Also, the seams between the wall panels will be touched up once the walls are glued in, so there won’t be visible cracks between them.
 Emily is a freelance writer, miniaturist, and adventure game enthusiast.


Wow, the walls look amazing Emily! I love the process you came up with to recreate the cracked plaster with lathe underneath. It’s super effective and looks great. It makes me what to build something that needs this effect! :) Loving following along on this room box.
Love how this came out. Your plaster and lath effect would look great in an attic, too!
Looks really good! It’s fun when you’re copying something into a mini!
A TERRIFIC solution for the decrepit exposed lathe and missing plaster!
Wow this really looks great! I like the lighter color for the stucco. And I’ve had the same problem with foam core board warping…so frustrating!
Fantastic job! I so look forward to your posts. I always learn something from your projects. Thanks.