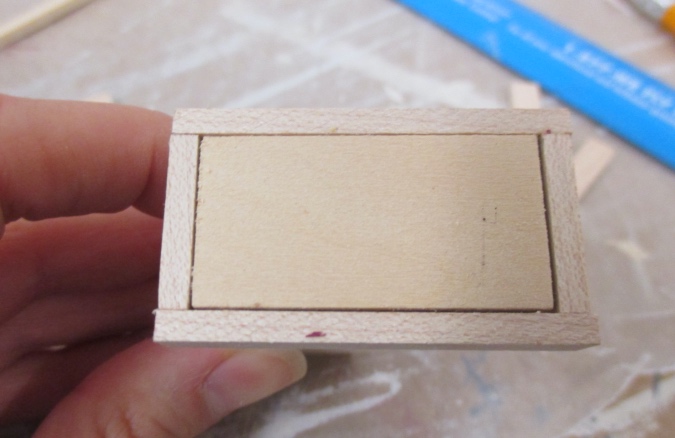
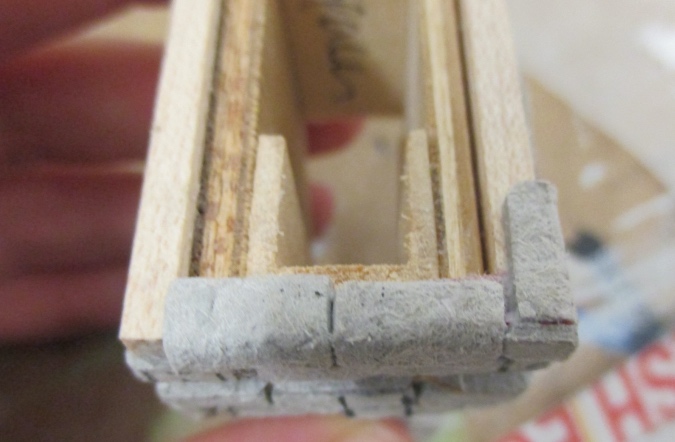
When I first started planning how to do the Victorianna’s roof, I made a chimney piece out of leftover kit parts. I cut the kit’s chimney piece flat where it will meet the flat roof.
I glued on a piece of 1:12 channel molding and a piece of scrap wood (a spacer from a furniture kit).
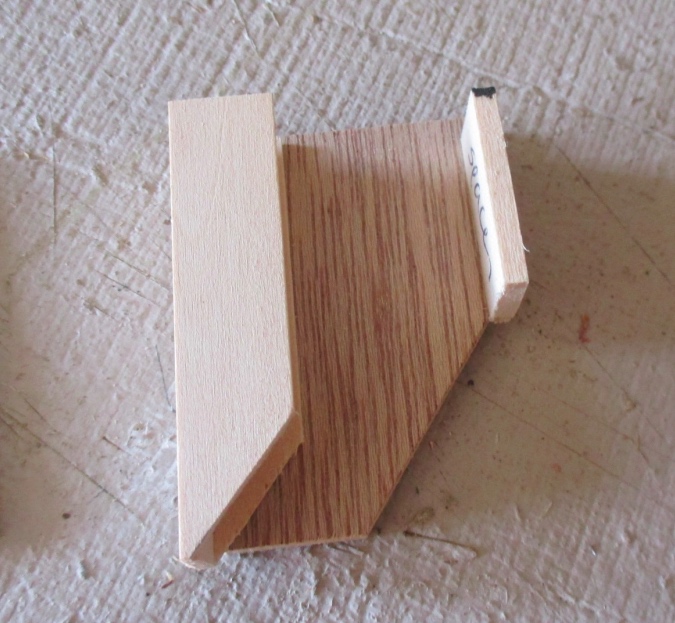
Then I glued on the other kit’s chimney piece. This little box fits over a protruding piece that would have formed the back of the chimney, if I’d built the kit according to the directions.
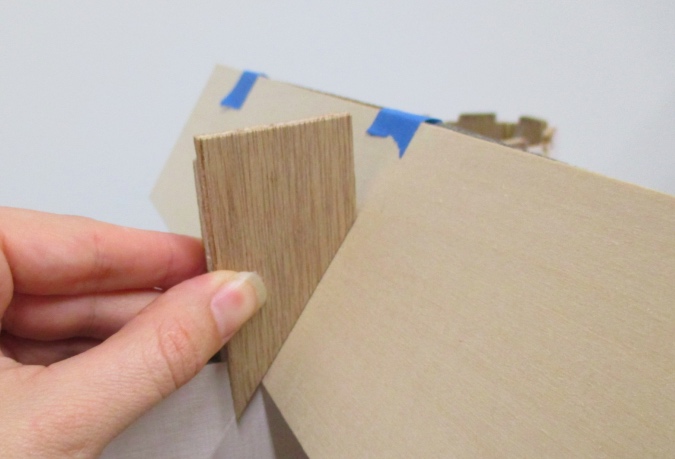
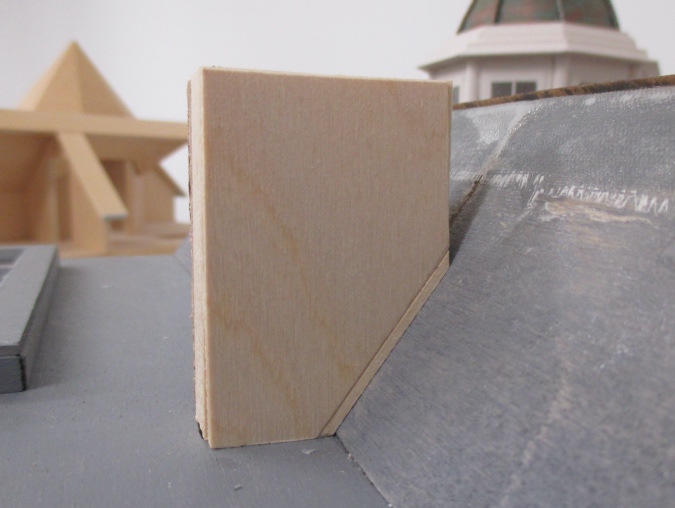
With the flat and sloped roof pieces now attached, I need to finish and attach the chimney before I can shingle the sloped roof. On this side of the house, the angle of the chimney meets up perfectly with the roof.
But there’s a gap on this side because my house and roof aren’t square.
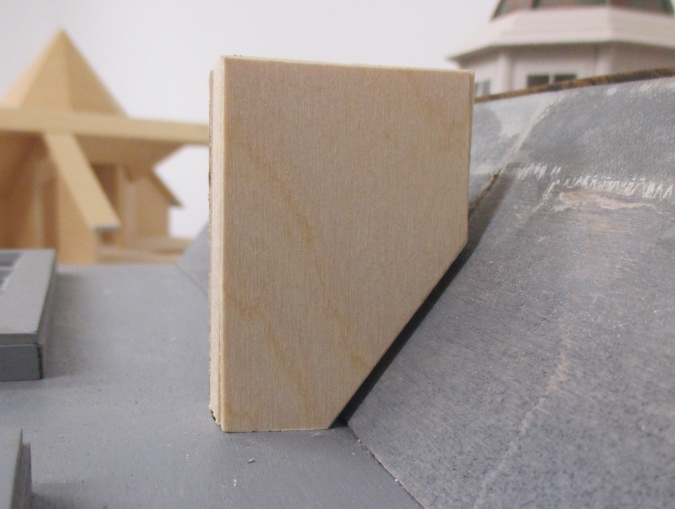
I filled this in with a skinny piece of strip wood.
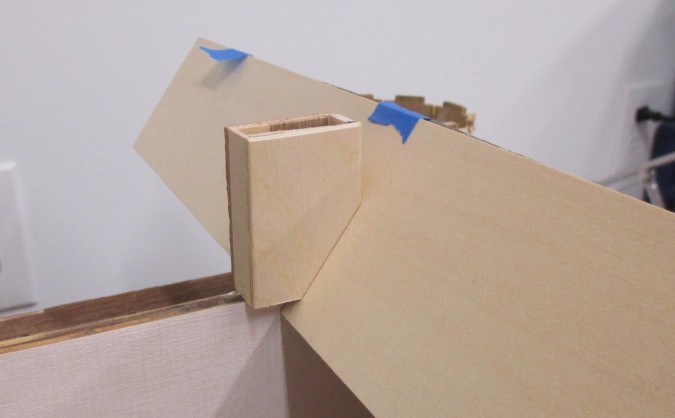
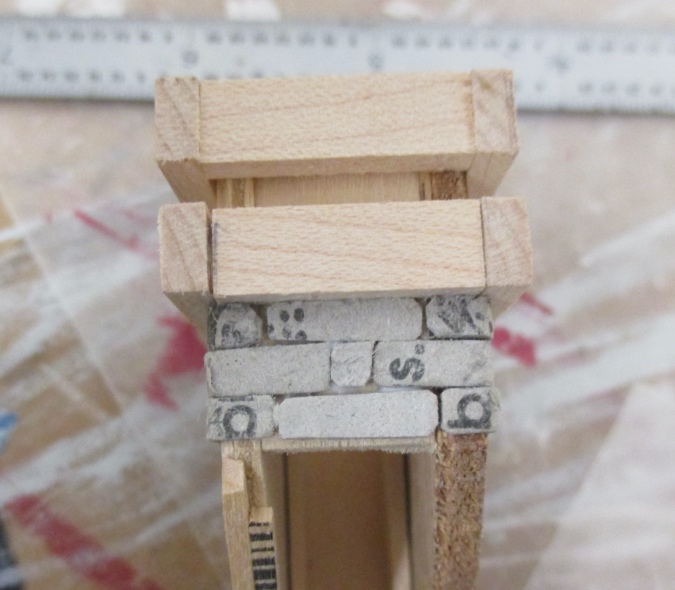
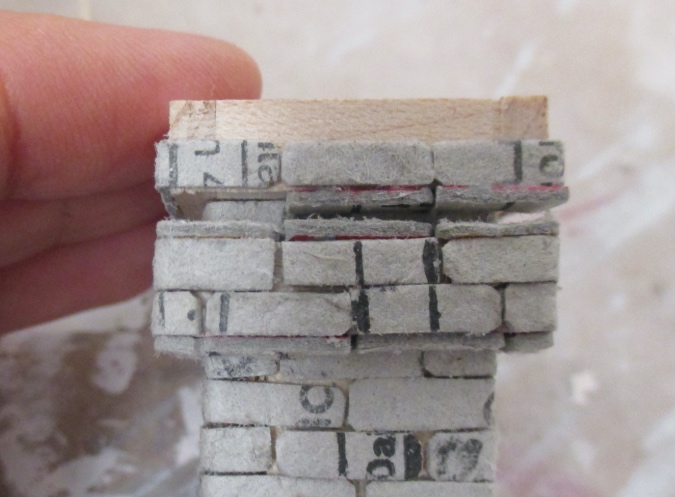
I glued pieces of 1/8″ x 1/4″ strip wood around the top of the chimney to create ledges that make it more visually interesting. These are spaced 1/8″ apart.
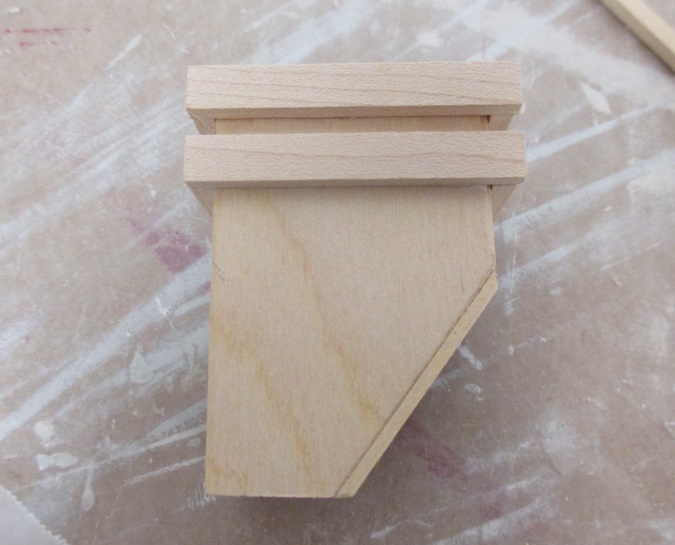
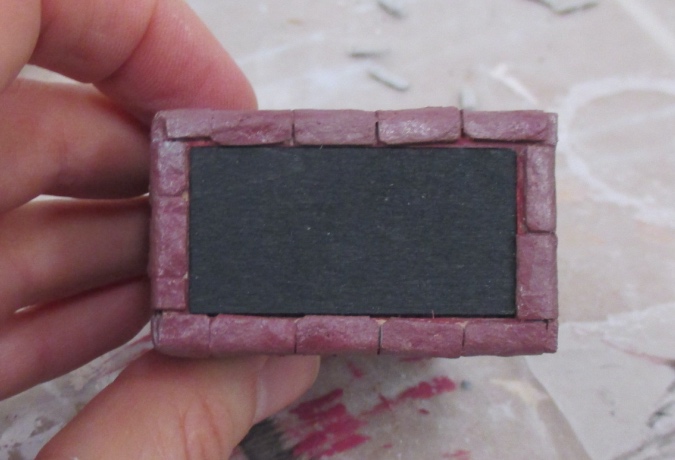
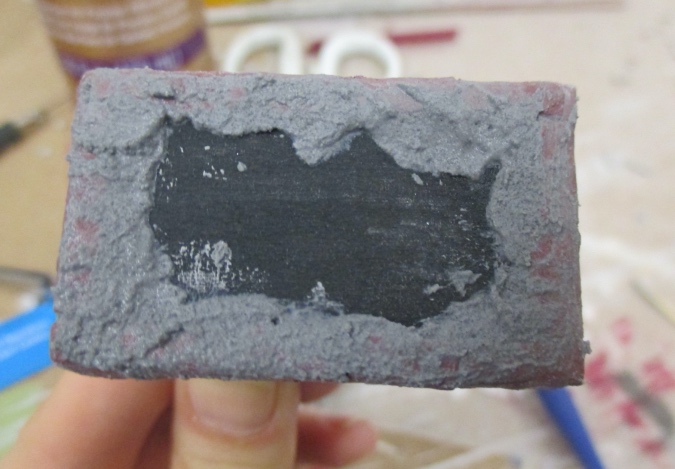
Here’s how the cobbled-together chimney looks from the top. It needs to be covered up.
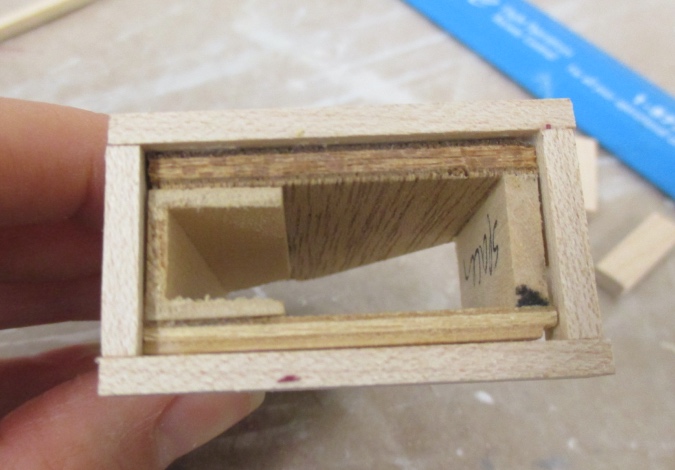
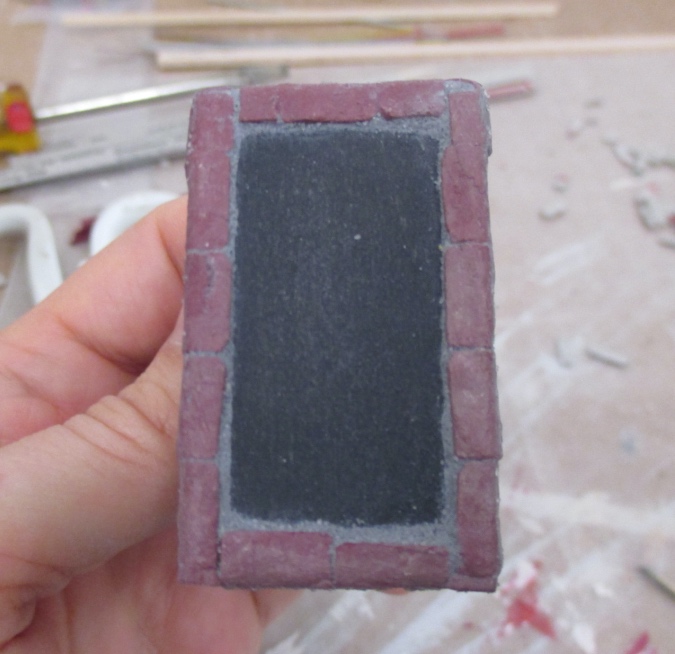
I cut a piece of wood to fit inside the hole. I’ll paint this black and add chimney pots to it.
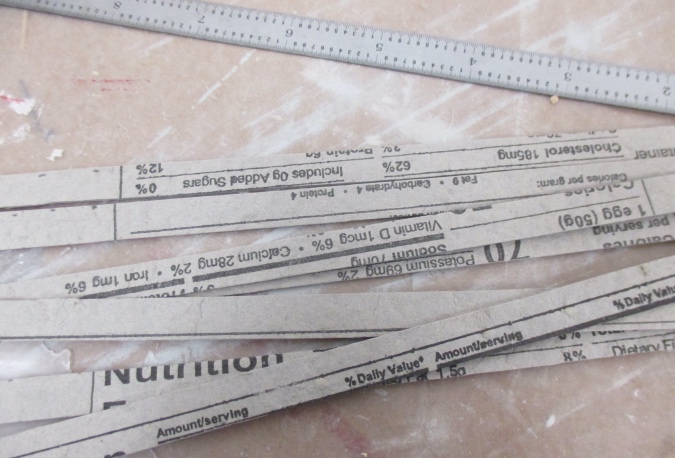
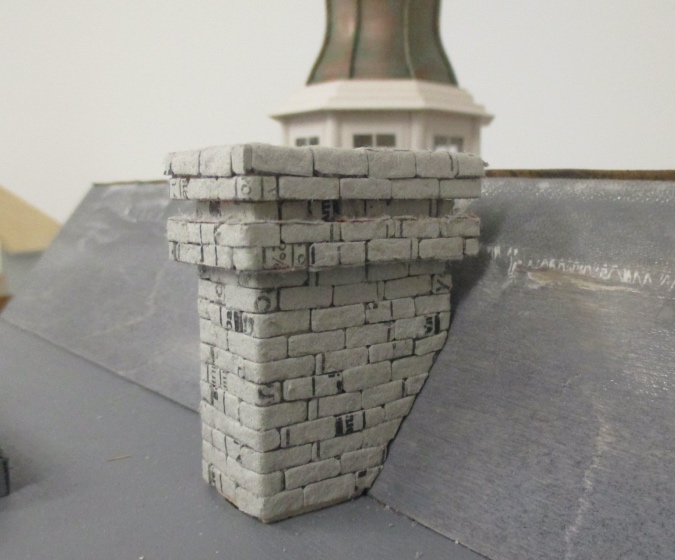
I’m using egg carton brick on the Victorianna’s foundation and decided the chimney should match. I actually started bricking the foundation back in 2015 (!), just a few months after I started building the house, but put off finishing it because it’s soooo tedious. I’ve also used egg carton brick in the Four Seasons Roombox.
My half scale bricks are 1/8″ tall by 3/8″ long. I use an Xacto knife to cut 3/8″ strips from the top of an egg carton, and then use scissors to cut these into 1/8″ pieces. I find this much easier than cutting 1/8″ strips. I also cut one strip of bricks that are 1/4″ long and 1/8″ tall; these are the ones that wrap around the corners.
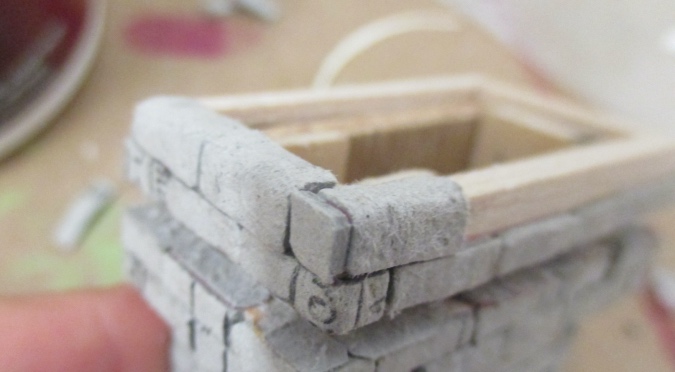
I started bricking on the side of the chimney that’s visible when you view the house from the back. Since you’ll be able to see this side, I wanted the bricks to be symmetrical here.
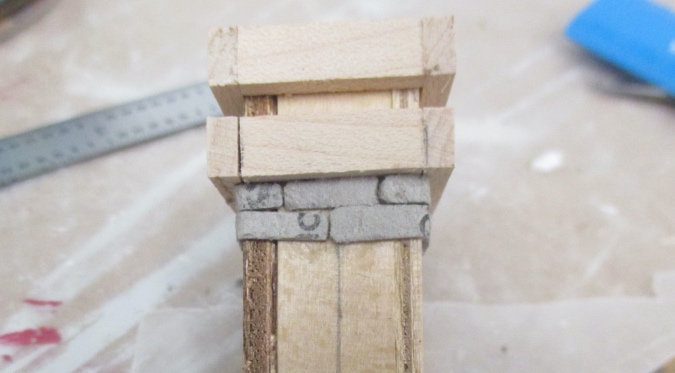
From there I did one side of the chimney, then the other.
And finally I did the back. This edge will be hard to see since it’s up against the sloped roof, so it’s okay if the brick sizes are a little funky.
Around the ledge, I glued bricks to the bottom as well as to the side. It looks bulky. It would have been better to cut larger bricks (1/4″ tall instead of 1/8″ tall) and wrap them up around the corner. But I figured once these were painted they’d look okay.
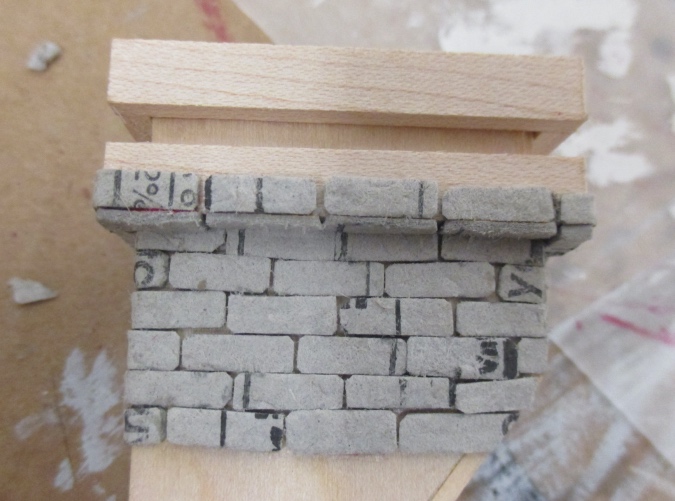
I finished the ledge and then did the space between the two ledges, which is just large enough for one row of bricks.
Then I did the top edge of the ledge. It’s starting to get really bulky. Should I have left more space between the two ledges?
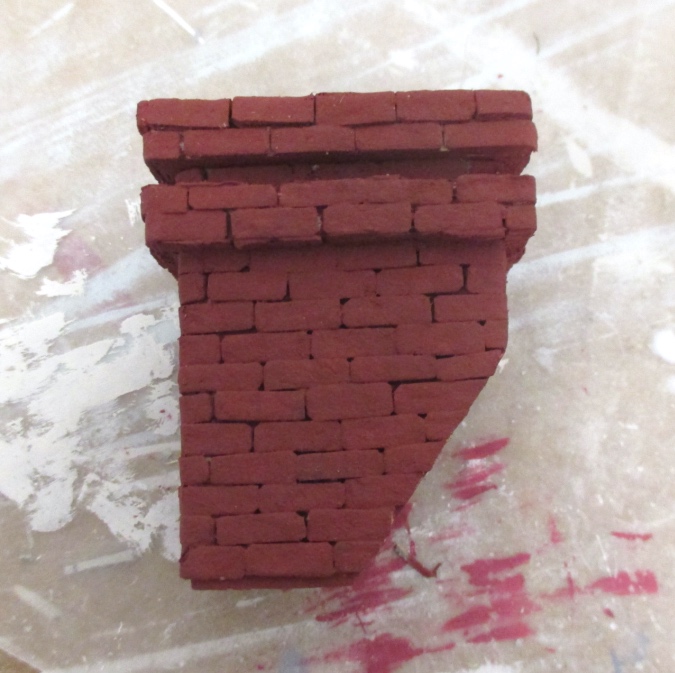
When it came time to glue bricks to the bottom of the top ledge I decided this wasn’t going to work. It just looks weird.
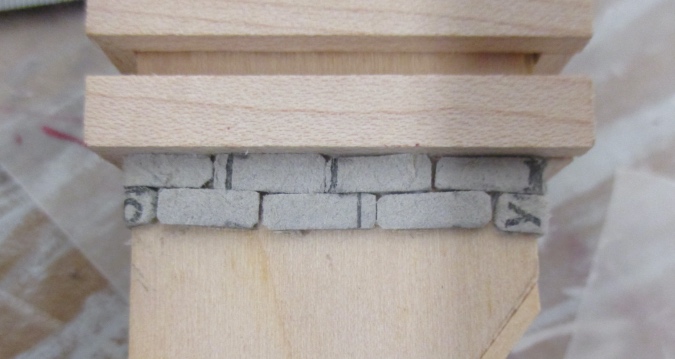
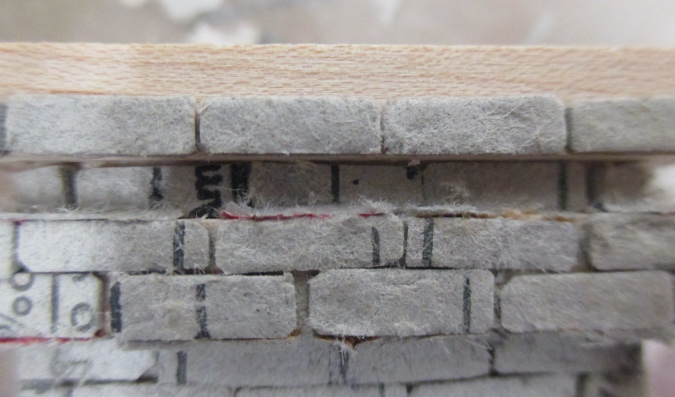
I pulled up the bricks on the top and bottom edges of the bottom ledge. By this time the glue had dried, and the egg carton material separated when I tried to pry them up. This was a happy accident, because this way the top and bottom edges still have the egg carton texture, without the bulk. Almost like I’d planned it!
The bottom edge of the top ledge does not have any texture, but once it’s painted and grouted you’re not going to notice.
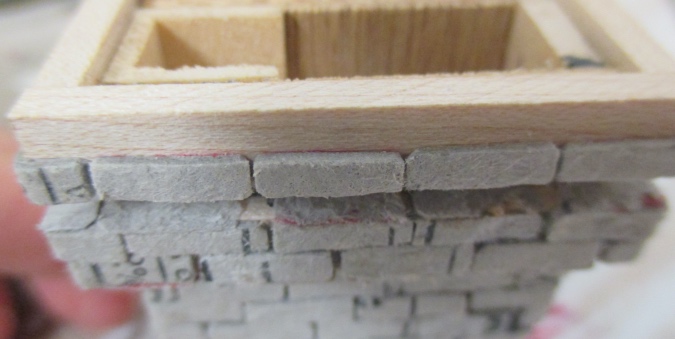
I wrapped 1/4″ bricks around the top edge.
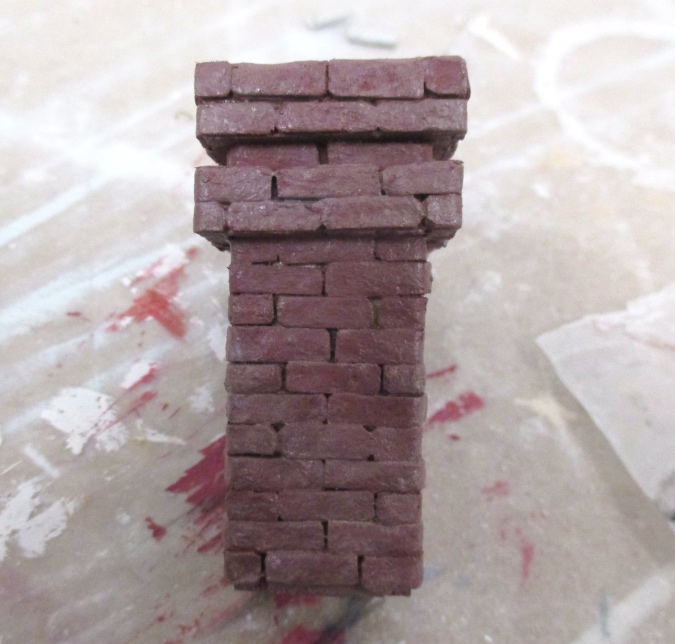
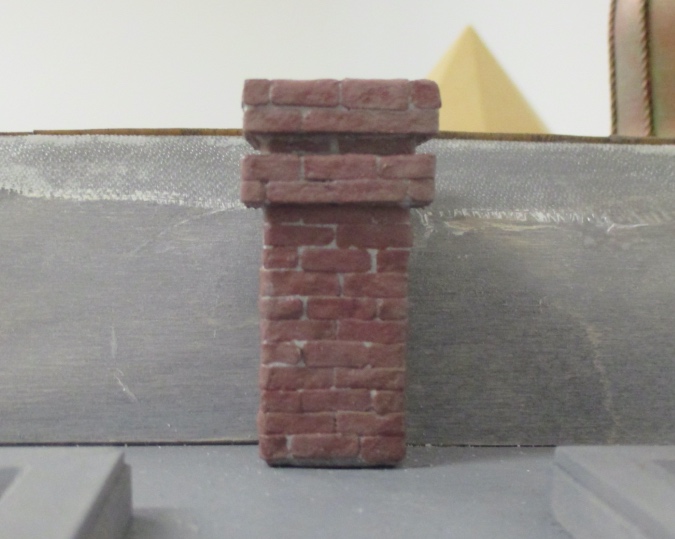
All done!
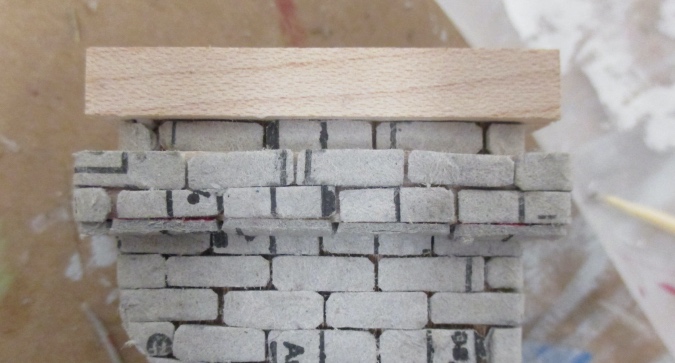
I painted it with Craft Smart Brick Red paint.
When that dried, I added a brown wash.
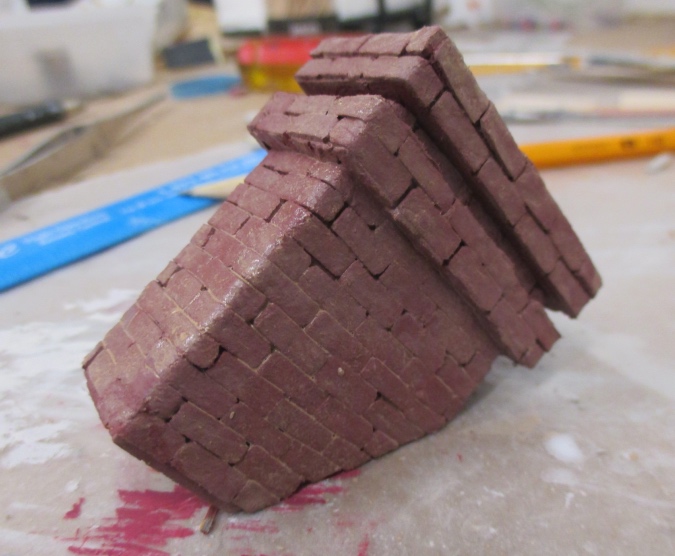
And then a gray wash.
I coated the chimney with matte varnish. While that was drying, I painted the wood piece to cover up the hole, and glued it in.
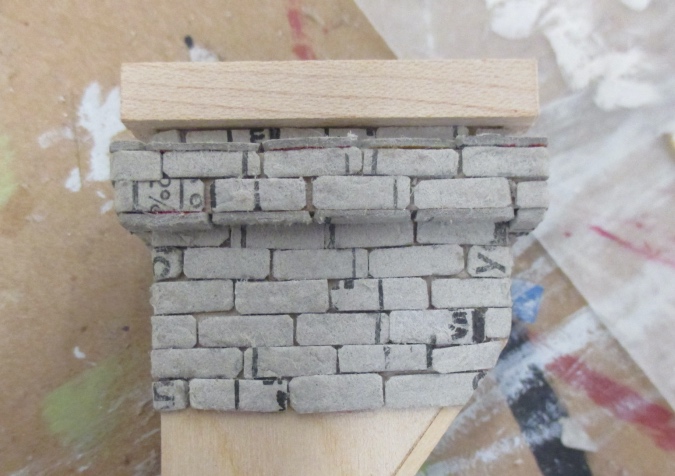
Next I applied Andi Mini Brick & Stone Mortar Mix. Miniatures.com sells this as a powder, but mine is a premixed tub that has dried out over time. I added water to it to rejuvenate it and it’s plenty wet now!
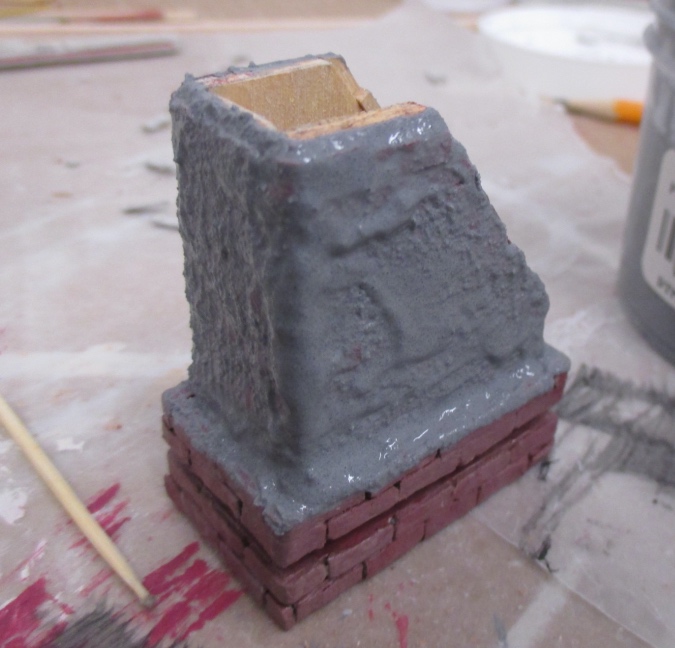
I spread the mortar on with a coffee stirrer and wiped it off with a damp sponge brush.
I also grouted around the top.
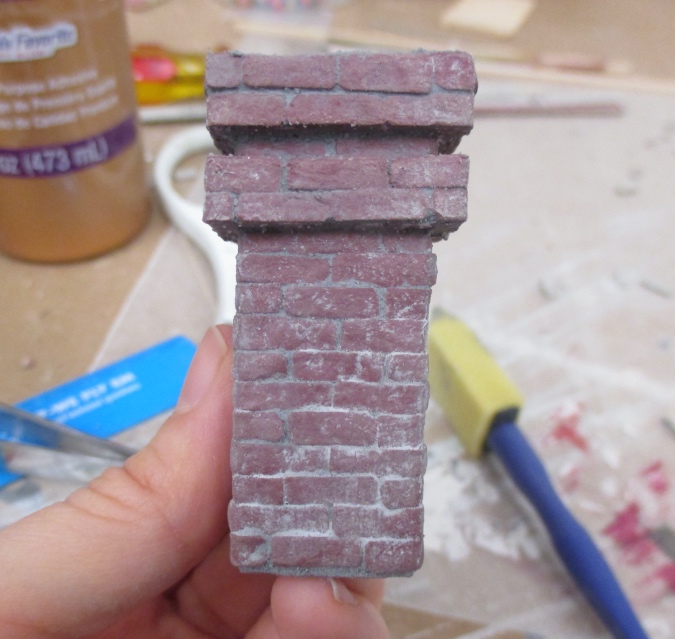
After the grout dried, I added another coat of matte varnish. That gives the chimney a nice hard shell.
In hindsight I think I spaced these bricks too close together. The foundation has larger grout lines. I don’t think this looks bad, I just hope they’re not noticeably inconsistent.
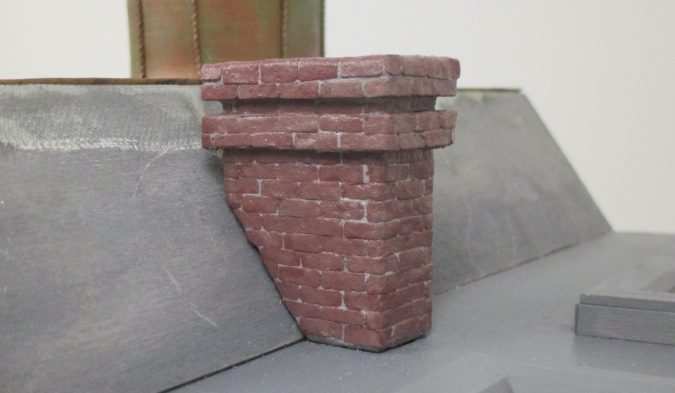
I still need to add chimney pots. On my Queen Anne Rowhouse I used pieces of dowel but I want something a little fancier for the Victorianna, so I have to think about what I can use.
 Emily is a freelance writer, miniaturist, and adventure game enthusiast.


I enjoyed this post. I used “real” brick for my chimney and a tube of brick grout repair stuff in a tube after buying the grout powder and not knowing how to use it. I was never happy with my chimney but resigned myself to using it any and I’ve grown to like it. So I enjoy seeing your work and how you create and problem solve and make mistakes and fix them and live with them. Well-done, Emily.
Your chimney turned out great!
All those tedious steps created a very realistic looking chimney and the finishing touch will be the chimney pots…great look!
Very nice!
The extraordinary skill and incredible investment of time for each and every detail of the house are simply beyond imagination! Each new detail is a work of art. Thank you for taking the time to share the process, as well as the finished project!
I loved that you used egg cartons…it looks great!! I am saving mine from now on!! My next project is applying “stonework” to a general store room box and I think this would work!….What kind of glue did you use?
Thanks! I used tacky glue.