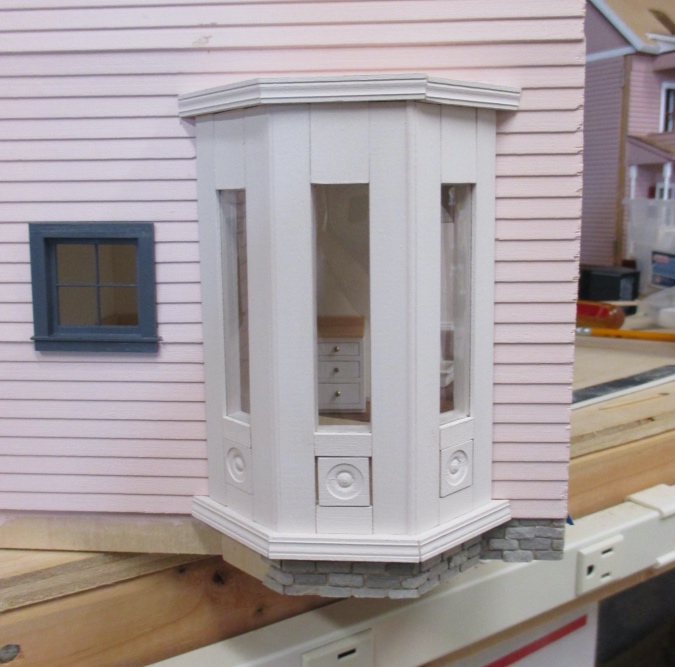
The Victorianna has four bay windows on the front, and one on the back. I finished the ones on the front of the house several years ago — you can read about that here, here, here, and here.
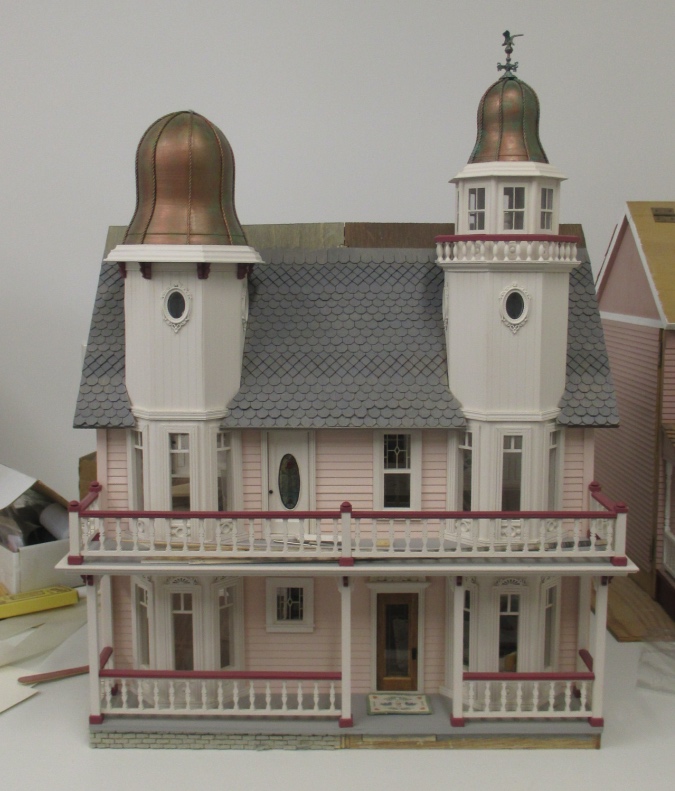
In late 2018 I started on the kitchen bay window as part of the kitchen project, but once the kitchen was finished I lost interest, and it’s sat in an almost finished state ever since.
I really am determined to get this house done while I’m stuck sheltering in place during the coronavirus pandemic (that’s a phrase I never would have expected to say two weeks ago!), so this week I did the last little bit on the last bay window.
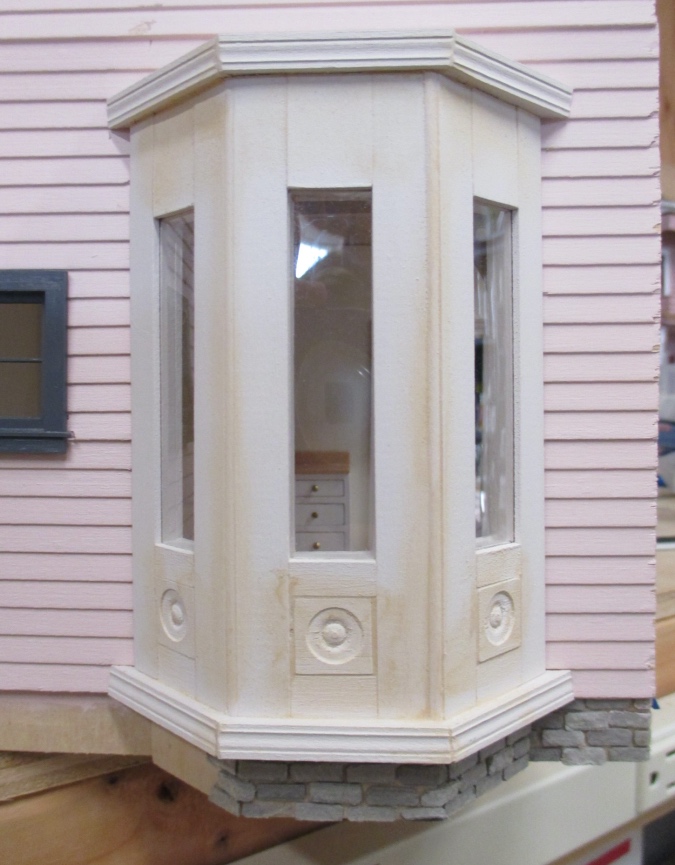
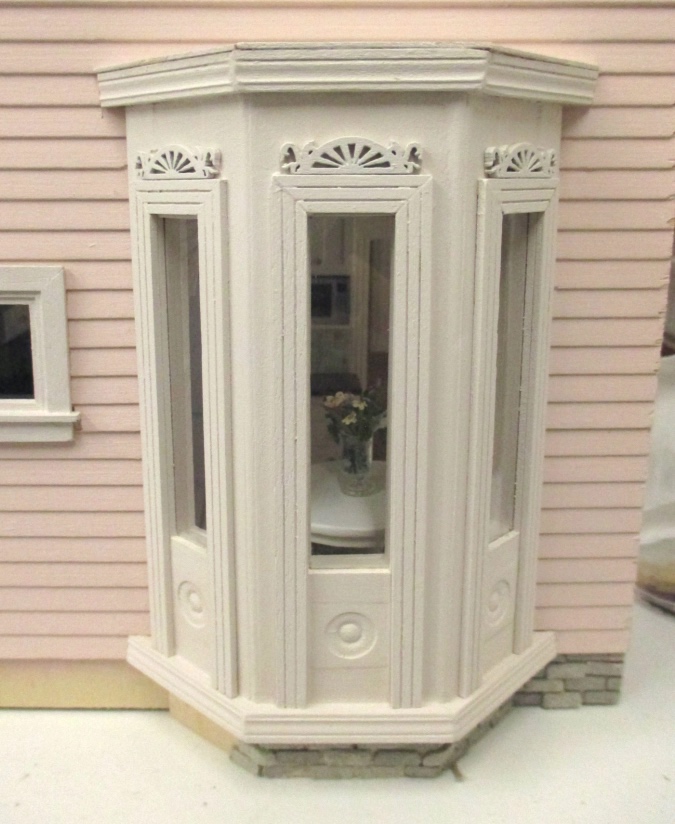
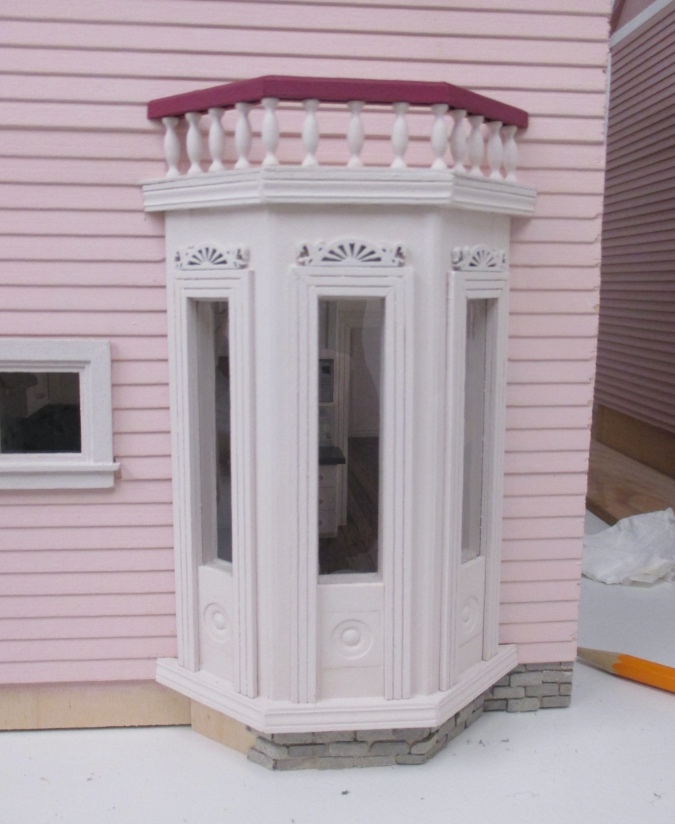
The process I used to finish the bay windows is documented in the posts I linked to above, but I’ve been saving these pictures so I might as well run through it quickly again here. The first steps were to add crown molding to the bottom, frame the insides of the windows with painted strip wood, and glue on the window acetate.
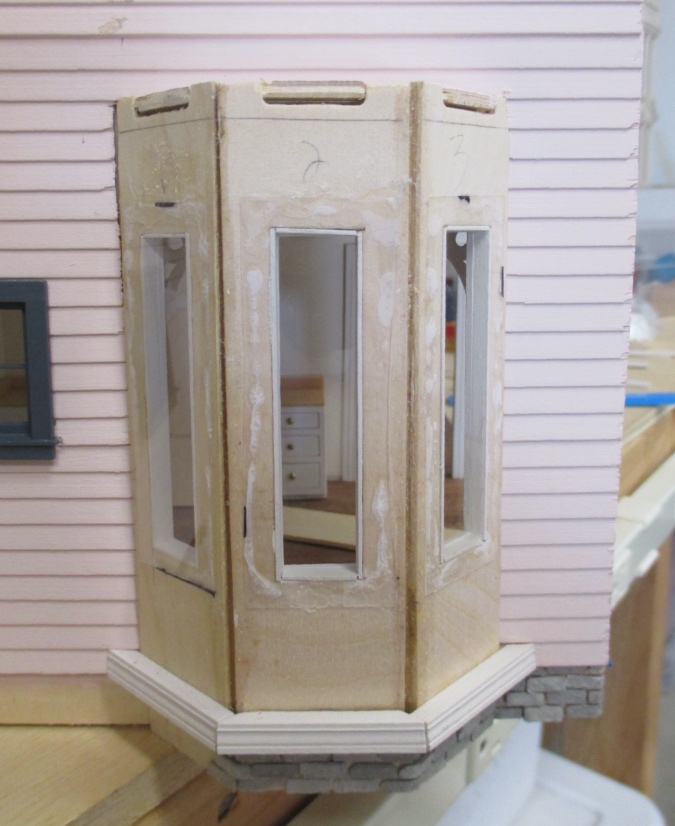
Next I covered the sides with strip wood.
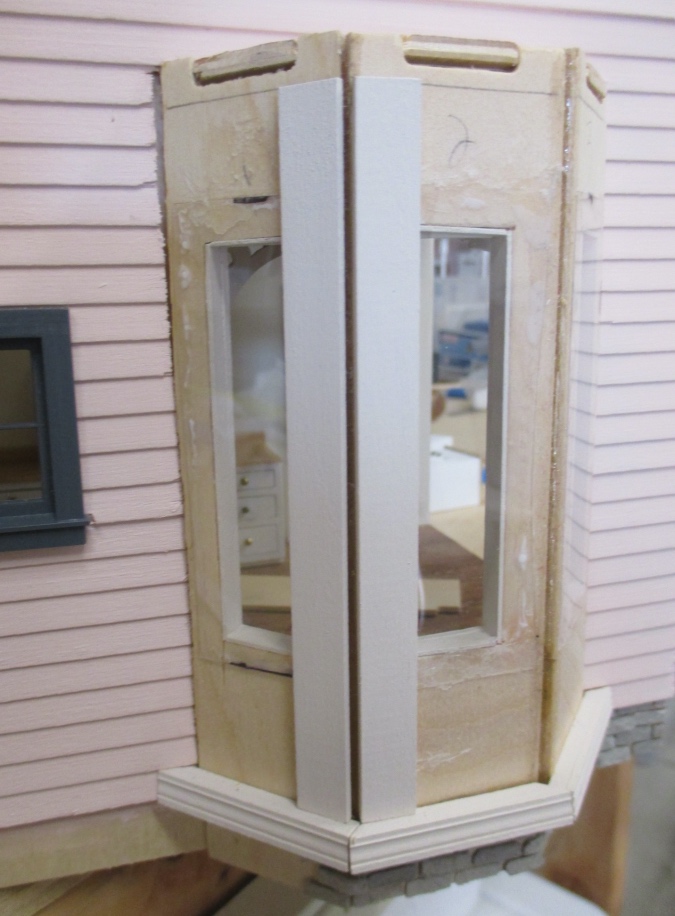
I added crown molding to the top and quarter round into the gaps in the corners.
Then I added the decorative panels (1:12 scale corner blocks) and more strip wood to cover the rest of the gaps.
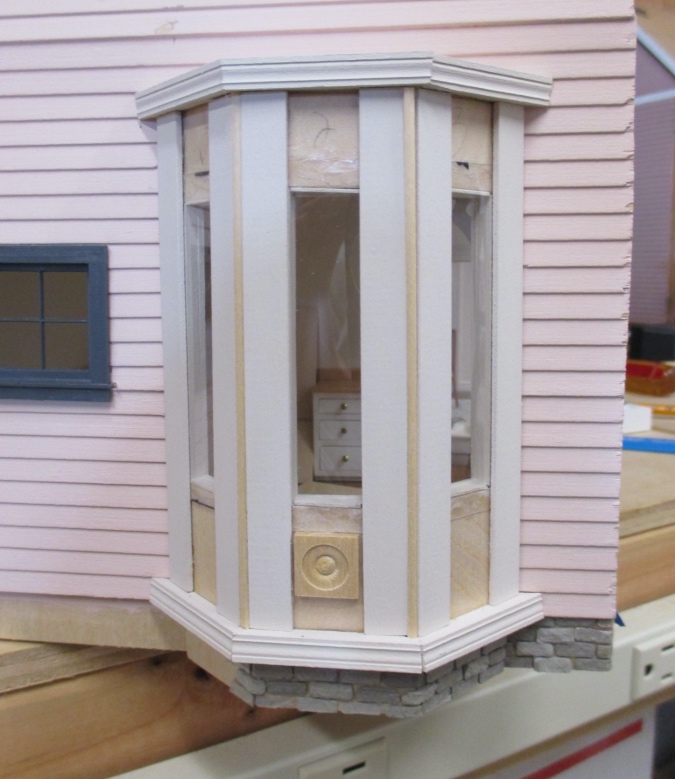
I added wood filler to all the seams and then painted over it.
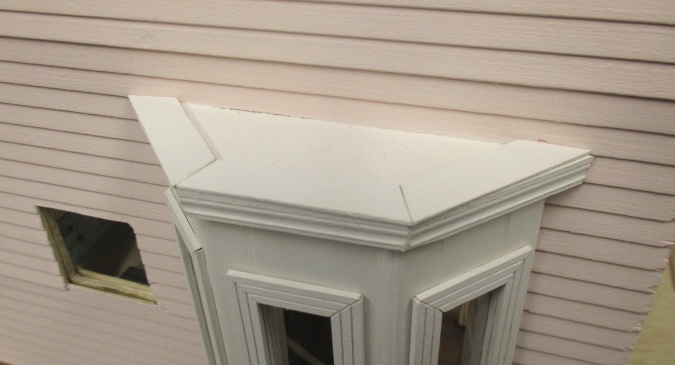
Here’s how the top of the bay looks. Obviously something has to be done about those tabs!
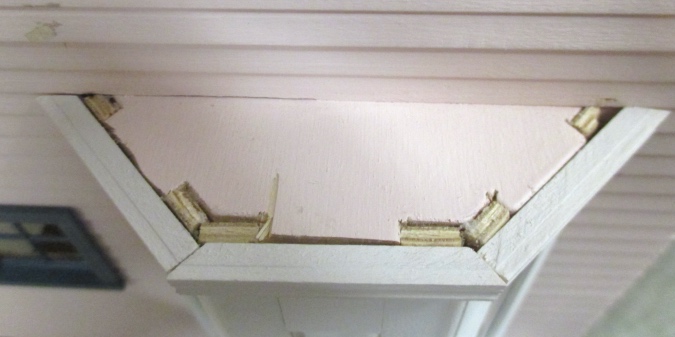
Wood filler wouldn’t have left me with a nice enough surface, so I decided instead to cover up the tabs with pieces of wood. I did something similar on the right tower.
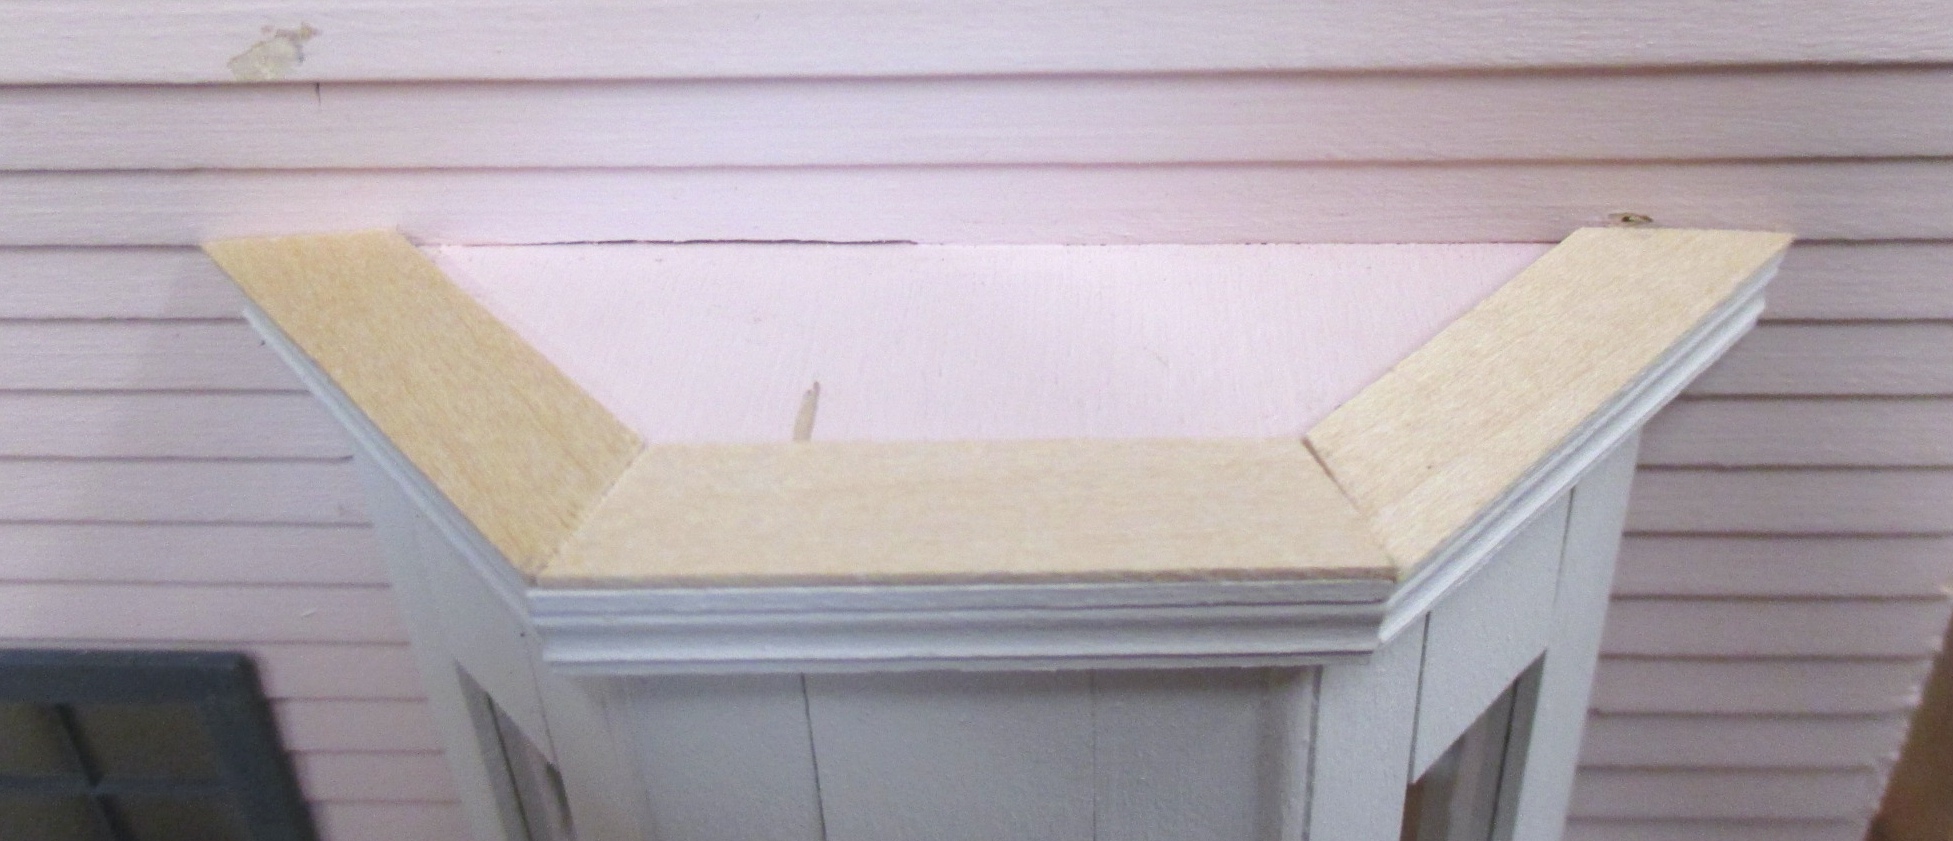
I painted the roof and the trim to match the rest of the bay.
Down below, I added window casing and sunburst embellishments.
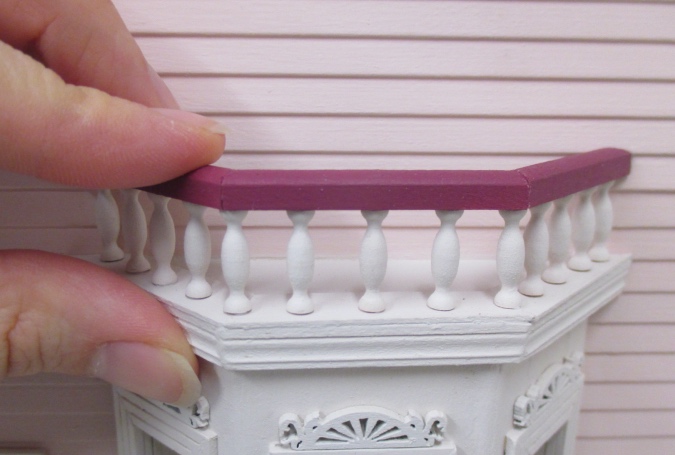
I made the railing on the right tower out of Tiny Turnings pieces and wanted a matching railing on top of the kitchen bay window, but when I dug out the Tiny Turnings I had left over, I was five pieces short. I turned to the internet and connected with a miniaturist named Marilyn in Louisiana who offered to send me what I needed. (Thanks, Marilyn!)
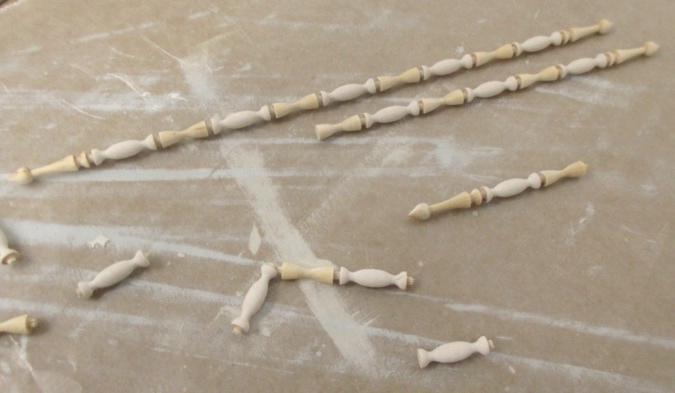
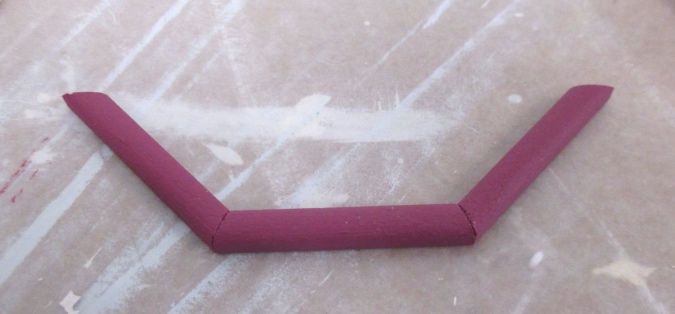
I cut the railing pieces to fit. This is 1:24 porch railing.
I glued these pieces together with Super Glue. Regular glue probably would have been fine but I didn’t want to wait for it to dry.
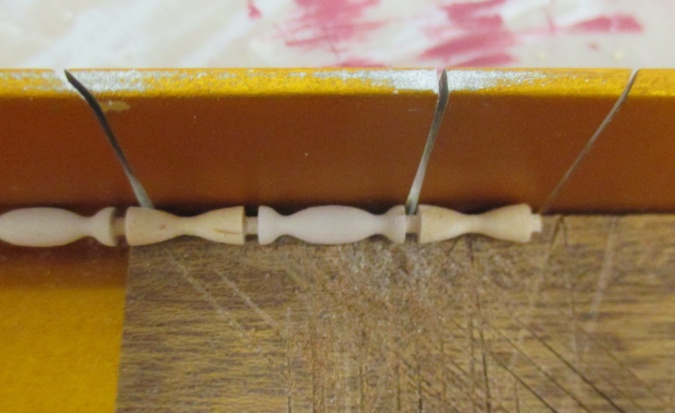
I needed the Tiny Turnings pieces to have a peg on one side (to stick into the groove in the railing) and to be flat on the other side. I initially used an Xacto knife to cut them apart. This resulted in short, frayed pegs and lumpy bottoms that had to be sanded.
After doing a few this way I realized I probably used the miter box last time. This worked better — by gently sawing I was able to salvage most of the peg and ended up with nice smooth bottoms that barely needed sanding.
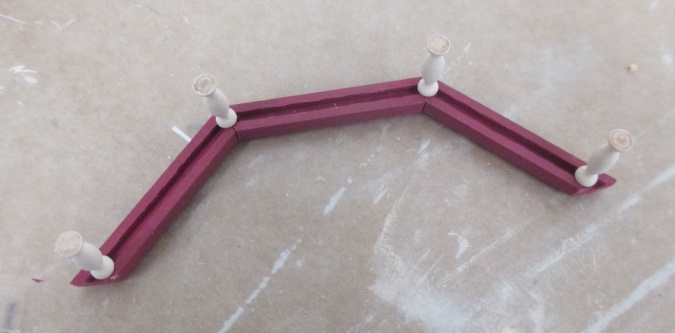
First I glued in the four at the corners.
Then I glued in the rest, evenly spaced (more or less). I added a dab of The Ultimate glue to each spindle and to the ends of the railing that meet the house.
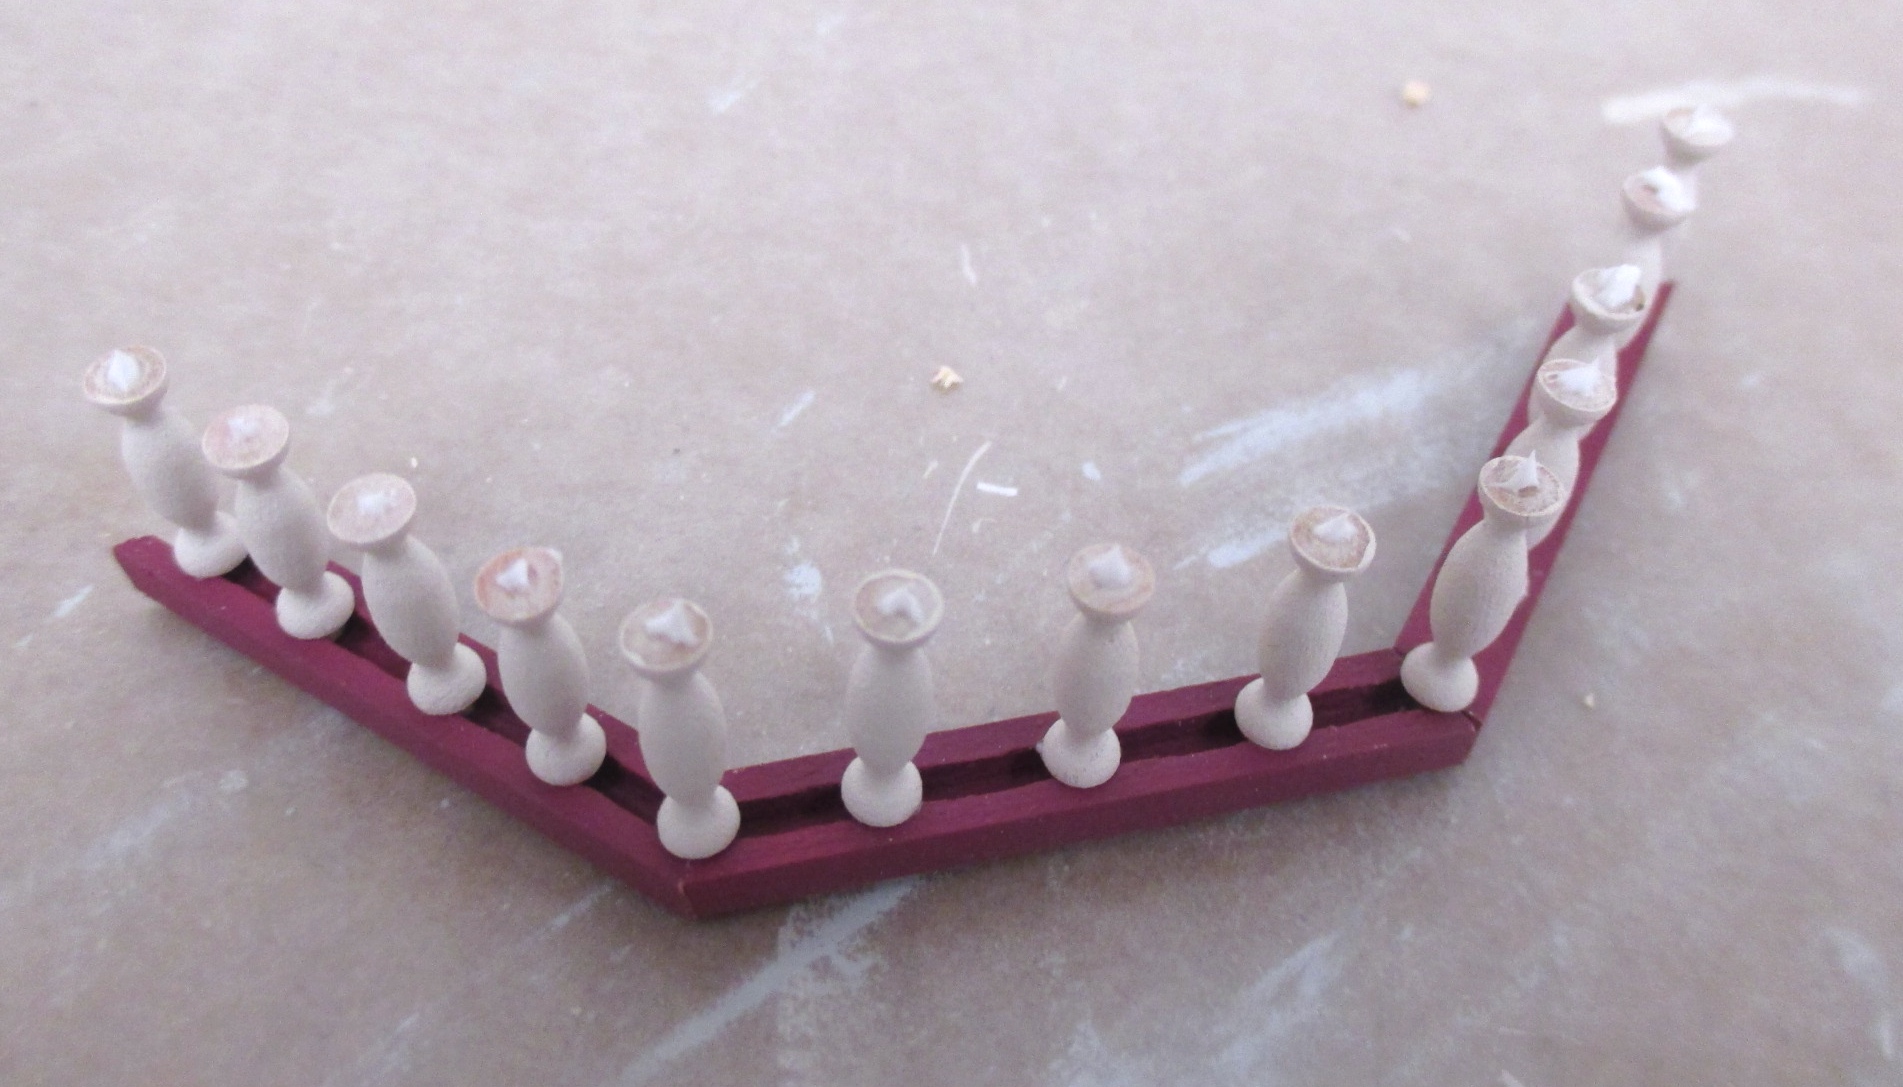
I put the railing in place. Pressing down on the top, I nudged each spindle with a toothpick to make sure they were straight.
And here it is — the last bay window!
But… I just realized that I forgot to add the muntins that I used in the other bay windows. Should I add them?
Here’s the back of the house… pretty boring. It’s going to be up against the wall. But I had to do *something* with that bay window, and at least now it’s finished.
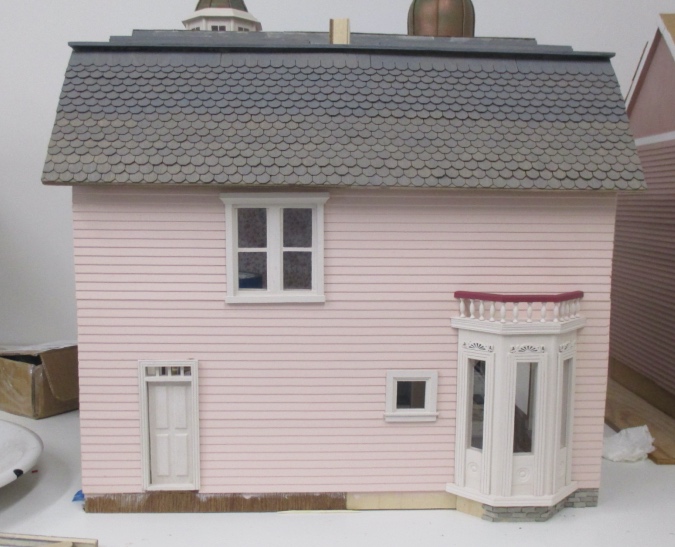
I’m close to finishing the shingles but ran out of hot glue sticks. Hopefully Amazon will realize they’re essential goods and deliver to me during the pandemic! I also have to finish the egg carton brick foundation, which I’ve been putting off even longer than I put off the last bay window. One more room inside needs baseboard and crown molding.
And then… this house might actually be done? Seriously?!
 Emily is a freelance writer, miniaturist, and adventure game enthusiast.


It looks wonderful.
Anytime Emily. I have more of those Tiny Turnings pieces if you find yourself needing a few.
The house is beautiful! Fantastic work.
The house is looking so lovely and you’ve done beautiful work on the bay windows. I would be tempted to add the muntins so that all have the same appearance but since the window is on the back of the house and is less visible they could be left off. Love the project and all the hard work you have done to get it to this point! Stay safe and enjoy time doing projects while we all weather this pandemic.
I look forward to the final tour. It’s a lovely house. I assembled the Dura Craft San Fransisco last summer but left of some of the crown molding that went beneath the window because I could not figure out the angle and how to cut the wood. You have done a fine job–and put your down time to great use. Stay well.
It’s a 37.5 degree angle, and I have a miter box with this angle on it. (Unfortunately the miter box is plastic and quickly got chewed up, but it’s still usable for now.)
If you can’t do a 37.5 degree angle, another way to do it is to cut one piece at a 90 degree angle and the piece next to it at 45 degrees. You’ll have a bit of a gap on the inside edge where they meet up, but this can be hidden with other trim. I did the crown molding on the bay window this way — you can see it in the second and third photos in this post, and also in the first one that shows the top view of the roof.
I am always so impressed with your detail work. Looks beautiful!