For the past few months I have been working on a bookcase for my office. I bought three of these unfinished bookcases and stained them with Minwax Aged Oak gel stain. This took a lot longer than staining dollhouse furniture! I dragged it out over a month and a half, doing a few pieces each weekend.
Then Geoff helped me cut down the tops so the three bookcases could fit right next to each other, and we assembled them and bolted them together.
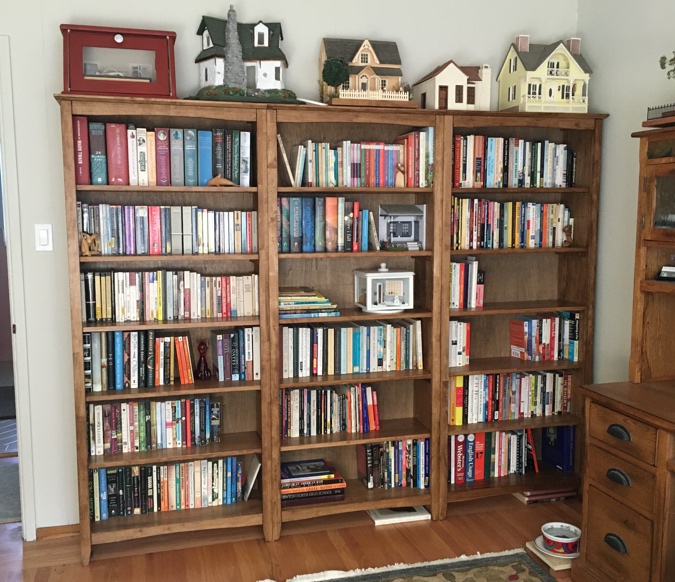
There are some empty spots on the shelves that are perfect for displaying minis. The Infinite Possibilities Porch and four seasons roombox have already found a home here, and I’ll put the screened-in back porch here when it’s finished. (I hit a snag with that and haven’t worked on it in a while — more details to come in a future post.)
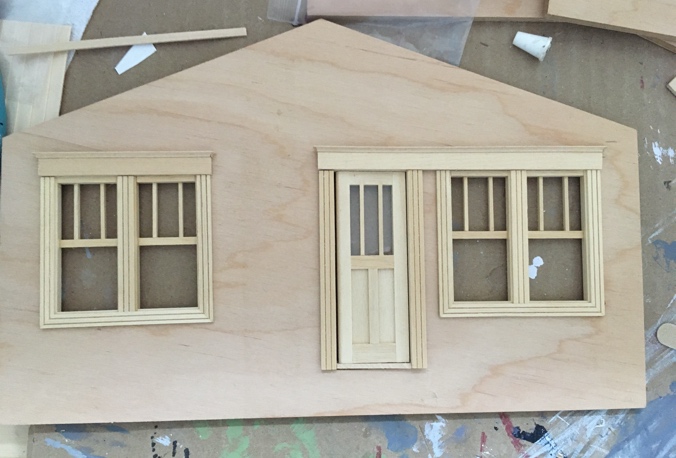
This weekend I started another small project that will fit on the bookshelf when it’s finished, a Craftsman bungalow vignette kit by Debbie Young.
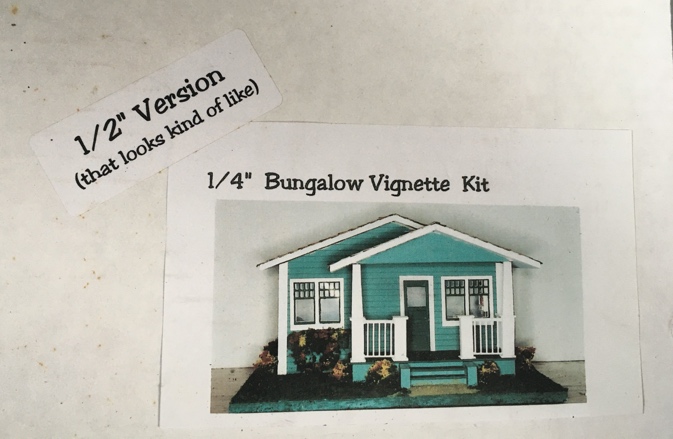
I bought this kit from the same seller as screened-in porch. It was originally a quarter scale kit that Debbie released a batch of in half scale (I think it was for a club project, but I might be misremembering).
The kit came with instructions and everything else required — components, shingles, siding, etc. The only picture is the one on the front of the box.
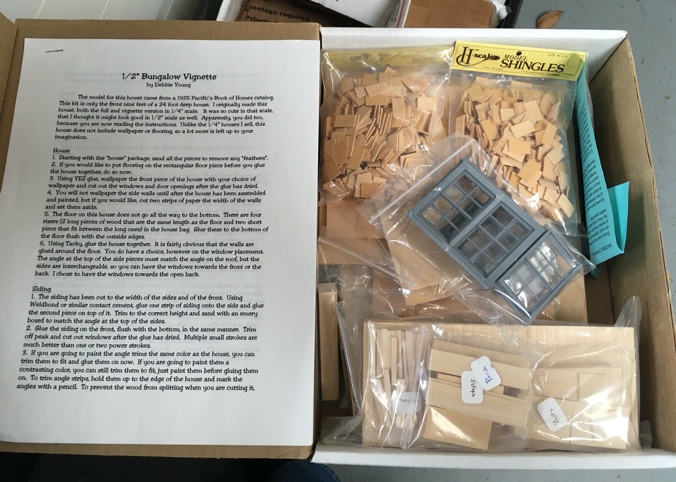
The window and doors are plastic Grandt Line components. I’m not a fan of these. I hate painting plastic and I want to stain the front door.
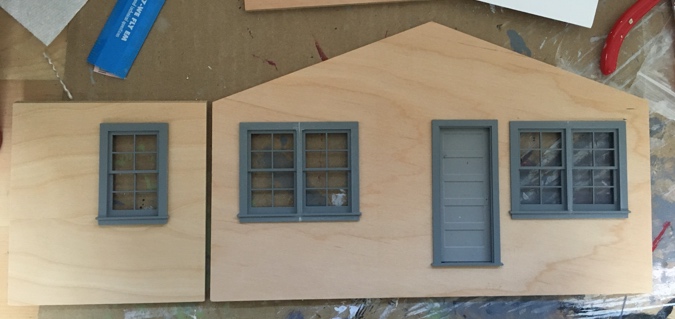
I dug through my stash and found these, which I bought on eBay several years ago. They look like components off a Real Good Toys East Side Townhouse, which is now discontinued. I really like the mullions, but was never a fan of the pediments. (And yet I still bought them, because I have an addiction.) The windows come with pre-assembled interior trim.
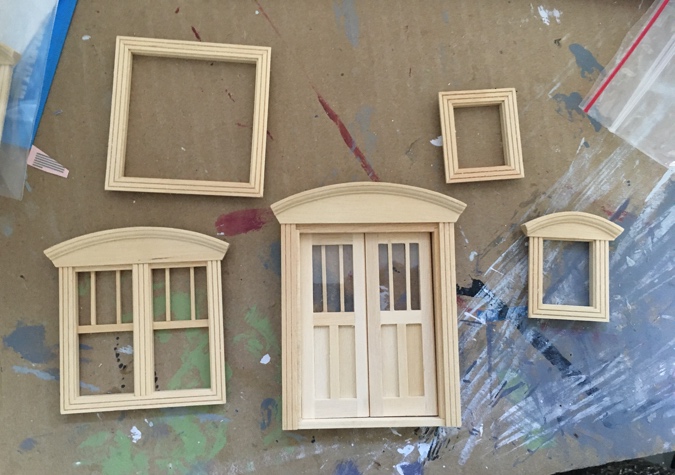
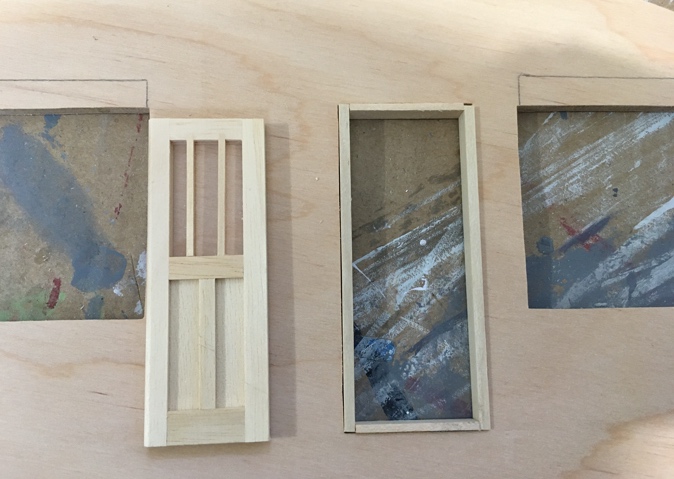
The double windows are the perfect width for the existing holes, but slightly taller. One door out of the double door will work for the front door, and the interior window trim from the small windows, turned on its side, will work on the side walls. (I’ll fill in the holes underneath the windows.)

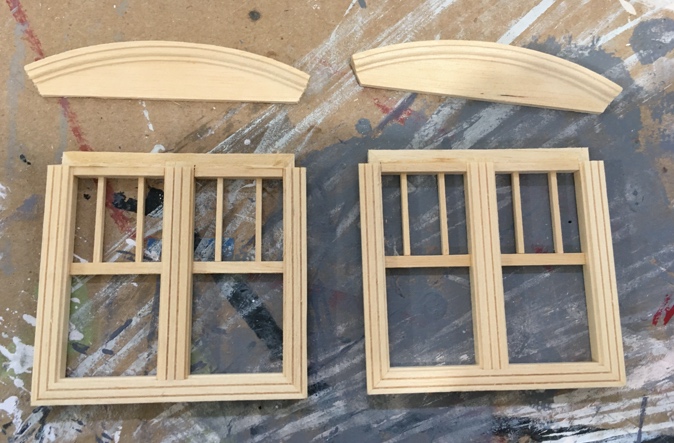
I gently bent the pediments until they snapped off. I’ll hold onto them for some potential future use. (Yes, I just admitted I don’t like them, and yet I’m saving them anyway!)
I built a door frame out of strip wood and drew around the windows to figure out where to cut. But as I looked at this, I realized the top edge of the windows should be at the same height as the door, so I erased these pencil marks and redrew them at the bottom of the window holes.
Geoff enlarged the holes for me with his multi-tool. I really should get over my fear of power tools and learn how to use that thing one of these days. But why bother when he’ll do it for me?
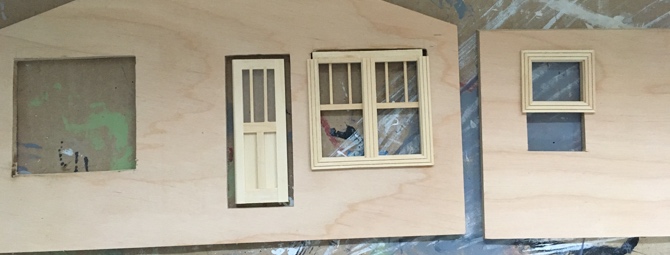
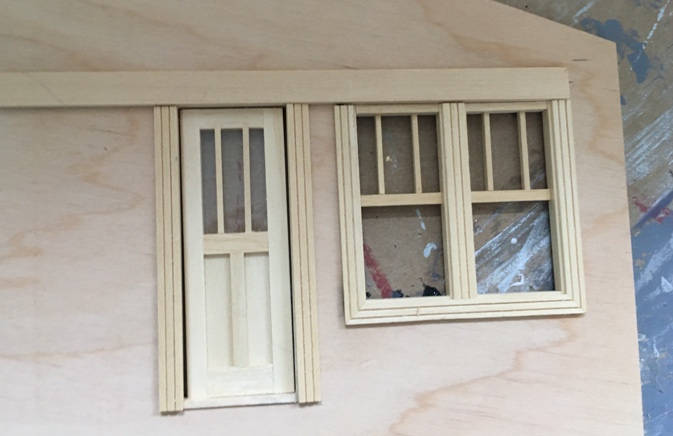
The windows need a header to replace the pediments I broke off, and I wanted them to match the door. Also, since there’s a window so close to the door, I had to make sure they wouldn’t interfere with each other.
I looked at pictures of real Craftsman bungalows to see how the trim looks when the window and door are right next to each other. The real bungalows I looked at tended to have simple trim around the windows and front door. But I can’t just add a piece of casing to the top of mine since the corners wouldn’t be mitered, so I do need some kind of pediment.
Here’s a house where the window and door share a header. (Source)

I like that idea.
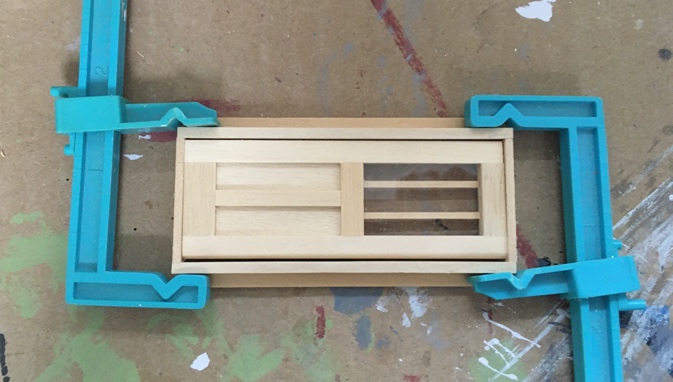
With the header issue decided, I pin hinged the door and glued together the frame.
Even though it’s not consistent with the real bungalows I saw online, I decided to put molding around the top of the window headers. This is small cove molding glued around the top of a piece of 3/8″ strip wood. You can’t see it in the picture, but the molding wraps around the corners.

Here are the two pediments (not glued in yet). Craftsman windows usually do have pediments like this inside the house, so even though they’re a little fancier than what I saw in the pictures of real houses, they’re not totally out of place.
Coming up next time: hardwood flooring and assembly of the structure.
 Emily is a freelance writer, miniaturist, and adventure game enthusiast.


Beautiful work! I love those windows.
Looks like it’s going to be fantastic! I had to laugh when I read you bought the pieces with the pediment because you had an addiction. My husband found my stash of goodies and blew a gasket, said I was sick and a hoarder. Well yes, yes I am when it comes to minis. Only thing is, I use my hoard, which real hoarders don’t. I have to say he had a point, considering the stack of bins in the closet is taller than I am (I’m 5′-8″). LOL
If I stacked all my bins they would be much taller than me!
Excited by the look of the ’empty’ spaces on your new shelving and looking forward to seeing this wee house come together. I love your solution for the façade – it ties it all together beautifully.
Ooohhh… bookshelves with empty spaces! Can’t wait to see them filled. I have to laugh about the hoarding because I tend to buy stuff I don’t need because I worry I’ll need it and won’t have it.
But I also do use the stuff I have…so mini hoarding isn’t the same as regular hoarding.
I can’t tell you how many times I’ve been grateful to have some silly little thing I hoarded. (Or, conversely, how many times I’ve been bummed to realize I got rid of the perfect thing I could have used!)
Starting out awesome. I can’t wait to see what creativity you put into it.