Swap time is rolling around on the Half Scale Minis Group and I have an idea I’m excited about, but of course I won’t be able to talk about it for a few months.
While I was thinking about this I realized that I posted about the basket I made for the last swap, but never showed how I made the goodies inside the basket. Luckily I prepared all of the pictures already. Now let’s see if I can remember the steps…
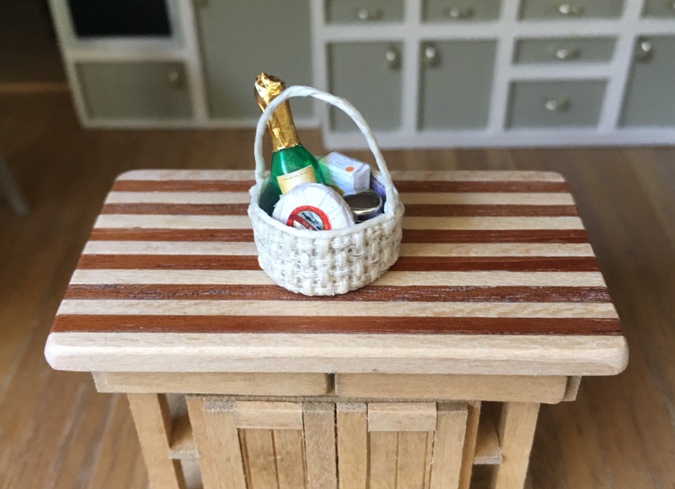
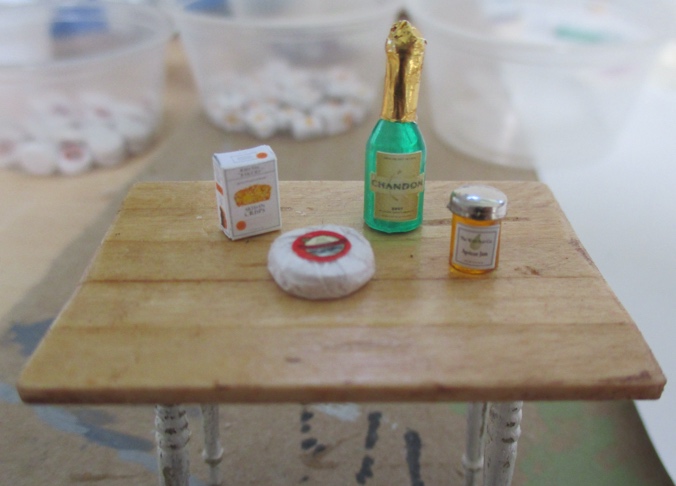
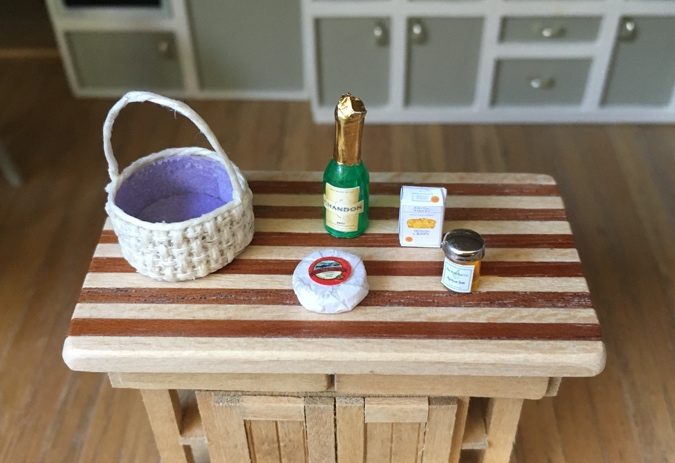
My swap item was a Northern California gift basket containing a jar of jam, a brie wheel, a box of crackers, and a bottle of champagne.
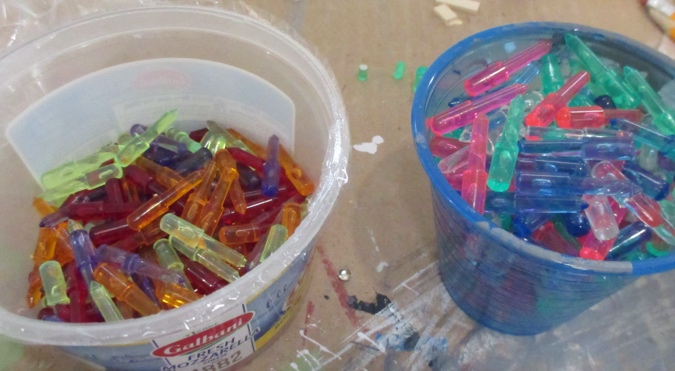
I made the jam jars out of Lite Brite pegs. I got the idea from this Joann Swanson tutorial, which is mostly about creating bottles from Christmas lights, but also has instructions for making bottles and jars out of acrylic rods.
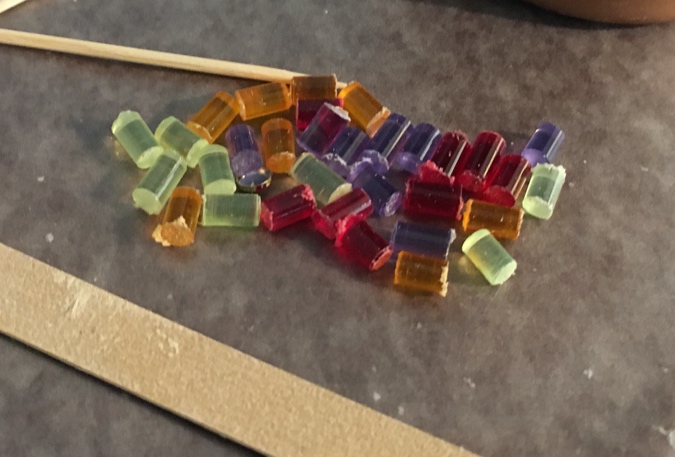
I shopped for Lite Brite pegs on eBay and soon realized that different sized and shaped pegs were sold in different years. The ones I bought are from the 1960s and they’re 1 1/8″ inches long.
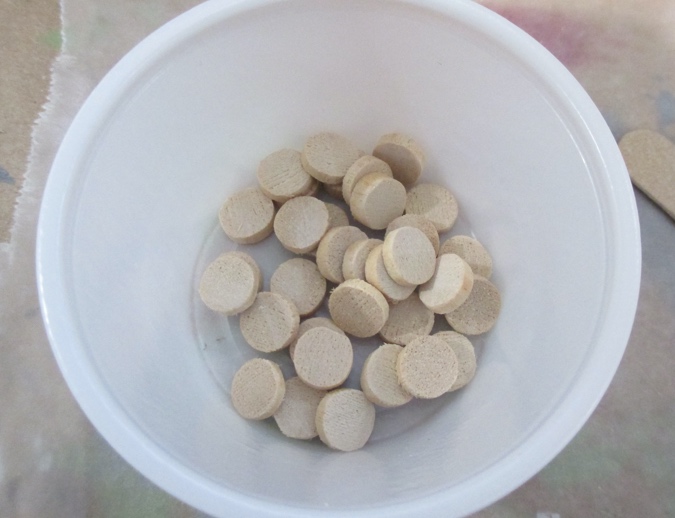
I separated out the colors that could realistically be jam.
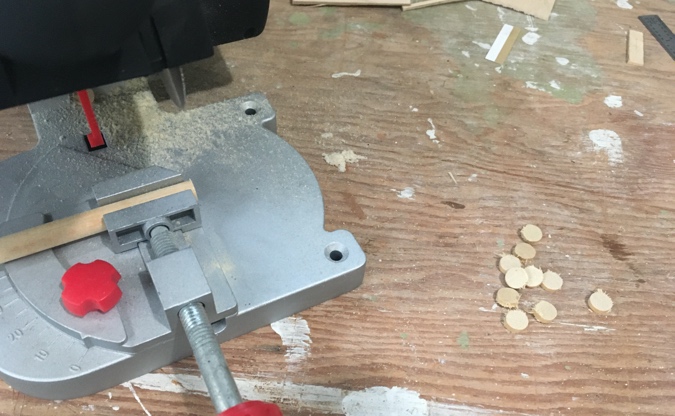
Using my razor saw and miter box, I cut off the pointed tips, and then cut a 1/4″ length. I saved the pointed tips to use as gum drops in the candy shop I’ll build one of these days. Never throw anything away!
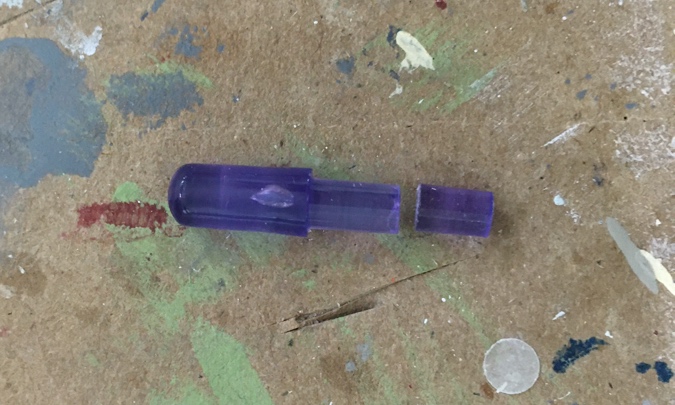
I sanded the raggedy edges with an emery board.
Next, I cut the legs off of silver mini brads to make the lids.
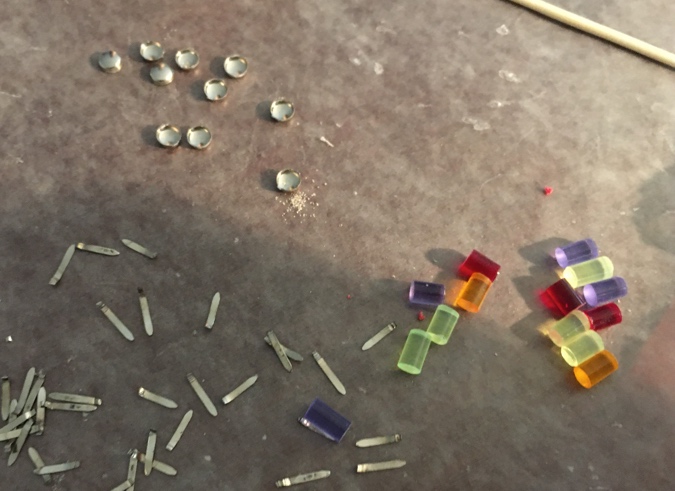
These are exactly the right size to slip over the top of the jar.
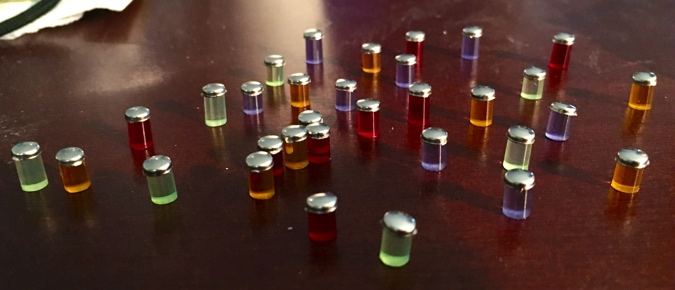
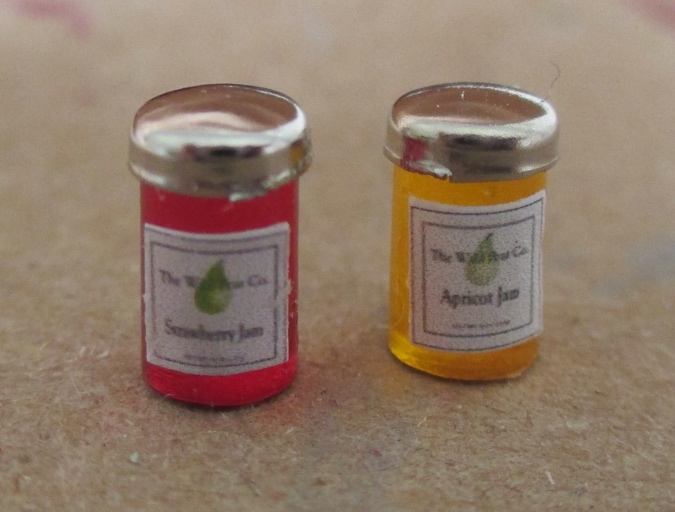
I made the labels by shrinking down pictures off the Wild Pear Co. website. This is a local business that sells jam at the farmer’s market. The flavors I picked are strawberry, apricot, pomegranate, and pineapple.
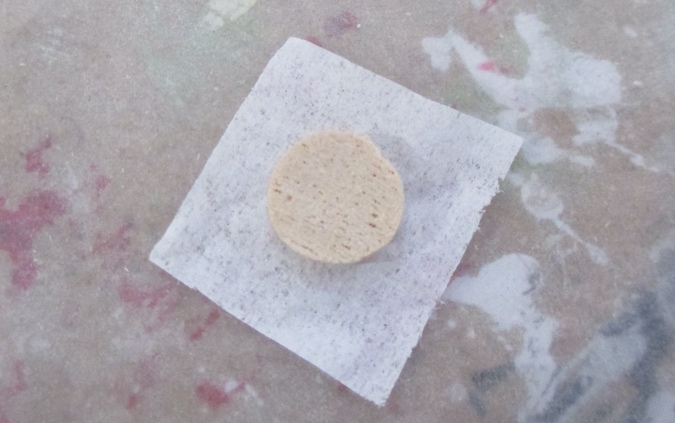
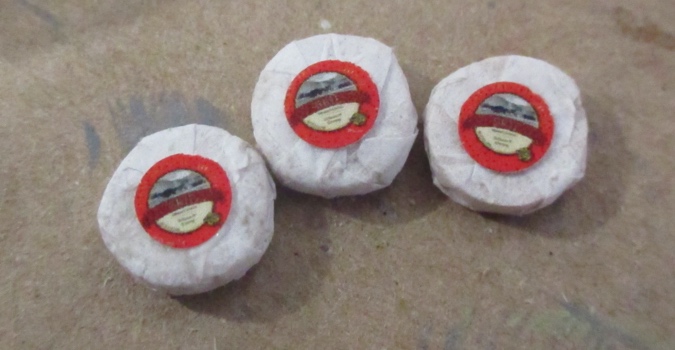
The brie wheels were super easy. I used the power saw to cut a 5/16″ dowel into 3/16″ thick discs.
Again, I sanded the ragged edges with the emery board.
Then I cut a square of tissue paper and wrapped it over the disc, gluing down the edges.
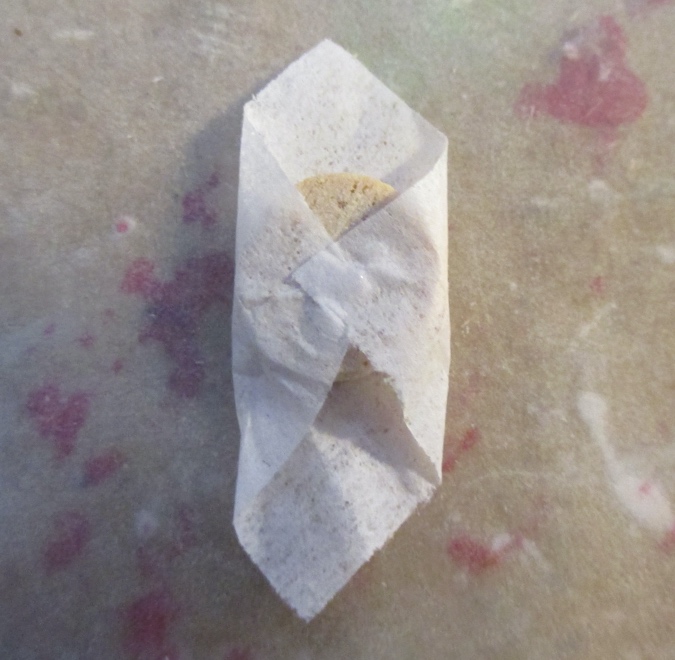
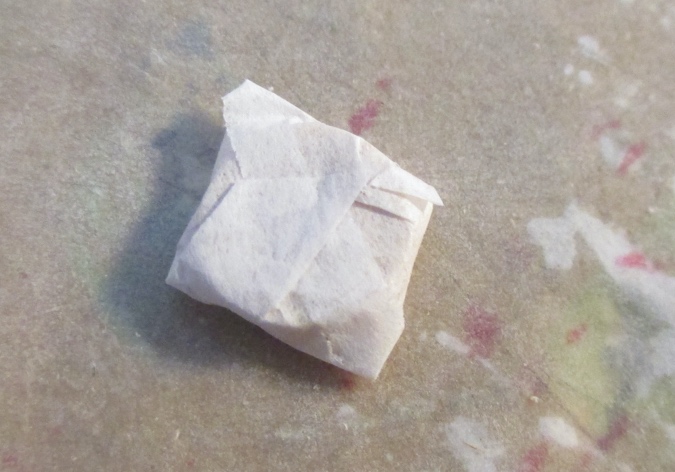
I pushed in the corners and then glued a second piece of tissue paper over the first, since you could sort of see the wood through the first layer. This looks just like the paper brie comes wrapped in.
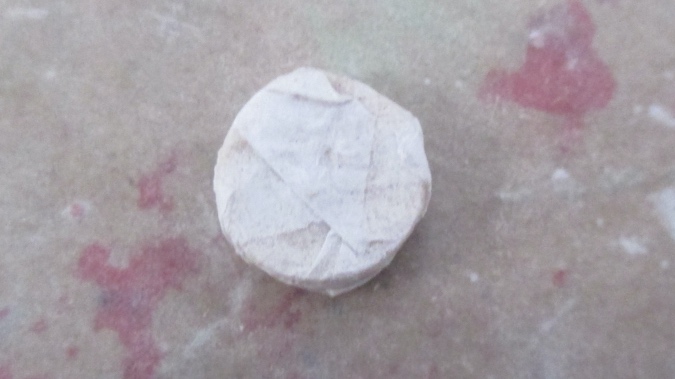
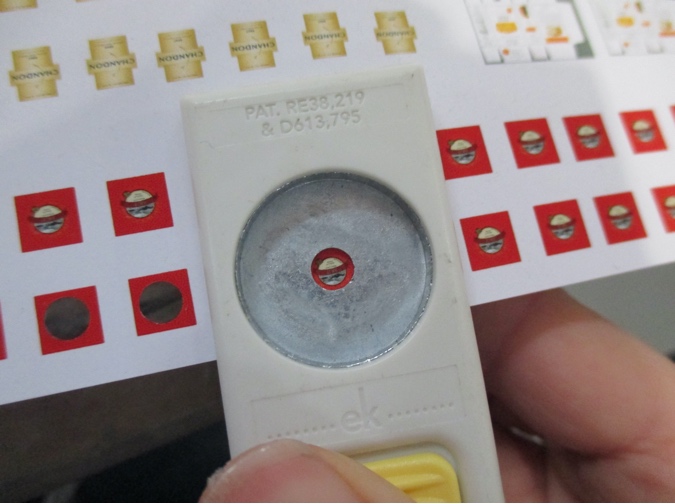
I found a label for Marin French Cheese, another local company. I reduced the label and added some extra red around the edges. Then I used a 3/16″ punch to punch out the labels.
Here’s how they look. Unfortunately, reduced to this size you can’t read the word “brie,” which is in the dark red stripe. But I hope they look enough like brie wheels to get the point across.
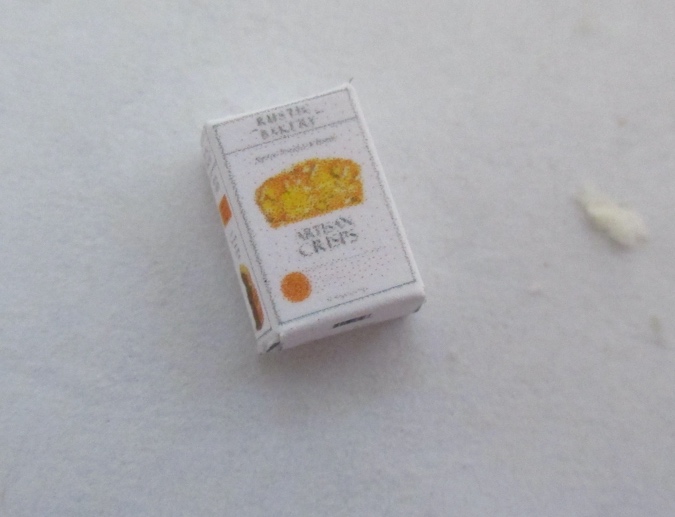
The crackers are Rustic Bakery Artisan Crisps. My neighbor works for Rustic Bakery and she often brings me goodies, including a box of these when I was formulating my plans for the gift basket. I flattened the box, scanned it, and reduced the photo to the right size. I added a gray background so I’d know where to cut.
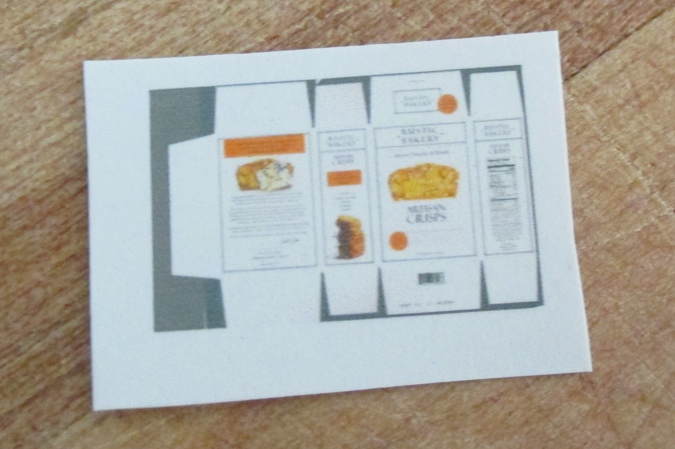
These are tiny boxes, and they’re just printed on regular paper, so I had to fold very carefully to keep from smooshing them. I started by cutting guide lines at each of the corners that needed to be folded.
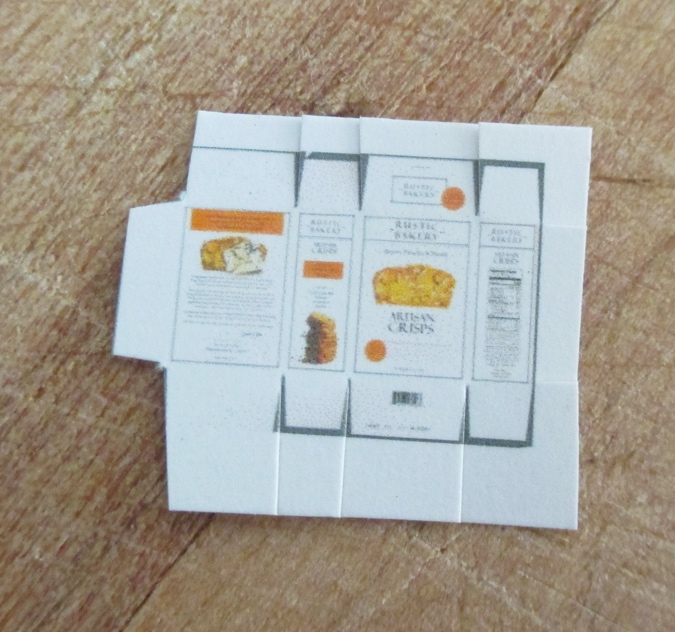
Then I flipped over the paper and scored those lines with an Xacto knife.
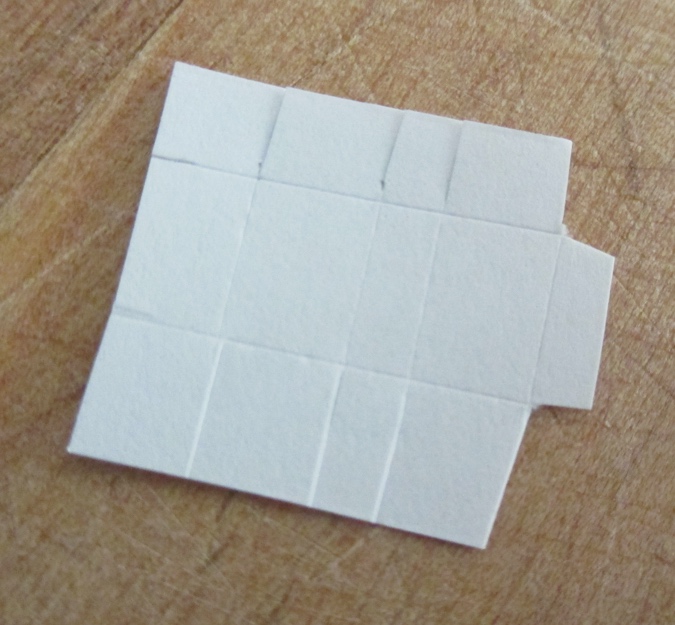
Next I cut out the box the rest of the way, using nail scissors.
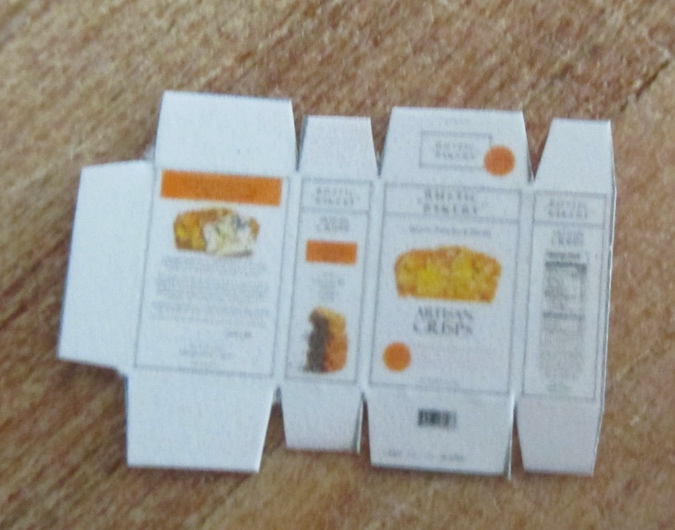
And then I carefully folded along the scored lines and glued. These boxes are a little small in real life, and I just reduced them to half scale without making a prototype, so they’re small in mini too. In retrospect I wish they were larger so you could see them better in the basket.
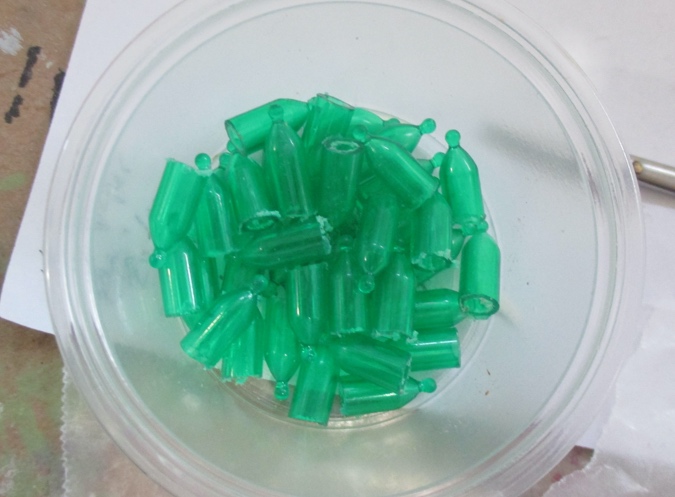
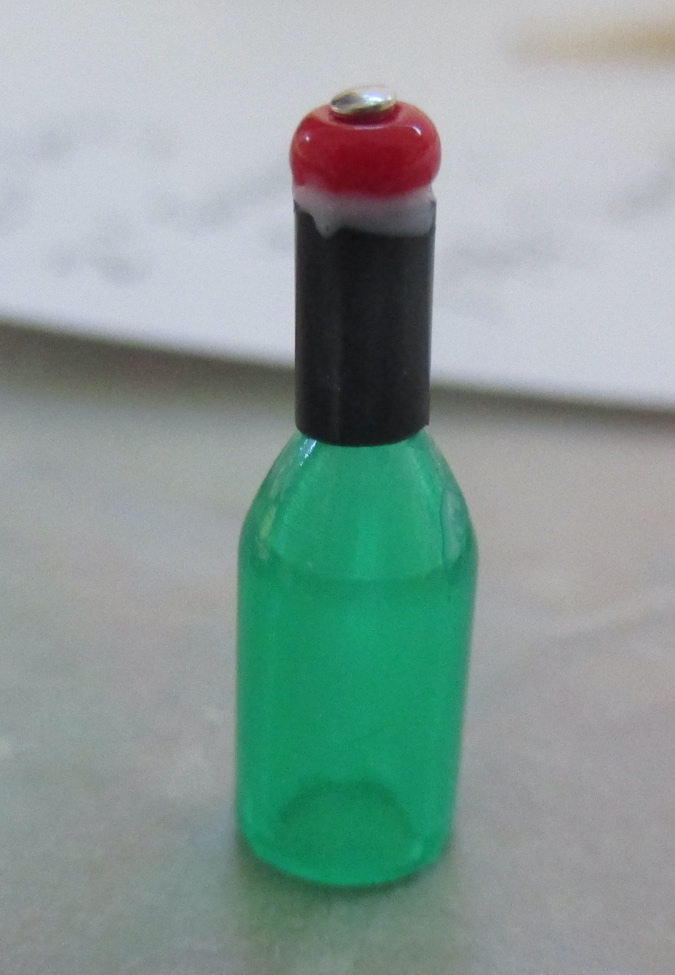
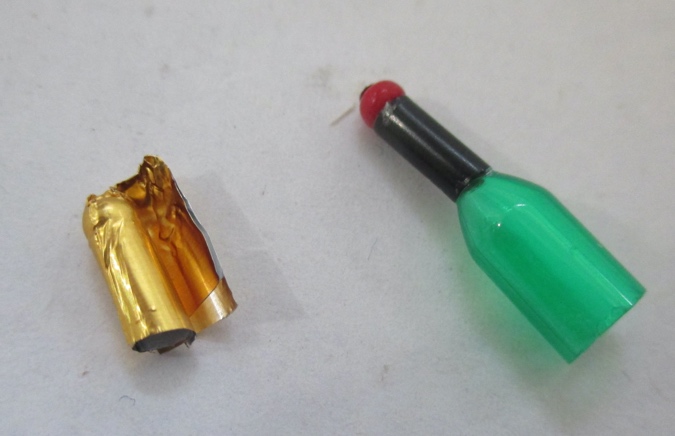
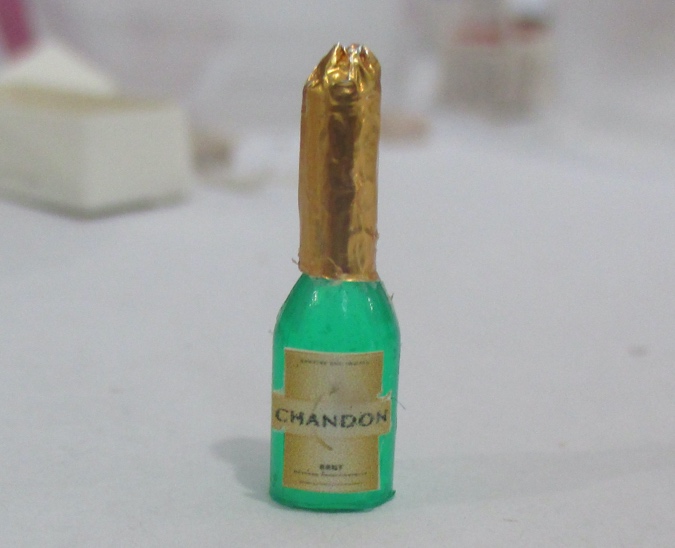
Finally, the champagne bottles. These were the most frustrating to make and I’m not completely happy with them, but by this point the swaps were due and it was too late to turn back. I’ve used LED Christmas lights to make bottles before, including the half scale cocktail set for the 2018 swap and in my 1:12 scale Blackbird Bar.

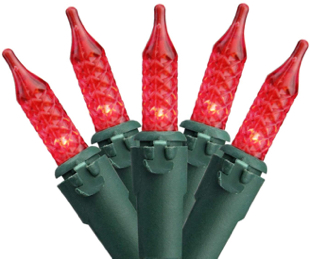
The LED lights are good because they’re made of plastic, but they have stubby tops that don’t look like the neck of a bottle. Incandescent Christmas lights are more bottle-shaped and the green ones are a deeper color that look more like a wine bottle, but as I learned the hard way, they’re made of glass, so they can’t be cut or sanded down.
I spent a ridiculous amount of time looking for the bottle-shaped LED M5 lights in Joann’s tutorial (in fact, I have been looking for that style for YEARS). I finally did find some on eBay, but by that point I was already halfway done with my batch of complicated champagne bottles, so I decided to stay the course.
(Quick digression: If you go looking for the bottle-shaped lights yourself this holiday season, be warned that the product pictures are deceiving. After years of shopping for these at stores and opening boxes to double check, I’ve found that the box often shows a light with a long skinny neck, like in the picture on the left, but the lights are actually shaped like the ones on the right.
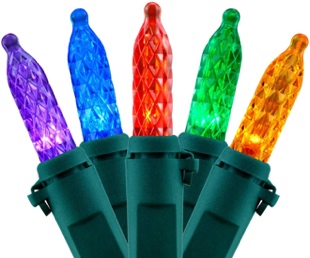
I ended up looking for eBay auctions where the actual set of lights being sold was pictured outside of the box, or I messaged the seller to ask for a picture. Now, back to our regularly scheduled tutorial…)
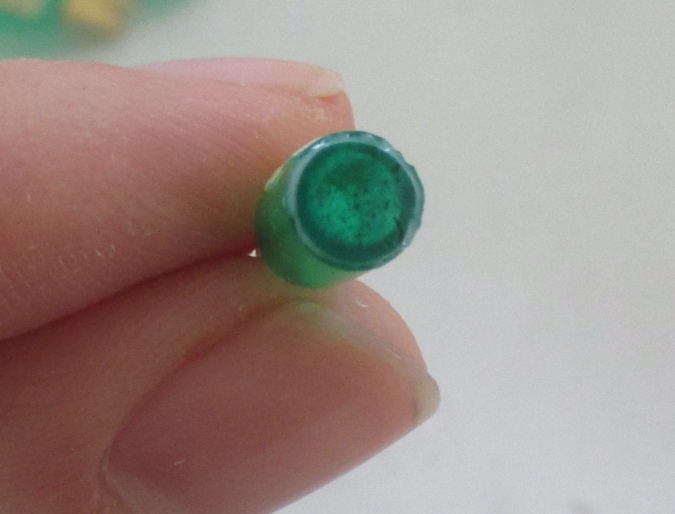
Step one was to cut the lights off the string. In the past I’ve been able to remove these by wiggling them out of the plastic holder, but the ones I bought this time were nearly impossible to remove that way.
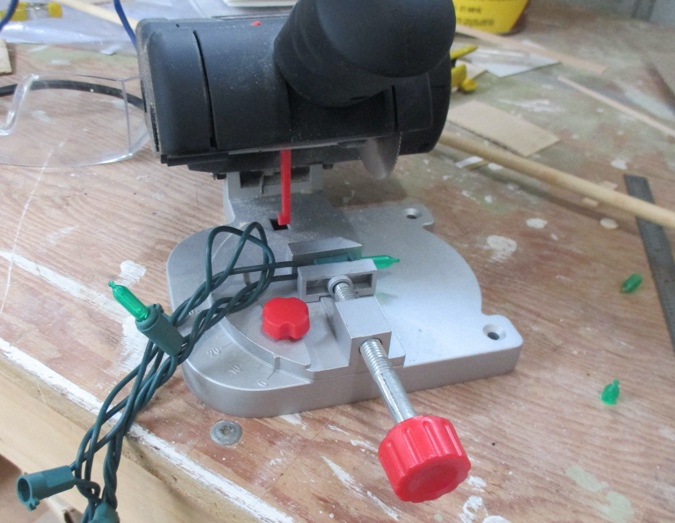
These are about 1/2″ tall. Guess what I did with those ragged edges? Yep, emery board.
Next I cut a 1/4″ piece of cocktail straw to form the neck.
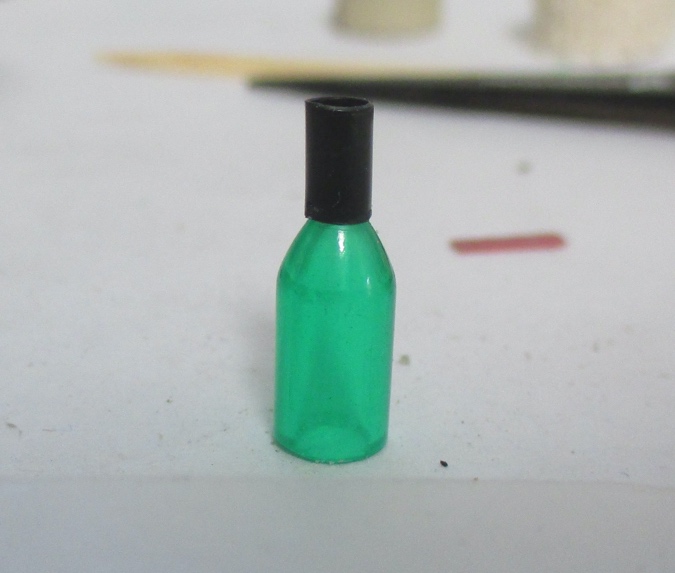
I attempted to glue these by glopping a lot of glue inside the straw. There’s barely anything to grab on to, but I hoped the glue would harden around the little nub at the top of the light.
To make the cork, I put a straight pin through a seed bead.
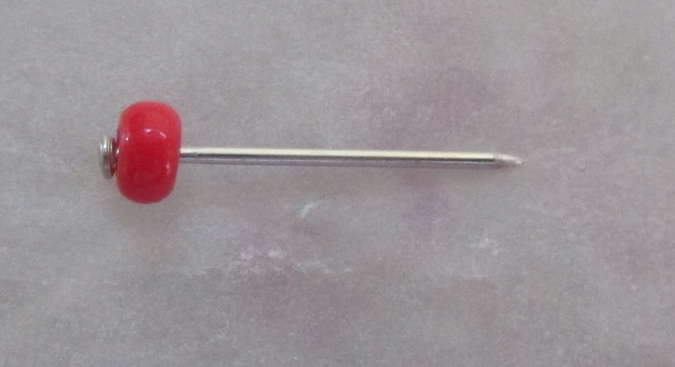
I cut the pin down and glued this into the neck. Since there’s once again not much to glue to, the pin is there so the bead can’t easily pop off.
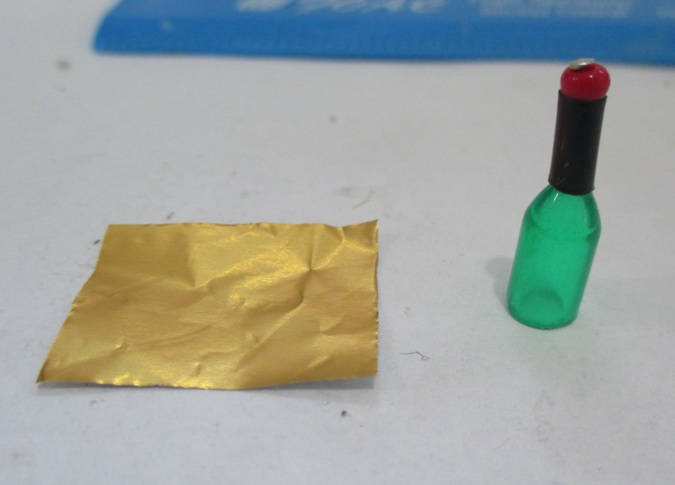
This gold foil is for wrapping candy.
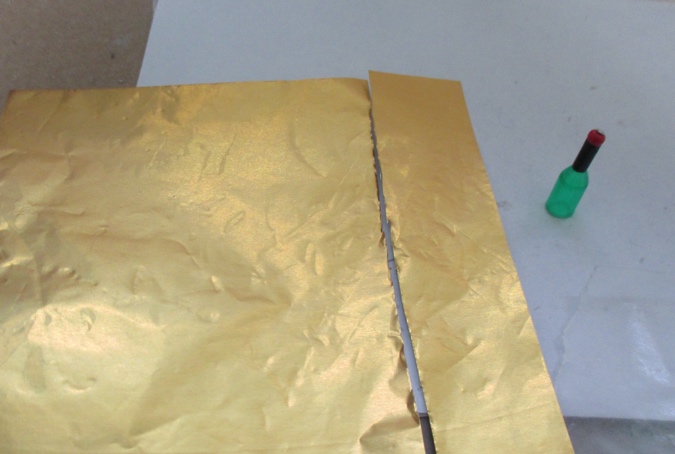
I cut a piece twice as tall as the neck.
I folded this over the neck and pressed down around the neck to tighten it.
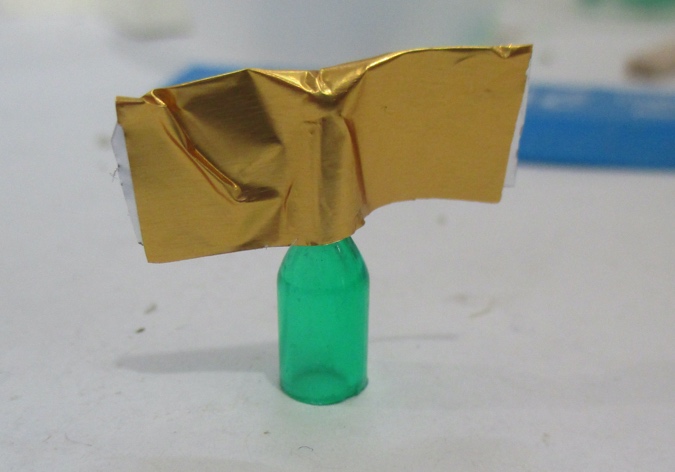
Then I wrapped the excess around the neck, squishing a little around the bead to make it look like a cork.
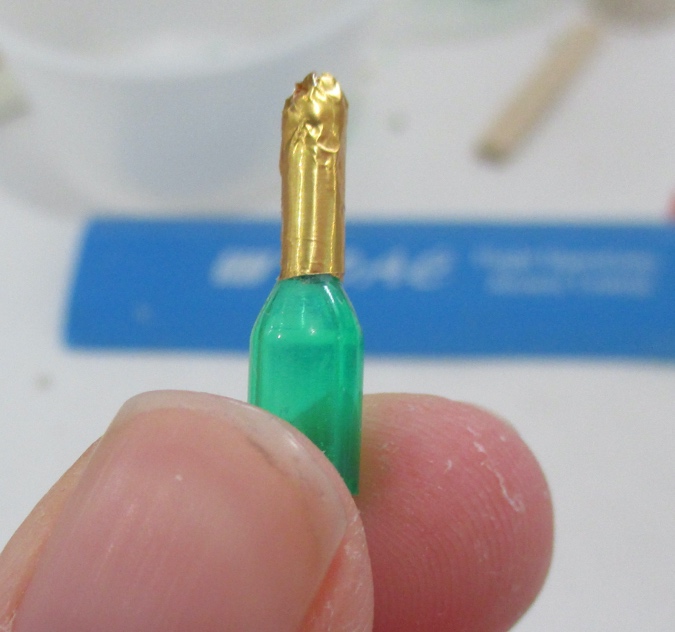
Once I had the shape, I slipped the foil off and applied glue to the neck to glue on the foil. At this point a lot of the necks had come loose and needed to be re-glued to the bottles, too.
When I made the cocktail set in 2018, the Absolut bottles didn’t have bottoms. Joann’s tutorial has a trick for this. I colored green Sharpie on a piece of plastic window acetate.

Then I used the 3/16″ punch to cut out green circles.
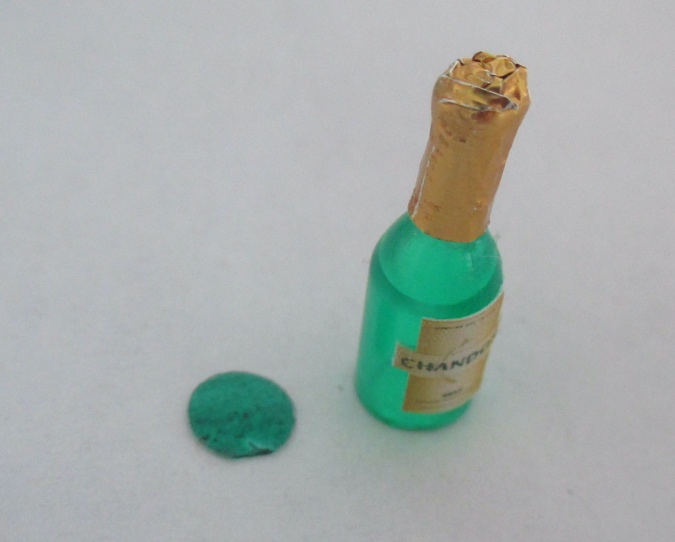
I glued these to the bottom of the bottle.
The last step was to glue on the Chandon label. The Chandon winery is in Napa Valley.
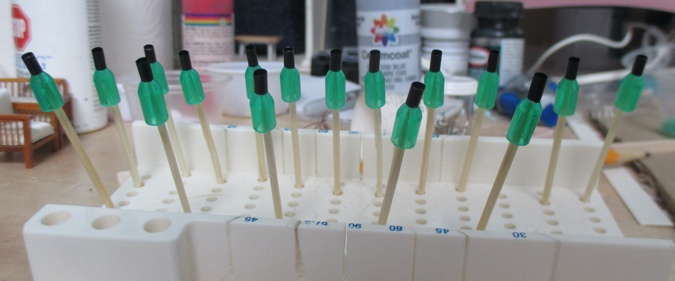
And that’s the Northern California gift basket complete! I had to make about 30 of these and it turned out to be pretty intensive. I think my idea for the next swap will be more manageable. (Famous last words…)
 Emily is a freelance writer, miniaturist, and adventure game enthusiast.


They’re so cute! I can’t wait to try them in 1:12 scale.
Fantastic. I have to find and try the bottles and jars yet. I have your champagne basket on my latest dollhouse’s dining room bureau.
Lovely! Swaps really do involve a lot of love, sweat and sometimes tears! They are so worth it when your surprise arrives.