While I was working on the Artist’s Cottage sleeping loft, I came across a MiniEtchers microwave kit that I’d put aside for the cottage years ago. The MiniEtchers site isn’t taking new orders right now, but you can see the microwave kit here.
I can’t remember when I bought this kit, but it must have been sometime after the original microwave I made for the cottage started to fade. I made this before I started spraying my printies with UV protecting sealer, and over the years it had gotten wonky.

I’ve already built this kit once, for the Victorianna. That time I placed a special order for the width I needed. The front piece had the window cut out.
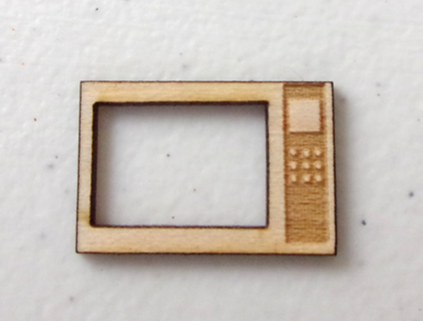
But the kit I’d set aside for the Artist’s Cottage, which was older than the one I bought for the Victorianna, didn’t have the window cut out. I guess the design was refined?
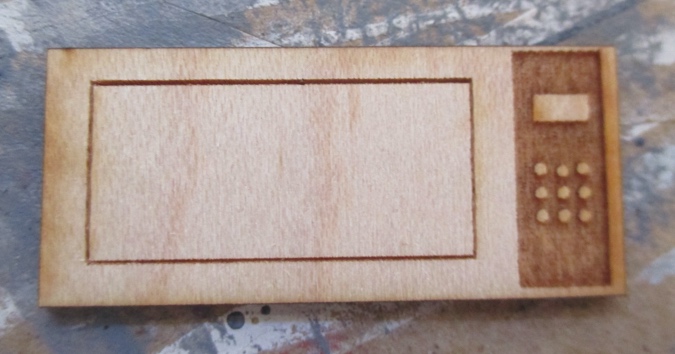
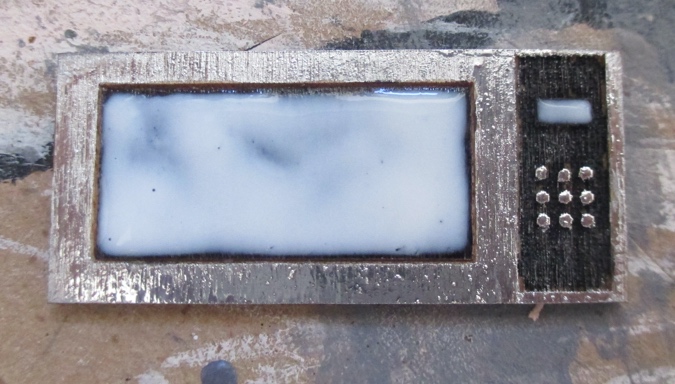
I tried using a utility knife on the score lines to remove the window piece, but it wasn’t working and I didn’t want to break the piece. When a microwave is closed, the window is dark anyway, so I just colored it in with a black Sharpie. (Easier to stay in the lines with a marker than a paintbrush.)
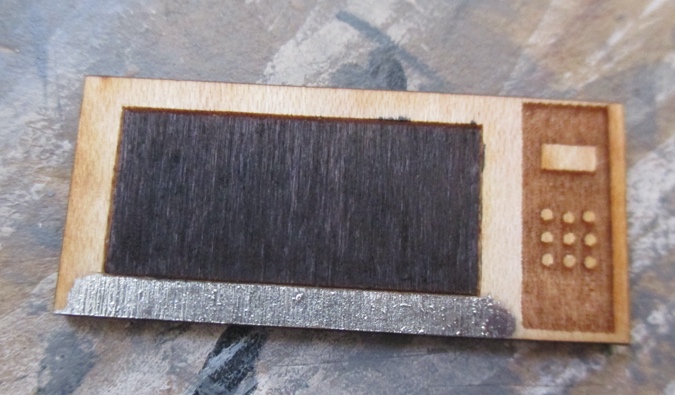
I used my Molotow Liquid Chrome marker to color in the edges. I love this marker because it has a very shiny metallic finish. But it also takes a while to dry and I kept getting fingerprints in the wet ink. Luckily I could color over it to hide the fingerprints, but it would have been better if I’d done just one coat and then left it alone for a few hours.
I couldn’t get the Sharpie into the corners of the panel, so I painted that with black paint, and then I went over the display window with Sharpie and the buttons with the chrome marker.
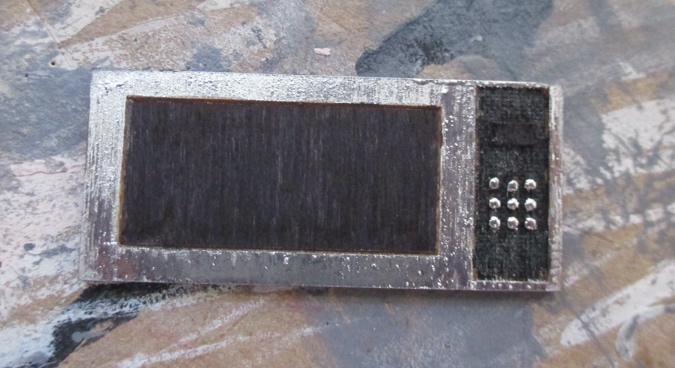
Next I coated the window and the display with Crystal Clear Gallery Glass to make them shiny. This is what it looks like when it’s wet, but it dries clear.
In addition to the window not being punched out, the top and bottom pieces were not the same size, and the handle that’s referenced in the instructions wasn’t included. I can’t really fault the kit because the design has clearly changed since then, and it was easy enough to swap the too-short side piece with a scrap of basswood.
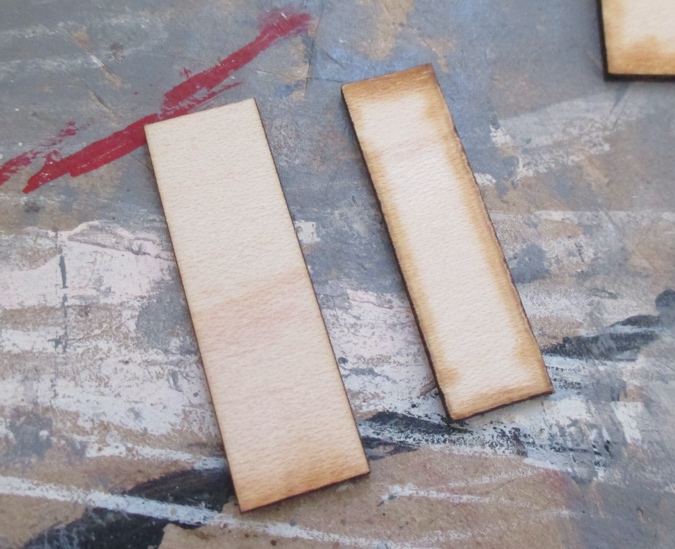
I also made a new side piece so the visible side of the microwave wouldn’t have seams at the top and bottom, and I added a piece of wood to the inside of the box for an additional surface to glue the front piece to.

Here’s how it looks assembled. The Gallery Glass paint bulges a little, which adds to the illusion of this being a window. On the bottom edge of the microwave you can see a smudge from my finger. I covered this up later.
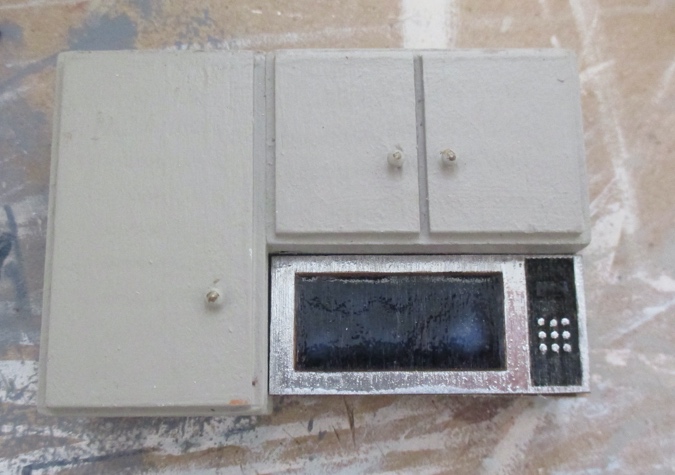
The microwave is slightly wider than the cabinet.
I sanded the left side with the disc sander until it fit exactly under the cabinet.
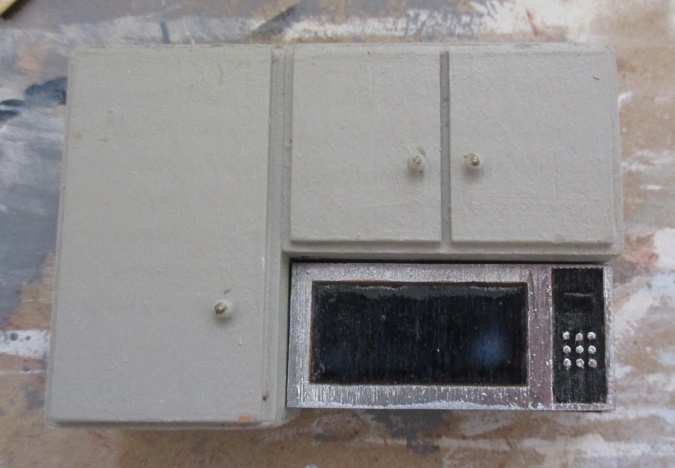
The front piece was warped, but I think this only happened after I “painted” it with the markers. When I glued it down, I used super glue on the center piece but not on the corners because I didn’t want it to seep out. Turns out I should have used it on the corners.

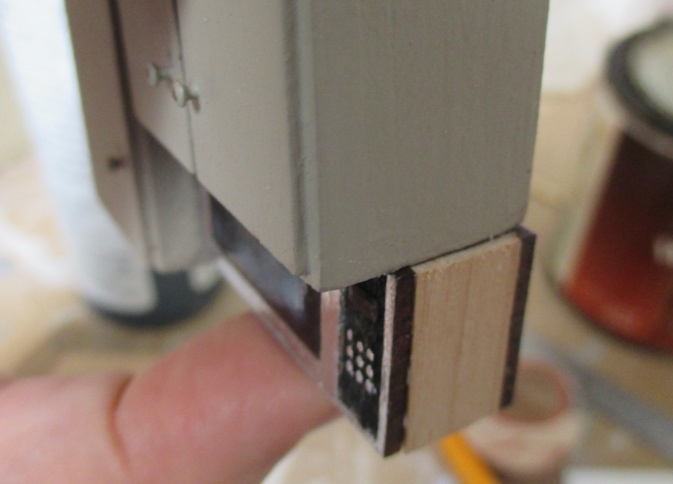
This side of the microwave is right in your face when you look into the house, so I couldn’t leave it this way. But because I didn’t want to smudge the ink any more, I was hesitant to slip glue under the corner and clamp it. (This is one of those cases where my impatience made everything more complicated than it needed to be…)
I ended up adding a side piece to the cabinet, to hide the messy side of the microwave.
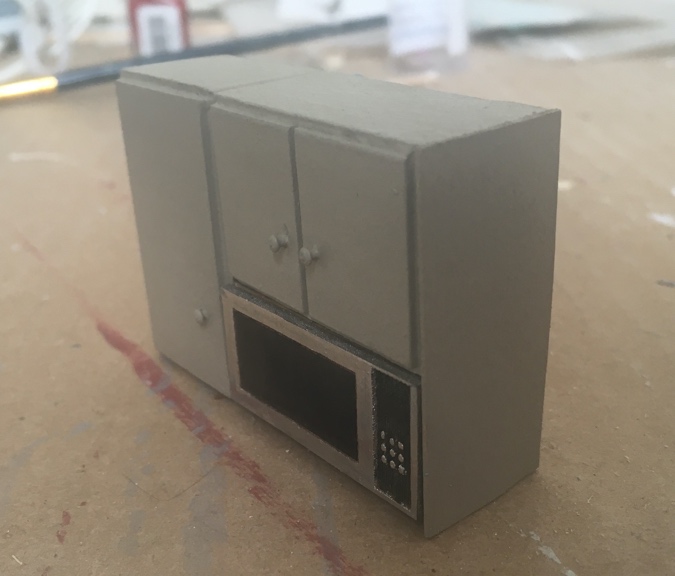
The finish looks rougher in the picture than it is, because it’s so reflective. Although, I admit, the finish would be better if I hadn’t smudged it and had to touch it up.
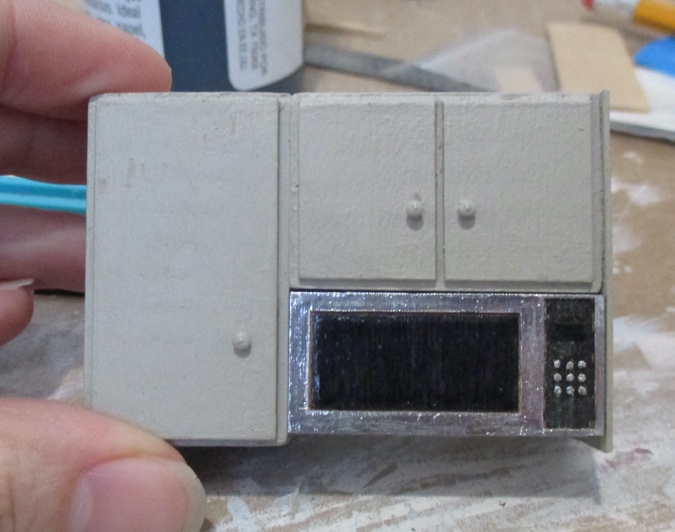
Here’s how it looks in place.
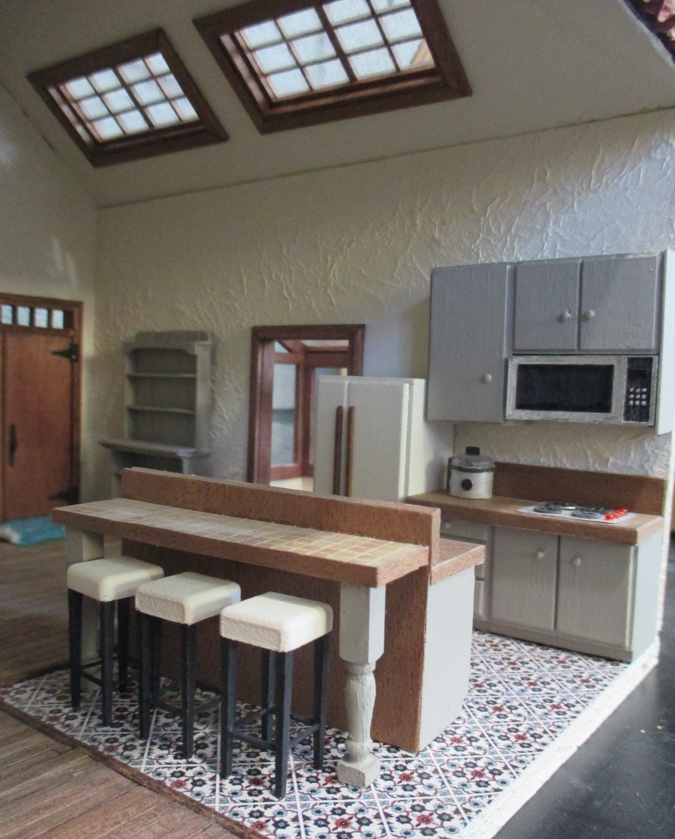
Originally I had an Acme magnet fridge in here, but it didn’t end up in the bin with the rest of the cottage’s furniture when I moved last year. I might have moved it into a different house at some point. While I was looking for it, I found this Horace Jones fridge in my stash, a pre-pandemic flea market purchase.
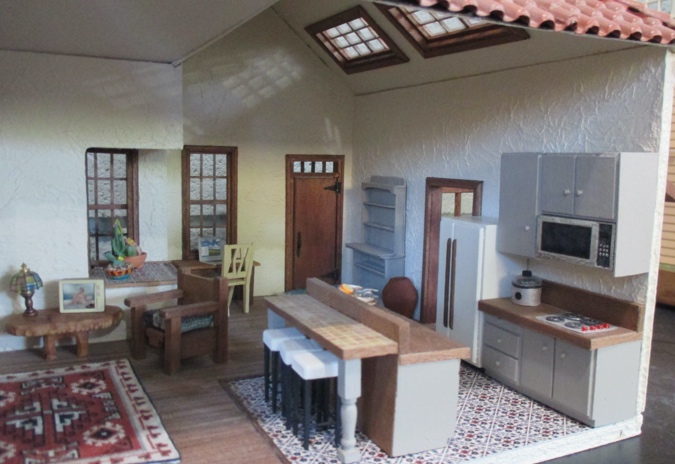
And here’s a gratuitous wide shot of the room. A lot in this house is handmade and imperfect, but it doesn’t bother me like it would in a different house. A hippie artist lives here, after all.
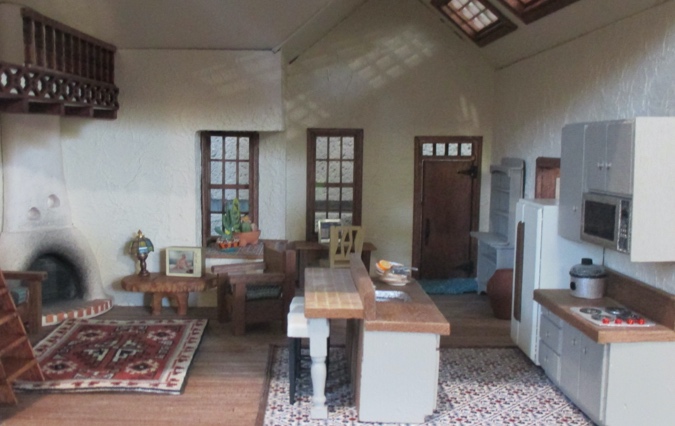
Speaking of which, now that she has a decent microwave to cook with, her studio could use some attention…
 Emily is a freelance writer, miniaturist, and adventure game enthusiast.


Cute little house. But she needs a lot more art around! :)
Yep, that’s one of the things I still need to do!
The finished kitchen just takes my breath away! Seeing the light shine through the ceiling panes onto the walls is awesome! Your attention to detail continues to amaze me, though it shouldn’t be surprising, after all this time. Beautiful work!
Love it. That end piece on the cabinet really finishes it off nicely.
Would you ever consider using aluminum foil glued on to represent a stainless steel surface? It could be shiny or matte depending on which side shows.
Foil is hard to work with without it getting wrinkly, but I used stainless steel contact paper for the Victorianna’s fridge and that looked pretty realistic. I still have a big roll of it.
Great kitchen!
I think your hippy artist will love it.
I heard a rumor that microwave popcorn is a muse for hippie artists….you did the right thing!
Hi, I’m Karen, the new owner of MiniEtchers.com . I love what you did with the room! Just tonight I have been putting kitchen appliances back up on my web site in 1:24 and 1:48. I want you (and your followers) to know that as I have been going through the kits to re-release them, I have fixed any problems with the sizes of the pieces. And I cut through the window on the microwave!
Happy minis!
Karen
That’s great news! Thanks for posting. I’m so glad MiniEtchers is staying in business.