The last time I posted about the Spanish Revival Artist’s Cottage, in September 2016, my post ended with “the only thing left to do is the sleeping loft.” That was a true statement! I just didn’t intend for it to take five years.
I bought this one-room 1:24 scale cottage as a $2 gatorboard shell at a flea market. At the time there were a lot of shows on HGTV showing “tiny houses” and creative uses of small spaces, and I got the idea to add a sleeping loft over the couch, since there wasn’t really space for a bed anywhere else.
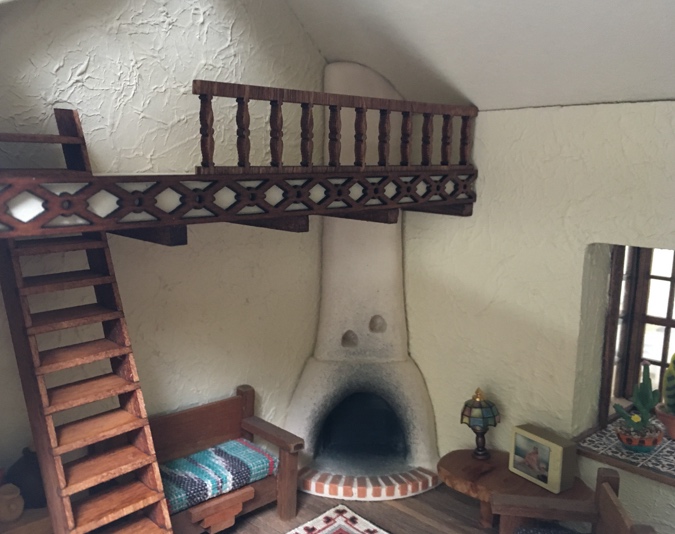
I made the loft out of 2″ basswood with a piece cut out of the corner for the chimney, and 1/4″ square basswood supports underneath.
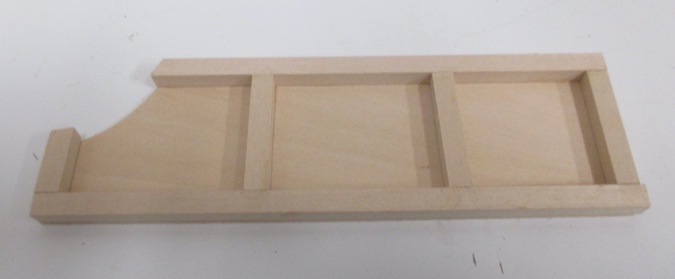
I glued another piece of basswood to the bottom.
I painted the loft with the Navajo White paint I used on the stucco.
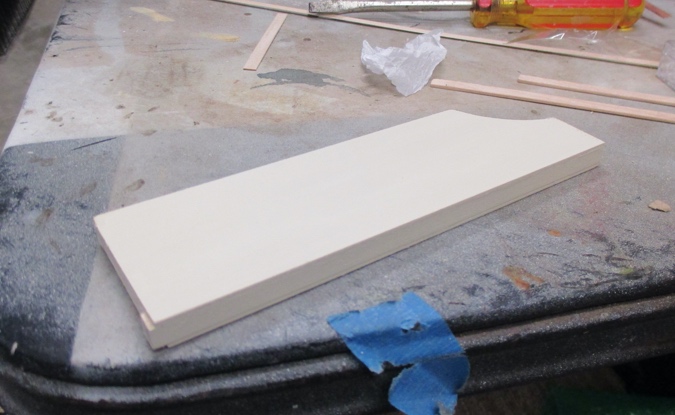
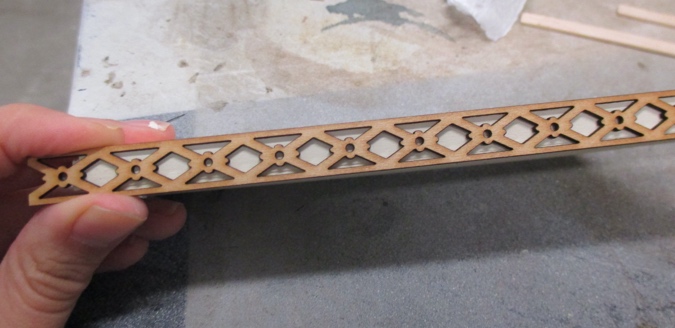
I got this trim at Heritage Laserworks, which has sadly been down for maintenance for over a year. (I tried emailing to ask if they’ll reopen and never got an answer.) I bought this trim specifically for the sleeping loft because it has a Southwestern flavor, but in the meantime I used some of it on the Blackbird Bar.
The sleeping loft languished at this point because I wasn’t sure what to do for stairs. Building a ladder seemed easy enough, but I couldn’t figure out how to tie it in. I did buy this ladder at a flea market in 2017 thinking it would work, but I didn’t like how much it stuck out into the room.
Recently, looking on eBay for supplies for the Turret House, I came across these 65-degree stairs from Alessio Miniatures. I’d seen these before in 1:12 scale and I’d even gone looking for something like this in 1:24 scale, but I couldn’t remember what I’d wanted them for. I was placing an order anyway so I bought a couple of them to have on hand.
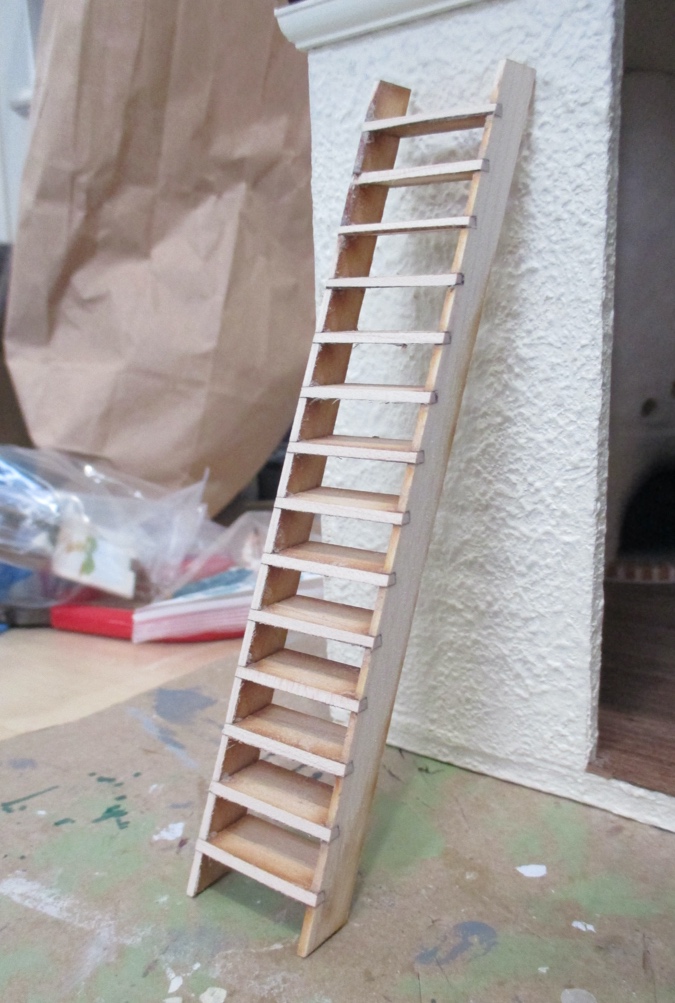
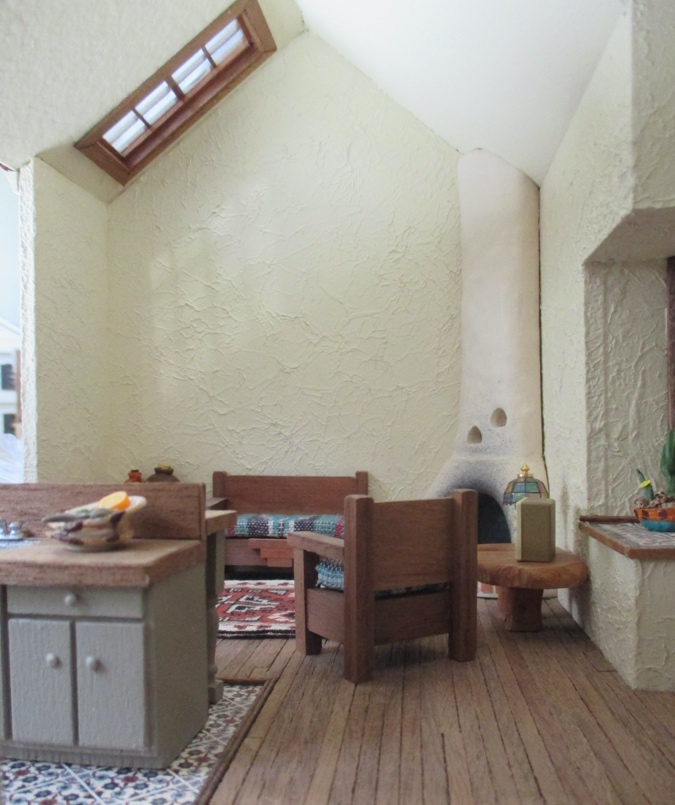
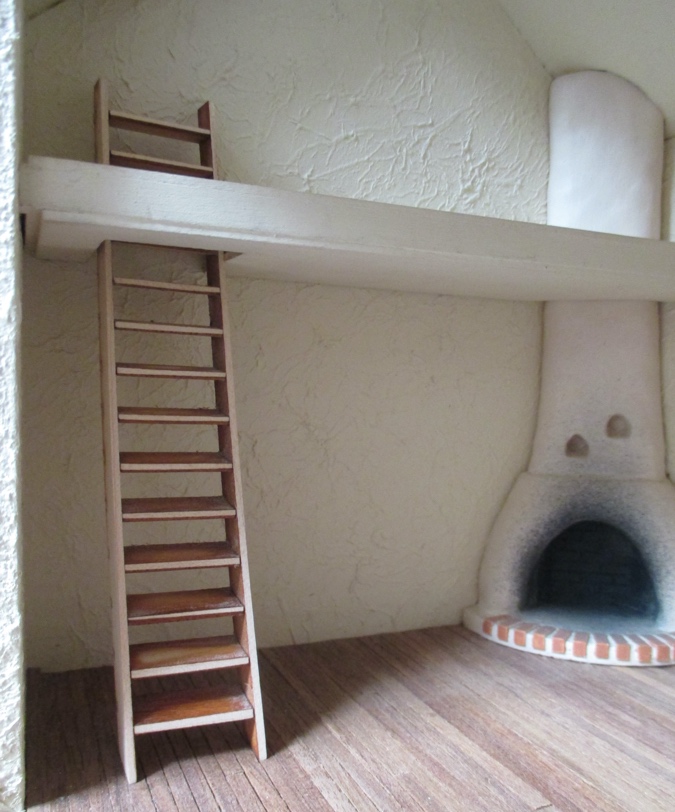
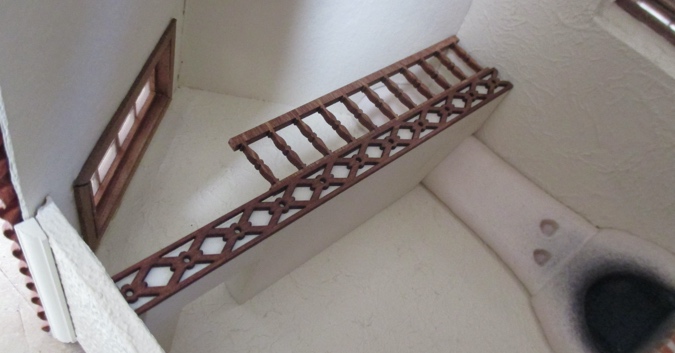
When the stairs got here, I realized they fit perfectly against this wall in the Artist’s Cottage. Maybe the sleeping loft was what I’d wanted them for in the first place.
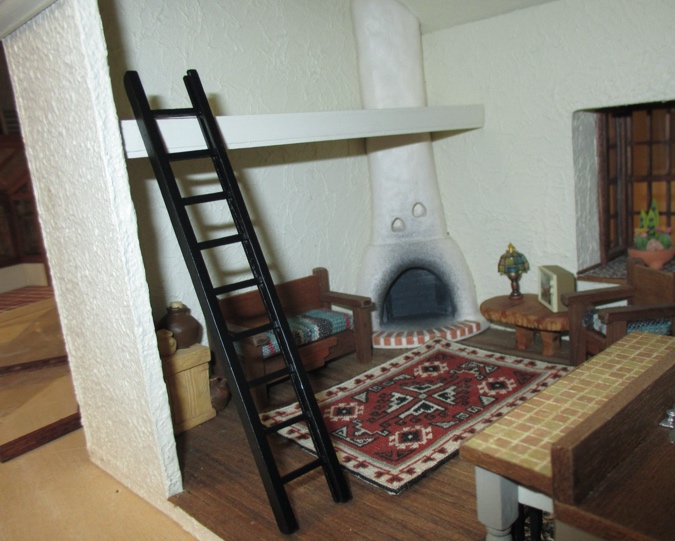
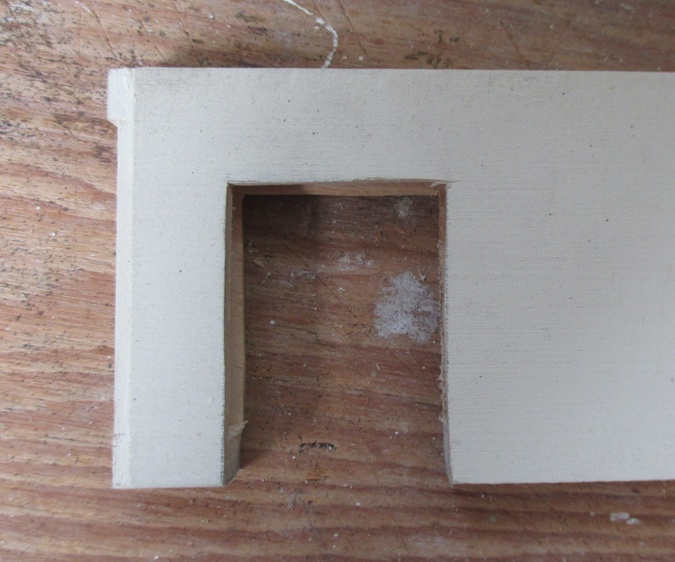
I really like them tucked up against the wall like that, but cutting into the loft’s side support didn’t seem like a good idea, so I cut a hole about half an inch away from the side.
Here’s how it looks with the stairs. Realistically I’m not sure how you’d climb them without bumping your head, but I don’t have to worry about that!
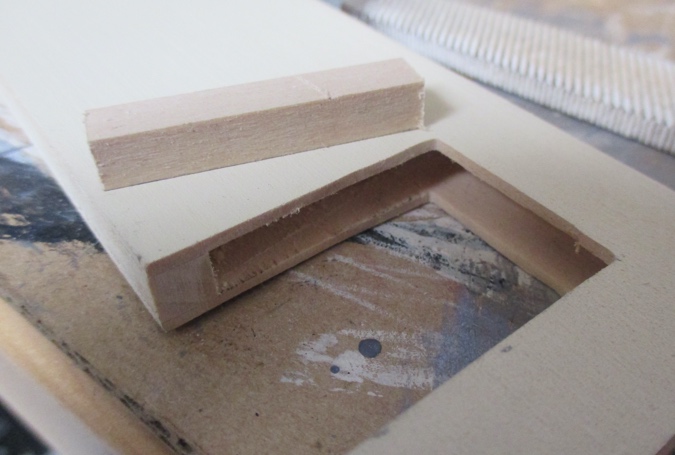
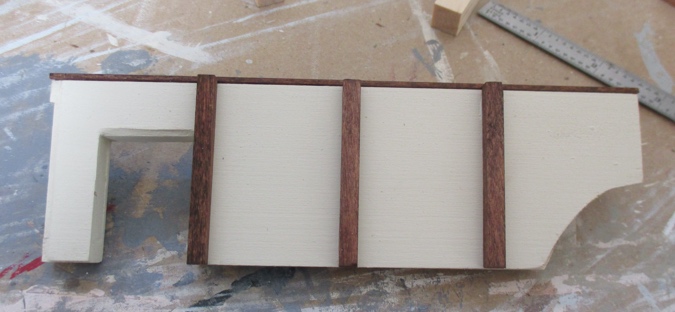
I used pieces of scrap basswood to create an inner edge for the new hole.

I had this railing piece left over from the Victorianna. Since the stairs go up into a hole in the loft rather than hanging off the front, the railing could have stretched all the way across, but the piece wasn’t long enough. Eh, whatever. The building inspector doesn’t bother with tiny houses.
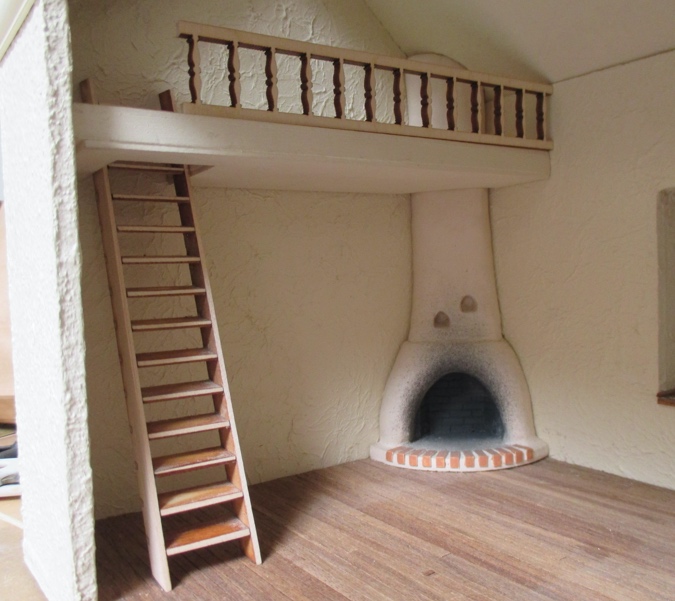
I stained the railing and glued it on, using some scrap wood to keep it at 90 degrees.
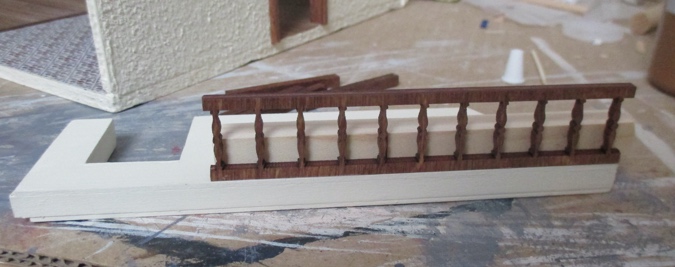
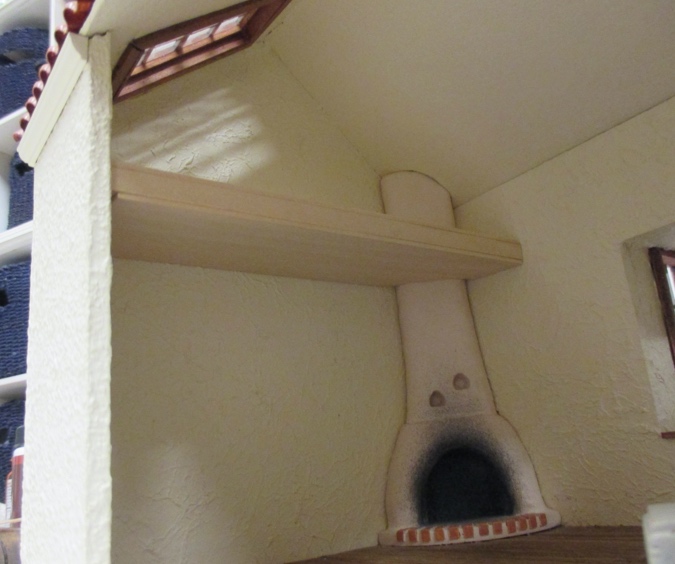
Then I lay the house on its side and put the loft in. It’s a tight fit, so I’m not planning to glue it in permanently. (That’s the other reason I didn’t want to chop into the side support.) With the loft in place, I cut the trim piece exactly to fit and glued it on.
I removed the loft again and added beams, which fit the Spanish Revival style.
And I put it back in to add the last two beams, to make sure they were all the way flush with the wall.
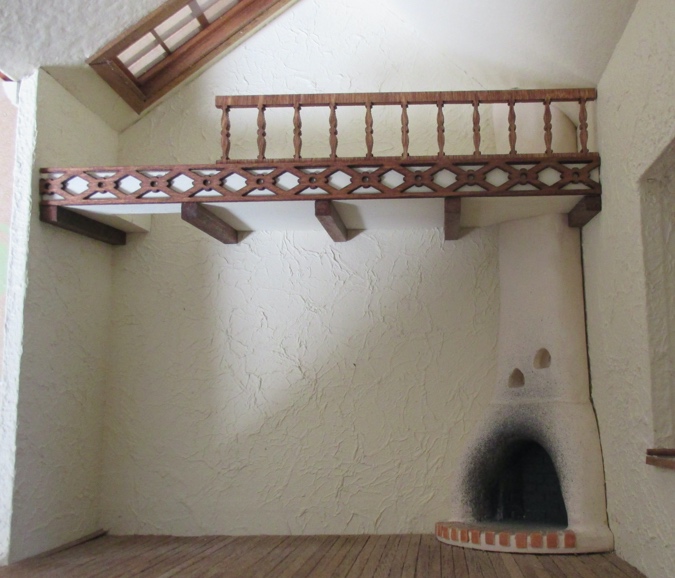
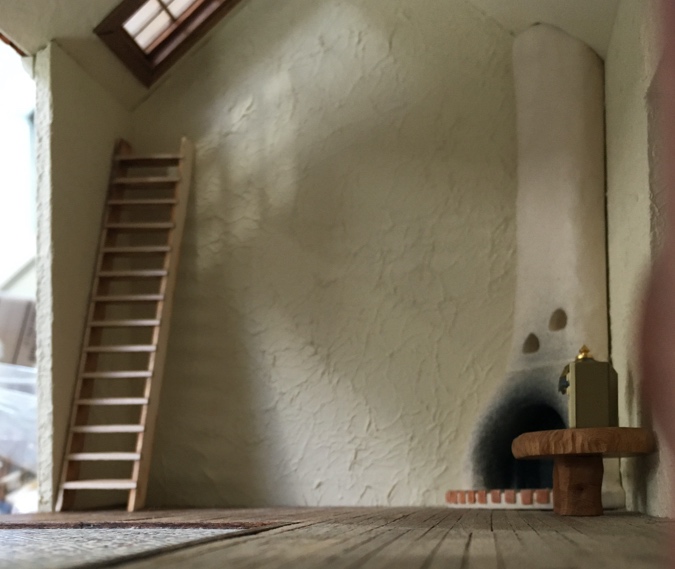
Here’s how it looks with the stairs.

I like it! The ceiling is 3.25″ high at the peak (six and a half feet in real life), so it’s not even as cramped as some of the lofts in HGTV’s tiny houses. It wouldn’t have to be for sleeping; you could put a desk or other furniture up here. But I’ll still use it for a bed since my artist needs somewhere to sleep.

The only thing left to do is make some bedding. I’ll get to it in 2026 or so.
 Emily is a freelance writer, miniaturist, and adventure game enthusiast.


Looks great!
I love it! Ran into a similar problem when I made a loft and ended up making a folding ladder.
The stairs, trim and railing look wonderful!
Hahahahaha! I love the delays, but you know I would. :D I think the loft looks great. The stairs are perfect…I need some! I like the beam supports. This little studio is turning out great.