People keep telling me they like my blog because I show the mistakes I make and how I fix them. I don’t do this on purpose! But it’s true that sometimes (okay, a lot of times) I go down a rabbit hole, and then I can’t stop myself from meticulously documenting what went wrong.
This is one of those times, because I’ve redone the Turret House’s front facade. Again.
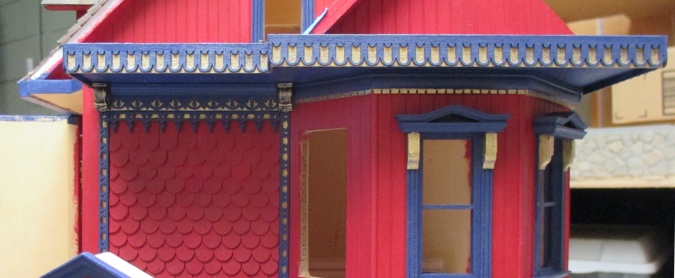
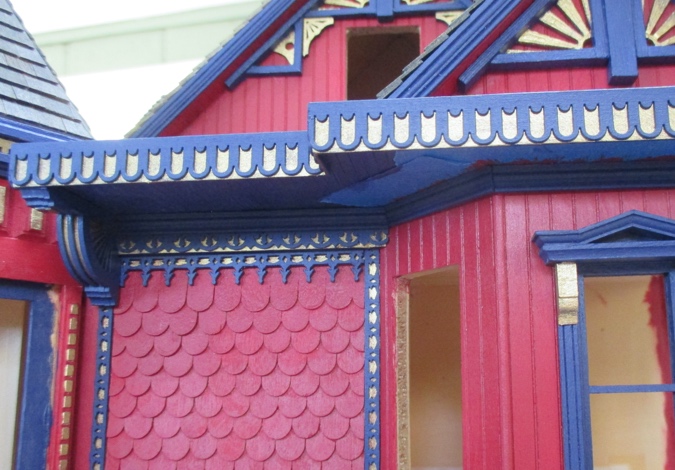
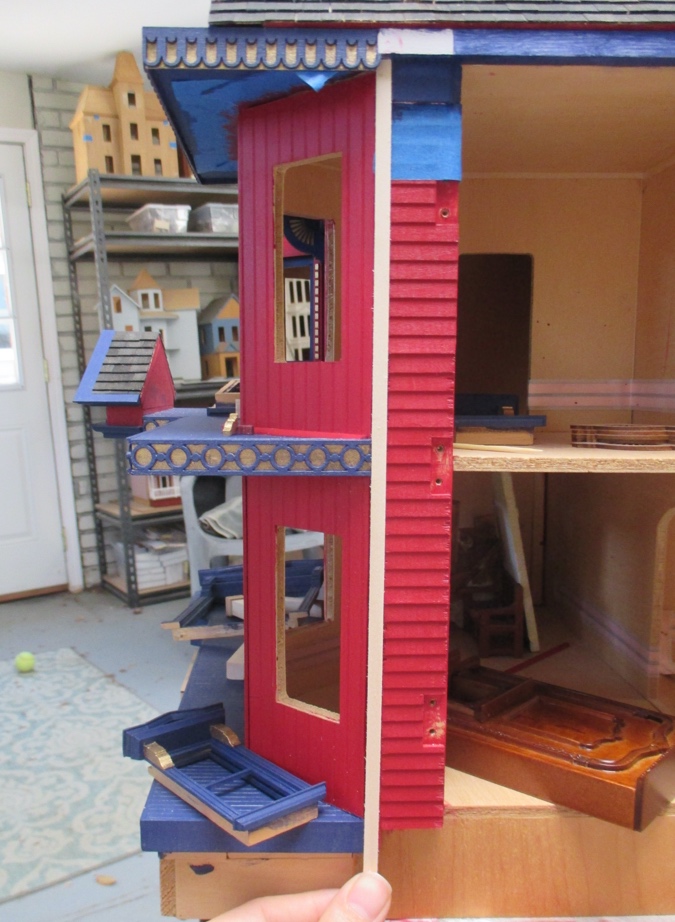
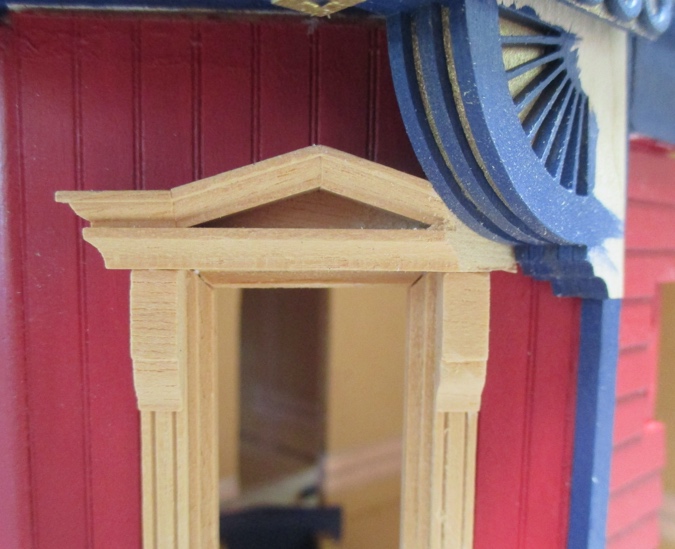
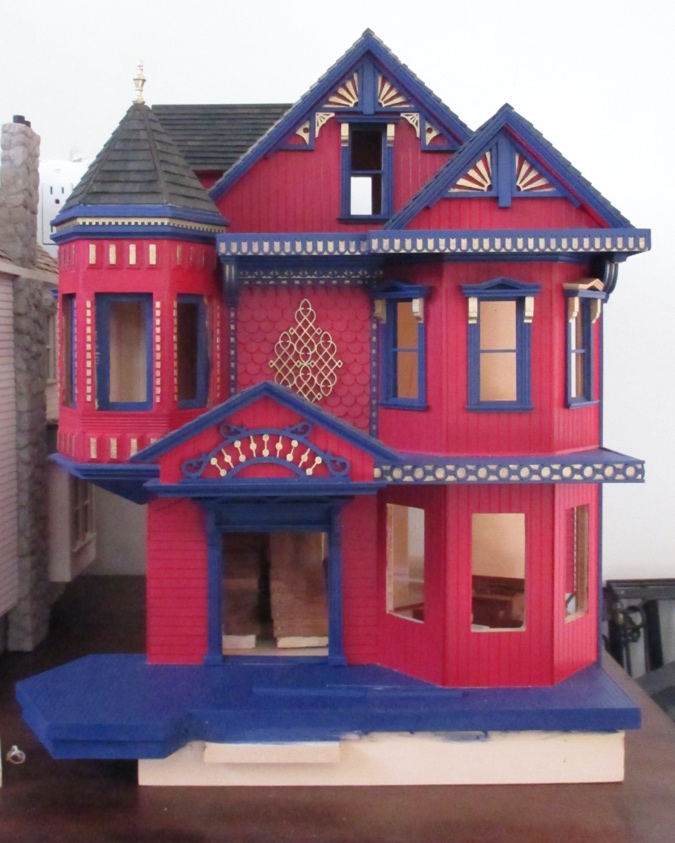
I’ve been working on the Turret House behind the scenes but haven’t posted about it in a few months, so here’s a refresher. This was my first attempt on the area in question:
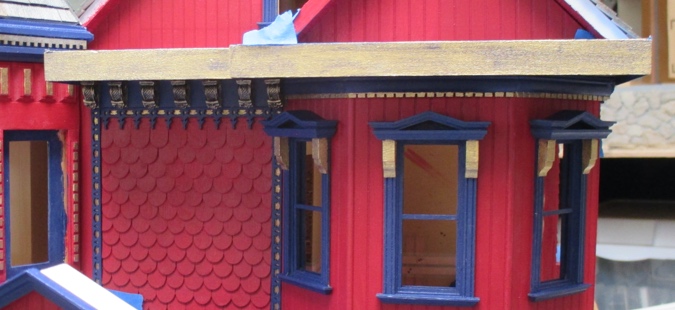
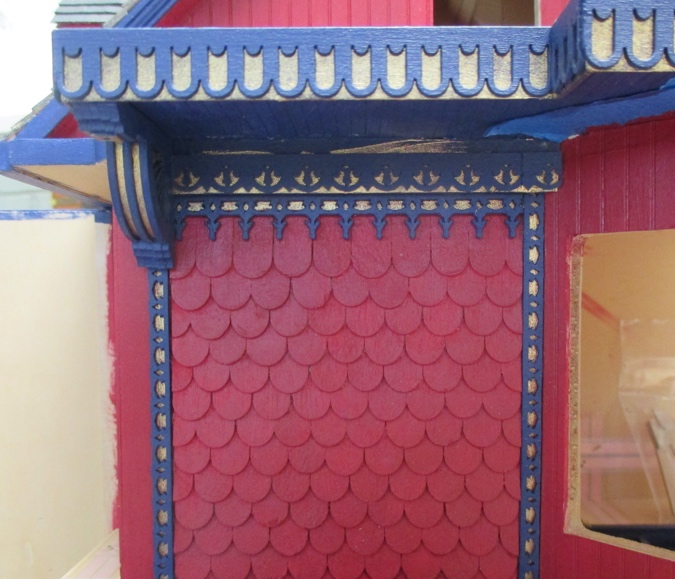
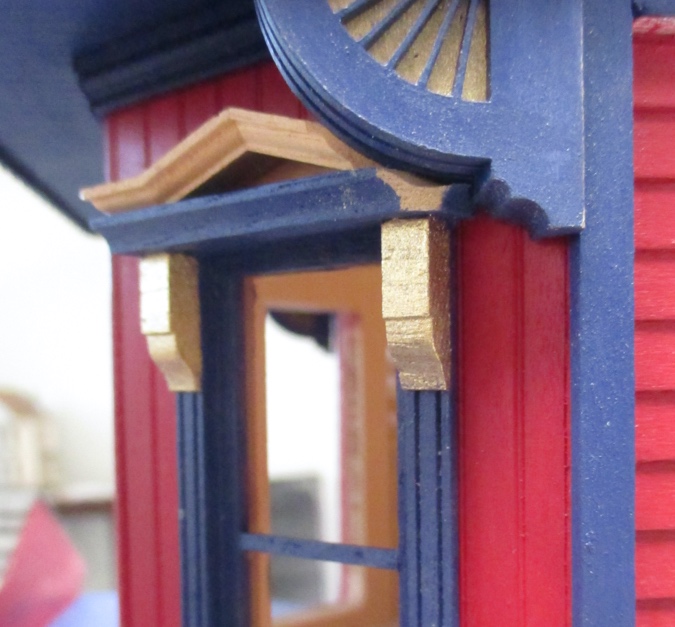
The chunky corbels seemed busy and out of scale. On my second try, I ripped out all of them but the ones on the ends, and I covered up the wood where the corbels had been with laser cut trim on the bottom (with gold showing through) and half scale crown molding on the top.
It’s an improvement, but I was still lukewarm about it. The detail of the crown molding gets lost in the shadow, so it just looks like a big blue blob on top of the fancier trim. And those corbels are still pretty chunky.
I also wasn’t really feeling the dentil molding on the bay window. I’d planned to use dentil molding on the sides of the house and thought there would be a nice smooth transition, but it didn’t look great. And as I started thinking about porch trim, I realized the dentil molding in the background would compete with the porch trim in the foreground.
So I did what I do best… I ripped it all out. I love how I can spend hours and hours on something and destroy it in a matter of minutes.

(Sorry for the blurry picture, but this is the only one I took at this stage. It looked so bad, why document it?!)
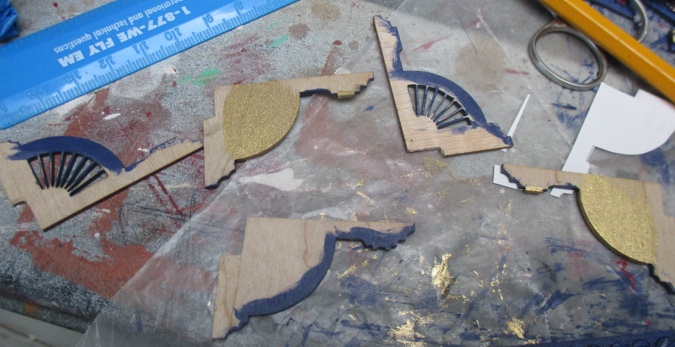
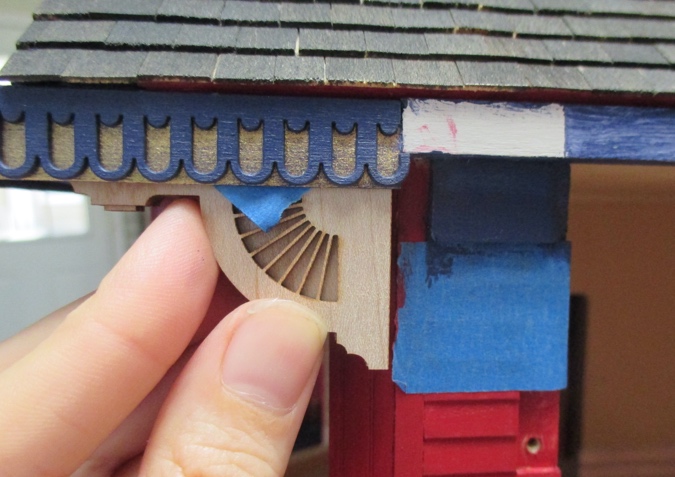
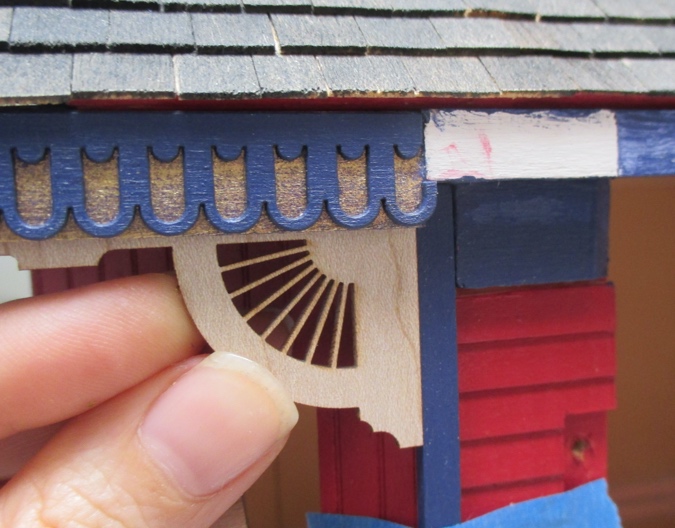
Removing the corbels left me with two 5/16″ spaces that needed to be filled in. And I wanted brackets that look substantial, like they’re holding up the porch roof. After a lot of looking around, I found these brackets at Earth and Tree.

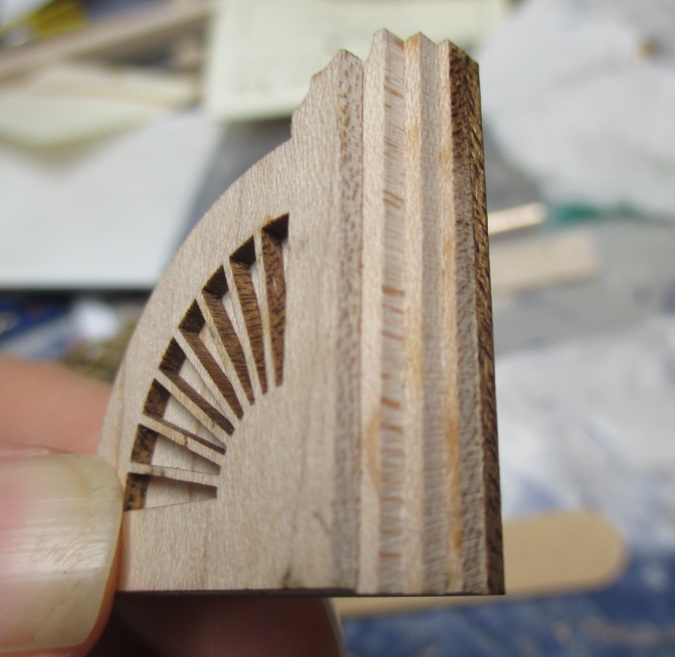
These are unusual because they’re made from five 1/16″ pieces that get glued together for a layered effect. The fan design is reminiscent of the apex trim.
I had to make a notch for the bracket to fit over the wood piece. I carefully did this on each piece using the belt sander rather than cutting, to avoid splitting the wood.
Before gluing the pieces together, I painted areas that I wouldn’t be able to get at once the bracket was assembled.
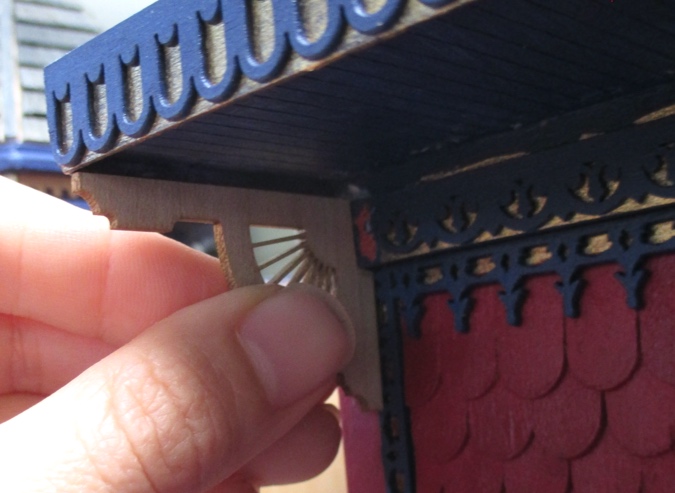
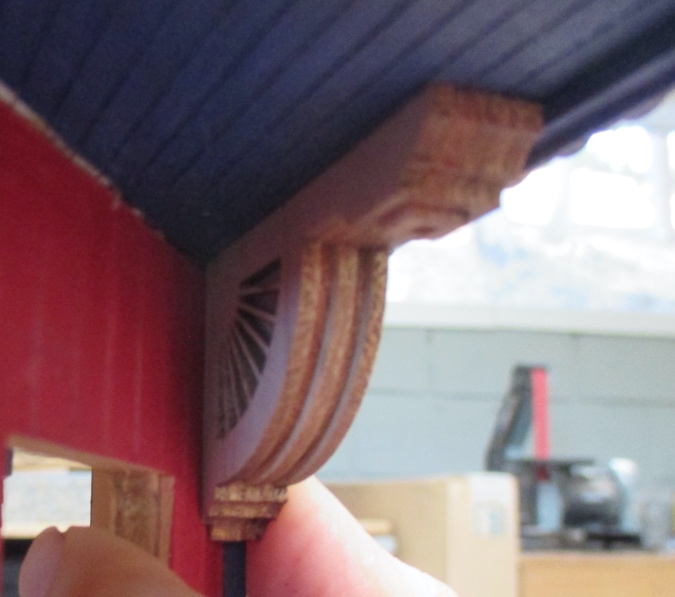
Once all five pieces were glued together, I cleaned up the notch on the sander. Here’s how the bracket looks in place. I also had to sand the front a tiny bit to make it fit under here.
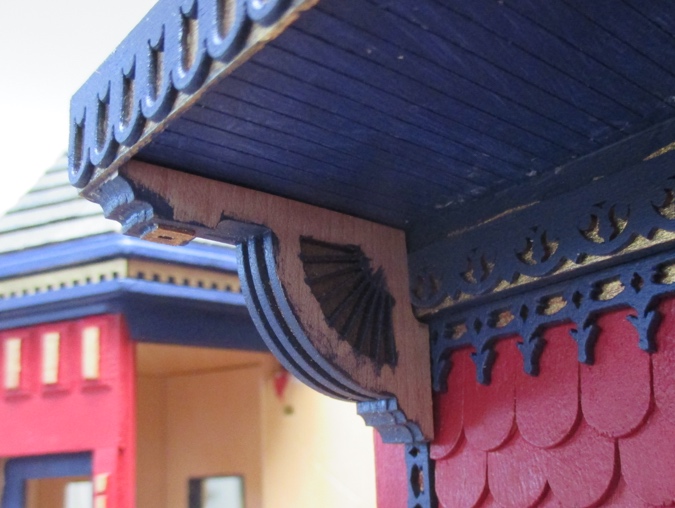
Once this is glued in, I’ll fill in the gap at the back with wood filler and paint over it.
Due to the angle of the bay and the fact that there’s a window pediment right next to it, this bracket wouldn’t work well where the other corbel had been, so on this side I needed to patch the trim. Luckily I had a small piece left.
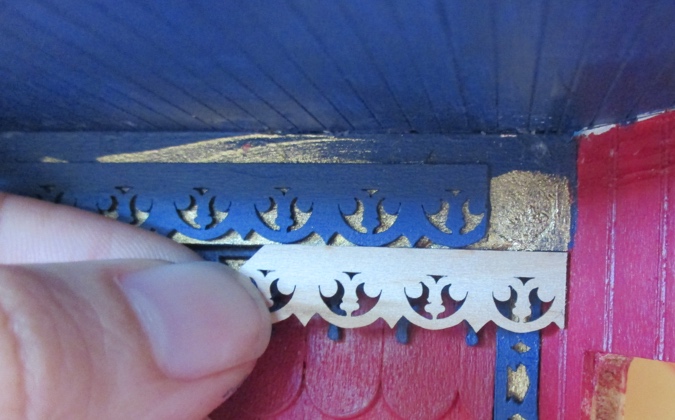
I cut this in the right spot and glued it in.
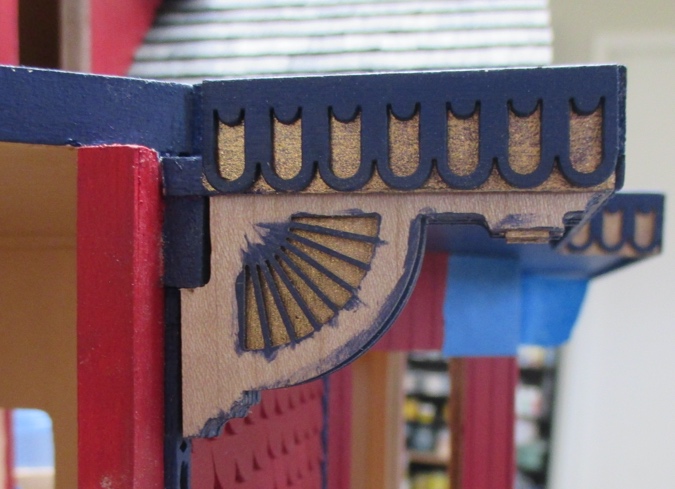
Whew. Already looking better. A small quibble: when I glued the five pieces of the bracket together, the one farthest to the right ended up a little lower than the others, so the bracket looks lopsided. But I think when you’re not staring straight at it, you won’t notice it.
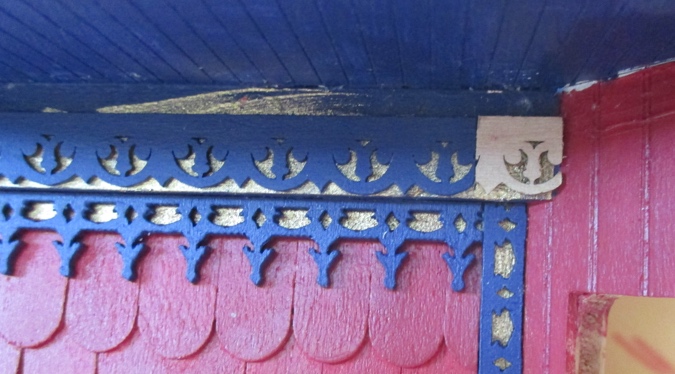
The crack where the patched piece of trim meets the original piece was too visible, so I added wood filler and painted it again.
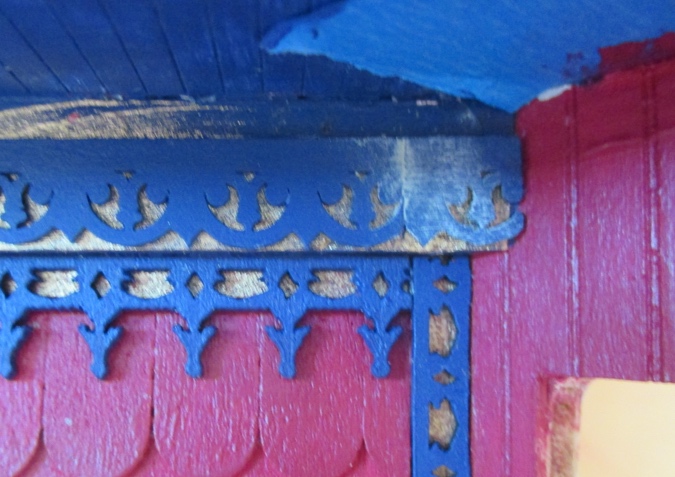
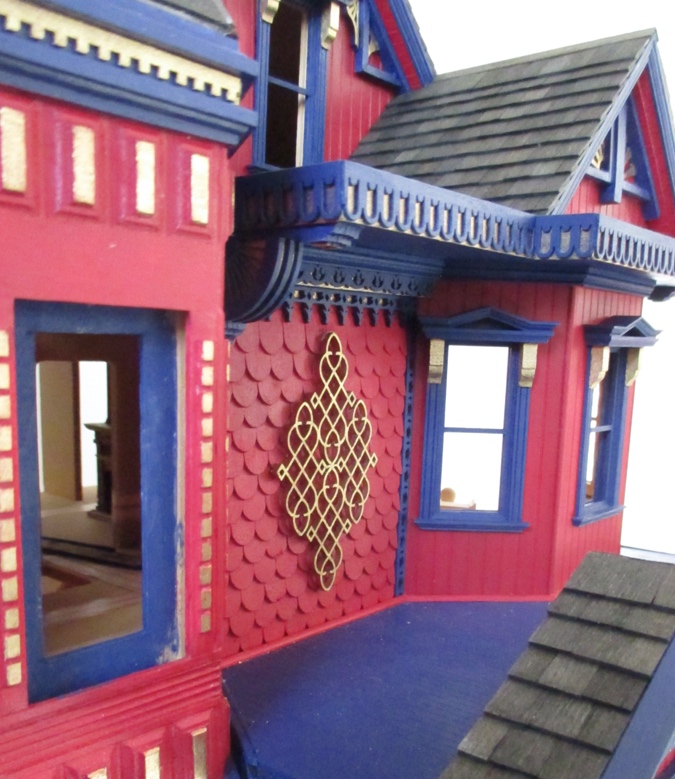
Then I added cornice at the top. This is the same cornice I used on the gables. It flows nicely from the flat wall to the bay, and won’t compete with the porch trim like the dentil would have.
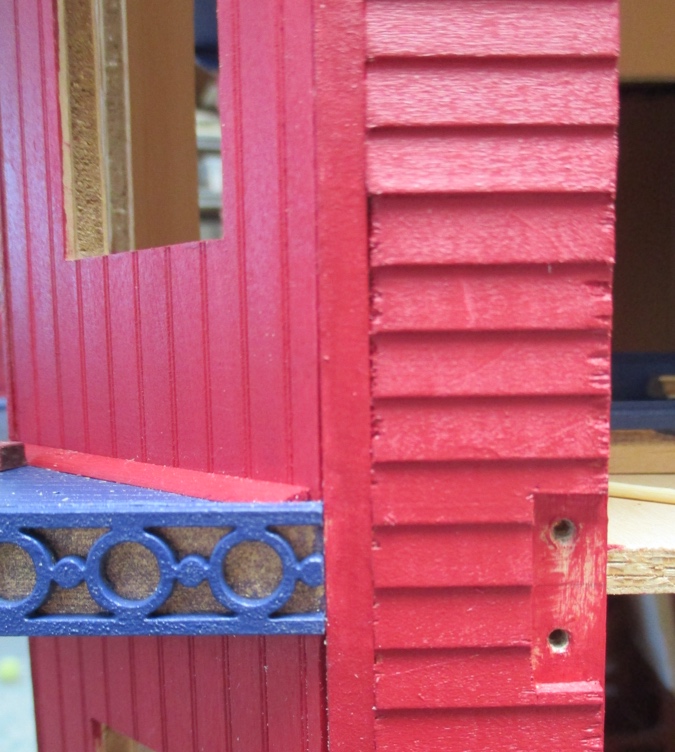
Moving to the other side of the house, here’s where the other bracket will go. The gap between it and the blue trim looks funny. If I were still going to put the dentil molding on top of the blue trim, I could just extend it to cover the gap, but as part of this process I decided not to use the dentil at all. (I have an alternate plan, and it’s a good one! But I’ll leave you in suspense for now.)
A piece of 3/16″ x 1/8″ strip wood fills that gap nicely.
Added bonus: the edge of the siding is a little janky here, and adding that piece of strip wood will make it less obvious.
I wanted to position the bracket so it’s flush with the strip wood. This works with one of the 1/16″ pieces, but the entire 5/16″ bracket is too think since it bumps into the slanted bay window wall. The back of the bracket needs to be cut at a 45-degree angle.
Using the disc sander, I sanded the back of each bracket piece slightly more than the last.
Now it fits nicely. Once I glued the bracket together I cleaned up the back edge with the disc sander to make it a cleaner 45-degree angle.
The window pediment is also a problem here. My Hillside Victorian had a similar problem that was resolved by cutting off the corner of the pediment at a 45-degree angle, so I decided to try that here.
It sort of works, but since the bottom of the bracket clears the flat part of the pediment, it looks funny to have the flat part chopped off. It seems only the triangular part needs to be angled.
I had previously removed the triangular part of the pediment from two windows to make them fit under the apex trim. I kept the pediments after cutting them off, and decided to play with one of these. Even with the triangular part removed, window didn’t quite fit underneath the bracket, so I cut off a tiny piece off the corner of the flat part thinking that would help.
But the corner wasn’t the problem. The top of the window still bumped into the bottom of the bracket. I used a circular file to sand a groove into the top of the pediment. Now the window slides in under the curve of the bracket, and then the triangular part of the pediment can be set on top.
I held on to the little corner I cut off, and am going to try gluing it back on. If that works, this will look much better! If it doesn’t work, I might try once more, this time just sanding the groove without cutting off the corner. These windows are $13 a piece, but I do have some extras in my stash, so why not. (And for the ones that didn’t work out, I can always remove the pediments completely and bash the other pieces into something later.)
In any case, the window needs to go in before the bracket does, and I can’t glue in the window until I’ve finished the room inside, so I can’t glue this bracket in right now either. In the meantime, I glued in the cornice. And, oops, I’m a little short.

This is my own fault. I cut a piece to the wrong size, and it resulted in me having just enough to go here and also around the bay on the first floor, but not enough extra to redo this too-short piece. But that’s okay! I have a small scrap left that can be patched in. Since this trim will be in shadow behind the bracket, you’ll never know.
Rather than butting up two flat ends next to each other, I cut the ends that meet up at 45-degree angle. This is called a scarf joint, and the seam is much less noticeable. I haven’t glued this in yet — I’ll wait until the bracket is glued in so I can make sure the patched piece doesn’t interfere.
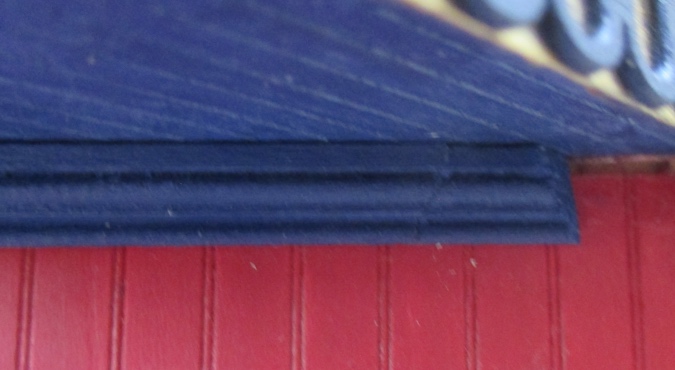
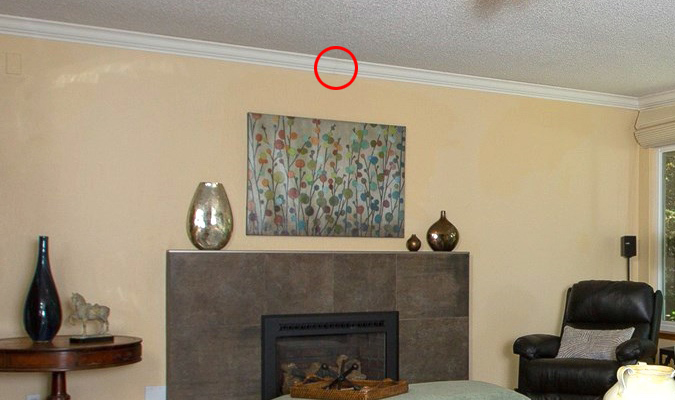
I know about scarf joints because two pieces of crown molding butted up against each other in the living room of my old house, directly over the fireplace, and I stared at that seam constantly. I don’t know if you’ll be able to see it in this picture, but I still can!
Ahem. Anyway.
The bracket isn’t flush with the trim piece behind it anymore. I think the pediment is pushing it out, and might need to be cut back a little more. And/or maybe the 45-degree angle needs additional sanding. Since I can’t glue any of these pieces in yet, I’ll worry about that later, and hopefully not forget about it when the time comes to glue in the bracket.
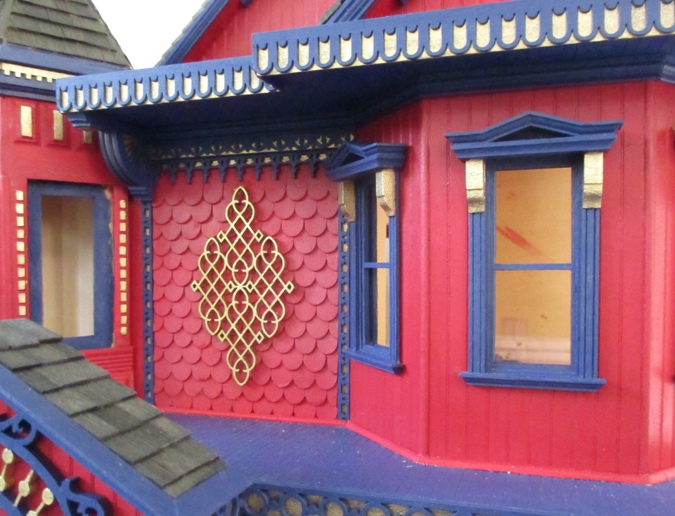
One last thing before this facade is complete. (Hopefully for the last time!) The fishscale shingles have always bothered me. Decorative fishscales in the gable would make sense, or in a band running around the house, but a rectangular patch of fishscales just doesn’t seem like something you’d see on a house. At the very least it should have some kind of design, like fishscales alternating with diamonds. It just seems like something more should be there.
I thought about trying to paint some of them a contrasting color to form a design but couldn’t come up with a good idea, and didn’t trust myself to paint individual shingles that are already glued to a wall. So I’ve been on the lookout for an embellishment that would work in that space, and I found the perfect thing on the Earth and Tree website.
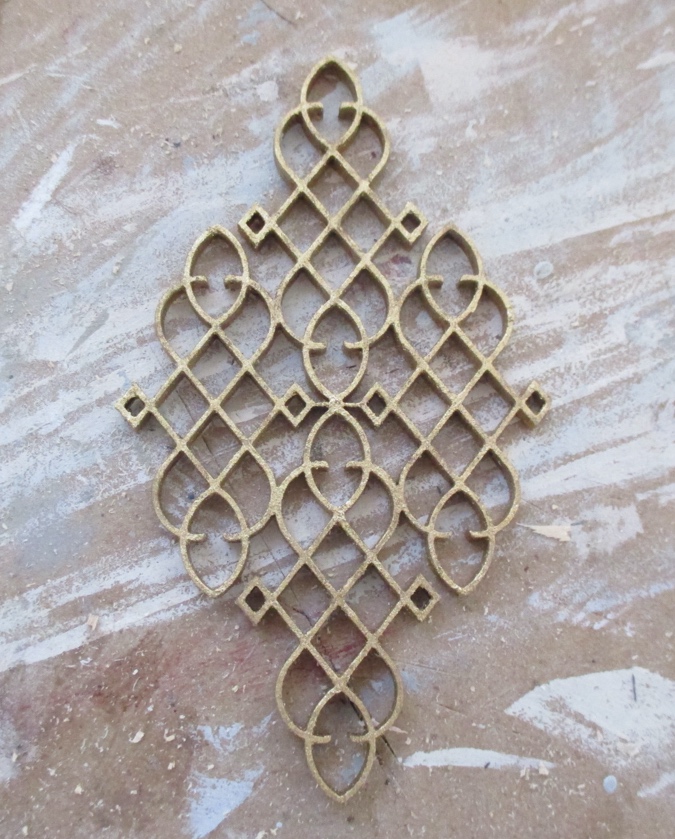
This trim is made by Laser Tech, item number LT303. Earth & Tree calls it a “Gabiel Decoration,” which I think is a misspelling of “Gabriel Decoration,” which is a different piece of Laser Tech trim. (I also don’t know why that trim is called Gabriel. Who is this Gabriel? What do words mean, anyway?) Other websites call what I bought a “Gable Decoration.” Whatever it is, it’s the perfect size to fit in that space.
I painted the gabiel / gabriel / gable decoration with the gold accent paint. Gluing it to the uneven fishscales was difficult. I tried it last weekend, first with The Ultimate glue and then with some stringy Aleenes brand super glue, since I was out of my usual go-to brand Loctite. Both attempts made a big mess.
I got off as much of the glue as I could off the embellishment and the fishscales and touched up the messy areas. Today I picked up a bottle of Loctite and tried again. I like this glue because the nozzle doesn’t get messy like the little tubes do, and it dries fast and strong.
The Loctite mostly worked. The top point of the embellishment didn’t want to stick, so I got some Ultimate white glue in under there and taped it down to dry.
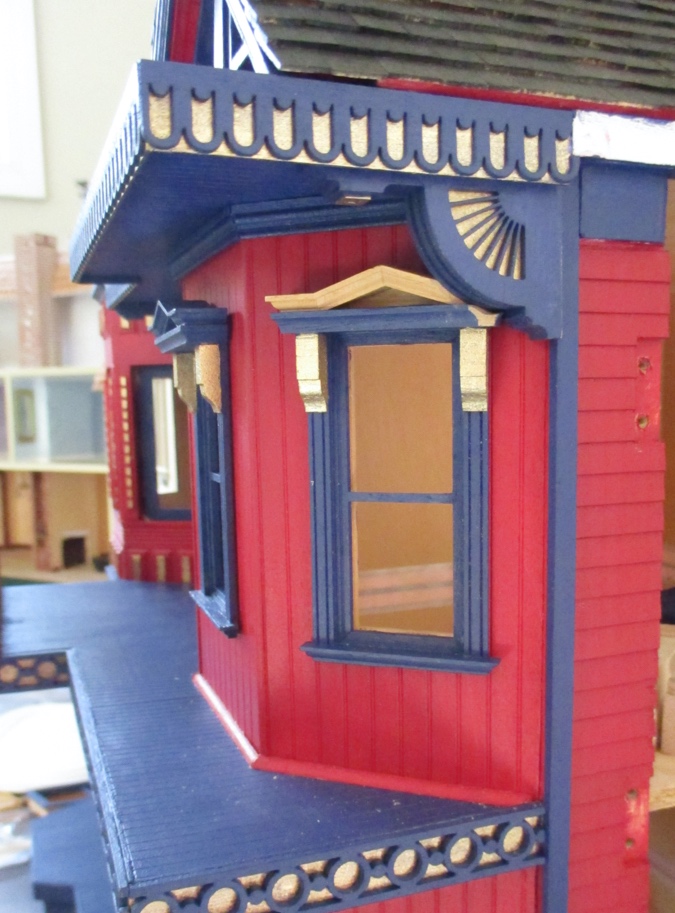
So here it is — a finished facade! When I was sitting two inches away from the house, the embellishment seemed slightly crooked, and I couldn’t fix it since that super glue *really* sticks, but it looks okay to me in this picture.
More adventures in trim coming soon!
 Emily is a freelance writer, miniaturist, and adventure game enthusiast.


It’s really gorgeous. I love those corbels and that gable decoration really
looks nice.
I like the new decorative piece. The whole thing looks good!
It looks good!
I’ve been reading your blog since the Ingall’s family log cabin. You help me by showing that we can redo if something goes wrong. I find it inspiring. It gives me courage to redo and fix. I also love your half scale Victorian. I like your choice of colors.
Thank you! :)
Gabiel / Gabriel / Gable looks great! That spot needed something and the solution is perfect. The gingerbread on this house is a show stopper and I can understand why you want it to be just so……Great job!
I think you were the person who got me thinking about putting something on top of the fishscale shingles in the first place. I’m so glad I stumbled across this doodad, it fits the space perfectly.