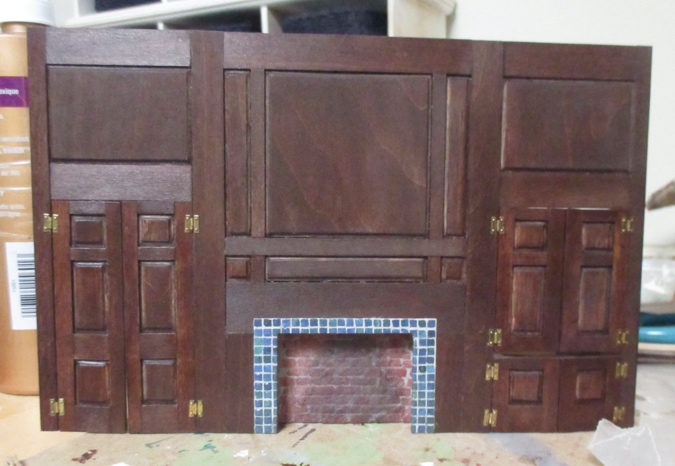
With the fireplace part of the Federal fireplace wall kit mostly done, I hinged the doors. I’d been putting this off for a while since hinges are intimidating (not to mention twelve of them!), and the hinges that came wit this kit were extra daunting since the hinges themselves had to be assembled.
The kit came with two packs of Realife flush hinges (a brand that’s no longer available). Each hinge has two pieces that need to be joined together with a hinge pin. Once the hinge pin is inserted, it gets cut down with wire snips. Just putting together the twelve hinges took at least an hour.

On to the hinging. I did my best to keep them straight and aligned with each other. I did the full height cabinet on the left and the taller cabinet on the right first.
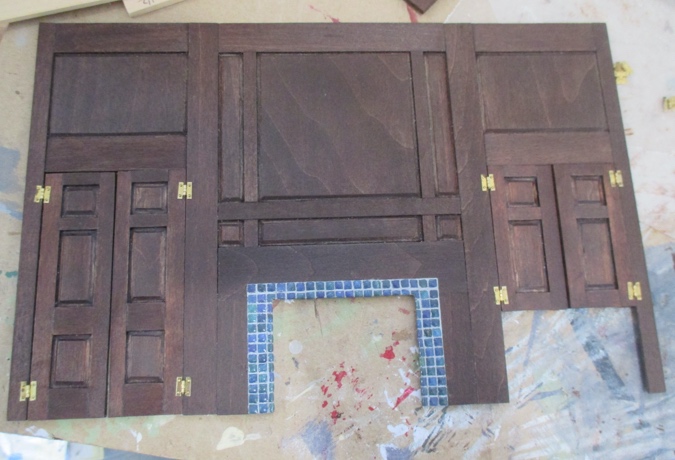
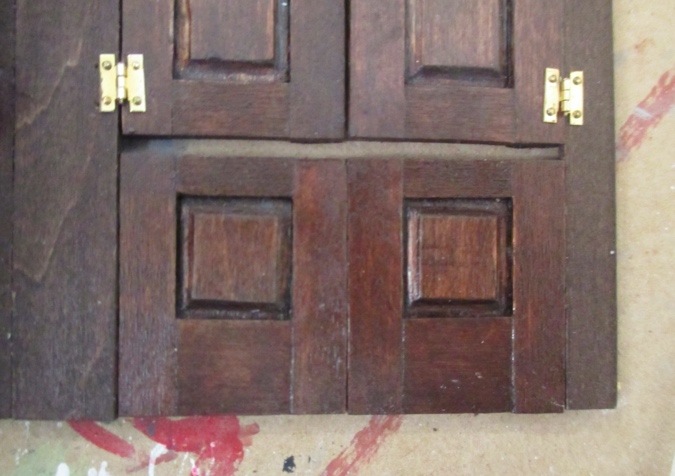
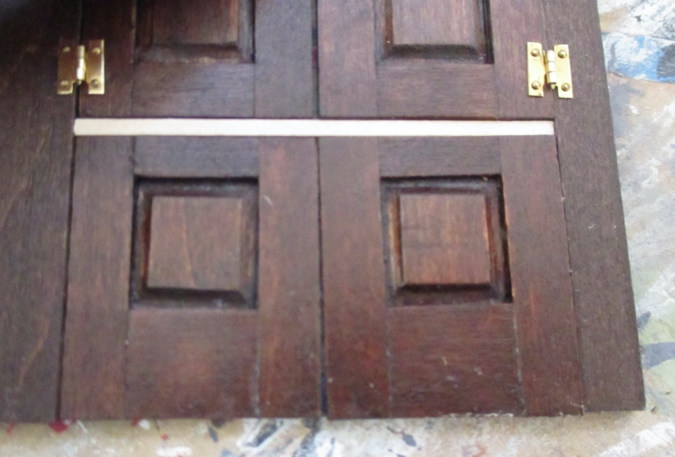
Then I set the small doors in place, flush with the bottom. This leaves a gap between the upper and lower doors.
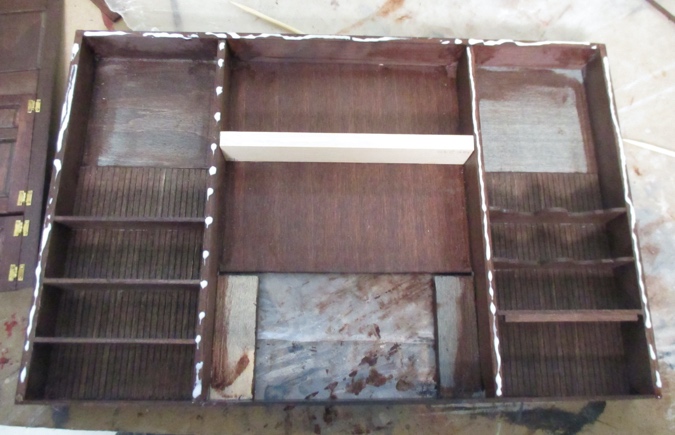
This kit started out as a huge jumble of wood pieces, with no parts list to help identify them. As I neared completion, I was left with a 3/32″ x 3/32″ x 1 3/4″ piece that wasn’t marked on any of the diagrams. Here’s what the instructions said about it:
Glue the 3/32″ sq. pc. to the front edge of the middle shelf on the right side, even with the top.
First of all, the instructions referring to it as a square threw me off, since the piece in question is actually a long skinny stick. Second of all… wtf? I’m pretty good with the English language, but I read this sentence over and over and just could not figure out what it meant.
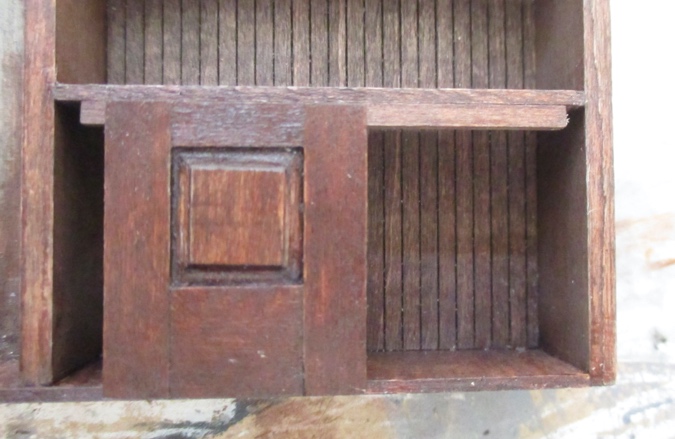
Because the small doors come up just to the bottom of the shelf above, there’s nothing to block them from getting pushed in too far. This isn’t a problem for the other cabinets, which have shelves behind the doors. I decided the mystery piece should be glued to the bottom of the shelf, flush with the front edge, which could maybe(?) be interpreted as “even with the top.”
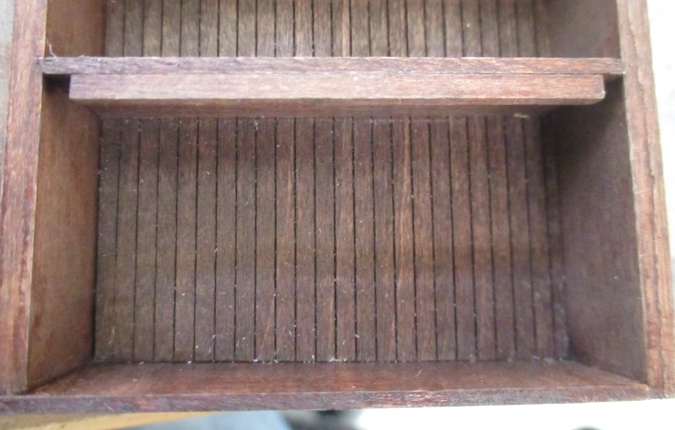
(Note that this is the bottom shelf, not the middle shelf. The middle shelf is scalloped, so gluing anything to or under the front edge of that shelf, “even with the top,” would have been impossible.)
This keeps the small doors from pushing in too far. Great.
Once I saw that gap between the upper and lower doors, it became clear that the mystery piece should have been glued to the *front* of the shelf. Which I guess is what the instructions say, but sometimes you get so fixated on something that reading comprehension goes out the window. (And if I had glued it to the front edge of the shelf, there would have been nothing to prevent the doors from swinging in too much at the top!)
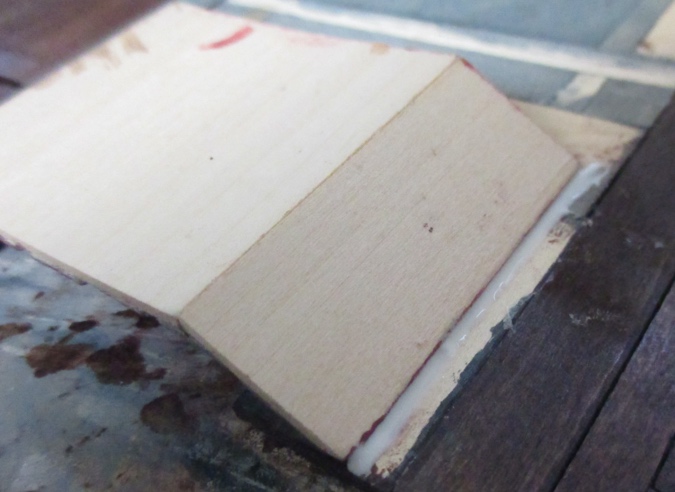
No biggie. I found a scrap in my wood drawer and cut it to fit. This is actually 1/16″ x 1/16″ — the 3/32″ x 3/32″ would have been slightly too big, but I could have sanded down the doors to make it work.
I stained this and set it in place while I hinged the doors, but didn’t glue it yet.
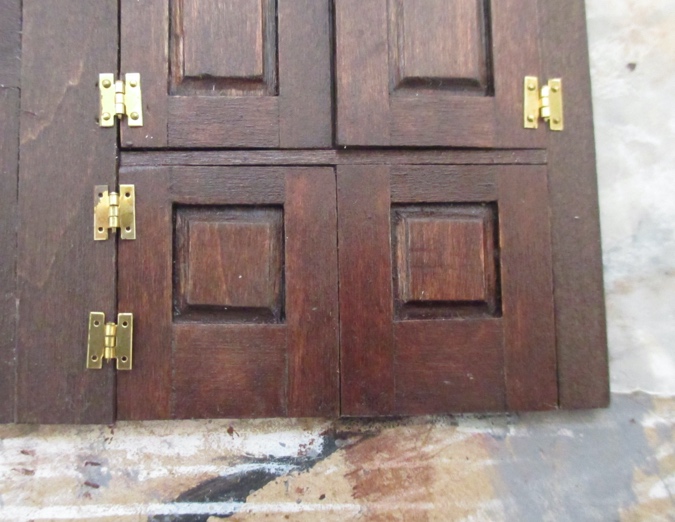
Here it is with all four doors hinged. The bottom left hinge on the small doors is very crooked. :(
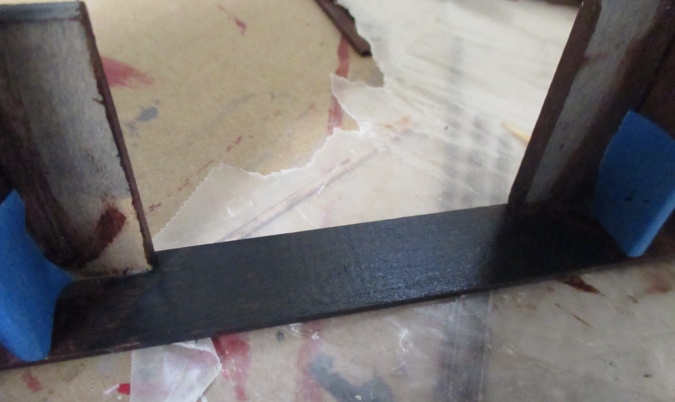
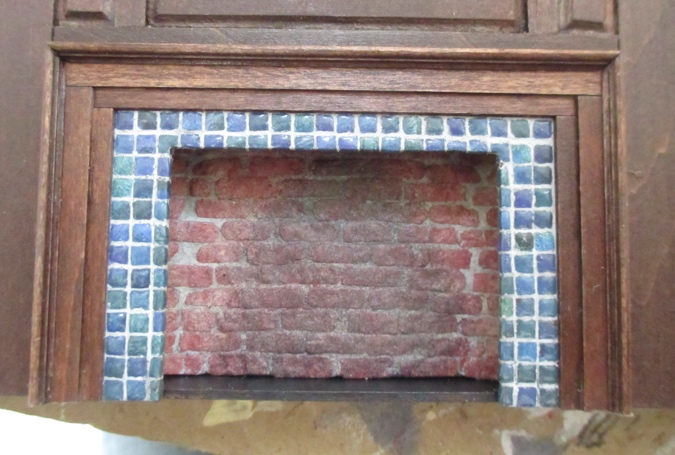
Next I glued the firebox to the back of the front facade.
(Initially I glued this so it was flush with the bottom, when it should have been nudged up a tad to account for the floor of the fireplace. Luckily I realized the mistake before the glue dried completely.)
Looking good.
While the glue was drying, I painted the fireplace floor black.
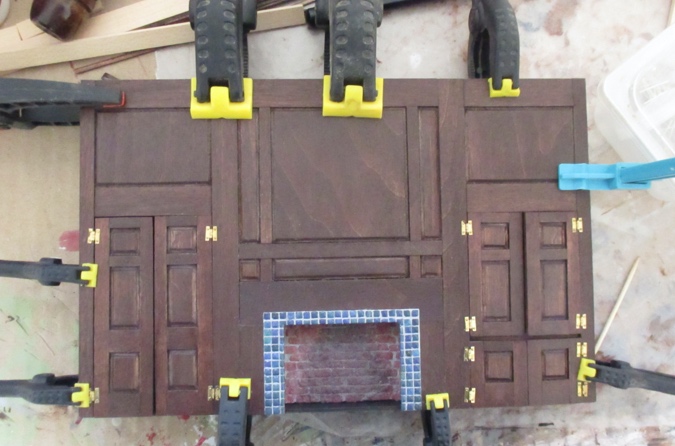
Finally, let’s put this whole thing together! I dotted tacky glue on the edges, reinforced with super glue in the corners.
And then used lots of clamps to hold it all down.
While the glue was drying, I added the trim around the fireplace.
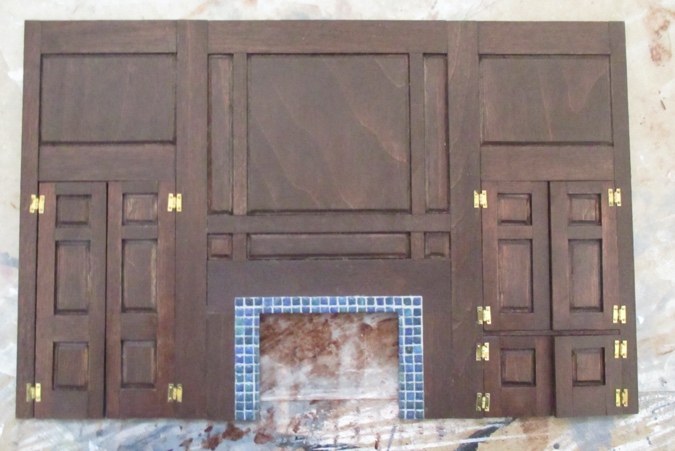
And then I glued in that piece between the two cabinets, and added the doorknobs. The kit only came with three.

There’s supposed to be trim around the cabinets, but I decided to leave it off. I didn’t like how big of a margin there is around the cabinet doors… looks strange and off-center.
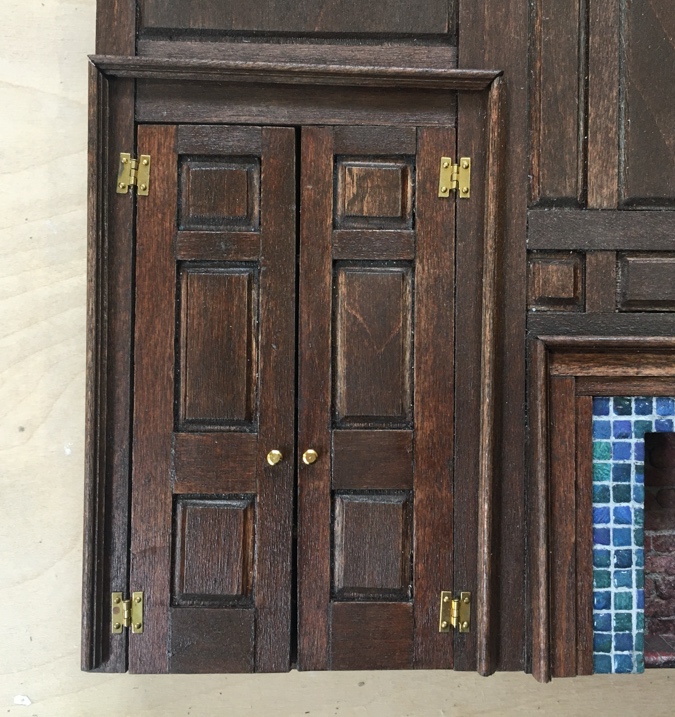
(Just to make things confusing: I took this picture later, after I’d added another doorknob.)
I thought I could cut the trim down and cover up the outside pieces of the hinges, but it didn’t work, so I decided to leave the trim off completely. The cabinets look fine without it.
Here it is with the doors open. A bit gratuitous, because I’ll probably never put anything on those shelves. I’m glad I added back pieces behind the shelves. Seeing the wall them would have been strange.
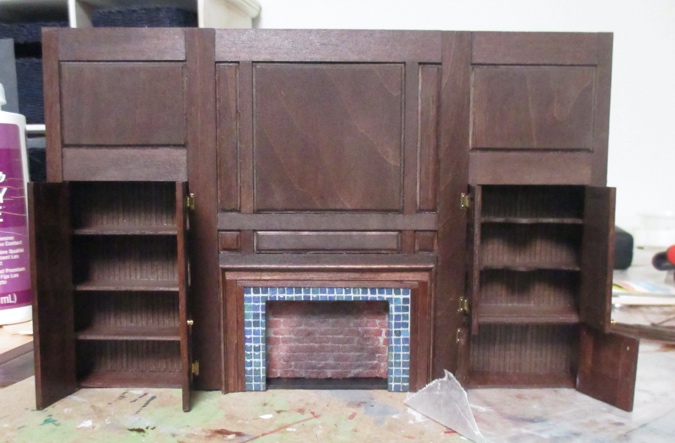
And here it is inside the Little Belle. I started building this kit planning to put it in the Mansard Victorian, before I realized the ceiling in that house wasn’t tall enough. My idea was to put a few steps next to it and then a landing, to imply that the stairs turn ninety degrees and continue up behind the fireplace wall.
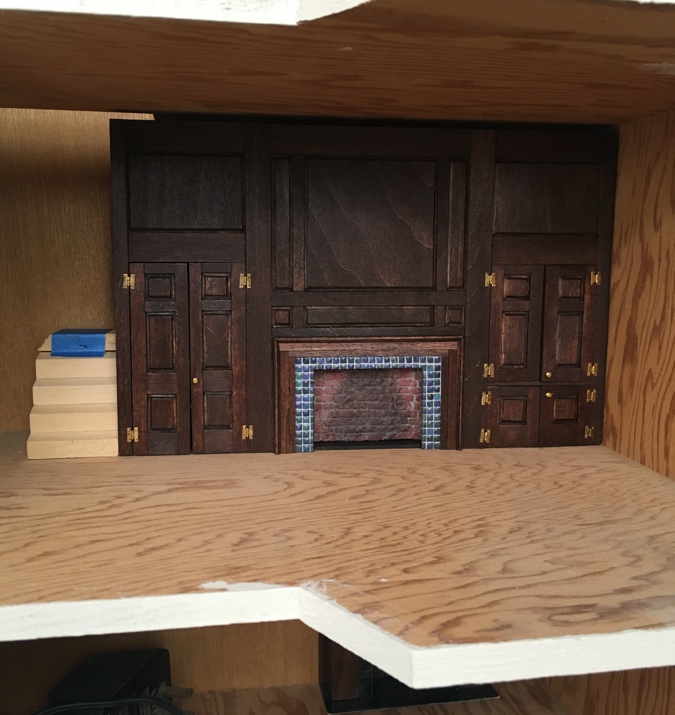
I could still do this in the Little Belle (I’d fill in the hole in the floor above). But after all this work, I’m not even sure I’ll use this in the Little Belle. The incongruity of a Federal fireplace in a Victorian house does bug me. Maybe I’ll use it in a roombox instead.
Looking at this picture, I decided I’m not actually done. There are a few things I don’t like here. The black hearth doesn’t look right — it should be brick. The single knobs on each cabinet look unbalanced. And that very crooked hinge on the left small door was driving me nuts.
You know what that means! Stay tuned for one more riveting entry…
 Emily is a freelance writer, miniaturist, and adventure game enthusiast.


I know, those things you look at (that won’t bug anyone else but you!) ha! But it looks good. And I think it could look good in any house… It could be a house that got updated over the years in a mish-mash of styles. You could keep one door open and fill the shelves to show the inside. It does look good! :)
You are truly amazing! Your skills, time, patience, and coping with weird instructions are phenomenal! Beautiful results. You should be proud (although I understand how perfectionism will keep you inspired to make changes.)
Very impressive! I really like how it looks in the Little Belle. Is there anything you could add to it to make it look more Victorian?
Awesome job Emily. Hinges are the Devil!
You might be able to adorn it with some Victorian influences. If you add an ornate fireplace mantle/ surround and some rosettes etc…. Some frou frou sconces and a Victorian painting, you could really sell it.
Whether building miniatures from scratch or kits, the projects are always challenging. From scratch you can do over, but from a kit, not so much. You will probably find a good spot for the fireplace eventually. We can all sympathize with a crooked hinge, too–or a crooked anything. Still, nice work, Emily.
Before I added the trim around the fireplace, I thought about what I could do to make it look more Victorian, but I didn’t have the wood pieces I’d need and I just didn’t want to frutz with this thing any longer than I already had. I like it a lot, I just don’t know if it’s right for the Little Belle. It’s a shame most other houses have 5″ ceilings. It would be perfect for something like the Thornhill.