With the porch finished, all I had left to do on the bungalow were a few pieces of trim. But first, as I often do as a project nears completion (see here and here), I went down a rabbit hole of destruction that took a little work to climb back out of.
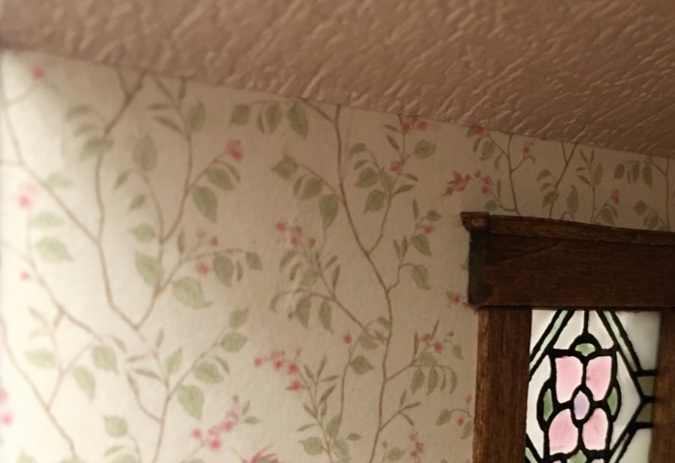
It all started when I added beams to the ceiling. These came with the kit, but there was no interior photo so I didn’t know how they would look. But beams are beams, right? I know what beams look like. What could go wrong?
I stained them to match the rest of the wood, glued them in, and… I didn’t like them.
I used a scrap piece of wood to make sure the beams on each side of the ceiling are evenly spaced, but didn’t think about how the two at the top would look in relation to each other, and they’re too close together. And I also just didn’t like the look. It’s distracting, and it doesn’t say Craftsman to me.
Of course, I let the glue dry before I decided I didn’t like them. So when I pulled them down, the ceiling ended up like this.
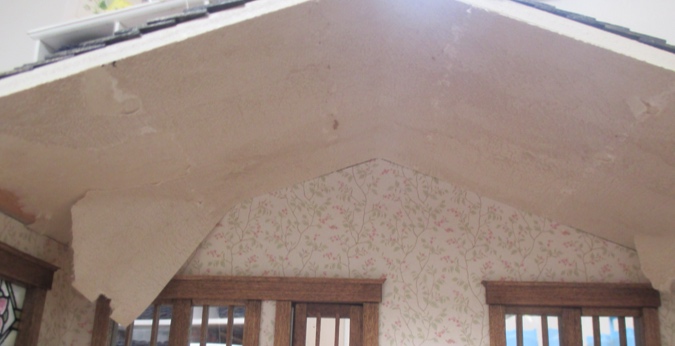
So that’s not great, but shouldn’t be hard to fix. Right? Except…
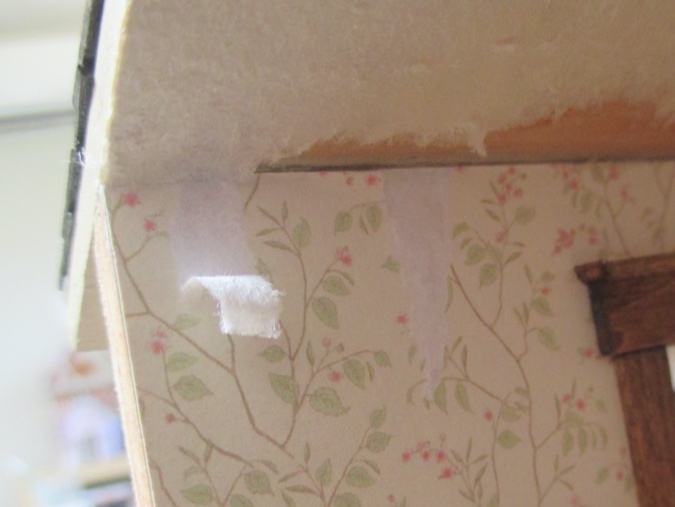
Yikes. I didn’t notice that some glue on the beam had stuck to the wallpaper, and when I pulled the beam down, the wallpaper came with it.
Luckily one torn piece was still attached, and the other piece was stuck to the beam.
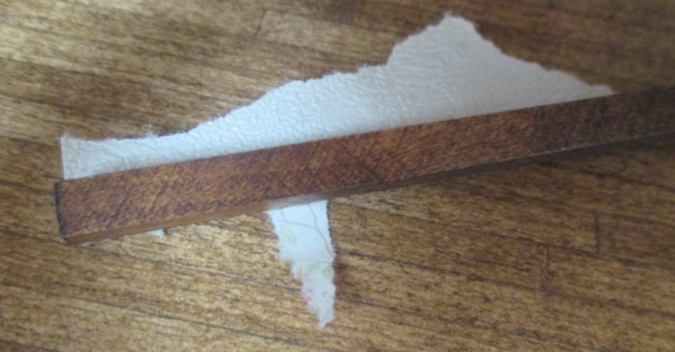
I was able to glue them back in place. Those spots aren’t perfect, you have to really look for them.
(It’s a good thing this was Brodnax Prints paper, which is thin and not coated. If it had been the thicker Itsy Bitsy Mini paper that I often use, I think the patch would have been more noticeable. On the other hand, the thicker, coated paper might not have torn in the first place?)
I cut another piece of ceiling paper and glued it in over the shreds of the old one. It’s like it never happened! Except…
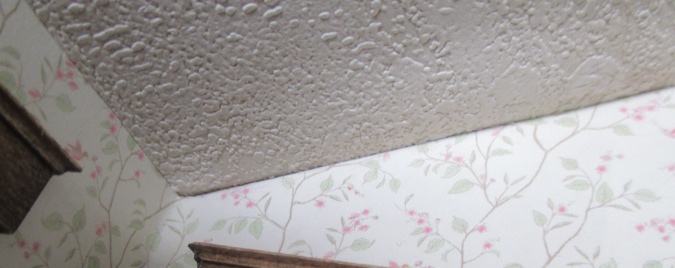
There are some cracks where the ceiling paper doesn’t quite meet the wallpaper, and you can see the wood underneath. This was true with the first attempt too (you can see them in the first photo above, between the beams). I’d been planning to add skinny basswood strips, either painted ceiling color or stained, between the beams.
I played around with trim but it since very skinny pieces of wood tend to be flexible and not perfectly straight, I didn’t think I could glue it in snug enough to neatly fix the problem. I also tried masking the wallpaper and ceiling paper and dabbing paint in the cracks, which was pretty risky (speaking of ruining houses when they’re almost done) and didn’t work anyway.
If only the ceiling paper were a little thicker, these cracks wouldn’t be a problem…
I cut a piece of stiff paper and glued this in on top of the ceiling paper. The thickness of the paper covers up the cracks.
Then I glued a piece of ceiling paper on top of that. Third time’s a charm! Except…
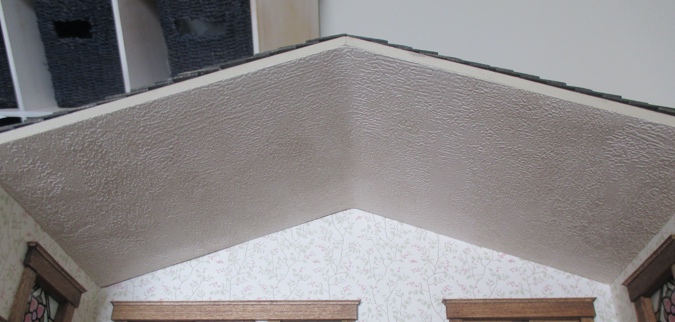
The multiple layers of paper have gotten rather thick, especially at the peak where they’re not folded sharply.
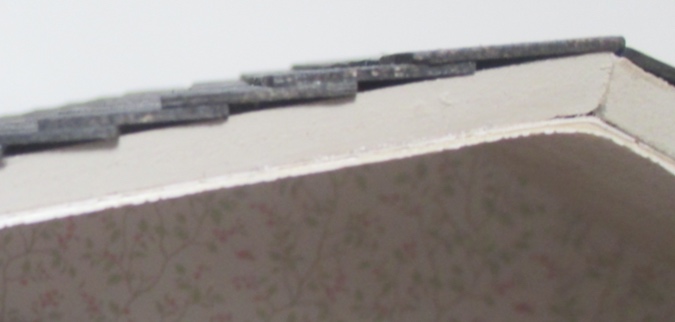
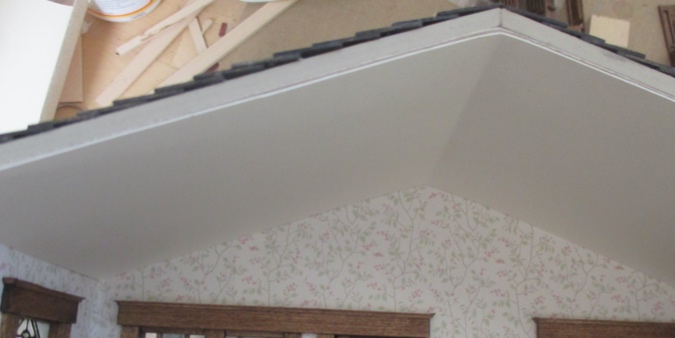
Luckily this will be covered up by the stripwood trim I’m adding to the edges of the roof.
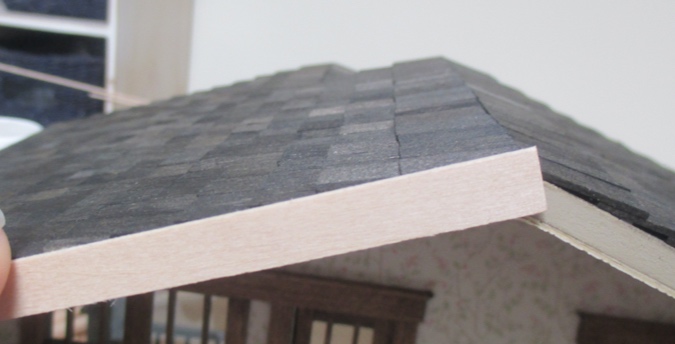
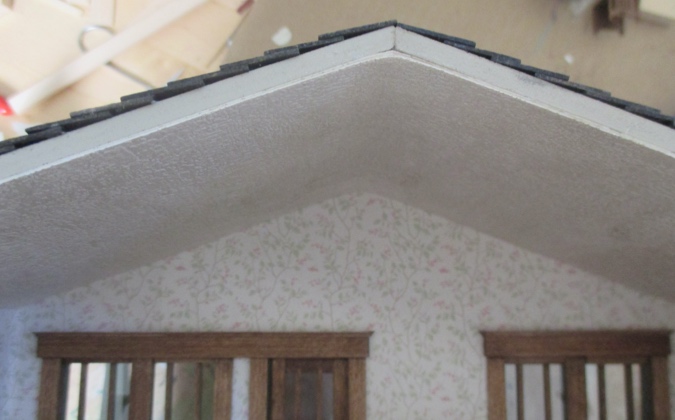
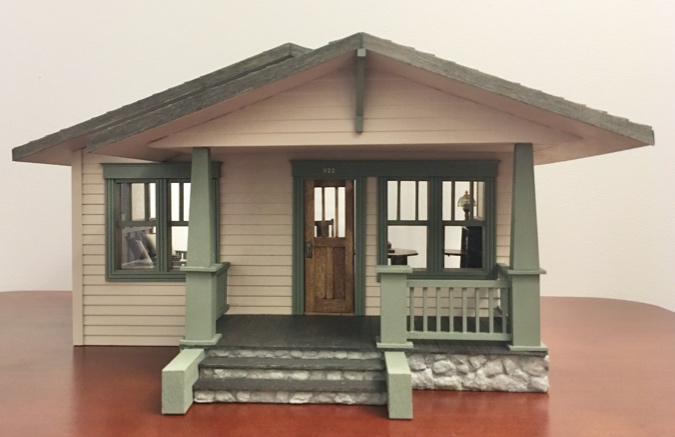
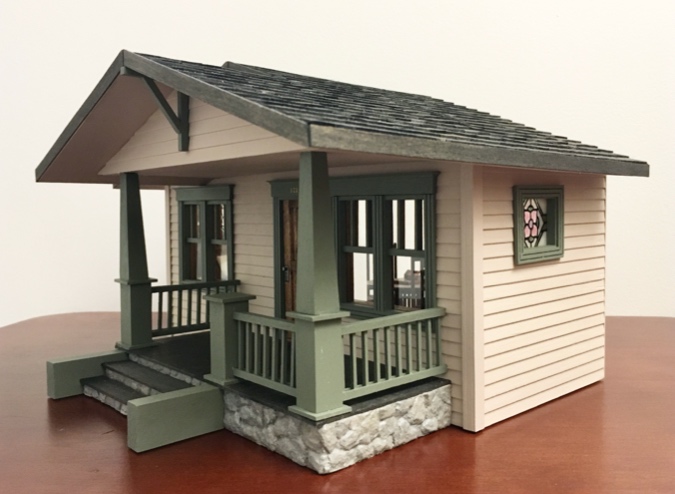
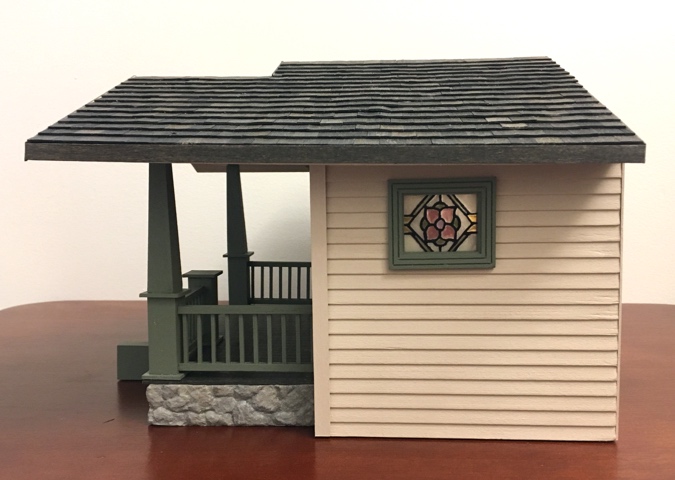
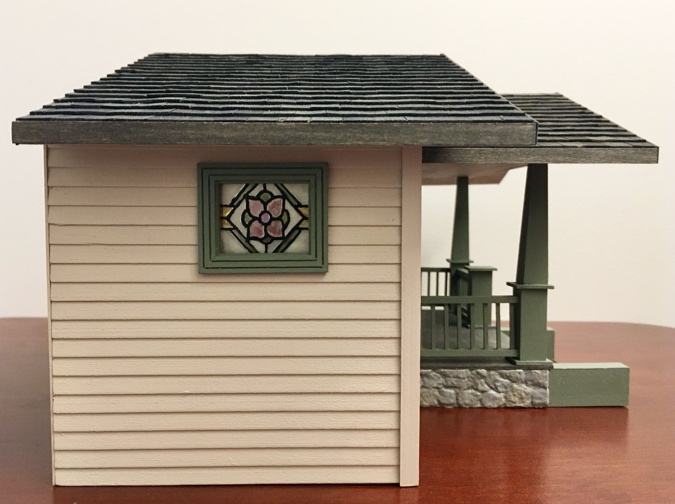
I glued 1/4″ x 1/32″ strip wood around the edges of the roof, stained Minwax Ebony like the shingles. My roof peaks had been a little sloppy because of how the pieces fit together, but the trim turns this into a nice sharp corner.

On the front corners of the house, I used 5/16″ x 1/32″ angle trim that came with the kit.
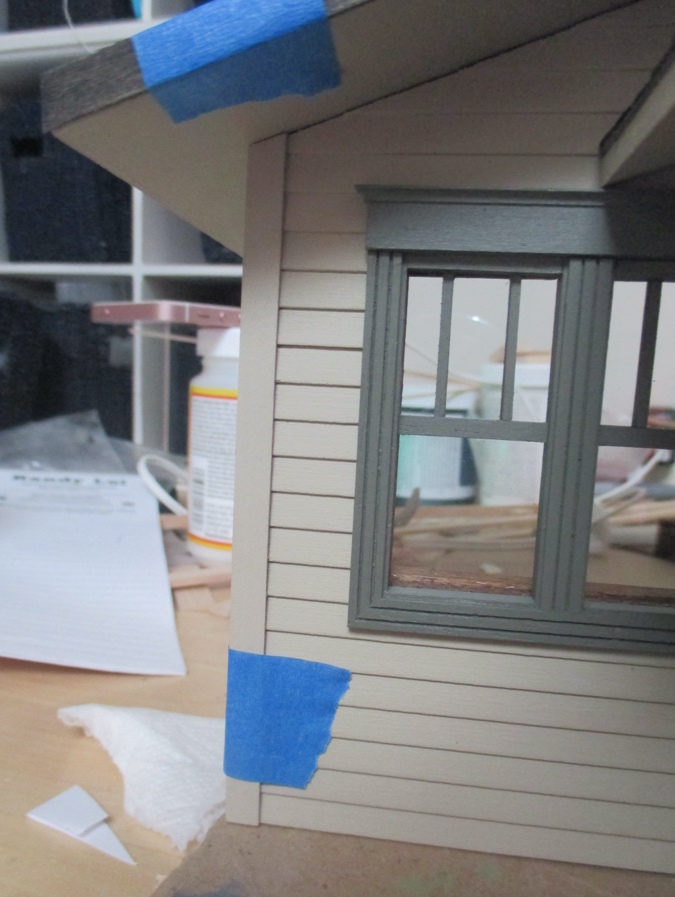
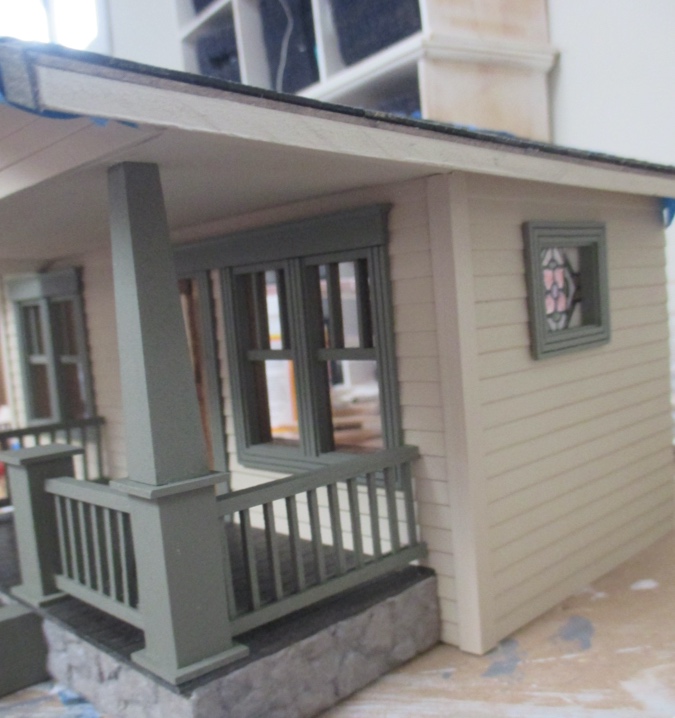
The kit came with angle trim for the back corners too, but due to the thickness of the siding, that corner trim wouldn’t completely cover the back edges of the walls.
Instead I used plain 5/16″ x 1/32″ strip wood.
The siding bumps up against it neatly enough.
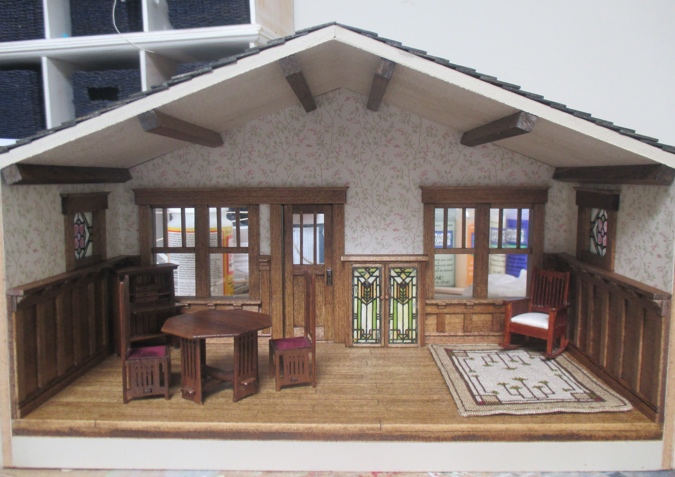
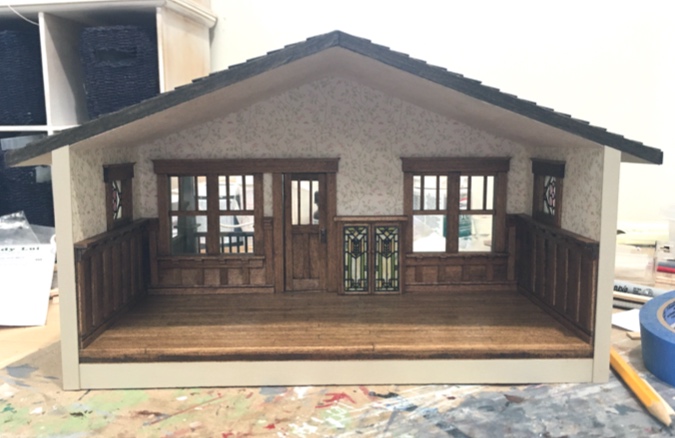
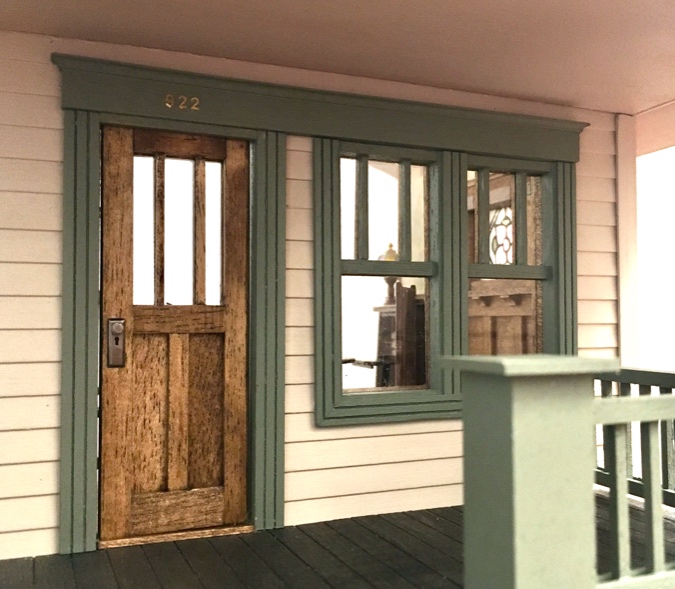
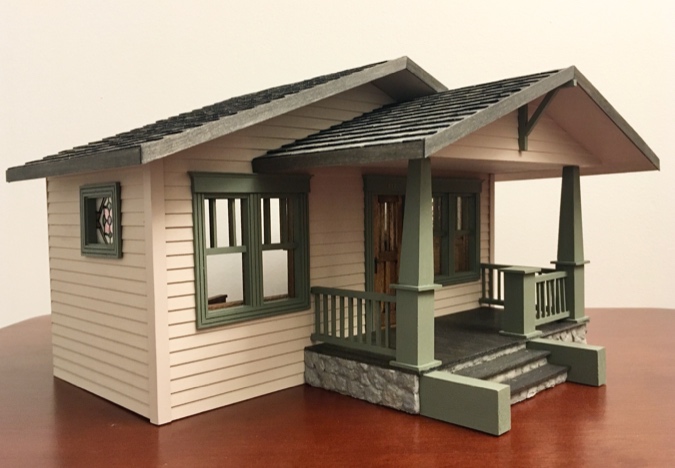
I’m not done decorating the house, but with the structure complete, I added a house number above the door. It’s 922 to signify that I finished in September 2022.
And here’s the finished house. I’m still planning to add a mailbox and a plant or bench to the left of the door. Maybe I’ll cross stitch a Craftsman style welcome mat.
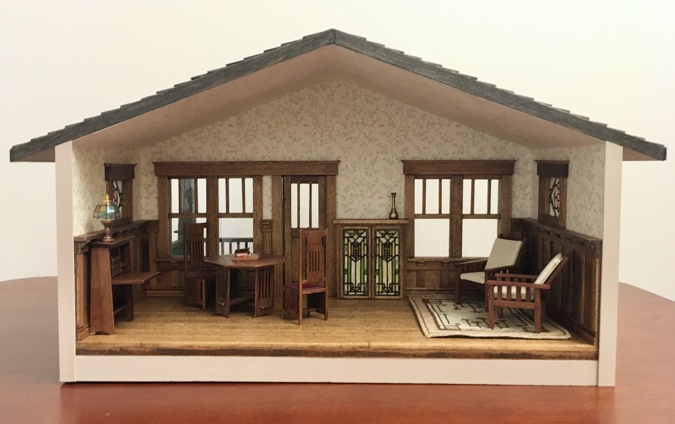
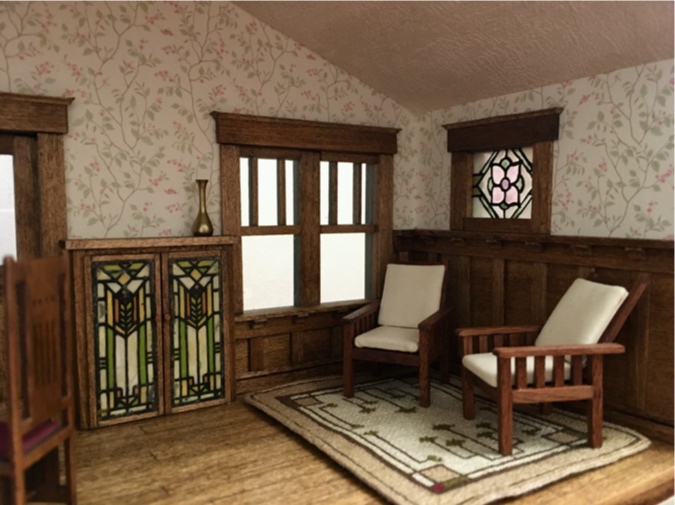
I’m not done decorating inside, but here’s what I have so far. The table and chairs and the desk came from Bauder Pine’s Etsy shop. I think they’re made from kits, but they’re not Bauder Pine brand (possibly Teresa’s Miniature Creations). The checkerboard and cigar box of checkers were my contribution to this year’s half scale swap.
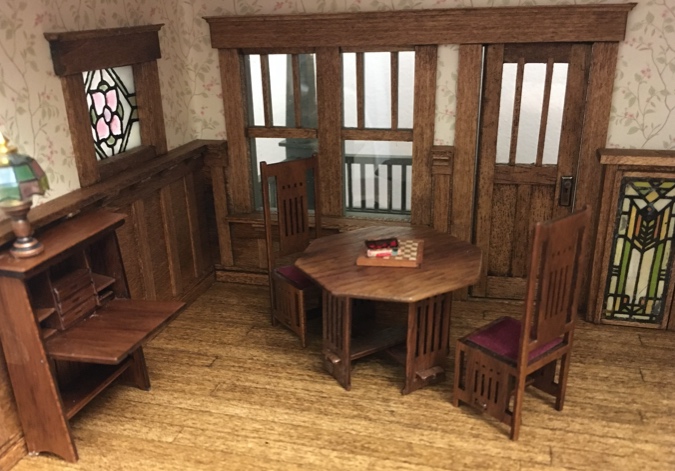
The brass vase is Tretters. I cross stitched the ginkgo rug based on a rug design I found online (free chart available here!), and made the chairs from a Jane Harrop kit.
This kit is a rare 1:24 version of a Debbie Young bungalow (her structures are usually 1:48 scale). If you haven’t been following along, you can read the rest of the entries from this build here.
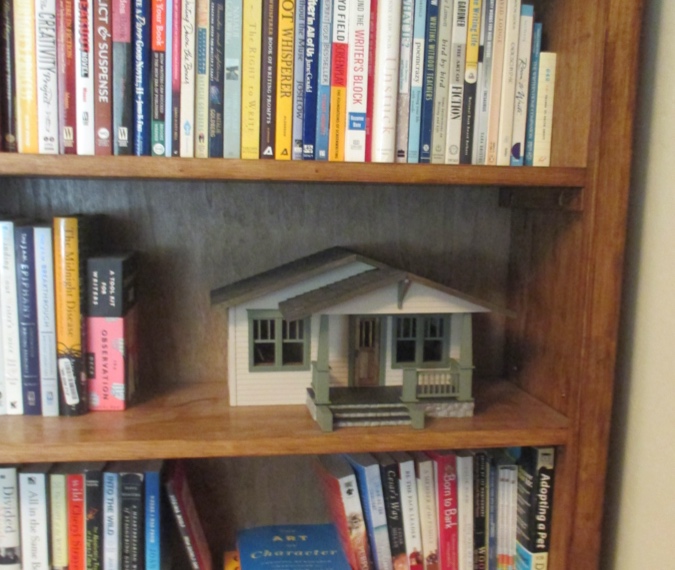
I started this little bungalow way back in December 2020, because I had an empty space on a bookcase that was just the right size for it. Although I have acquired more books since then, the empty space is still there and the house looks perfect there.
 Emily is a freelance writer, miniaturist, and adventure game enthusiast.


Looks wonderful! Great work.
Thanks Diane!
It really turned out great. I know how that goes… fix one thing, wreck three others. ha! But a great job! Still working on my Fairfield. (photos at link)
Your Fairfield is looking great! I like what you did with the railings.
Who WOULDn’t Love to own That piece?!! A true Treasure for Generations to come. My name is Billie if you have a Will. :-)))))))))))))))))
Haha thank you. :)
Love this! I somehow missed your gingko rug post. Great minds think alike! I did the green version of this rug in my RGT half-scale bungalow. If I had known you needed it, I still have the chart I made, but I suspect you like to do your own anyway. :-) Yours turned out beautifully. I always wanted to have this rug in real life.
I saw a picture of yours after I charted mine! It’s a great design and easy to scale down. I saved several other pictures all from the same online store, so I might try some more Craftsman rugs in the future.
Beautiful! I really love this creation! (Craftsman architecture is a favorite of mine.) Excellent detail, as always. Thanks for sharing your talent!
I hope I’m not being insulting, but I take comfort knowing that I am not the only one who makes disastrous mistakes and then has to fix them. I have become quite adept at covering them up, so take comfort that you help us all when you share how to problem solve problems. I feel that what is covered up does not have to be prefect, for who knows–other than our followers. The bungalow looks like it belongs in the bookcase. It feels good to have the project finished, doesn’t it? Bravo.
Nice job, I really like this!
I really like your take on it! Did it in quarterscale but never furnished it. It. Has a ME look to the outside though.