Cute furniture alert! I recently bought this rocking horse off eBay for the Mansard Victorian. It’s made from a Cassidy Creations kit (the same one I finished as a zebra for the Victorianna). The little blue horse toy was a bonus the seller included in the package.

I don’t think this was finished by Bauder-Pine. It’s signed MM underneath — I don’t know who that is — but it’s very nicely done and this is a rare kit, so I decided to buy it rather than wait in vain for another kit to turn up.
(I mention this because I’m planning to furnish my Mansard Victorian with all Bauder-Pine and Cassidy Creations furniture. This post has more details.)
Moving on. With the Mansard Victorian’s foundation finished, I can finally get started on the interior. I’m starting with the living room and entry, which will be separated by a partial wall.
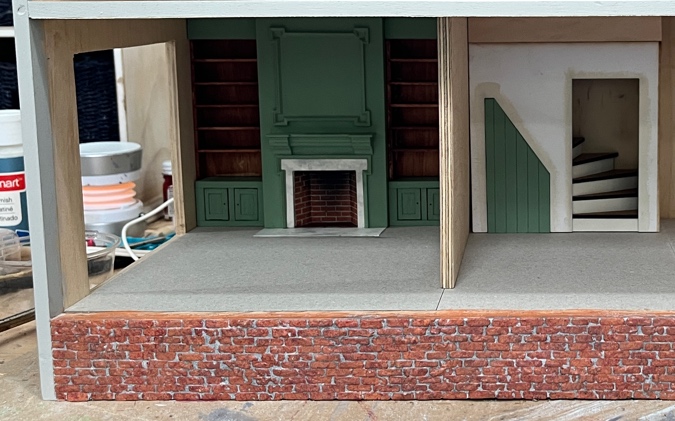
The first thing I did was flip the house over and glue in the ceiling paper for these two rooms.
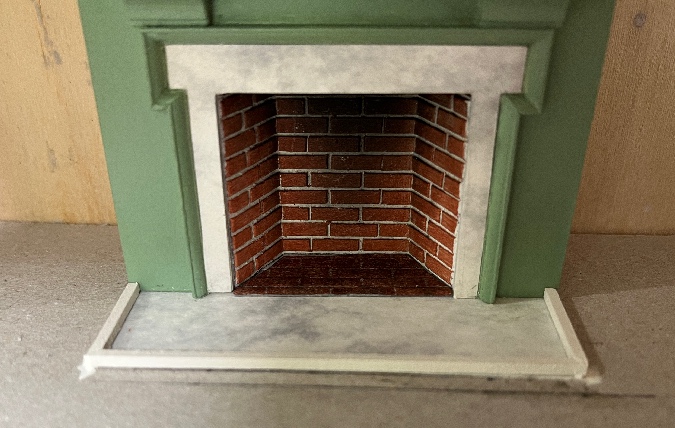
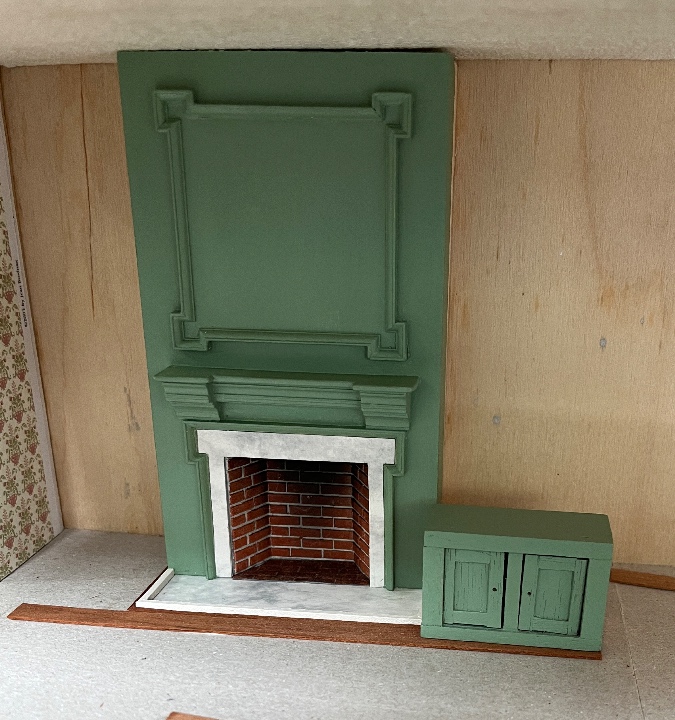
For reasons explained in this post, I had previously glued cardboard to the floor. My Braxton Payne fireplace was a snug fit once the cardboard was added, and that fit got even snugger with the addition of ceiling paper. I needed the fireplace to be a tad shorter in order to slide a hearth underneath it.
I brought it over to the disc sander… what could go wrong?
Um, this:
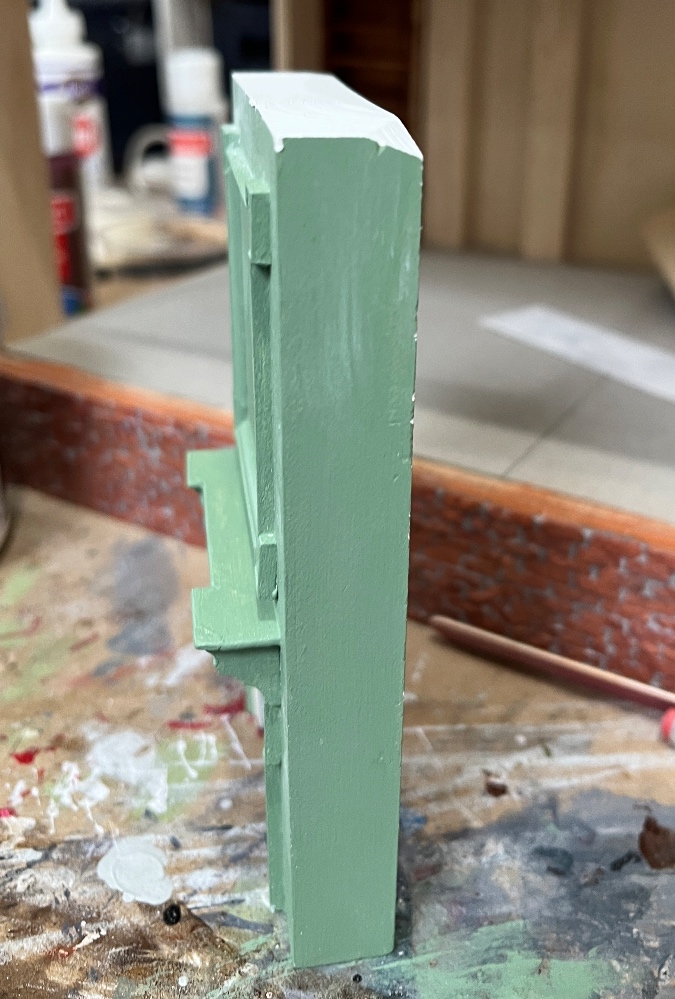
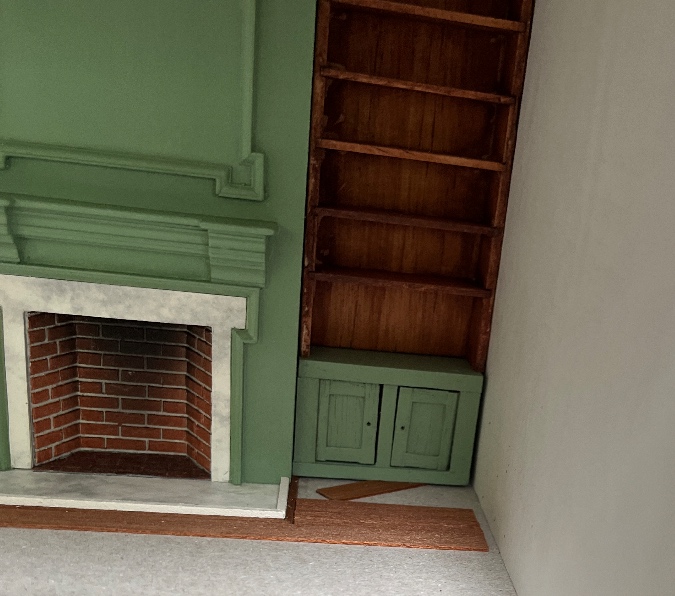
The disc sander is great for little pieces of trim, but whenever I use it to sand something wide, there’s a risk of catching a corner on the spinning sander, and that’s what happened here. Luckily this corner will be hidden by the built-in bookcase. But I didn’t want to try my luck a second time.
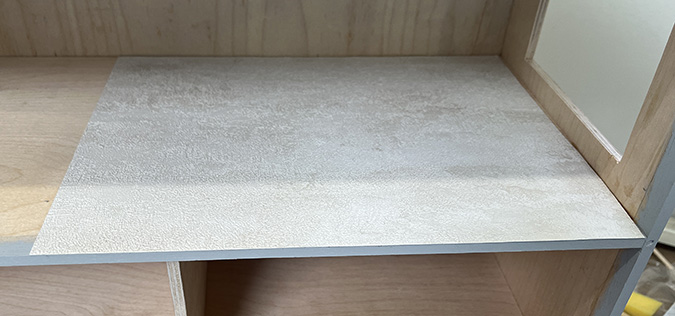
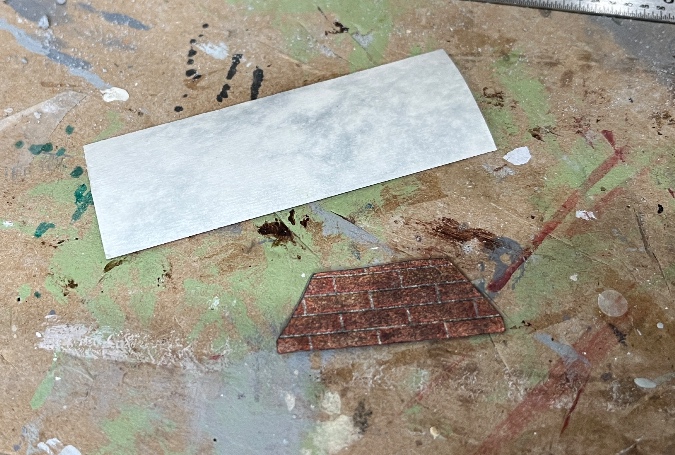
At least I had sanded enough off the top to be able to slide a piece of marble paper under the fireplace. This is the same paper I used for the surround. I also cut a piece of embossed brick paper to fit inside of the fireplace.
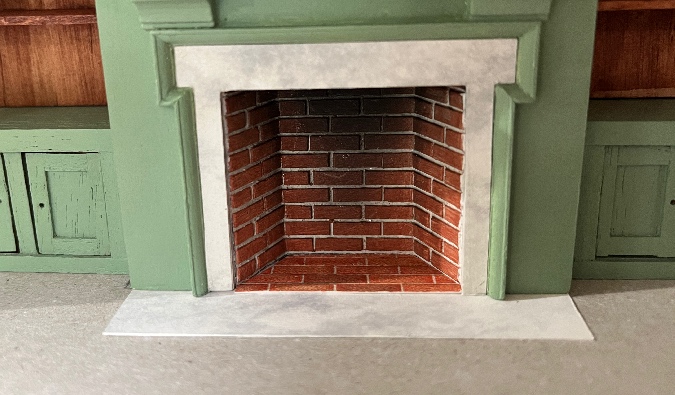
I painted the marble paper with matte varnish, and dirtied up the brick paper with black paint.
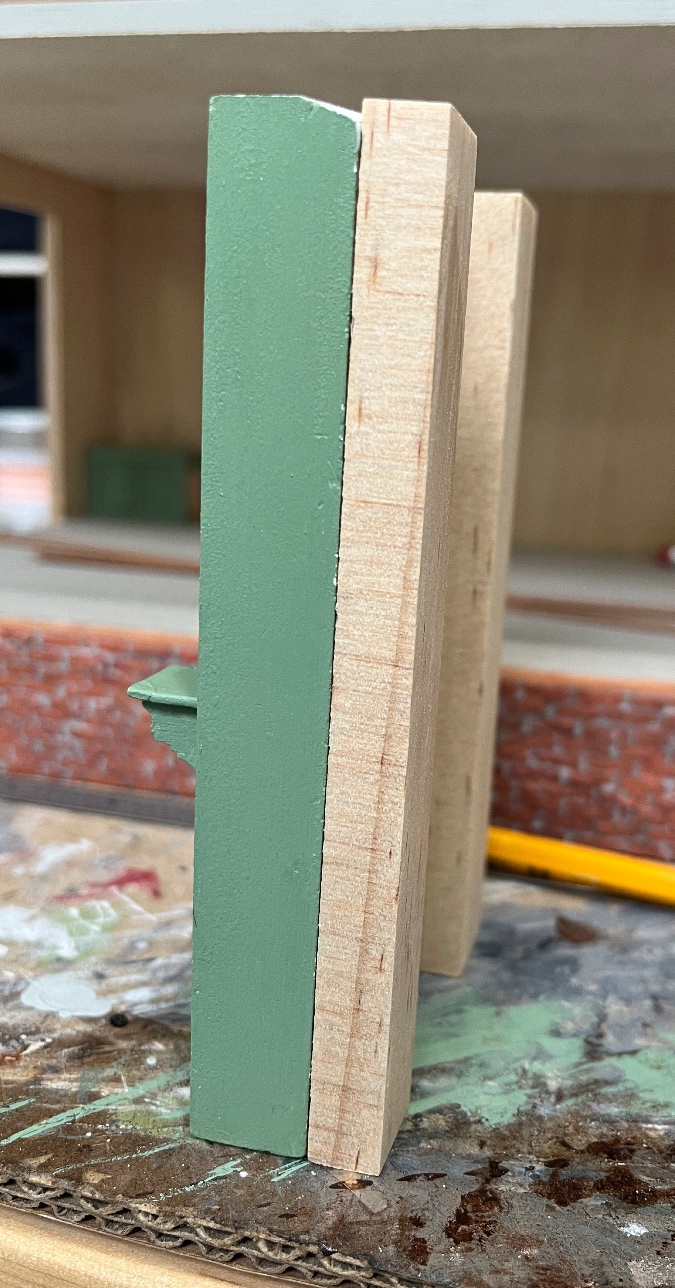
Next I glued 3/8″ strips to the back of the fireplace. These will push it out from the wall to make the fireplace deeper than the built-ins.
Because the fireplace was such a tight fit, I had to glue in the marble paper before gluing in the fireplace. I traced the bottom of the fireplace onto the cardboard and put the cabinet in place to (theoretically) get the marble paper into the right position.
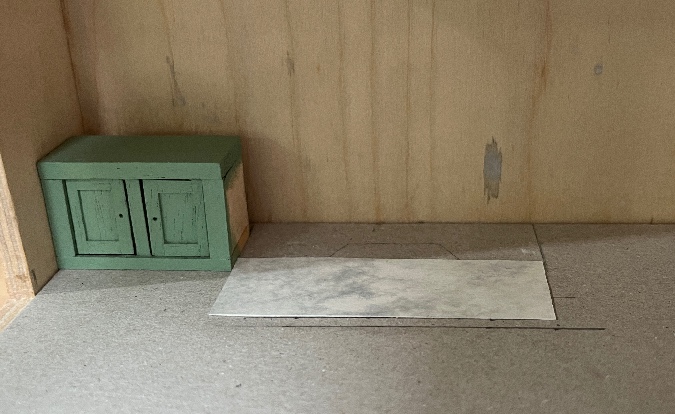
(Ignore the pencil line in front of it — originally that’s where I wanted the hearth to come out to, but when I put everything in and looked at it, it seemed to protrude too much.)
I glued in the fireplace and the brick paper. Due to the depth of the room, it was hard to tell if the marble paper was in straight, but I suspected it wasn’t. Also, it’s shifted slightly to the left, not quite lined up with the edges of the fireplace. Oops.
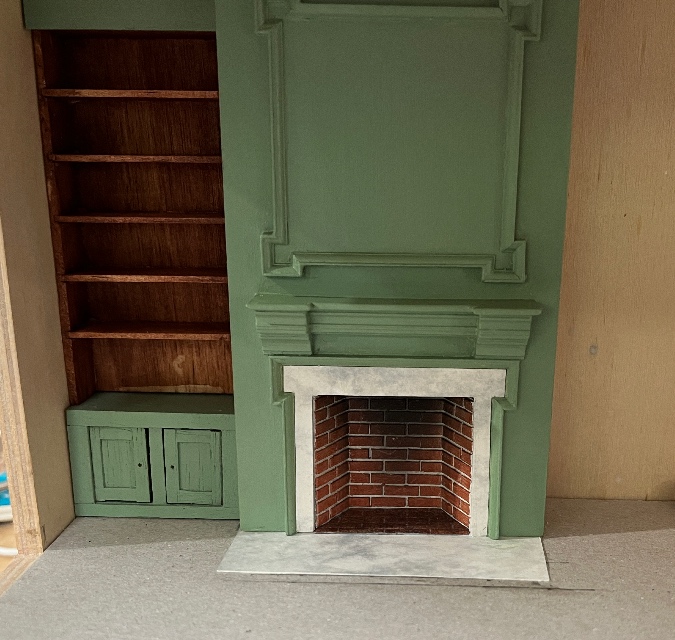
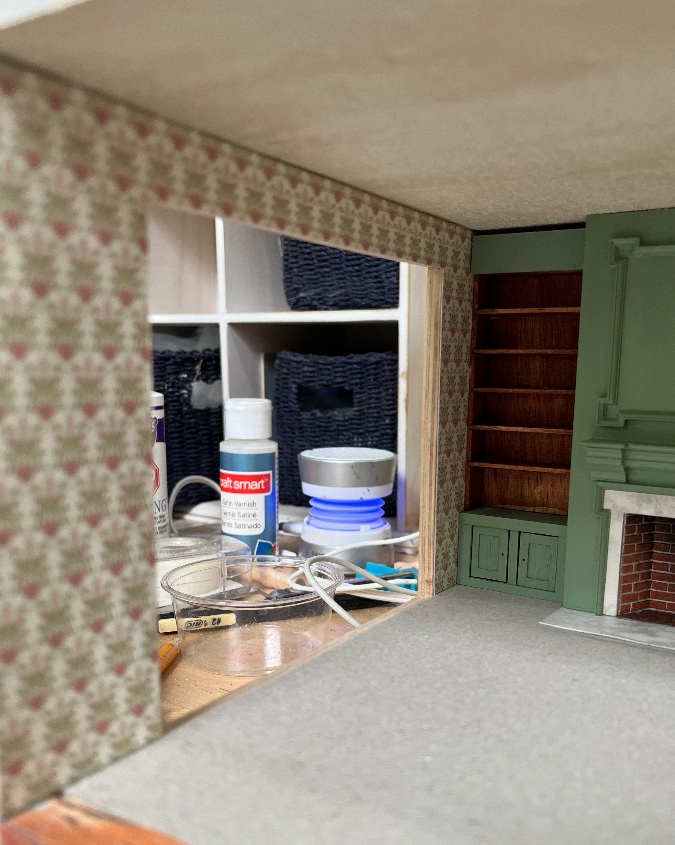
Before gluing in the fireplace, I had put in the left cabinet and bookcase to make sure the fireplace was positioned correctly, but I didn’t glue these in yet since they’re not quite done. Once it was too late to nudge the fireplace over, I realized that the addition of wallpaper might bulk up the wall too much for the cabinet and bookcase to squeeze in there. Oops again.
I hate painting, and when I started working on this house, I didn’t want to take the time to prime the walls. But I also worry about the wallpaper becoming discolored sitting right next to the plywood — especially since I’m using Brodnax wallpaper in this house, which is thinner than the Itsy Bitsy paper I usually use.
To protect the wallpaper, and also to cover up the seams where I added strip wood to bulk up the house, I decided to glue a piece of thicker paper between the wallpaper and the walls in this house. Will it work? We’ll find out!
Here is a piece of scrapbook paper I cut to fit on the wall to the left of the fireplace. The pink side will go up against the wall (I didn’t want to take a chance of the bright pink showing through the wallpaper). The piece of wallpaper is glued to the other side — the white square you see here is the back side of the wallpaper, that needs to be cut out for the doorway to the addition.
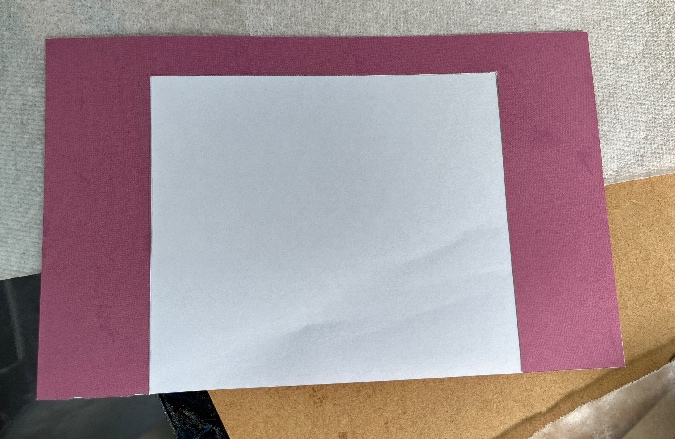
And here it is with that piece cut out. I put the small piece aside to use elsewhere.
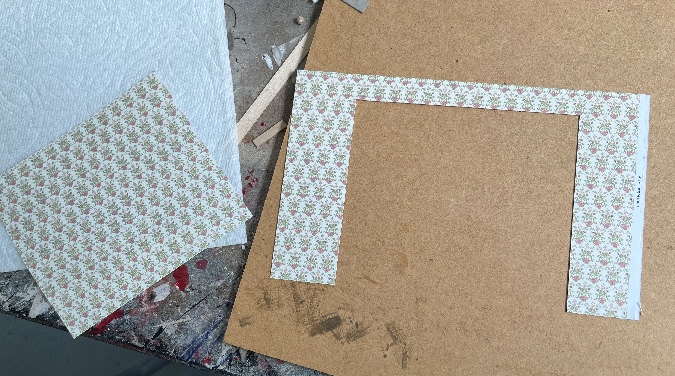
I glued my scrapbook paper plus wallpaper to the wall. The built-in is *very* snug, but I am still able to slide it out.
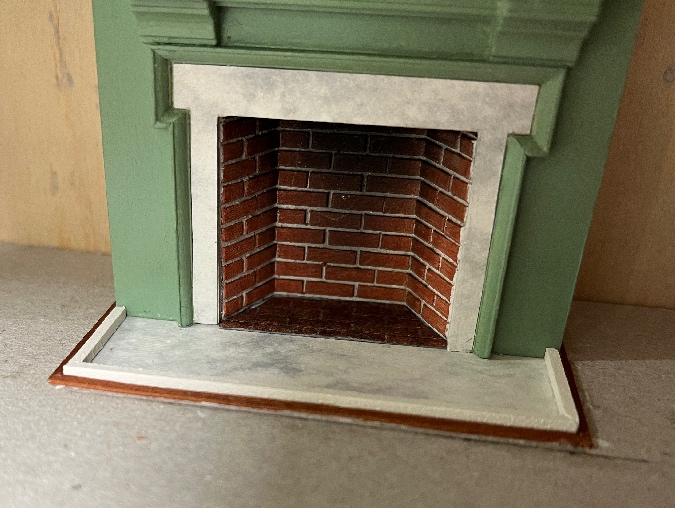
Back to the hearth. My intent had been to add a border around the outside of the marble paper, but since the paper wasn’t straight I decided to add the border on top of it instead. I started by cutting two side pieces. I positioned these to hide that the paper was slightly off center from the fireplace.
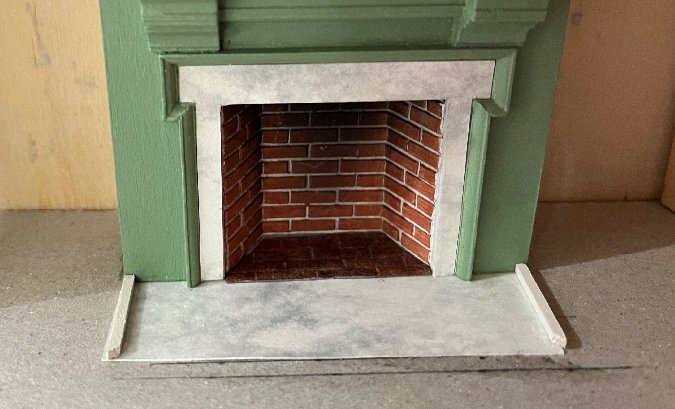
The horizontal piece then hides that the paper is crooked. I touched up the corner seams after gluing in the pieces.
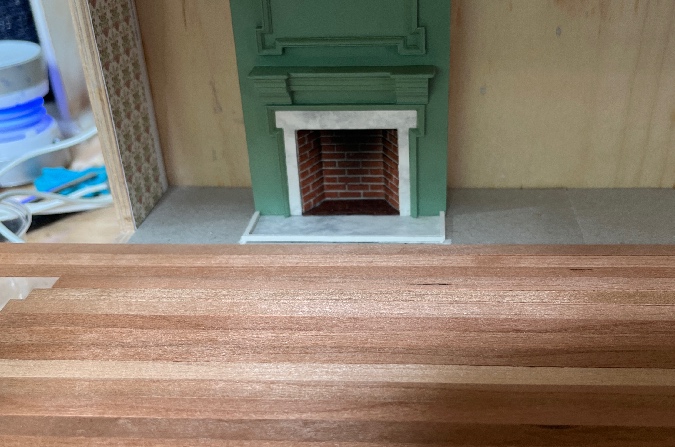
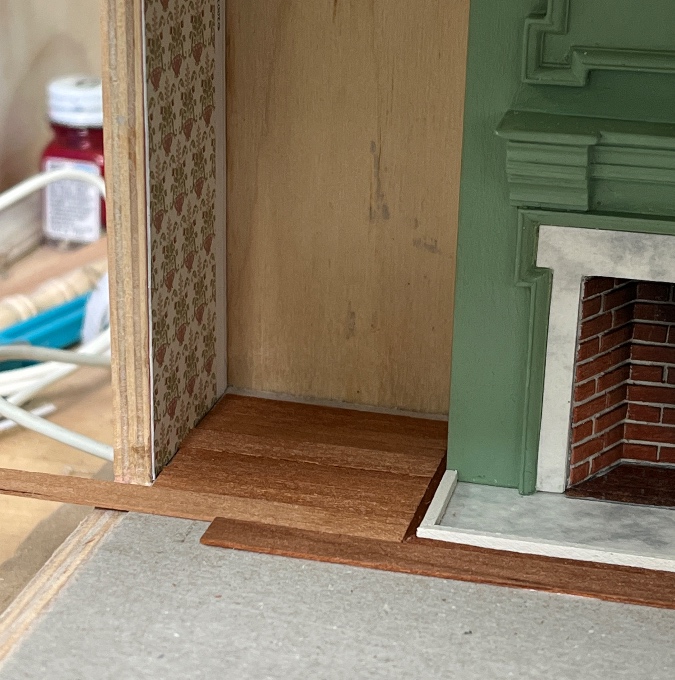
Starting at the front of the house, I laid out flooring pieces to see what I would end up with around the hearth. These are 1/4″ LittleWonders Lumber strips in cherry, stained with Minwax Cherry stain. I started at the front because I want the flooring to look nice and clean on the open front edge of the house.
I should have looked at this before adding the hearth, because I ended up with a sliver of space between the last floorboard and the border. I could have notched a floorboard to fit around the hearth, but thought that might look sloppy.
Instead, I cut a piece of floorboard into skinny pieces with my utility knife. They’re not perfectly straight, but you won’t be able to tell once they’re glued in with floorboards around them.
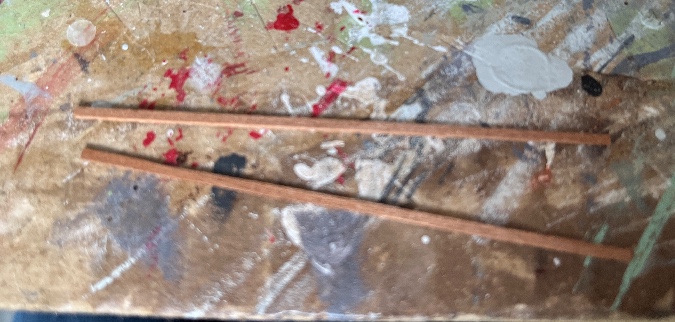
I used these to create another border around the hearth.
Next I lay down a floorboard in front of the hearth, using a cabinet to estimate where the right wall will be.
I started working backward from this. There’s a sliver at the back but you won’t be able to see it once the built-ins are in place.
On the right side, when I set the wall in place I saw that the first few floorboards were too short. I have some more work to do before I can glue in that wall, so this is where I’ll leave off on the floors for now.
 Emily is a freelance writer, miniaturist, and adventure game enthusiast.


Everything looks great. Nice work! I love that rocking horse. I have a bit of an addiction to them, I think I’ve made 5 of them.
Haha, that’s where all the rocking horse kits have gone!
I noticed that this one has five slats on the bottom (two for the feet plus three more for the center). The one I made into a zebra only came with three slats. How many do yours have?
Now that I’m looking more closely at the zebra pictures, the shape of my rockers and of the horse’s body and head seem somewhat different from the one I just bought, which makes me wonder if the new one definitely Cassidy Creations? It’s possible that my zebra kit is a newer version with slightly different pieces. Diane, does the one I bought look like the ones you’ve built?
The legs do seem a bit longer, and the head seems a little different. I don’t know if more kits were cut at a later date?
I think 3? I don’t think as many as 5.
I just love how you share your processes with us. I really appreciate it and look forward to reading them. It has really helped me with my building.
Thank you! I’m glad it helps. I have a big electricity post coming up next…
I always enjoy reading your posts and am glad that you choose to share your “oops” situations, too. They’re helpful!
Always inspiring, I love your solutions. I will some in my 2 room box project.