I’m loving how easy this house is to put together!
This morning I poked around at Michael’s and Dollhouses, Trains, and More, looking for scrapbook paper or wallpaper for the inside of the cottage. Nothing caught my eye and I decided to move forward with assembly and worry about the inside later. I have some ideas for furnishings already but it’s not stuff I already own, so there’s no rush.
At Michael’s I picked up a bottle of Gesso. I haven’t used it before but people on the Greenleaf forum recommended priming my windows and door with it so the paint will look the same on both (my windows are plastic and the door is wood, and I worried that the two different finishes would cause problems come painting time). While I was there I peeked in the craft department, as usual, and saw a ton of Creatology puzzles but no houses. Are wooden replicas of dinosaurs, skeletons, helicopters, and the Eifel Tower really popular enough to keep stocking them, but not the houses? I don’t get it.
I wanted some 7/16″ basswood for the base of the house, but the closest I could find was 3/8″. I also picked up some 1/4″ square basswood to use as porch posts, and half scale porch spindles. I’m pretty sure I already have railings tucked away somewhere.
Since the 3/8″ basswood was a little too short to fill the gap under the porch the way I wanted, I improvised by first gluing some (slightly thicker than 1/16″) trim from the kit that I’m not planning to use to the bottom of the porch and at the back of the floor.
This is the trim marked “A” and “C” in the kit, if you thinking of trying this yourself.
While that was drying, I cut the basswood to size, then glued that on over the trim.
The basswood I used is 3/8″ square, which makes for a nice sturdy base. I didn’t go all the way around with it – just used it in places where you could see a gap.
The basswood plus trim was a bit taller than what I needed, leaving a slight gap where the sides were no longer sitting flush on the table, but I used the mouse sander and some plain old sandpaper to even it out. (Alternatively I could have used siding to cover up the slight gap at the bottom sides but since I already cut my siding last night, that wasn’t an option.) I still need to apply some wood filler, to even out the seams where the different pieces of wood meet, but I think it’ll look real nice when it’s done… much classier than the original design that had an open space under the porch and the floor.
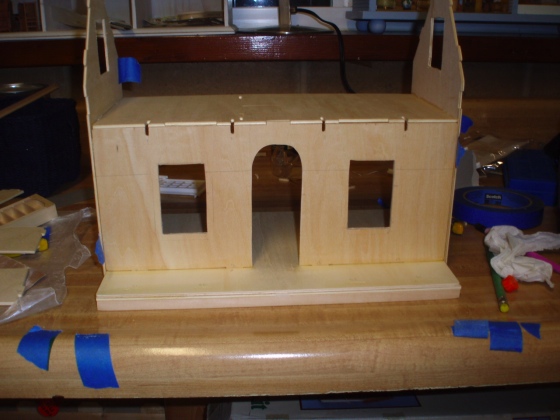
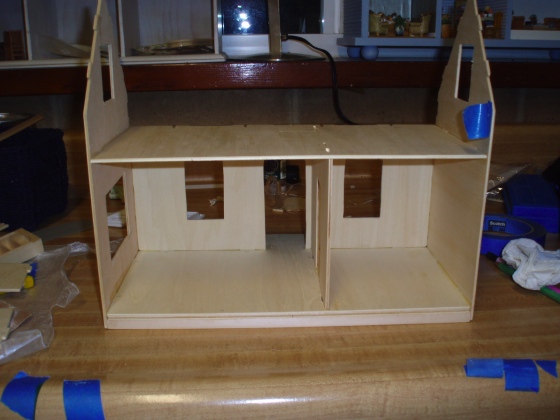
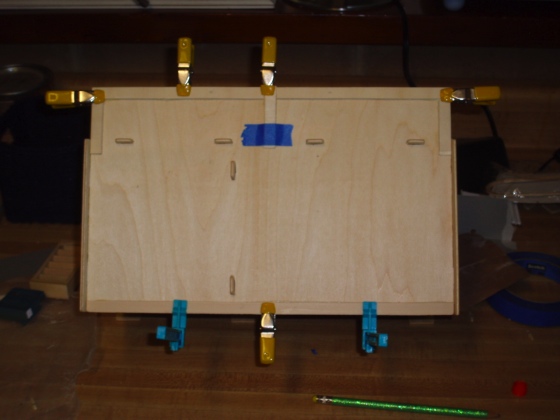
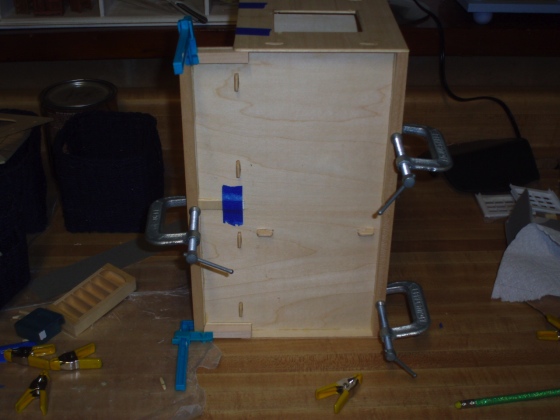
When that was done, I cut the rest of the siding for the front of the house and did a bit of sanding around the window holes to make sure everything will fit well. Then I glued in the divider between the two first floor rooms, and the second floor. The house is currently being squashed under paint cans, much like last night…
Tomorrow I should be able to get the rest of the assembly finished, glue on my siding, and maybe even start painting. I repeat, I love this easy little house!
 Emily is a freelance writer, miniaturist, and adventure game enthusiast.


Emily, I’m so impressed! Jan had mentioned to me that you built dollhouses, but for some reason I didn’t grasp that she meant miniture houses. They are wonderful!
When I was in college, I had to build lots of models of interior spaces I designed and I really appreciate all the work that you put into your great little houses. Lot’s of detail equals a steady hand and lots of patience and a love for what you do. My compliments!