In the fourth Little House book, On the Banks of Plum Creek, a big deal is made of the fact that Pa buys Ma a cookstove and she won’t have to cook on an open fire anymore. In spite of this, in Little House in the Big Woods (the book I’m basing my Little House cabin on), a cookstove is mentioned several times. Maybe they left it behind when they moved to Kansas?
Since there are no pictures of the stove in Little House in the Big Woods, and since my cabin’s going to be cramped anyway, and since cooking in a fireplace seems so much more pioneer-y, I decided to forgo the cookstove and just give Ma a fireplace.
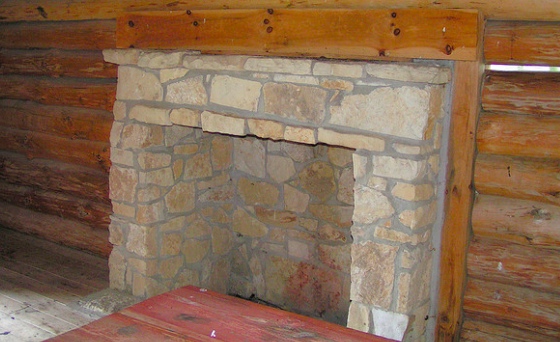
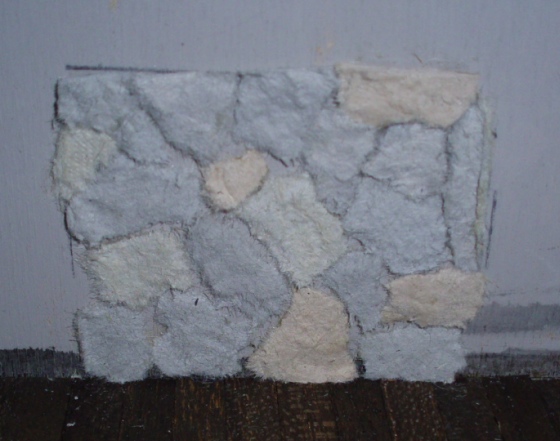
I briefly considered buying one of these colonial beauties from Braxton Payne, but it seemed too fancy somehow. Especially compared to this photo of the fireplace in the the Little House in the Big Woods replica cabin in Wisconsin.
There aren’t really any good fireplace illustrations in Little House in the Big Woods, so I also referred to this illustration from Little House on the Prairie.
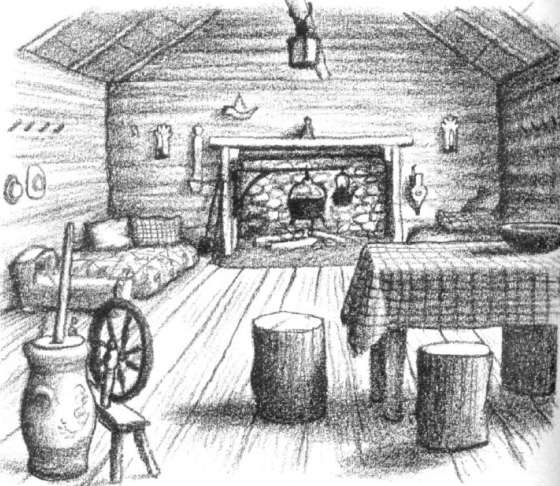
As described and depicted in the book, the Little House on the Prairie fireplace was just a hole in the wall with the inside of the chimney behind it. I opted instead to do a stone hearth around the fireplace as in the photo from the replica of the Pepin cabin. But I really liked the big hanging pot in the illustration and decided to add that to mine. In the absence of a cookstove, Ma needs some way to make soup!
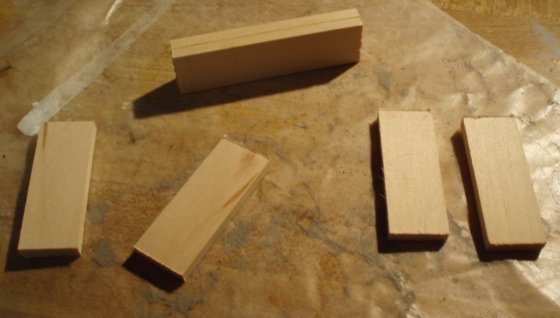
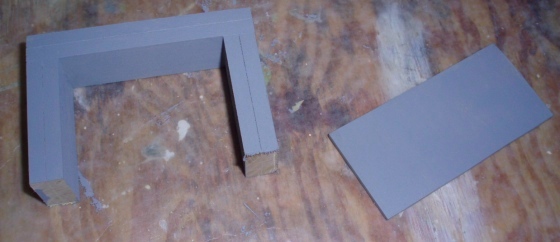
I started by building a fireplace structure out of basswood scraps. The basswood is 3/8″ thick and I glued two pieces together to make each side 3/4″.
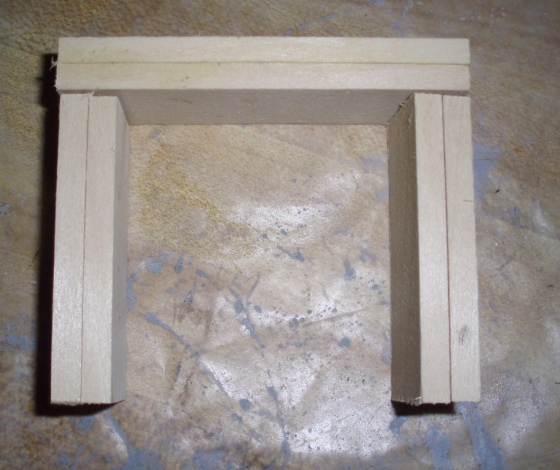
Here it is after the 3/8″ pieces were glued together. After taking this photo, I sanded the edges level using the disc sander before gluing the assembly together.
I cut a hearth out of a piece of scrap wood leftover from my Rosedale kit.

I meant to make the fireplace two inches tall, which would translate to four feet in this 1:24 scale cabin. But I didn’t think it through and cut the side pieces to two inches, which of course made the height of the fireplace 2-3/4″. I didn’t want it to look out of scale so I cut 3/4″ off the bottom of each side before continuing.
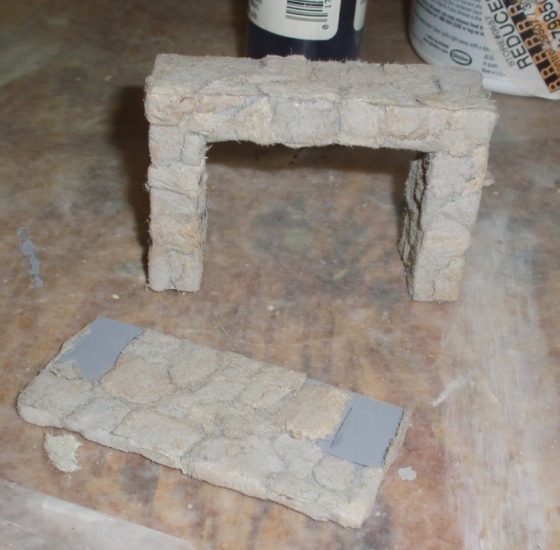
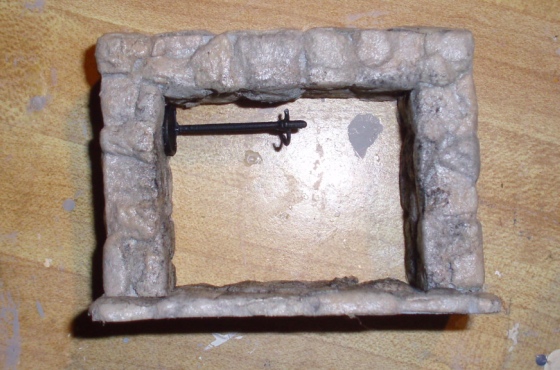
Most of the stones I had left from the chimney were very small and I wasn’t thrilled with how they looked on the chimney anyway, so I decided to do the fireplace with egg carton stones instead. First step was to paint the pieces dark gray, to look like grout.
I marked the inside edges of the fireplace on the wall and glued egg carton stones onto what would become the back of the fireplace. I used the exact same process as with the foundation for the 1:12 Hillside Victorian, except the stones are smaller.
Then I added stones to the fireplace and hearth.
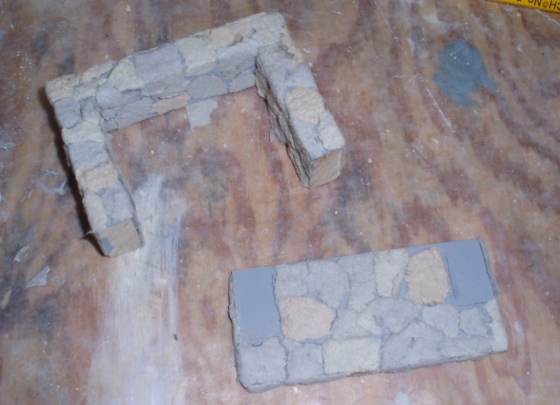
The three pieces fit together nicely. I didn’t glue them together yet, thinking it would be easier to paint the stones if they were separate.
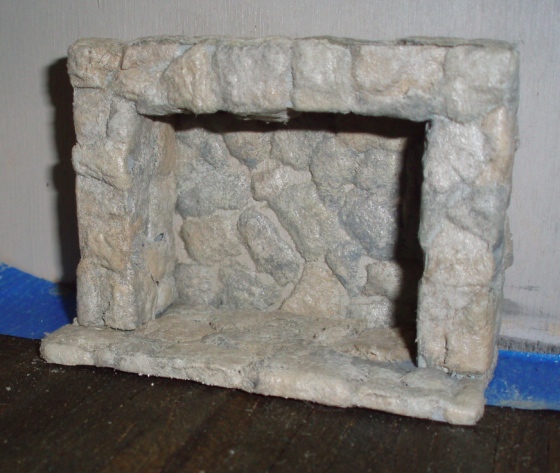
I applied a few shades of gray and brown paint with a dry brush, to color the stones.
Then I coated the whole thing with matte varnish.
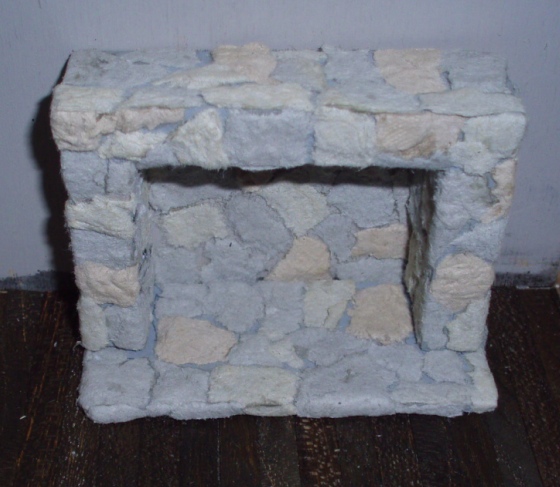
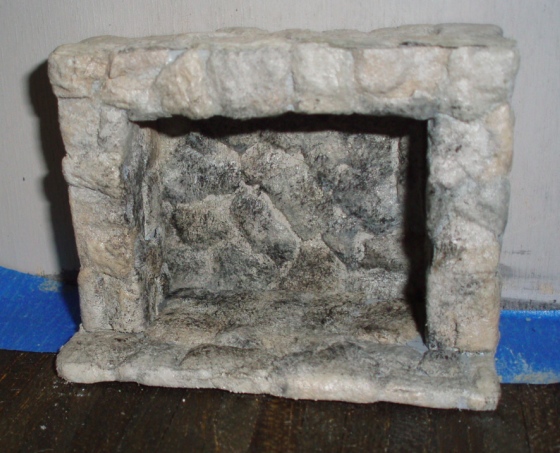
Finally, I used black paint (again with a dry brush) to apply “soot” to the back and inside edges of the fireplace and to the hearth.
I haven’t glued in the fireplace yet, because I’m planning to do some weathering to the walls and floor and it seems like that’ll be easier to do without the fireplace in the way. But I set it in place to measure and glue the skinny stick “logs” on this wall. (I will also add trim around the fireplace, like in the photo, but not until the fireplace is glued in for good.)
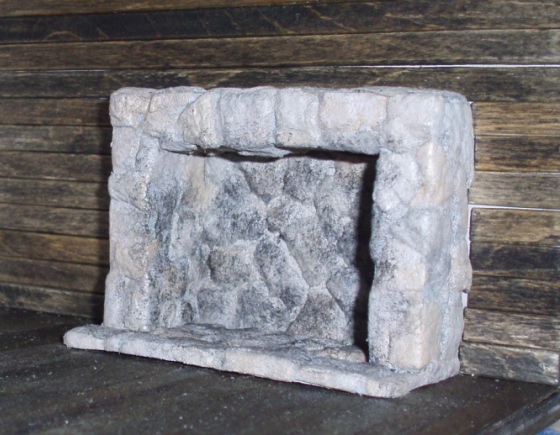
The last step was to add the hanging pot. Karma stepped in here. Several months ago, I bought a set of fireplace tools for the Fairfield that came with a little holder. The tools kept slipping out of the holder and when I tried to resolve this by bending the “arms” that were supposed to hold them a little bit, one of the arms snapped off. (This was like ten minutes after I got the purchase home… I was pissed!)
Because I can’t stand to throw anything away, I tossed it onto a shelf over my workbench and forgot about it. While I was thinking about how to hang a pot in the fireplace, the broken holder caught my eye…
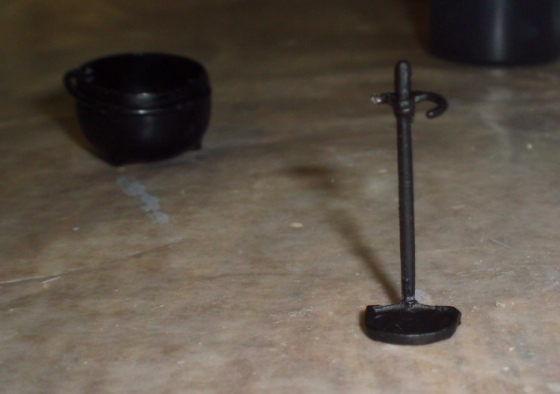
It looks just like a metal hook! And it’s the perfect size!
I picked up the pot this morning at the dollhouse store. It was with all the regular 1:12 pots and pans so I’m not sure if it’s supposed to be half scale. But hey, it fits! It was very shiny so I painted a coat of matte varnish over it.
Ta da!

With the fireplace and the wall around it finished, I moved onto the front wall. This one has a lot of finicky pieces that need to be cut to accommodate the door and window holes. Here’s as far as I got today. Once the windows and door are in, I will add trim around the holes to cover up the jagged edges.
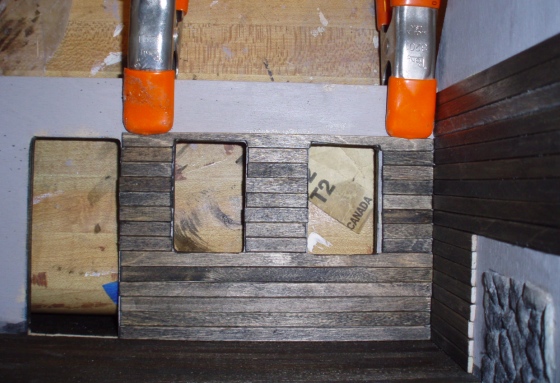
The part above the door is the only wall area that’s longer than a skinny stick. I don’t really want to have joints meeting up there and nowhere else, so I am going to try to buy some basswood that’s the same width/depth as skinny sticks for the top three rows. Hopefully it won’t look too mismatched.
 Emily is a freelance writer, miniaturist, and adventure game enthusiast.


What do you mean when you refer to painting “with a dry brush”?
It’s something I learned in a workshop I took with the Guys from Texas. You dab a stiff brush in paint and then dab most of the paint off on a paper towel, so there’s just a very small amount of paint left on the brush. And then you dab the brush lightly on the thing you’re painting, to give it an accent color.
In the workshop, we used gray paint to give stained beams (on a house near the ocean) a “salty” look: http://www.emilymorganti.com/dollhouse/cypress-fog/cypress-progress4.jpg
I was thinking I could do something like that on the logs. However I’ve also been messing with some gray water-based stain on the interior and it’s doing a nice job of lightening up the ebony, so I’m not sure if I’ll end up needing to do that on the logs. Will figure it out when I get there!
Sorry if this is kind of a silly question, but what method did you use to make the egg carton stones? Did you merely rip up an egg carton and make stone-sized pieces? Thank you for your insight!
Pretty much! There’s more info about the process on my blog here: http://www.emilymorganti.com/blog/?p=4589
Great work once again on the ‘stonework’. What fun to be bringing a childhood favourite to life!