I knew all along that getting stairs into the Queen Anne rowhouse would be a challenge. The stair holes were positioned in a place that wouldn’t fit a regular straight staircase. The original kit may have come with stairs that turned a corner, and apparently Houseworks used to sell stairs like these because I’ve seen them a few times on eBay. But the only half scale stairs readily available now are the straight ones, so bashing was my only option.
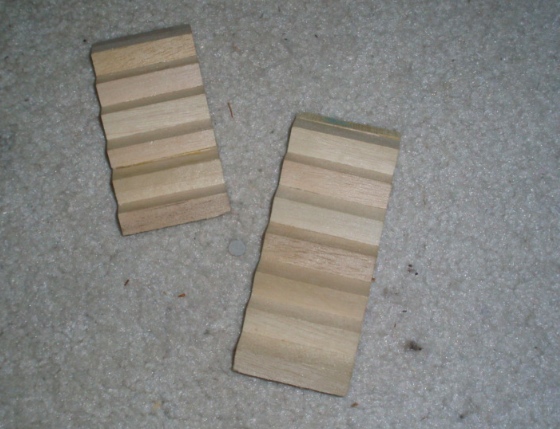
From looking at the photo of the old Houseworks stairs and at the stairs in my own house, I had a basic idea of what I wanted to do but wasn’t sure how to go about it. I got as far as cutting the staircase into two pieces, back in September, before my head started to hurt.
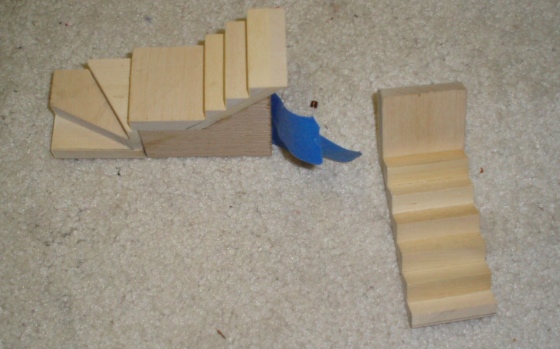
So I put them aside until my parents came to visit last week. My dad is good at figuring out this sort of thing, and he knows how to use power tools! Here’s the basic design we came up with.
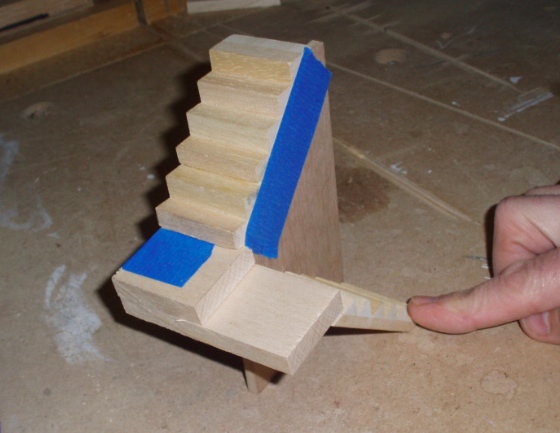
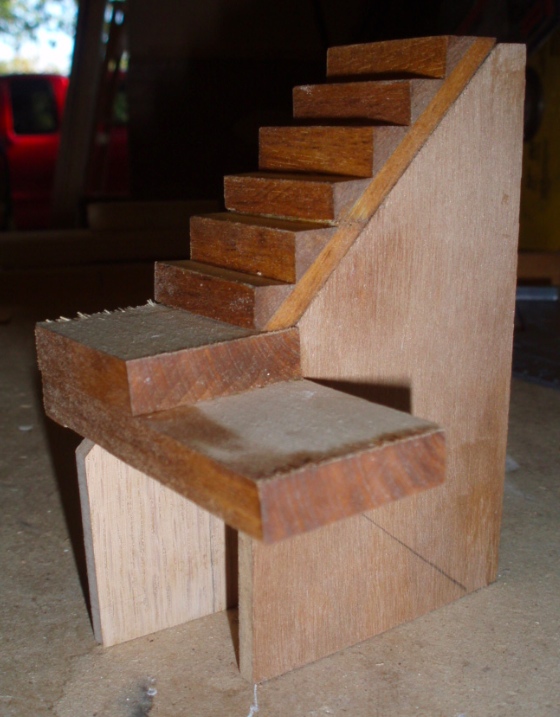
Initially I cut the staircase into two pieces: 6 stairs at on the top piece and 7 stairs on the bottom piece. But I was concerned about headroom, so we ended up making a 2-step landing and removing one additional stair from the bottom section.
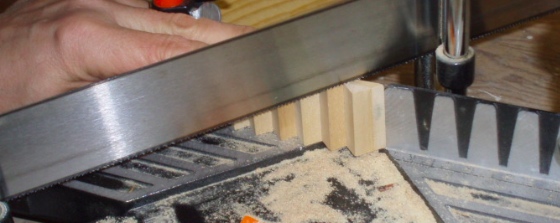
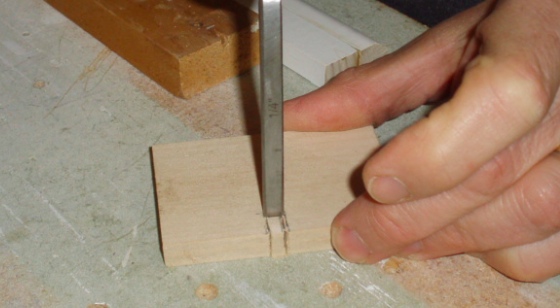
The stairs were easy to cut with a miter box. For all of the other pieces, my dad used the scary circular saw. (I didn’t take any pictures of that, too busy covering my ears…)
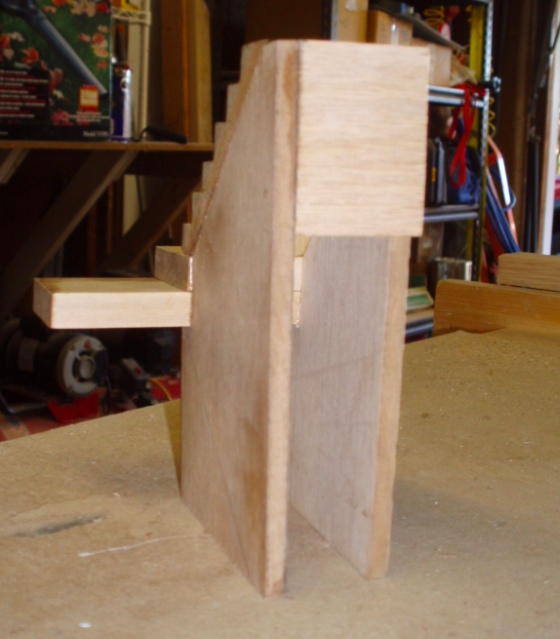
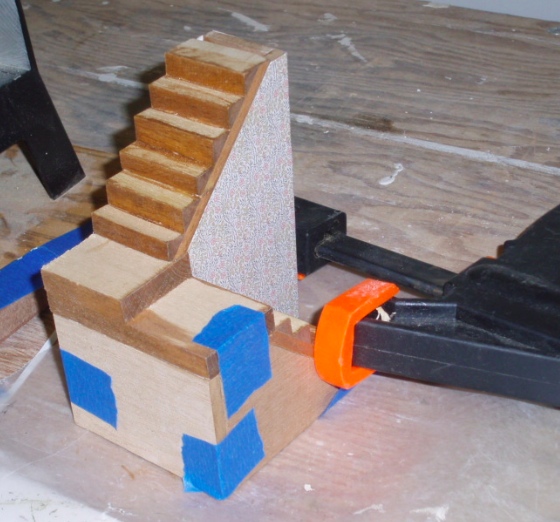
The landings are made from wood that’s 3/8″ thick and the wall pieces are 1/4″ plywood. For the bottom landing, my dad cut a notch out of the center so it could slide into the wall piece.
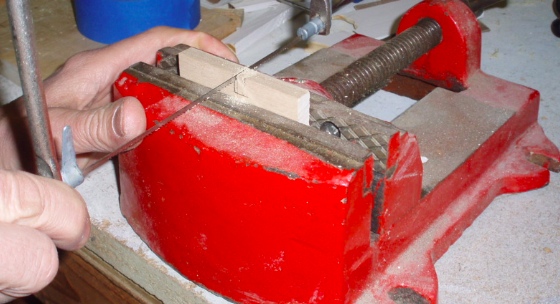
After cutting the side edges of the notch with a saw, he popped it out using a chisel.
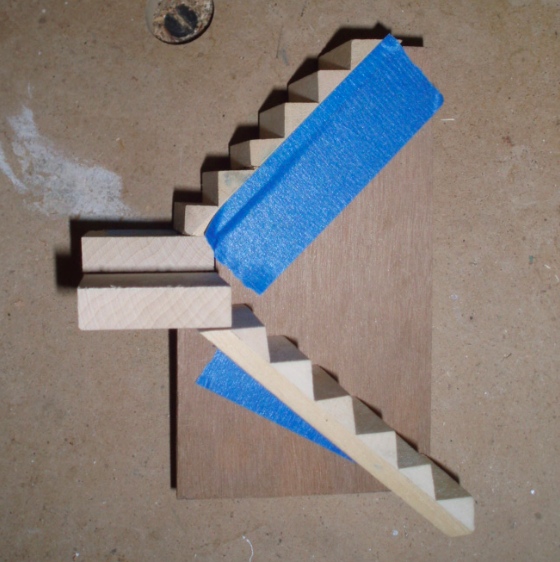
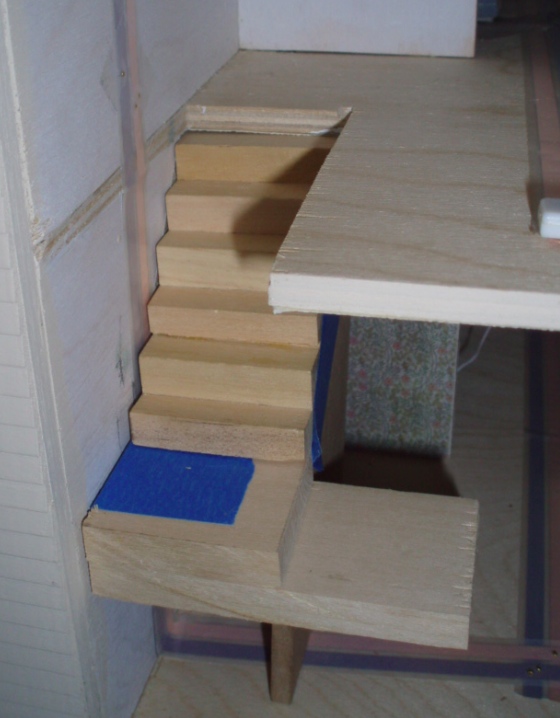
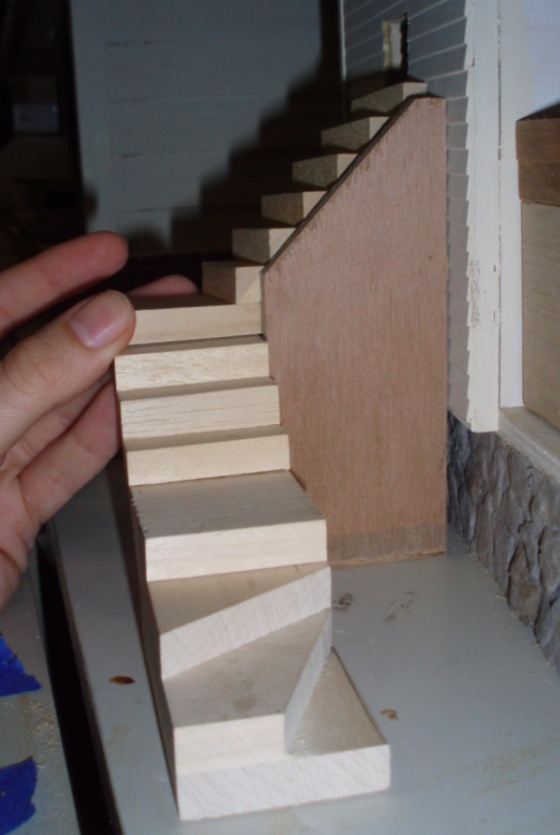
Here’s the top stair section with the two landings. The thickness of the floor makes up the top step, and the top step’s tread will be glued directly to the floor.
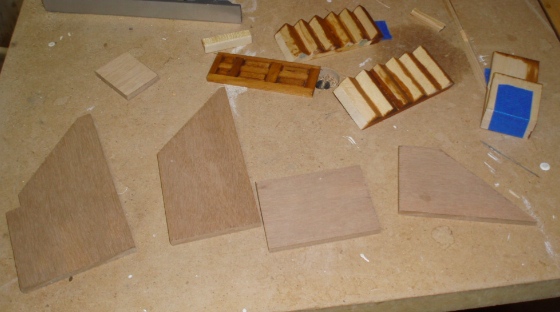
And here are all the pieces involved. On the far left you can see the front wall piece, which has a right angle cut out of it where the top landing piece rests. The bottom landing piece slides in under this. The door is for a closet that I decided to build into the assembly, even though it will be 99% impossible to see once the stairs are in place…
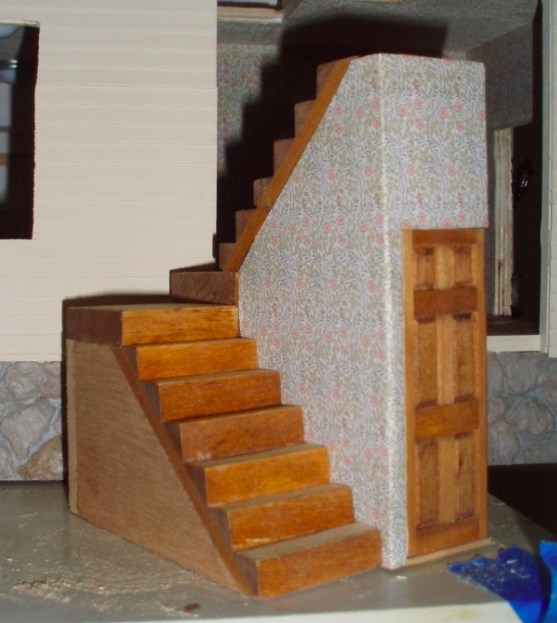
I stained the risers, but not the tops of the stairs since those will be covered with treads.
This is where the closet will be.
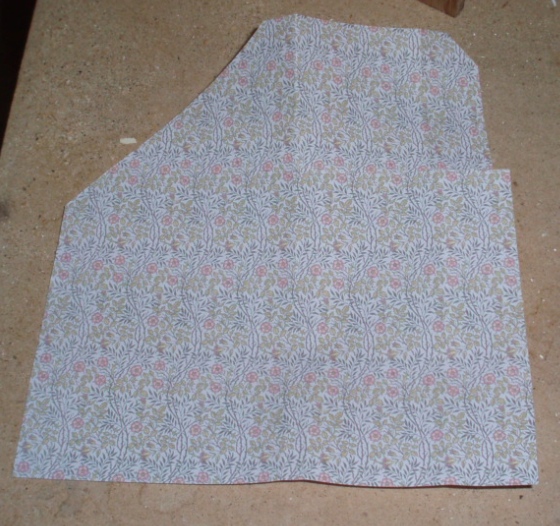
Next I wallpapered the front wall, since it would be easier to do that before the bottom stair piece was glued on. I cut the wallpaper so it would wrap around to the top wall over the closet, as well as inside the closet.
It will be very difficult to see the inside walls of the closet but I figured it didn’t hurt to paper them, just in case. I will probably put a mirror on the wall opposite the closet so you can at least get a glimpse of it.
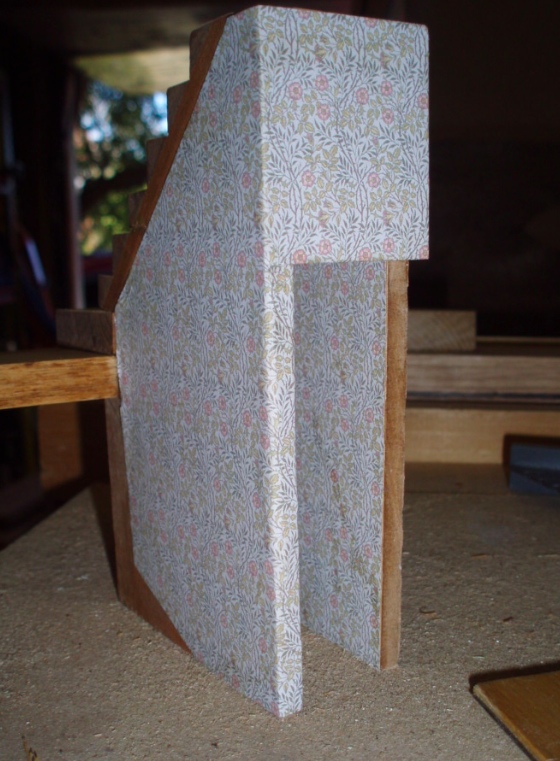
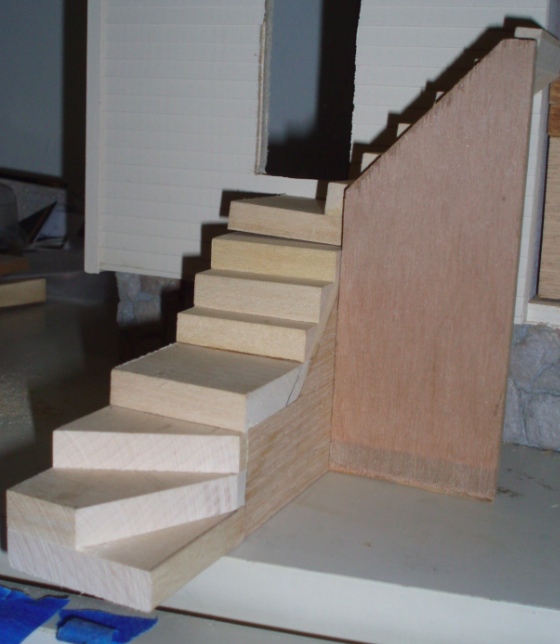
Once the wallpaper was on, we glued the rest of the assembly together.
It’s really hard to get a good photo of this in place, but here’s the end result outside of the house. I haven’t decided yet if I’ll glue this in permanently or leave it so it can be slid out, but I’ll at least leave it out until I finish the wallpaper, trim, and flooring that would be difficult to reach with it in.
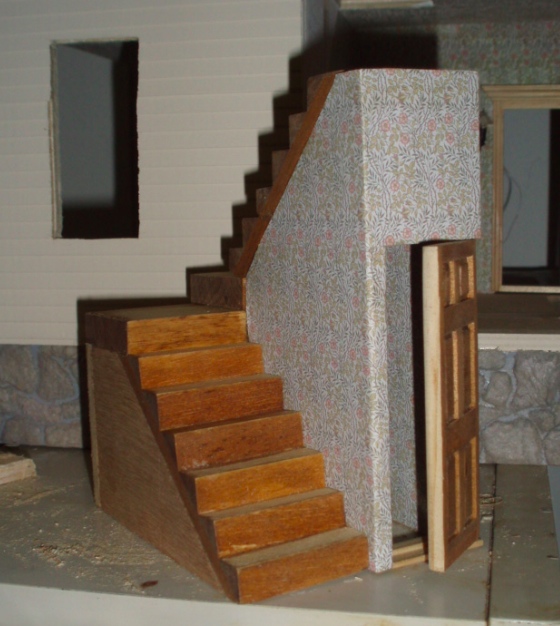
This is a Houseworks door. When I bought this house, the front door was a handmade double door that promptly fell apart, so the closet door and threshold came from that. My dad sanded the door a little to make it fit, so I still have to restain that edge, as well as the threshold. And I’ll probably add trim around the closet door.
On to the second floor! For reasons I don’t entirely remember, we decided this staircase had to be different than the one downstairs. Part of the problem was that the wall we used downstairs, that the bottom portion of the stairway is attached to and lines up with the edge of the ceiling, could not be reproduced upstairs because it would fall into the stair hole. So our option was to build the same staircase but with some slight modifications, and I didn’t like the thought of the pieces not matching up upstairs and downstairs when you opened the wall panel to look in. Also, having two rooms with the exact same layout seemed kind of boring. So my dad came up with the idea to make a U-shaped staircase that wrapped around the open wall of the house.
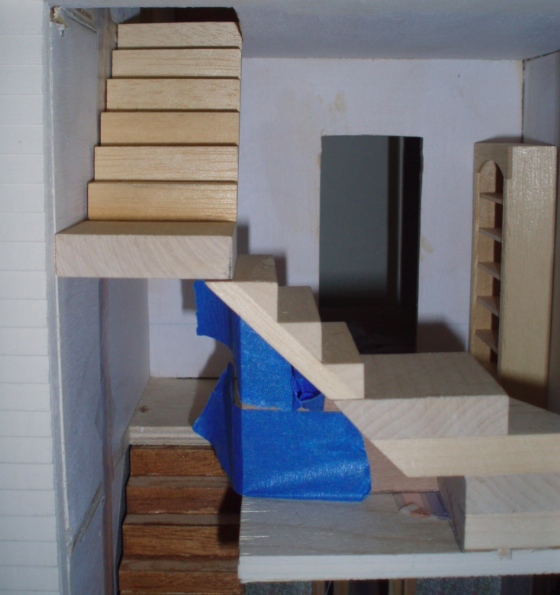
Here are the pieces. The top portion is basically the same, with six stairs and a landing. Then the bottom portion has three stairs, a landing, and three more stairs that go around a corner. His initial design was a little different but I stubbornly insisted on stairs that wrapped around the corner, like in the Rosedale, and he figured out how to make it work.
The front wall has to go outside of the top stair portion, rather than having the stairs rest on top of it like they did downstairs, due to the aforementioned issue with the stair hole mucking up the positioning of the the wall piece.
Here’s another view. I’m planning to make the room with these stairs a reading room or library of sorts… the original plan was to put bookcases on each side of the window with a window seat in between, but that won’t work anymore because the stairs take up space on one side of the window where the bookcase would have been, and the area under the window where the window seat would have been needs to be empty so as not to block the bottom steps. Instead, I might add couch or bench or something to the corner formed by this stairway.
Because of the way the wall pieces come together, there was a bit of floor that was closed off and inaccessible. My dad had the idea to cut it out, which creates more headroom for the staircase below it. (That’s a good thing, because originally the clearance would only have been five feet!)
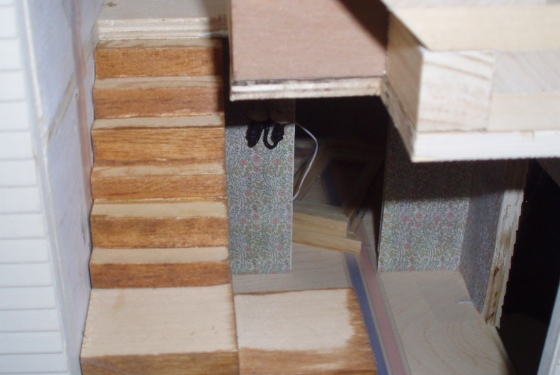
And here’s the view of both staircases in place. Obviously you would never see the exposed pieces in real life, but because this wall opens, they’ll be visible. I will probably paint those the color of the house. Then the stairs will all be stained, and I’ll add banisters. I’m also thinking about adding a light underneath the top landing, that hangs down into the stairwell.
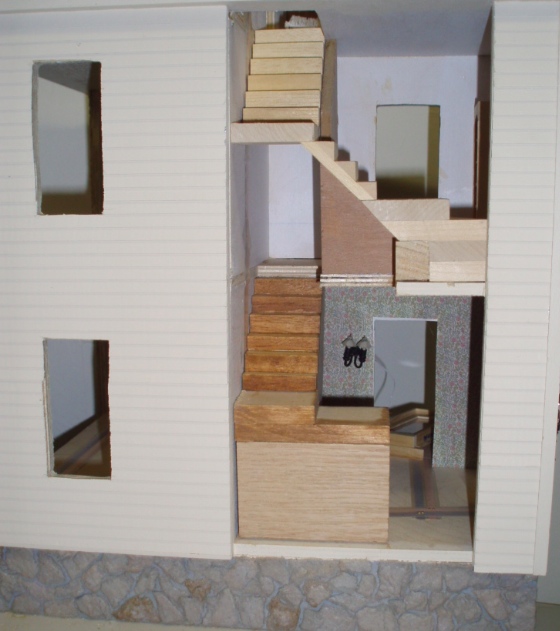
This turned out to be a crazy project that took 10 or more hours of work. It’s not ideal that these stairways are against an open part of the house, but I’m not sure how else we could have done it with the stair holes where they were. Very complicated, but also very rewarding once we figured it out! And I do like that they’re completely different than most dollhouse staircases. Sorry if my explanation of this whole process isn’t the best, but hopefully the pictures will at least give future builders of this house some ideas.
 Emily is a freelance writer, miniaturist, and adventure game enthusiast.


Em,
Good description of a complicated but fun project. I also like how the final combination looks.
BTW, the wall thickness is 1/4 inch, not 1/8 inch.
Dad
I just happened across this today, looking for something else and so glad I did, about 6 months ago I cut my straight stairs in half, wanting to turn them and then couldn’t figure out what to do next, so the whole project got side lined because I needed to finish the stairs to do anything more (LOL) …I think I might be brave enough to try again with your pictorials