Because I’m planning to put the chimney along the seam where the right side panel opens, I decided to put fireplaces in the corner of the rowhouse’s bay window rooms. This has the added benefit of hiding the mess of wires that are running down in these corners to the tapewire on the underside of the house.
I didn’t want to block too much of the opening with a wall, so the wood I cut to fit there is only 1″ wide.
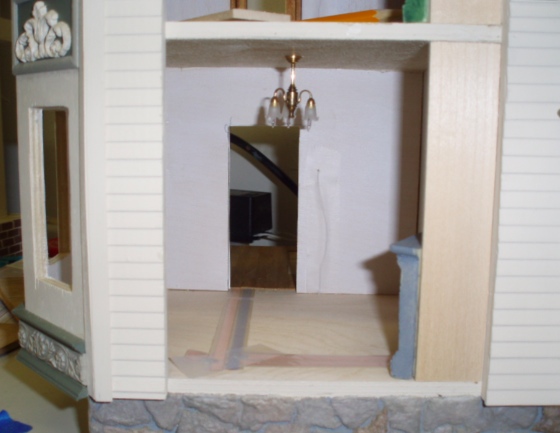
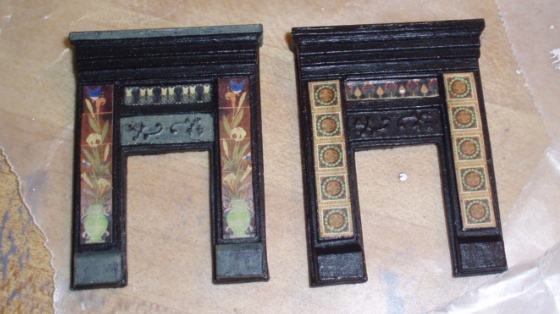
This creates a very small triangle for the fireplace to go up against—only about 1.4″ wide, which I didn’t realize until after I’d committed to it is very narrow for a fireplace! After searching far and wide, I found one at Petite Properties that’s a perfect fit.
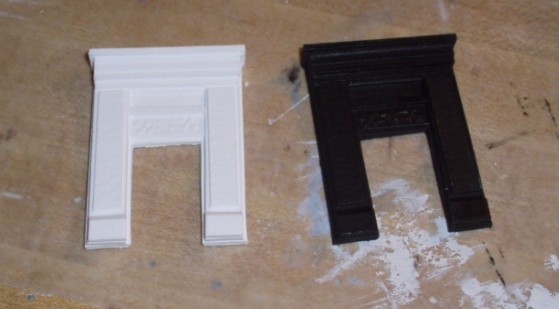
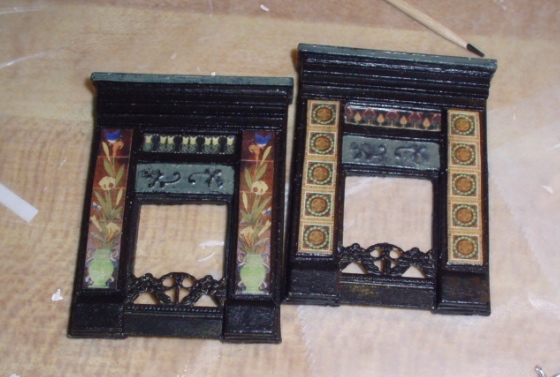
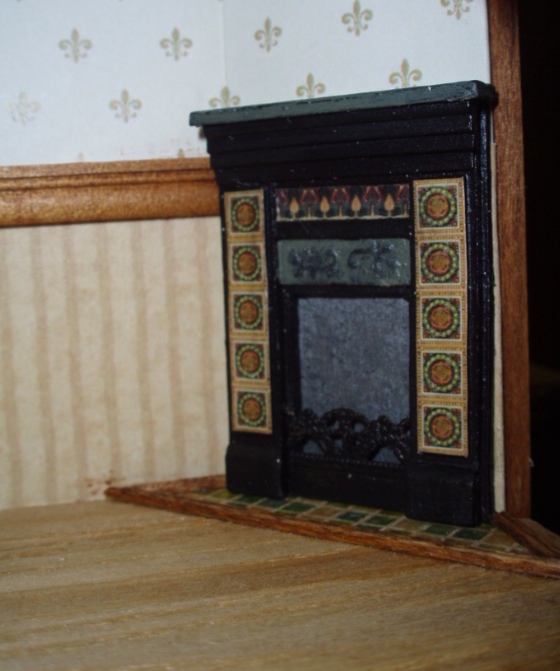
The fireplaces are white resin, and I painted them black to look like cast iron.
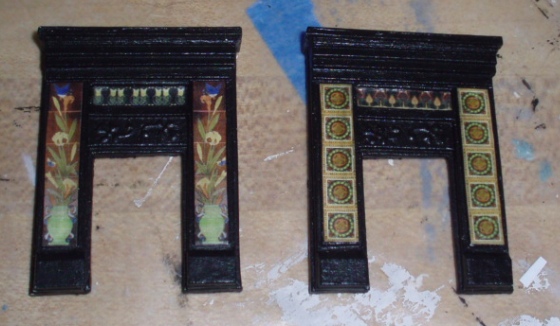
After looking through a library book and at a lot of pictures online, I printed off some decorative tiles from websites for real Victorian fireplaces. After gluing these on, I painted the fireplaces with a couple of coats of matte varnish.
Geoff helped me cut the diagonal walls with the big scary power saw. Since I needed them to be ~1.4″ wide and wood doesn’t come in that width, I got 2″ basswood and we cut it down.
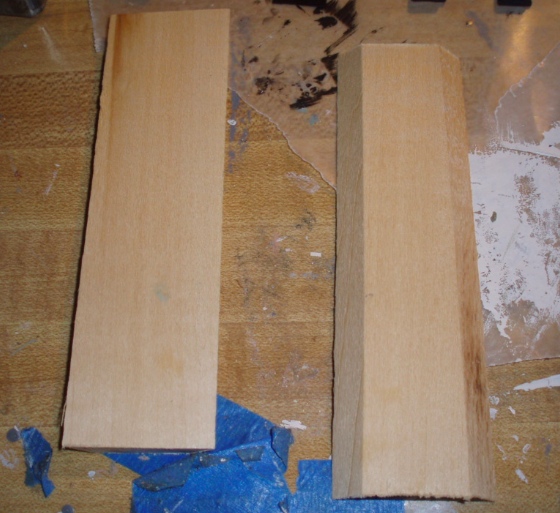
The sides are 45-degree angles so they butt up against the wall pieces.
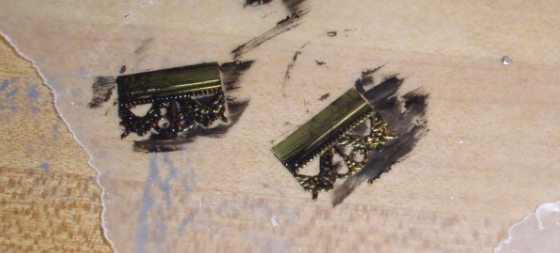
Not entirely satisfied with my “cast iron,” especially on the panel just above the hole where the raised design was getting lost, I started playing around with green paint. This is “Mossy Green,” the same dark green I’m using for accent trim on the exterior.
My first attempt came out nice entirely by accident… I painted the entire panel green, and decided a few minutes later that I didn’t like it, but it had dried too much to wipe the paint away. As I attempted to rub off the paint I managed to rub off enough of the raised portion for the original black to show through. Almost like I planned it!
I also did the feet and the top with a coat of Mossy Green, and then sponged it off with a paper towel. (I ultimately changed my mind on the feet and painted over them with black again. Fickle!)
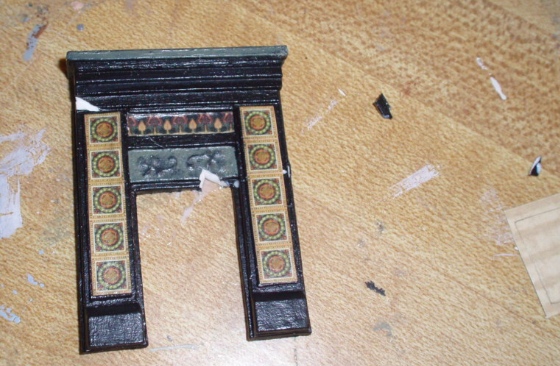
I wanted to add some sort of grating to the front of the fireplaces. After a lot of browsing at the dollhouse store without finding anything quite right, I ended up with this 1:12 scale fireplace fender.
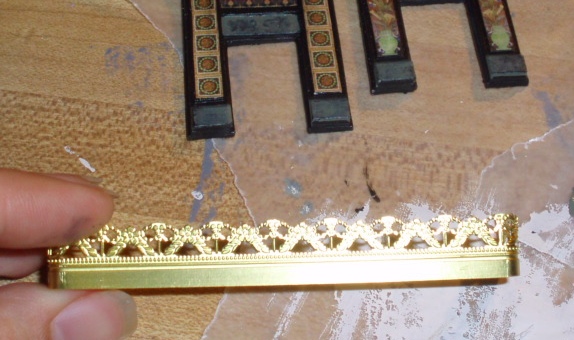
I cut pieces to fit inside the fireplace holes. Also you’ll notice in this picture that I wasn’t able to replicate my success with the black piping on the green panel. This gets the job done, but I like the other one better.
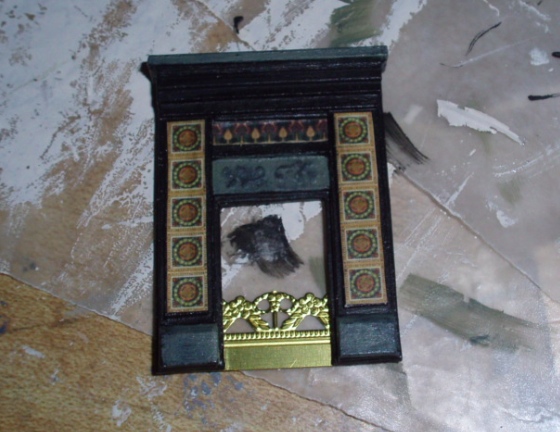
I painted the grating pieces black. This is after just one coat, the paint didn’t want to stick to the shiny surface. I ended up doing a second coat and then a coat of matte varnish.
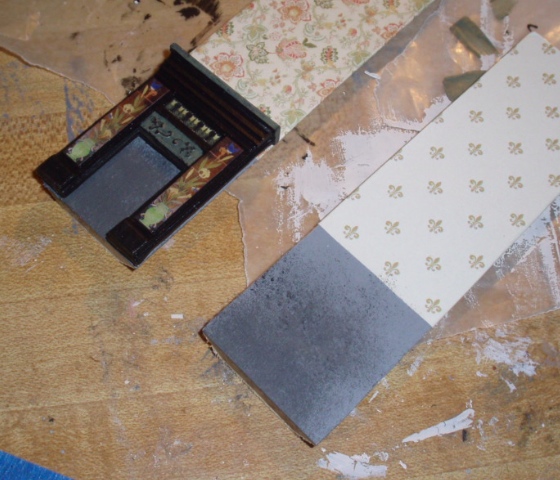
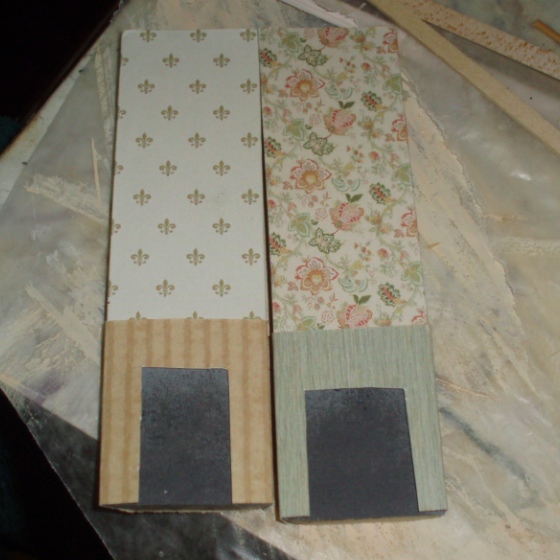
My original plan was to cut a hole at the bottom of the diagonal wall piece so the fireplace would be open. But because this is so narrow, I was worried about the “legs” being too skinny and breaking. After a lot of thought I decided it would be easiest not to have a hole. These fireplaces are going to be hard to see, anyway. Instead, I painted the bottom of the wall pieces gray (the same color I used as “grout” under the egg carton stone on the foundation and chimney).
When the gray paint was dry, I added the wallpaper, being careful to match up the design at the left side with the design on the wall where it meets. (What I should have done was waited to wallpaper that room, glued in the corner wall piece, and then used just one piece of paper so there wasn’t a seam. I wasn’t thinking this far ahead when I did the wallpaper. Blargh.)

The gray seemed too bright, so I used a dry brush to speckle on some black and brown paint, like soot.
Then tragedy struck: the upstairs fireplace went flying out of my hand and landed on the tile floor. Oops.
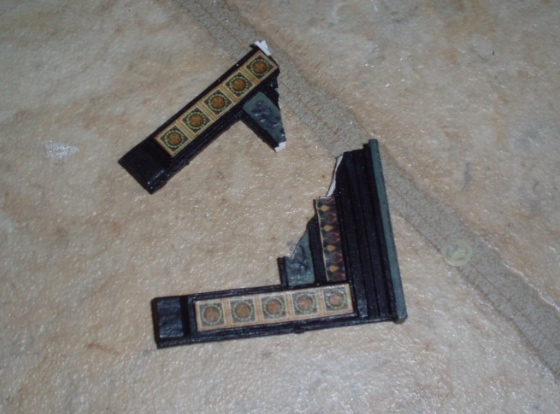
Luckily I was able to glue it back together. It broke into two big pieces and two tiny pieces. Might have been worse, but the paper tiles actually helped hold the legs together. The leg pieces did crack, but since they were still attached to the paper, they didn’t go flying and were pretty easy to repair.
Once the tiny pieces were back in, it looked almost as good as before. After the glue dried (and after this picture) I painted over the cracks and you can barely see them. Phew!

Because the walls were slightly wider than the fireplaces, I decided to add paper to the bottom halves, just in case you could see a sliver of it from some angle (which would have bothered me forever…)
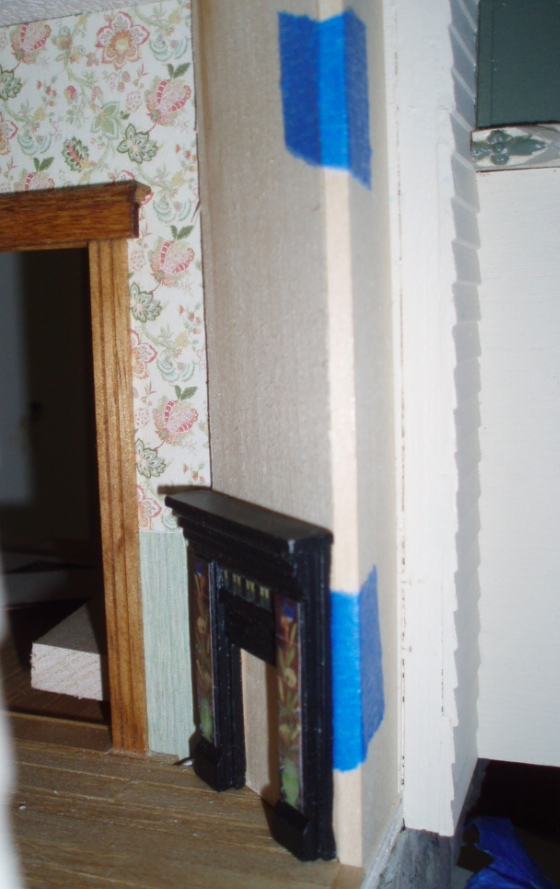
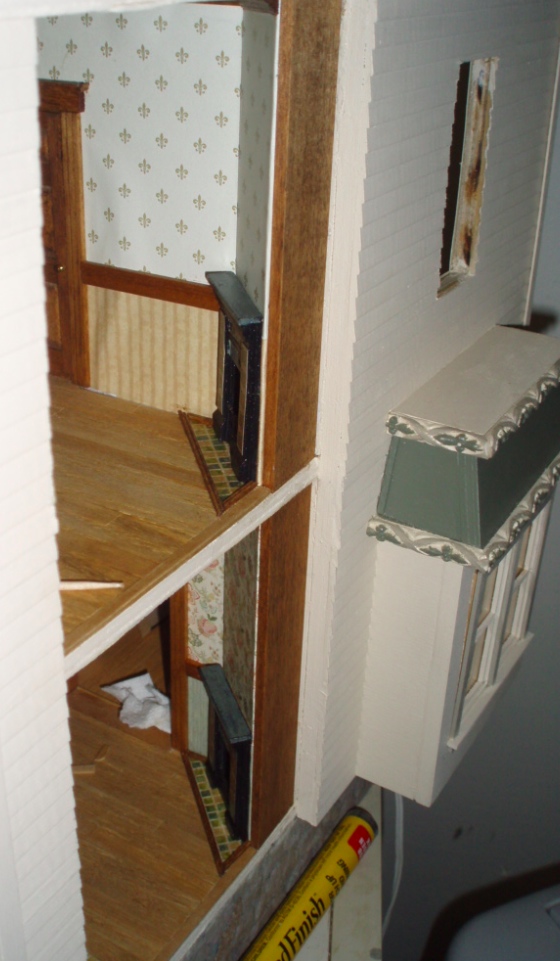
Here are the fireplaces on their respective walls.

The fireplaces have a narrow border around the hole. I glued the grating pieces to this to give a tiny bit of depth (rather than gluing them directly to the wall, as I’d originally planned). You can see in this picture that even after a second coat of paint, some of the gold shows through on the grating pieces. I liked it so I decided to leave it that way.
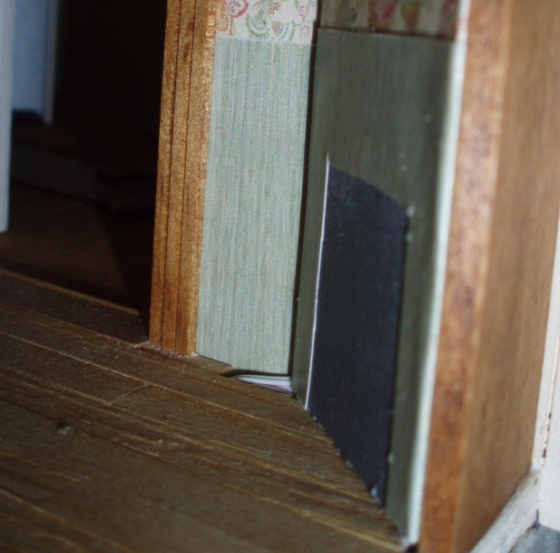
Now to put it all together! Since these are at an angle, it was really hard to get pictures. First I glued in the wall pieces, lining up the wallpaper designs as best I could.
On the first floor, I had some wires off to the side that still needed to be covered up.
I used tile paper from Itsy Bitsy Mini as a hearth, butting up against the wall to cover the wires.
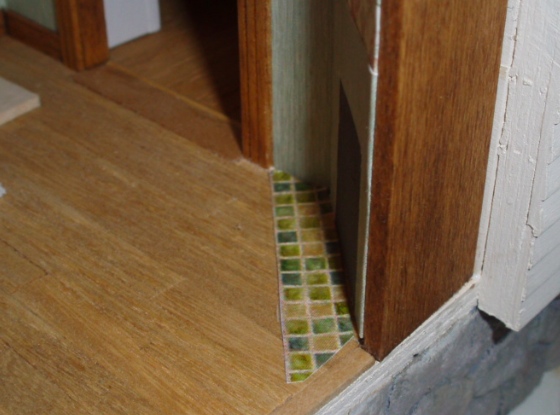
Added wood trim around this.
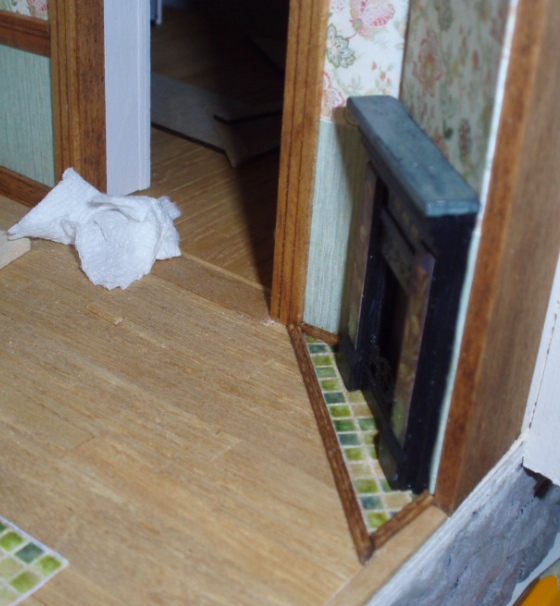
When I repeated the process upstairs, I realized the baseboard needed to run behind the hearth trim. I’ve been waiting for two months for the dollhouse store to get more of this in (it’s actually 1:12 chair rail) and this is the last (tiny!) piece that I have, so I slipped it in temporarily to ensure the hearth trim had enough of a gap for baseboard to go behind it, once I get more.

It’s a good thing I’ll be putting baseboard back there, because I got stain on the wallpaper. Oops.
By the time I figured this out, the glue on the trim pieces downstairs had already dried. I’m not sure if I’ll pull up the trim downstairs to add baseboard behind it, or shave the bottom off the baseboard piece and set it right on top of the trim piece. I’ll worry about that once I actually have the baseboard.
I also added crown molding but couldn’t get a good picture. It looks nice, take my word for it. :)
 Emily is a freelance writer, miniaturist, and adventure game enthusiast.


I just love this and how they look. I like them in the corner too! The one on the left is my favorite, but they’re both very nice!
These are a very attractive way of covering up the wires and at the same time adding interest and character to the rooms.