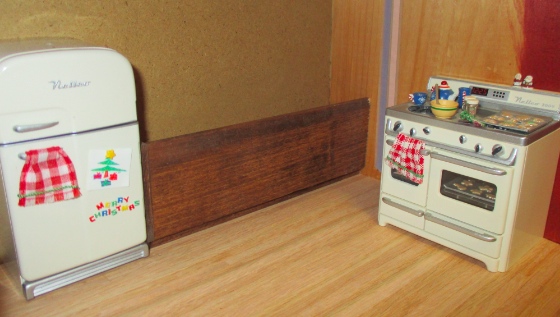
Because the Hallmark ornaments I’m using in my breadbox roombox have funky dimensions, I’m scratch building cabinets to go with them. This was my first time trying this, but how hard could it be? I started with the cabinet next to the fridge; we’ll go around the corner with a cabinet next to the stove in a future blog.
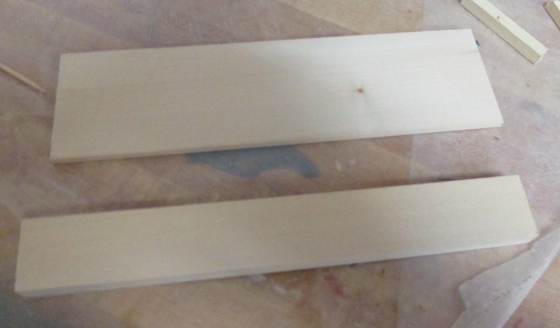
I started with two pieces of basswood – one 2″ wide and one 1″ wide – and cut them to the length I wanted the cabinet to be.
I glued these together, using spacers to leave a quarter inch at the bottom to serve as a toe kick. I could have used a smaller piece of wood for the toe kick but wanted plenty of overlap for the two pieces to attach.
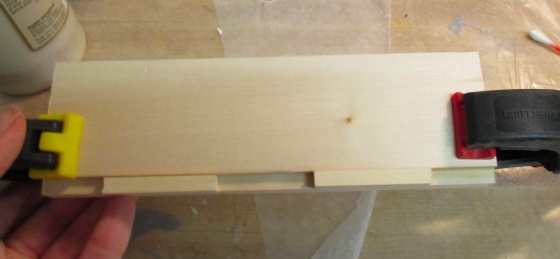
The 2″ piece of wood is too large for my miter box and my little power saw, and Geoff wasn’t around to help me with the power tools, so I cut it using a hand saw, which was a pain. (I’m used to half scale & smaller wood!) To match the depth of the fridge, I needed a 1.5″ piece for the side of the cabinet, and I didn’t want to try to hand cut my 2″ wood down to that size, so instead, I used the miter box to cut two .75″ pieces to glue together. I used a utility knife to cut the notch out of the front piece.
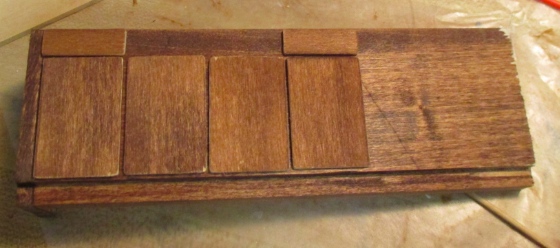
Skipping a couple steps – glued together and stained, it looks like this.
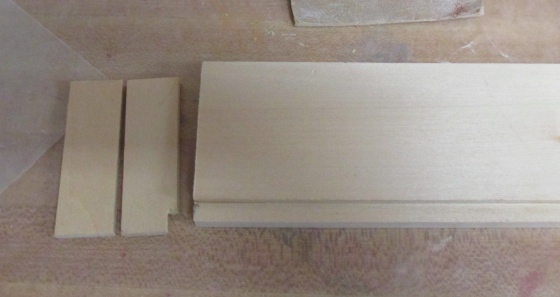
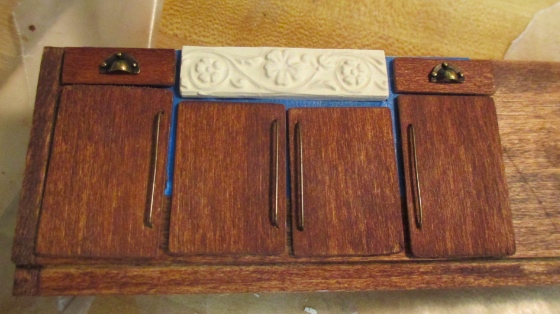
My cabinet is 6.5″ long but the cabinet that butts up against it will be 2″ deep to accommodate the stove depth, so that leaves 4.5″ visible. I cut four door fronts and two drawer fronts, all 1″ wide, from thinner pieces of basswood. These doors will not open.
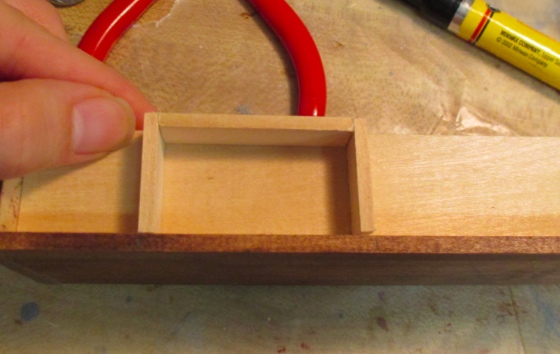
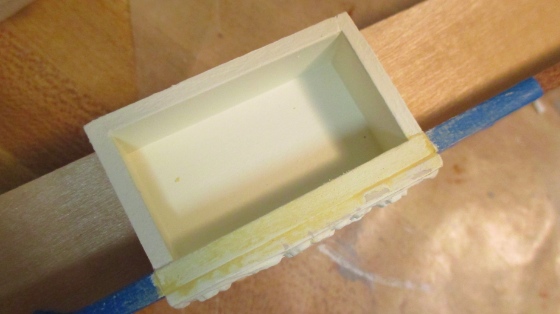
Next I tackled the sink. To simplify the amount of cutting I’d need to do to the countertop – and because it’s trendy right now – I decided to make a farmhouse sink. I started by building a three sided box. The bottom piece is longer than it needed to be, but I thought gluing in a longer piece would add stability to the rest of the cabinet. (Probably not, but it’s not hurting anything.)

The front of the cabinet forms the fourth wall of the sink.
My original idea was to add a piece of basswood with rounded corners to the front, to look like the sink extends through the front of the unit. (Again, I wanted to minimize cutting of the big piece of wood.)
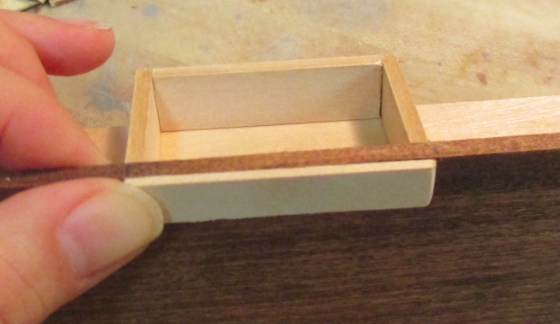
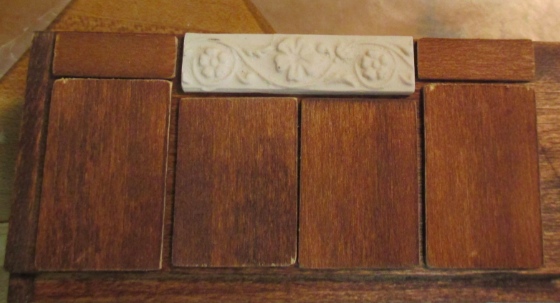
With the doors and drawers, it would have looked like this.
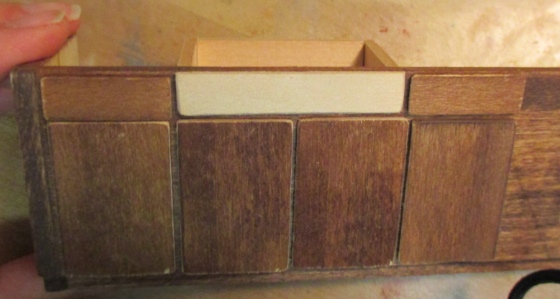
Then a scrap of resin trim left over from the Queen Anne Rowhouse caught my eye. I’d seen some pictures online of farmhouse sinks with designs in the front, so why not? I had to cut down the two middle doors a bit to make it fit.
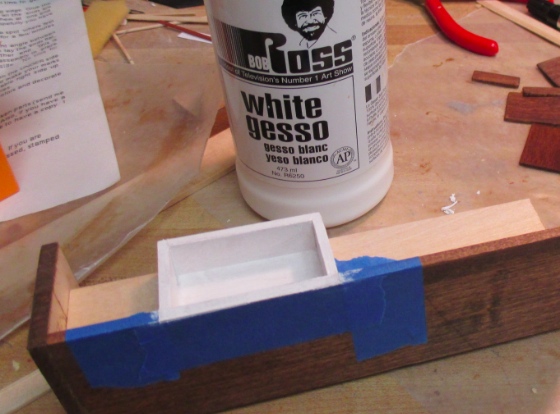
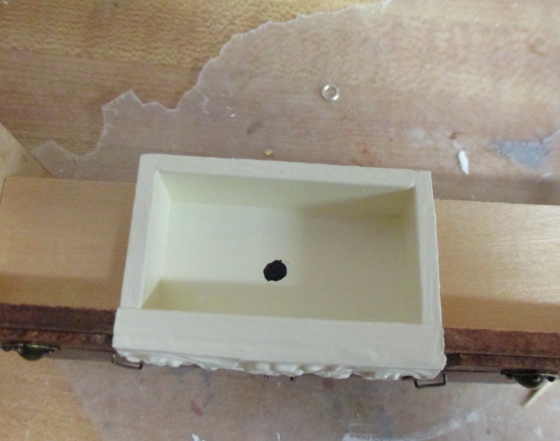
Following the advice in this tutorial, I painted the sink with several coats of gesso, sanding in between. This smoothed out the grain so it doesn’t look so much like wood.
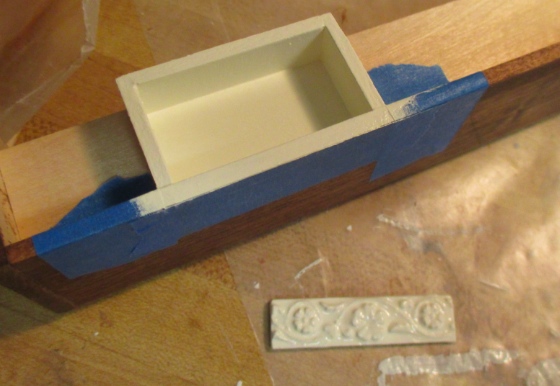
Next I painted the sink and front piece with an off-white paint I have named Raw Cotton that’s close to the color of the fridge and stove. It’s not as yellow as it looks in this photo, which was taken with the flash. I watered down the paint to minimize visible brush strokes.
When that was dry, I glued on the resin front.
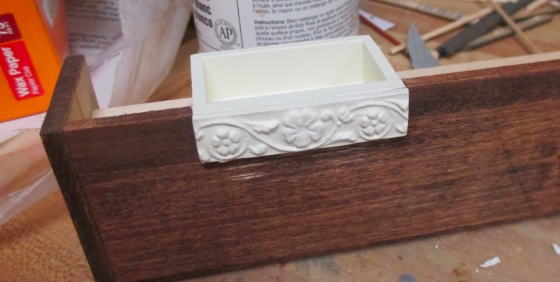
The resin piece wasn’t completely flat and left a visible seam that I needed to hide, since the sink is supposed to be all one unit. This is how it looked after I went over it with more paint — not good enough.

I added woodfiller (below), then another coat of gesso, and finally another coat of paint.
While the last coat of paint was drying, I finished the drawer and door fronts. I made handles out of some jewelery eye pins left over from when I made the hanging pot rack for the Rosedale.
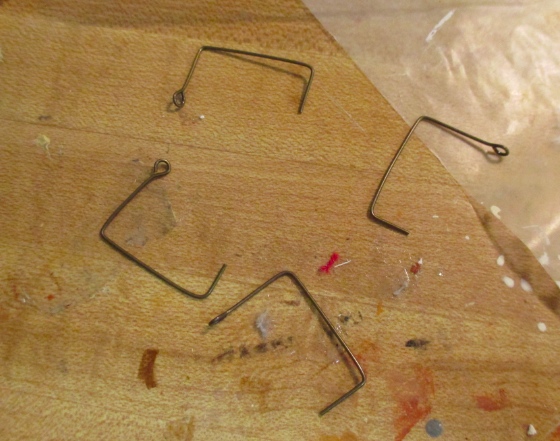
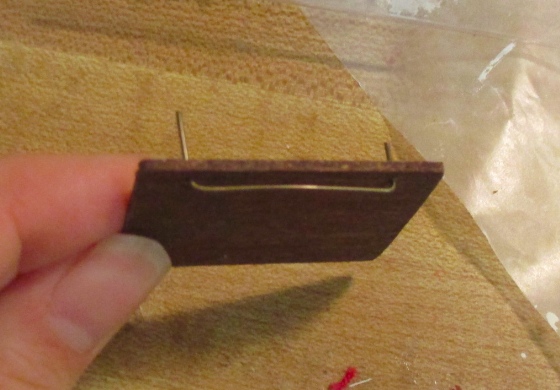
I poked holes with the pilot punch tool, inserted the handles, and cut off the excess wire from the back.
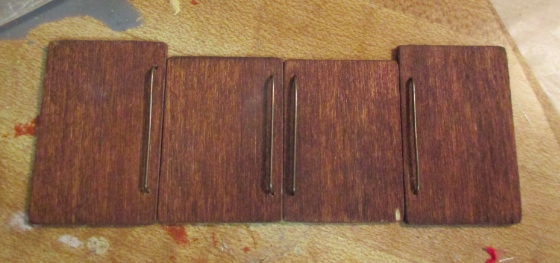
Here are the four doors. The handles aren’t exactly the same length (especially the one on the far right) but I’m trying not to be OCD about it.
As luck would have it, the drawer pulls I’d ordered online arrived in the mail while I was working on this. Thanks, USPS!
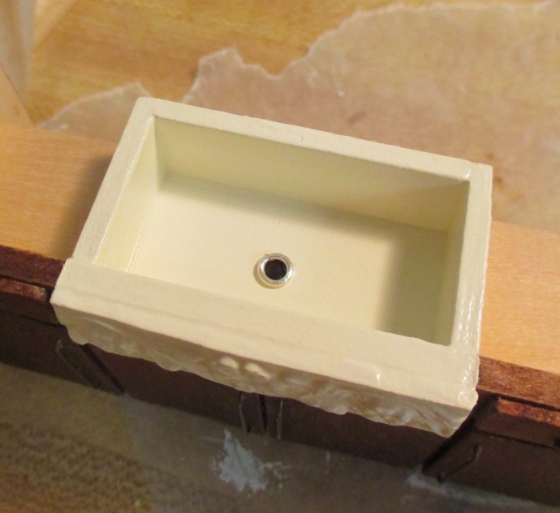
Once the sink paint was dry, I painted the sink with gloss varnish. It’s hard to tell in the photo, but the glossy sink looks reasonably like porcelain. Then I removed the masking tape and glued on the drawers and doors.

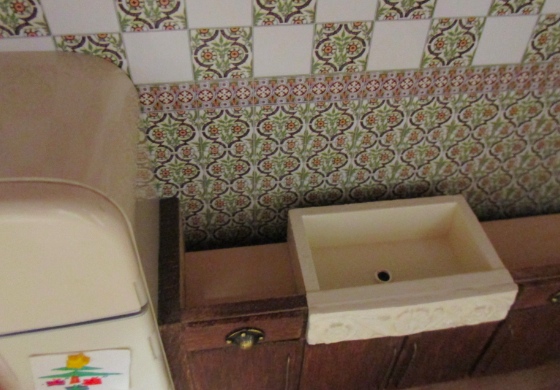
After the gloss varnish dried, I painted a black spot in the sink for the drain.
Finally, I glued in a jump ring to finish the drain.
Here’s how it looks in the roombox. The door handles kind of blend in – thicker wire would have worked better – but I do like that they’re the same finish as the drawer pulls. You can’t tell from the picture, but I coated the wood with Minwax finishing wax, which gives it gives it a nice soft finish.
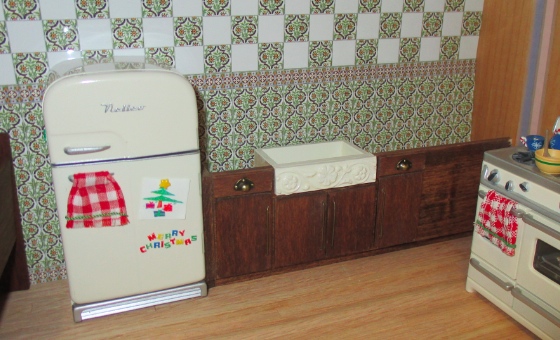
It turns out you can only see the drain if you stick your head in the roombox to look for it. Oh well, at least I know it’s there…
I’m waiting for the stove hood I ordered from Miniatures.com to show up before I make the other cabinet, since its placement will determine the stove’s placement and the length of the cabinet. Once the second cabinet is finished and they’re glued together in an L-shape, I’ll add the countertop.
 Emily is a freelance writer, miniaturist, and adventure game enthusiast.


Looks good! Do like that sink :)
I too have these ornaments! You’ve inspired me to get to work on creating something to use them in! This roombox is just wonderful! You’ve done a great job!