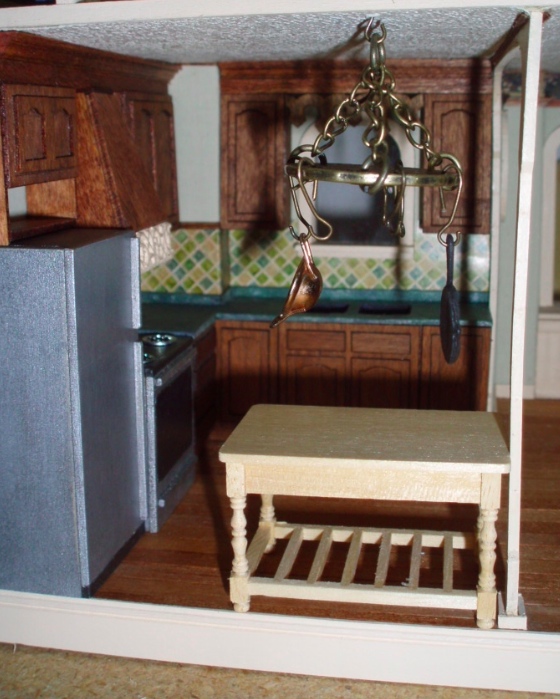
After finishing up the Rosedale kitchen, I felt like it was missing something. The space is fairly compact but I thought I could get away with a small island up against the room divider, with a hanging pot rack above it. I looked online for half scale pot racks and could only find very pricey handmade ones, so I decided to make my own at a fraction of the price.
Here are the parts I used, from the jewelry area of Michaels:
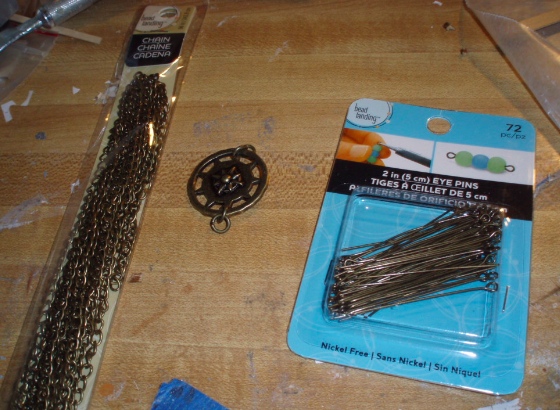
I started by looking for a metal embellishment to serve as the rack itself. I almost went with a black wrought-iron looking thing, then happened across this circular pendant. I can’t find any evidence of its existence online to link to, but the tag says it’s a ShortCuts “Metal Connector” from Blue Moon Beads. It’s about 1-1/8″ in diameter and if I’m looking at the right item on the receipt it cost $3.99. I bought the chain and the eye pins, which were $3.99 and $2.99 respectively, in the same antique gold color to match the pendent.
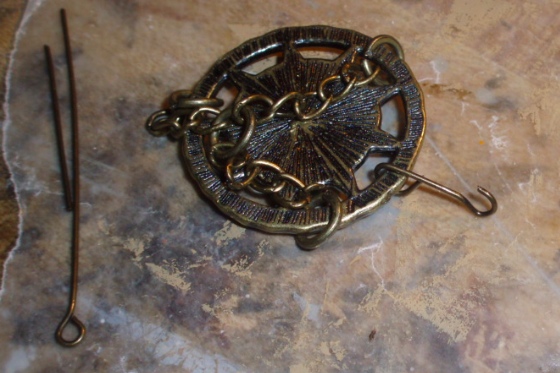
The pendent had four jump rings attached to it. I probably should have bought smaller jump rings and a smaller chain, to be more in scale, but I didn’t want to buy a whole new set of jump rings when I only needed the four that came with it. I opted for this chain rather than a smaller one so the jump rings would fit through it. I positioned three of the jump rings evenly around the pendent and connected chain pieces to those, then to the fourth jump ring to hang from.
Next came the hooks. I bought the eye pins as opposed to plain wire so I could neatly make them into hooks by opening up the circular part with needle-nose pliers.

I then cut the wire down and folded the top over the edge of the pendent.
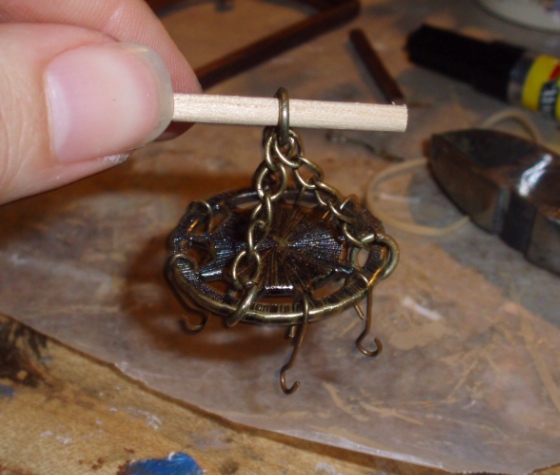
Each hook looks a little different but I think it goes with the “hand forged” look of the metal. The whole thing is kind of bohemian and artsy.
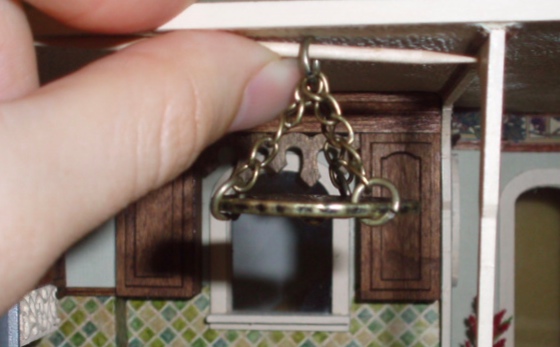
Hanging the pot rack from the ceiling was the hardest part! I didn’t have any very small eyelet screws and even if I had, they wouldn’t have been the right color of metal. I tried poking a hole in the ceiling with the electricity pilot tool and then shoving a hook (made from the same wire as the hooks on the pot rack) into the ceiling, but couldn’t get the pilot tool to make a good enough hole for it to “take”.
Finally, after a lot of wrestling, I managed to screw in the smallest eyelet screw I had, just enough to make a decent hole in the ceiling. I then dabbed the tip of my hook in super glue and shoved it into the hole. So far it’s staying put.
The island in the photo above is a placeholder. A few months ago I built an island from a kit to go in my Queen Anne Rowhouse. It included a butcher block top that was made by gluing alternating types of wood side by side. It was so easy with such a nice result I wanted to do it again.
I bought two pieces of 3/32″-square strip wood from the dollhouse store — one basswood, one cherry. I knew I wanted the island to be not as wide as the one I was using a placeholder, so I just measured the pieces to be slightly smaller than the width of that table.
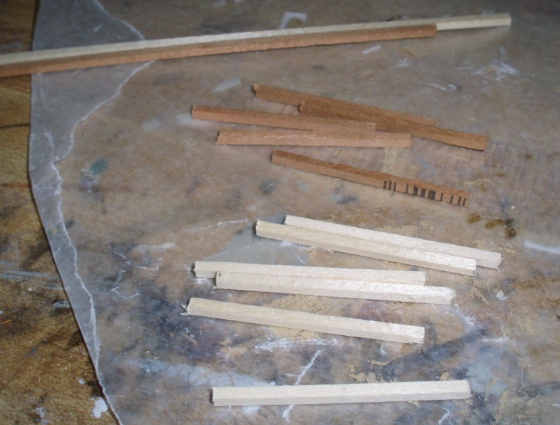
I wasn’t super precise in cutting the pieces, as you can tell from the jagged edges. I also didn’t bother with sanding before gluing them together.
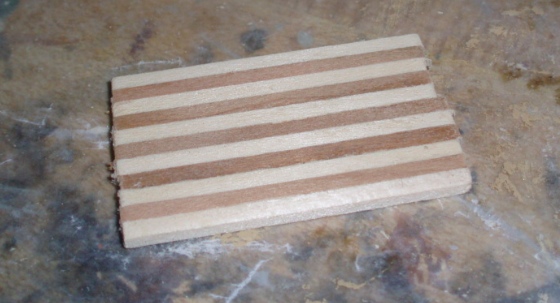
With the pieces glued, I took the butcher block over to the disc sander and leveled out the edges. Then I hand-sanded the whole thing with fine grit sandpaper and rounded the edges with an emery board.
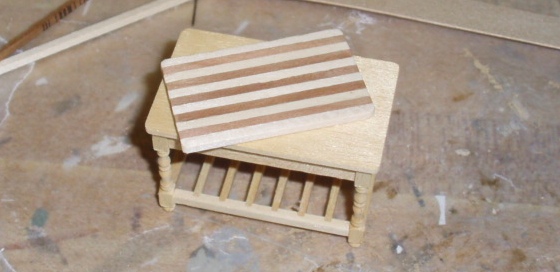
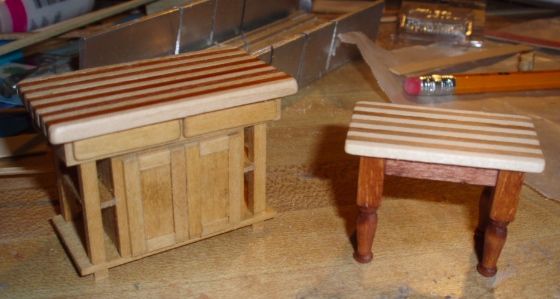
Here you can see how its size compares to the original table. (This would be a great method for making cutting boards, too!) The finished table top is about 1-11/16″ x 1″.
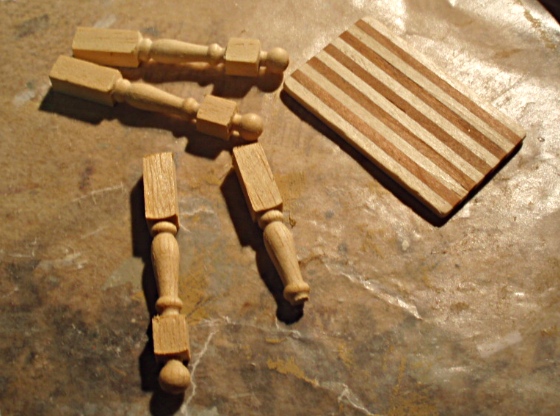
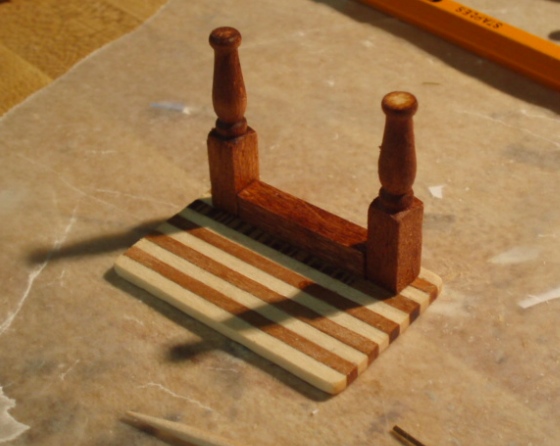
Next I cut legs from half scale newel posts. Since there will be pots hanging down, I wanted to make the island a little shorter than the placeholder table. I decided to cut off the block and ball at the end, but if you wanted a taller table you could just cut off the ball, and then sand the blocks at the top and bottom to achieve the desired height. (Sorry for the wonky lighting in this picture, the flash was off!)
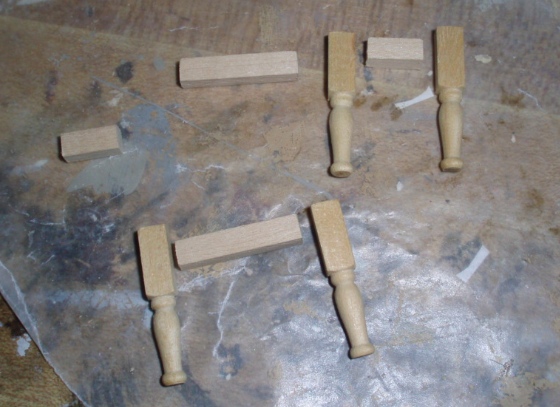
I had some scrap wood about the same thickness as the blocky part of the legs, I think it’s 3/16″ square. I cut two long pieces and two short pieces to form the base of the table. Again this was all eyeballed, but for those following along at home the longer pieces are about 15/16″ and the shorter ones are 7/16″.
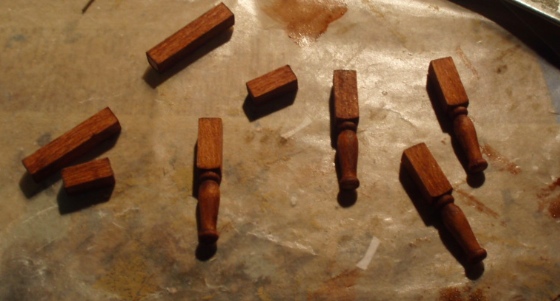
I stained all of those pieces with ACE Hardware Red Mahogany.
While the stain was drying, I applied Minwax finishing wax to the tabletop. The island I built from a kit has a coat of this, too. It makes for a nice smooth surface and adds a bit of a golden tinge to the unstained basswood, but unfortunately you can’t really tell from the photo…
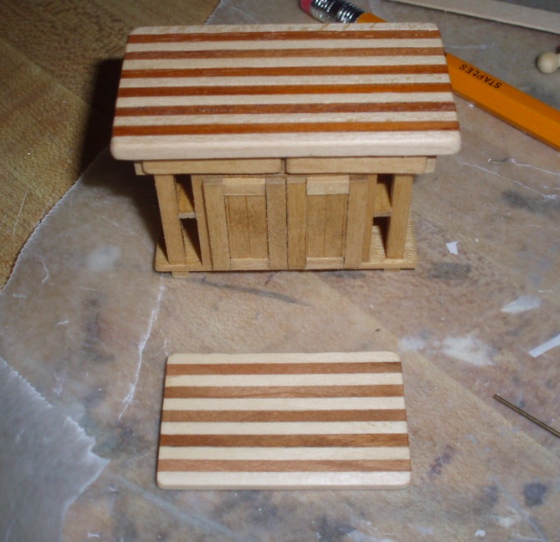
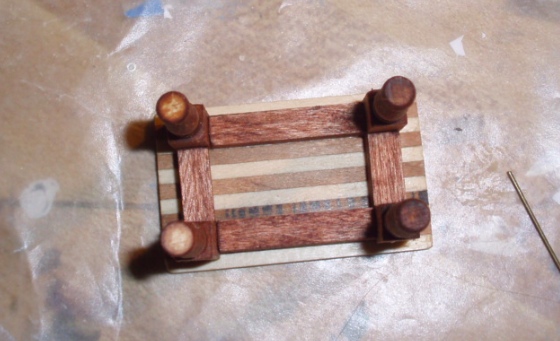
I glued the legs and base to the underside of the table top, using the stripes as a guide for placement. (Those black lines in the shadow are a bar code stamped on one of the pieces.)
Here it is with all the pieces in place. The stripes made it easy to keep the assembly straight and square.
Ta da! Considering how easy this was to make, I kind of can’t believe how well it turned out.
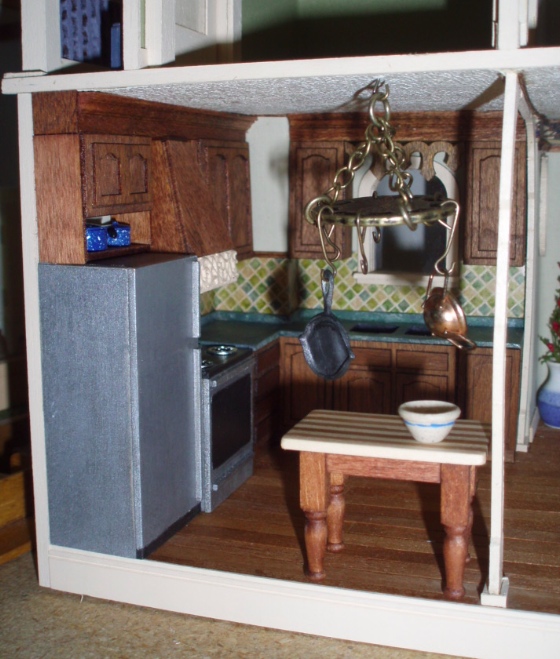
And here’s the finished island in place. It’s a bit shorter than the countertop, but then again so is my real life butcher block island. I think it’s just what this little kitchen needed.
I need to buy some more pots for the pot rack… I have a bunch, but not with holes in the handles. The pot rack has nine slots altogether and right now six of those have hooks on them, and the other three have jump rings. I might end up adding hooks to the slots with jump rings, too, but will wait to see how crowded it looks with six pots on it first.
Altogether the pot rack parts cost $11 (with a ton of chain and eye pins left over) and the island pieces were $6 or less. Ironically I’ll probably end up spending more on pots than on both of these items combined.
 Emily is a freelance writer, miniaturist, and adventure game enthusiast.


Leave a Reply