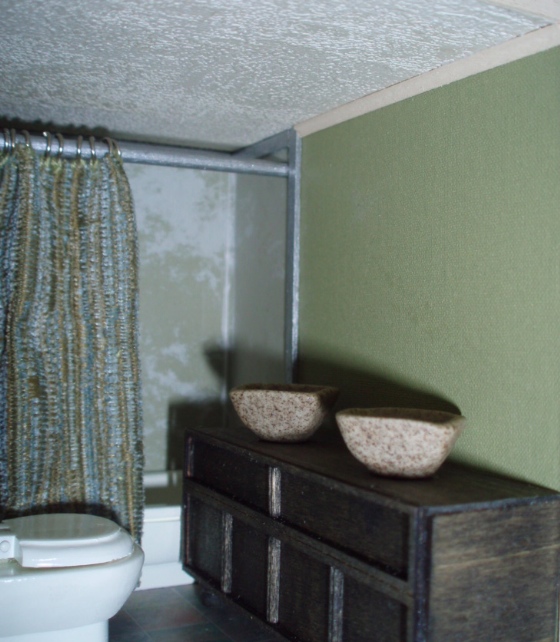
I’ve been working on the Rosedale’s bathroom, starting with building a vanity out of basswood. I glued square pieces on the inside corners to support the corners. The stain is Minwax ebony.
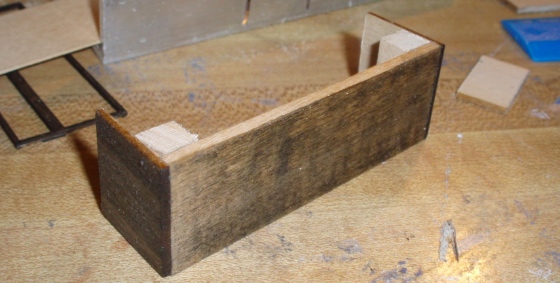
I got the idea to make this vanity from a leftover piece from rowhouse kitchen kit. This was supposed to be the front of the refrigerator. I turned it on its side.

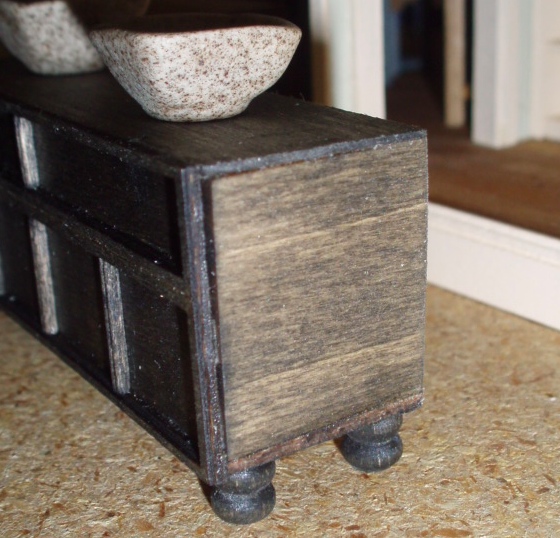
I hate the “above ground” sinks that are popular now, but the lady who lives in this dollhouse is trendy! These are 1:12 bowls I got from Miniatures.com a few years ago.
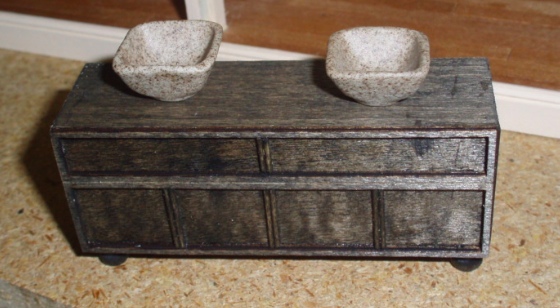
The feet are pieces removed from 1:12 porch spindles. (I used other parts of the spindles for another project I haven’t posted about yet…)
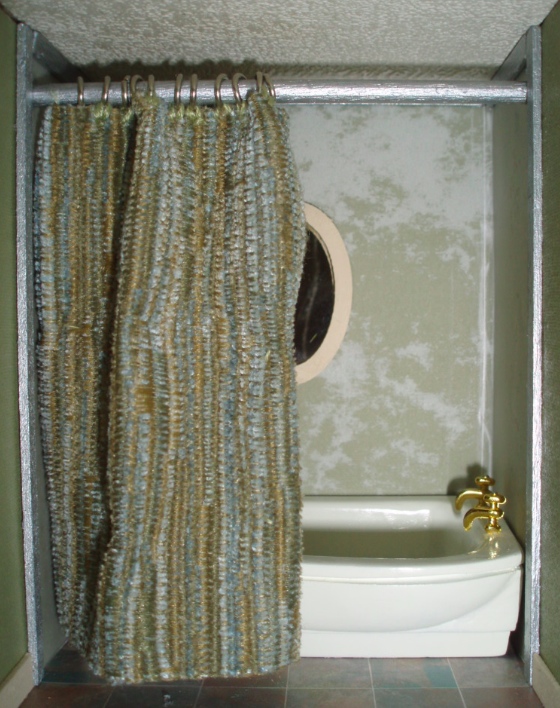
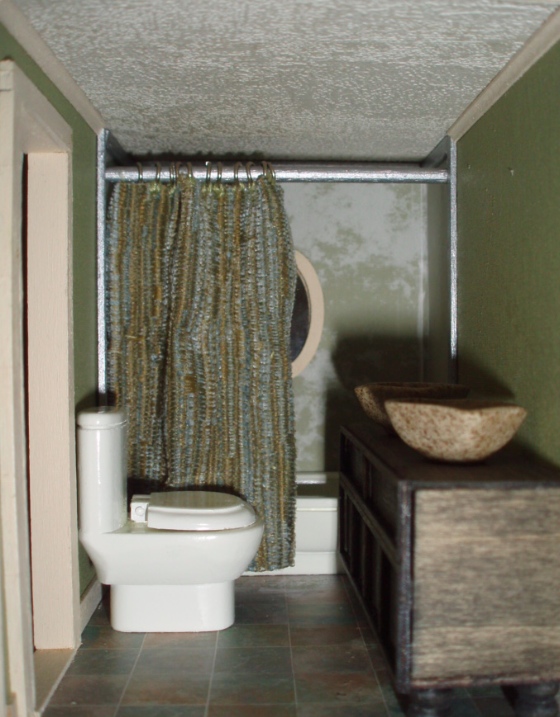
The vanity fits with just enough space for a bathtub behind it. The toilet and tub are from one of the funky bathroom sets I bought from Cascade Miniatures last fall.
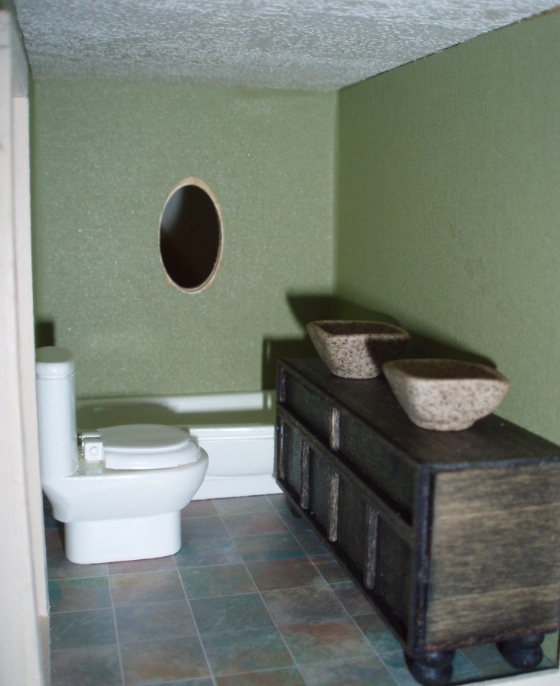
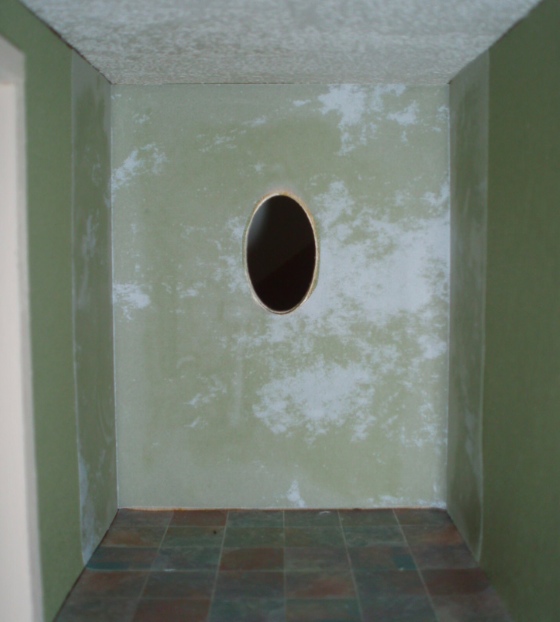
I wanted to add some kind of tile surround to the bathtub but that would go well with the green wallpaper and not compete too much with the colored tiles on the floor. After a few failed attempts with tile paper I got the idea to use this “cloud” vellum paper over the wallpaper for a marbled effect. As an added bonus, creasing at the corners caused a white stripe that looks like grout or caulking.
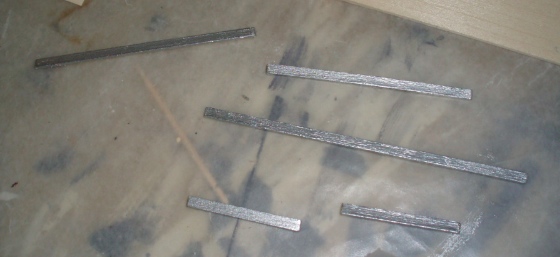
I initially framed this with strip wood painted the same color as the trim in the house. (On the right it butted up against the top of the vanity, that’s why the wood didn’t go all the way down.) As soon as I got this glued in and saw it, I decided silver would look better. So I ripped it out, unfortunately pulling the (not quite dry) vellum out with it.

I cut new pieces and painted them silver.
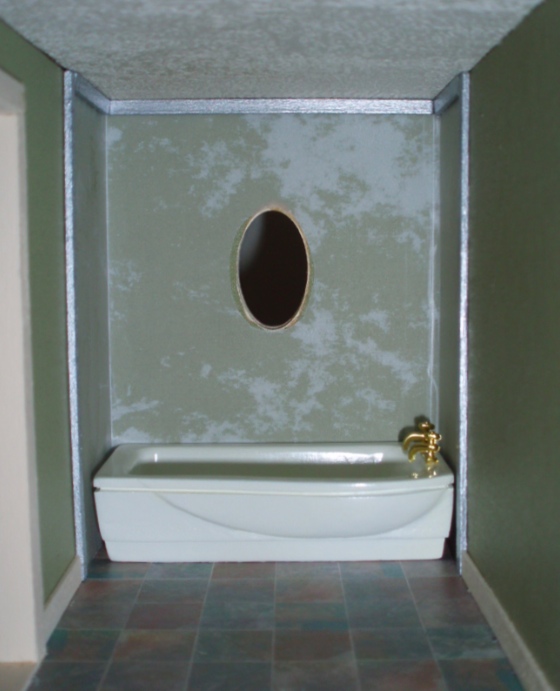
I managed to cut another piece of vellum but it was tough to do since the walls were sticky. My right corner crease wasn’t in quite the right place this time but I decided to suck it up. This is a tiny spot to get my hands into and sometimes you have to call it good enough.
Here it is with the silver pieces glued in (this time with the piece on the right going all the way down). Much better!
I’m going to paint these frames and add mirrors to them. For now I just popped them up there to see how they’d look. They’re resin scrapbook embellishments — “Petite Frames” from Melissa Frances.

Next task was the shower curtain. I probably should have used something sheer and light so it would drape easily, but since when do I make things easy?! I had this upholstery fabric (previously used as a rug in the Fairfield) with perfect colors for this room, so I decided to give it a try.
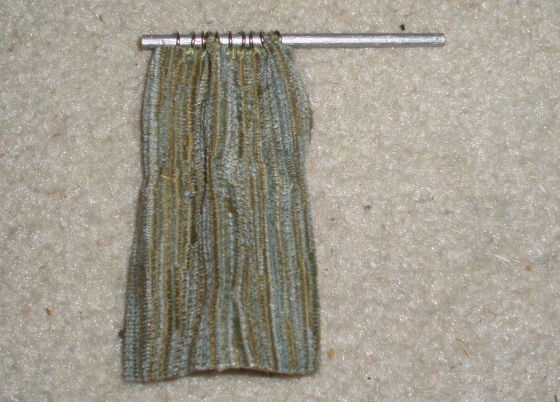
I sewed jump rings to the top and pulled thread along the back to gather the curtain. I’m not much of a sewer, so this was pretty much a stab in the dark.
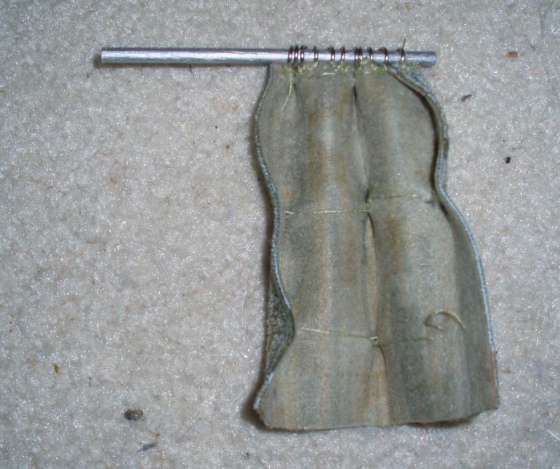
It’s not perfect, but it’ll do (for now at least). The shower rod might be a bit too bulky but that’s the smallest dowel I had. I want to remove the gold faucets from the tub and put in something more realistic, but I haven’t found a tub spout in half scale, so I’m not sure yet what I’ll use for that.
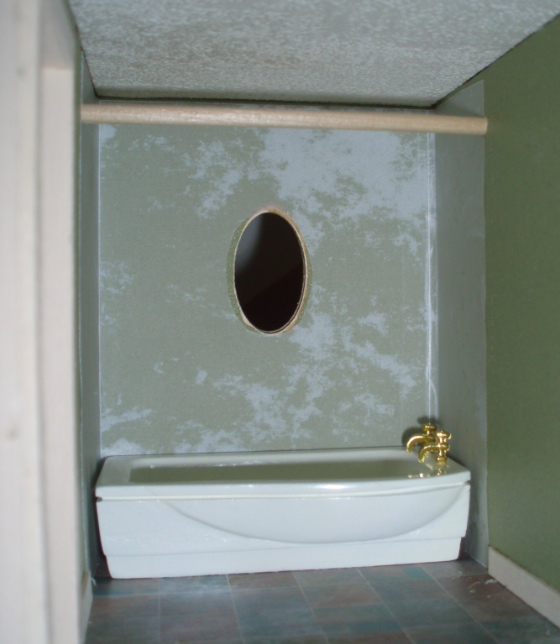
I glued in the window and small crown molding at the top of the walls.
Besides finishing the mirrors, I also need to add shower and sink fixtures. For the shower and sink I plan to use the Dijon 1/2″ scale water tap and waste pipe. I’ll turn the pipe upside down to use as a showerhead and put one tap over each sink, just need to figure out how to attach them to the wall.
 Emily is a freelance writer, miniaturist, and adventure game enthusiast.


Why not just paint the tub faucets with silver paint?
I’ve never seen a real bathtub with two taps like that (at least, not a modern one!) I want one spout that comes out of the wall, but those aren’t really available. Might use this or this with the faucet attached to the tub edge and the handles on the wall.
Love the idea of turning the cabinet on its side! I have the same piece sitting in my scrap bin.