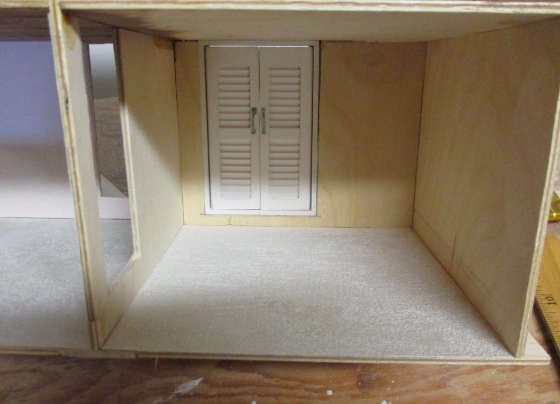
Once the laundry closet was glued in, finishing the Victorianna’s bathroom wasn’t something I needed to do before gluing on the back wall, but once I got started on it I didn’t want to stop. I tend to save bathrooms for last — in fact, the Rowhouse’s has been sitting unfinished for two years, and is one of the last things keeping that house from being “done” — so I figured I should keep going on this one while I was still in the mood!
The third floor is now glued on, providing a nice flat surface so I could flip over the house and add ceiling paper.
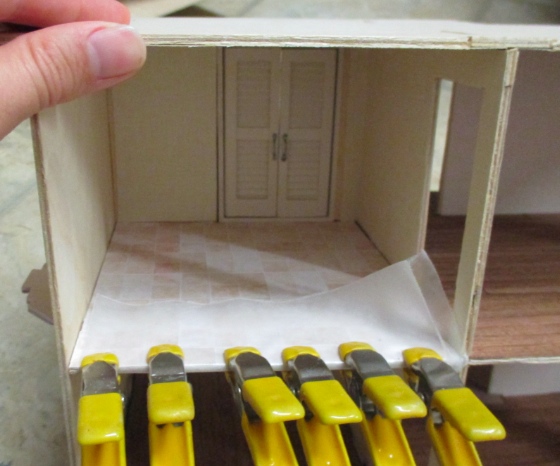
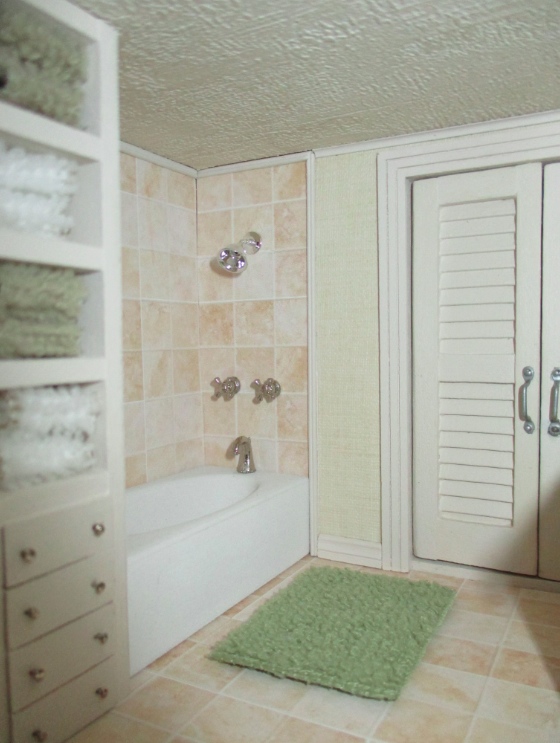
Next I added beige wallpaper to the walls with the closet and door, and tile flooring. The tile is from ELF Miniatures, and it appears to be color printed onto sticky paper. I could have done that myself, but I was placing an order anyway and it wasn’t expensive…
I was concerned that peeling off the backing and sticking it down would result in lumps and wrinkles, so I left the backing on and glued it down instead.
On this side of the linen closet, which will be impossible to see, I did peel off the backing and stick it on. It went on fine but can’t be repositioned like with glue.
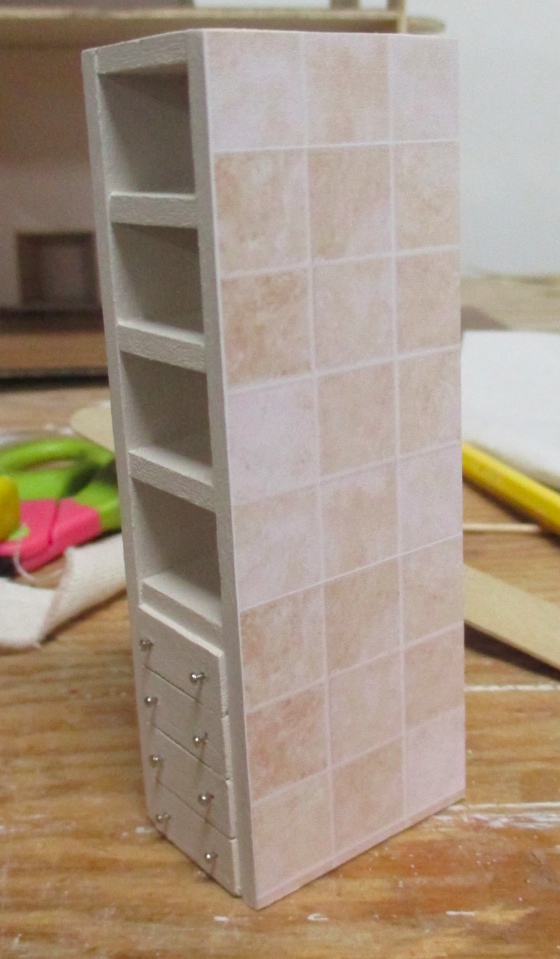
I glued the tile for the two other surround walls, and added trim around the laundry closet door.
Next I added double bead trim so there would be clean edges where the tile meets the ceiling and wall. I mitered the visible corner but didn’t bother with the corner that meets the linen closet. I probably won’t bother putting the double bead at the top of the linen closet wall, since it isn’t visible.
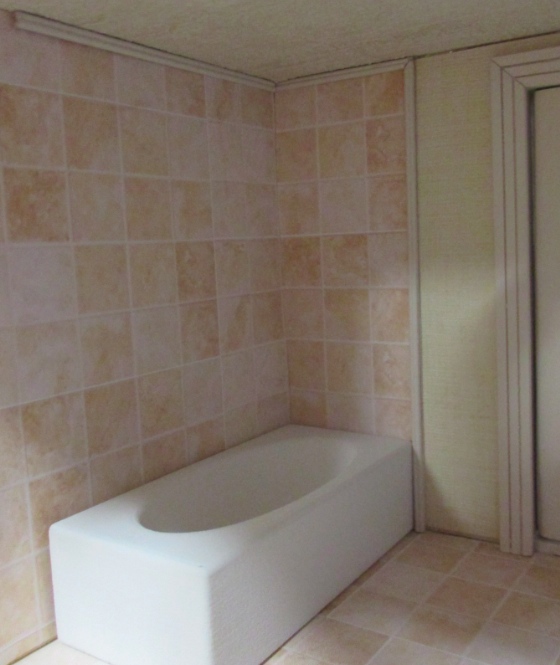
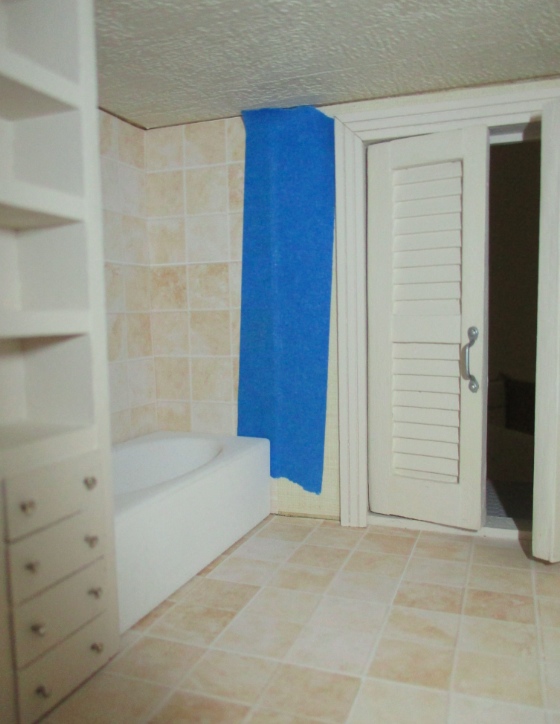
Next I added thin cove molding at the top edge of the wallpaper. I would have used a larger crown molding but was all I had that would fit between the top of the closet door trim and the ceiling.
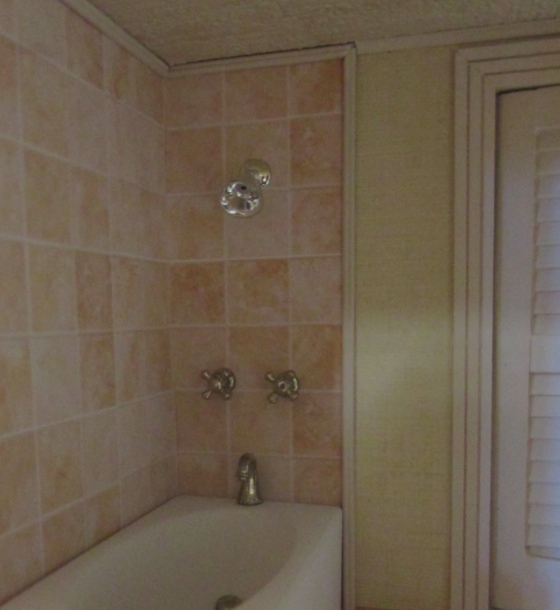
The showerhead is made from a silver Chrysnbon wine glass with the stem bent. It looks a little funky from this view and I can’t get a good picture of it from the side, but here’s how the same thing looks in my Rosedale.
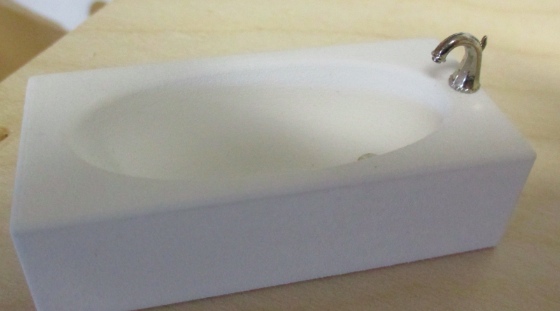
For the tub, I used an Oakmont faucet set. This is meant for a 1:12 sink but the size works for a 1:24 tub.
I attached the handles to the wall, trying to line them up at the corners of the center tile. I used super glue to attach these and it was hard to see what I was doing with my hands reached into the dollhouse, so one is slightly higher than the other, but close enough.
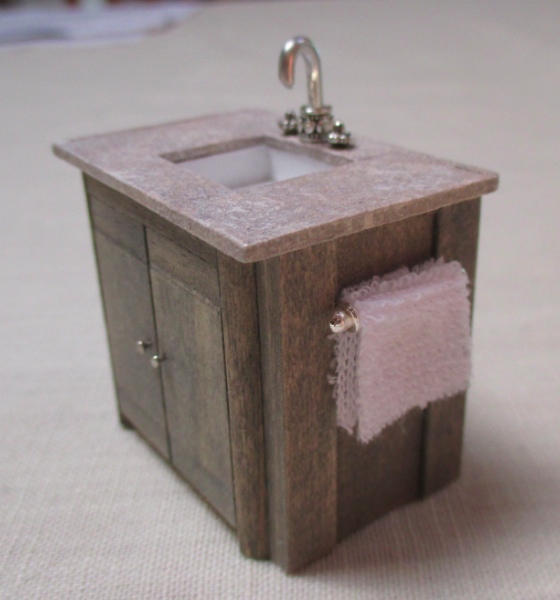
Next I added baseboards. This is 1:12 chair rail. On the right side, I cut the baseboard so it will butt up against the vanity.
Brief detour here to make some towels. I got these dishtowels and baby washcloths at the Dollar Tree.
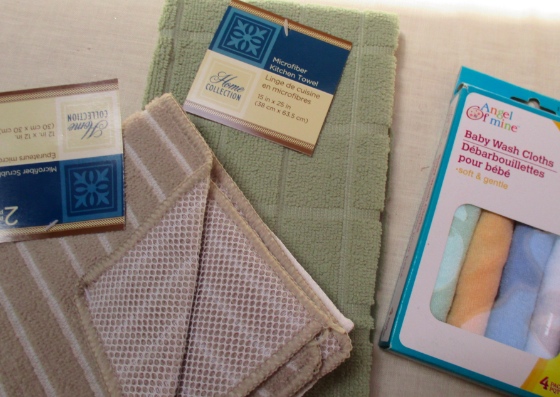
The baby washcloth makes a pretty convincing towel, and hangs well. I used a dab of tacky wax on the inside to stick the two sides of the towel together; otherwise the top part would want to stick out.
I used the dish towels to make a bath mat and towels for the linen closet. These are puffier and a bit too bulky for the towel bar, but one rectangle of the big dish towel is perfect as a bath mat. On the smaller dishtowel, the width of the stripes kind of limits what you can do with them. I later went to a different Dollar Tree that had more colors available and I bought two more of the big dishtowels in light and dark brown, so I might play around some more before calling the towels done.
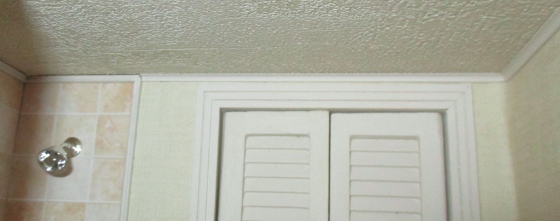
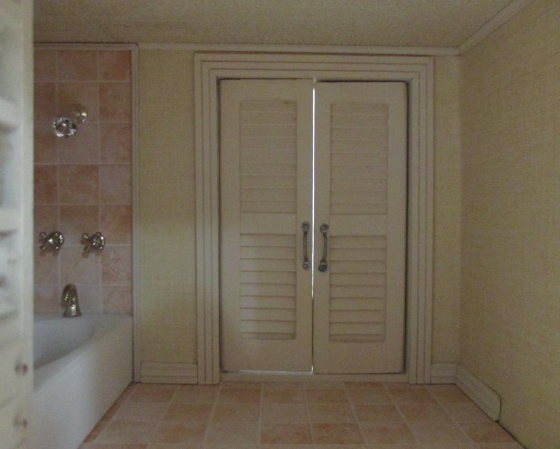
Finally I added the door to this room. I made the black doorknob out of some of the mini-brads I bought at Michaels — just cut down the legs to a good handle length, dab with glue, and force into the (relatively soft) wood of the door.
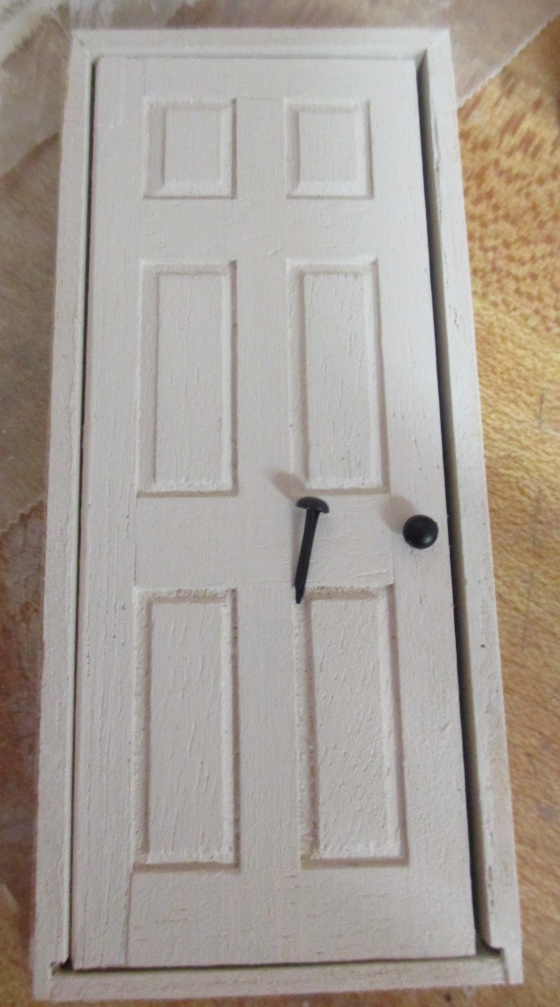
I cut down the trim that came with the door so it sits on top of the door frame instead of going around it — this way it’s consistent with the front of the door, and looks neater to me. These doors are thicker than the Victorianna’s 3/16″ walls, so I added shims to the trim to compensate.
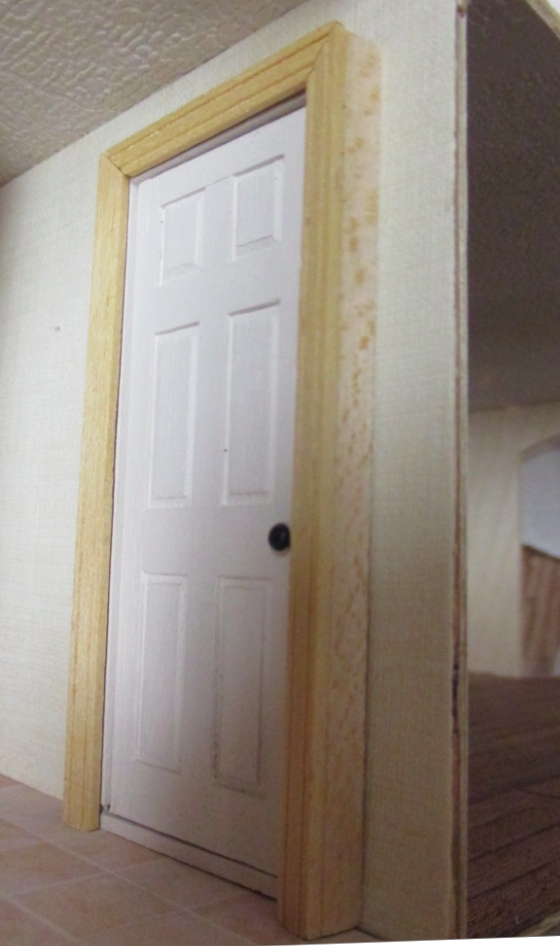
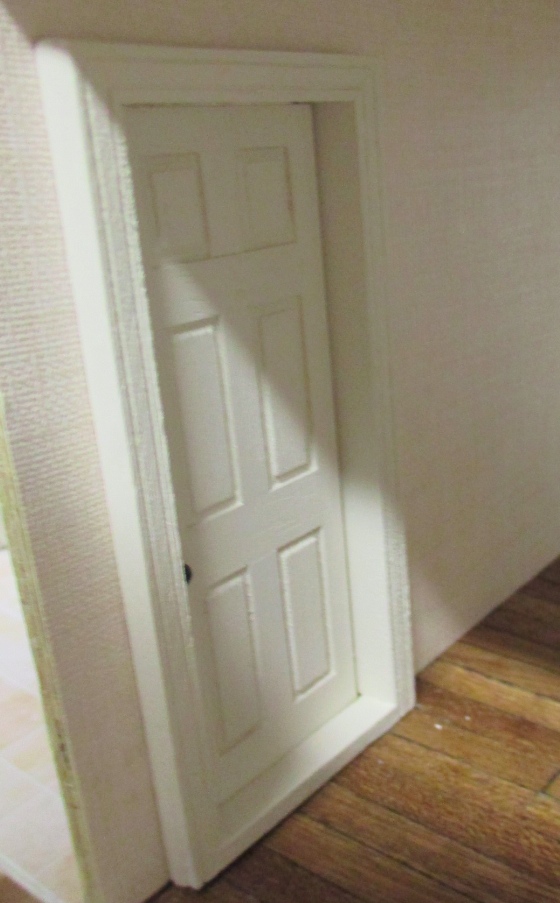
It didn’t occur to me until after I’d glued in the door and attached the trim that this sticks WAY out from the wall, compared to the other side which is flush.

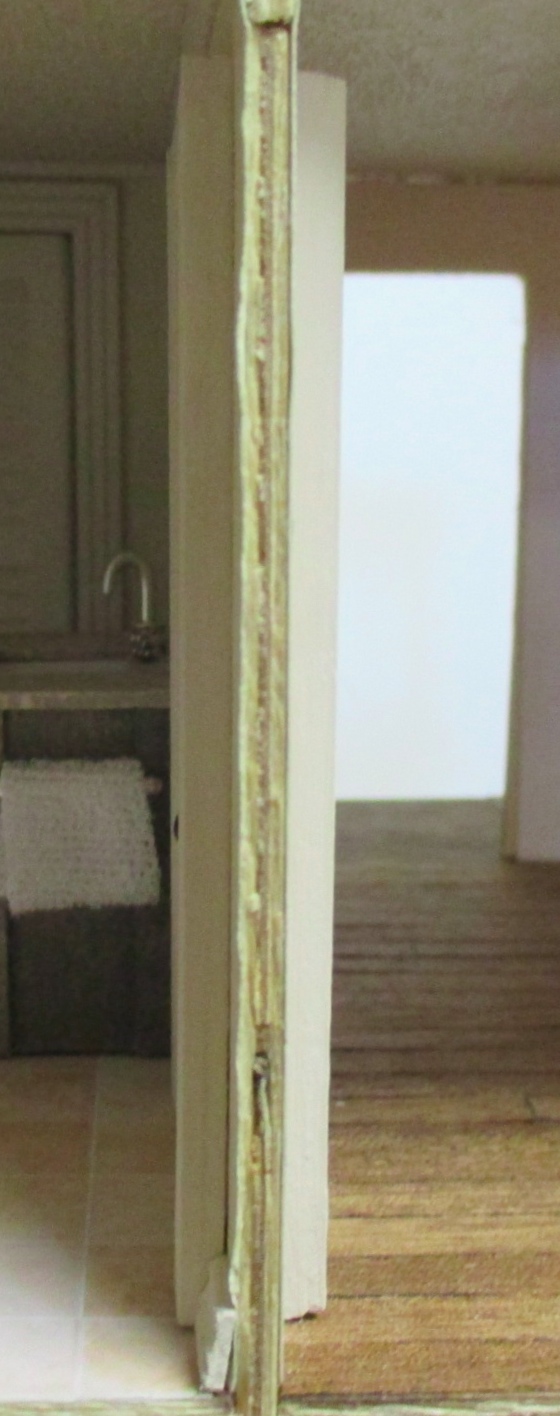
Sorry for the fuzzy pic, but this shows how disproportionate the two sides are. I hated it.
![]() The last two houses I added Houseworks doors to, the Queen Anne Rowhouse and the Gull Bay, are both made from 1/4″ plywood, so the shims were much smaller. Before that I added Houseworks doors to the Fairfield, which has the same depth walls as the Victorianna. The shims aren’t so crazy big in that house because I put the trim around the outside edge of the door frame rather than cutting it down to sit on the frame, so the Fairfield’s trim wasn’t as far away from the wall.
The last two houses I added Houseworks doors to, the Queen Anne Rowhouse and the Gull Bay, are both made from 1/4″ plywood, so the shims were much smaller. Before that I added Houseworks doors to the Fairfield, which has the same depth walls as the Victorianna. The shims aren’t so crazy big in that house because I put the trim around the outside edge of the door frame rather than cutting it down to sit on the frame, so the Fairfield’s trim wasn’t as far away from the wall.
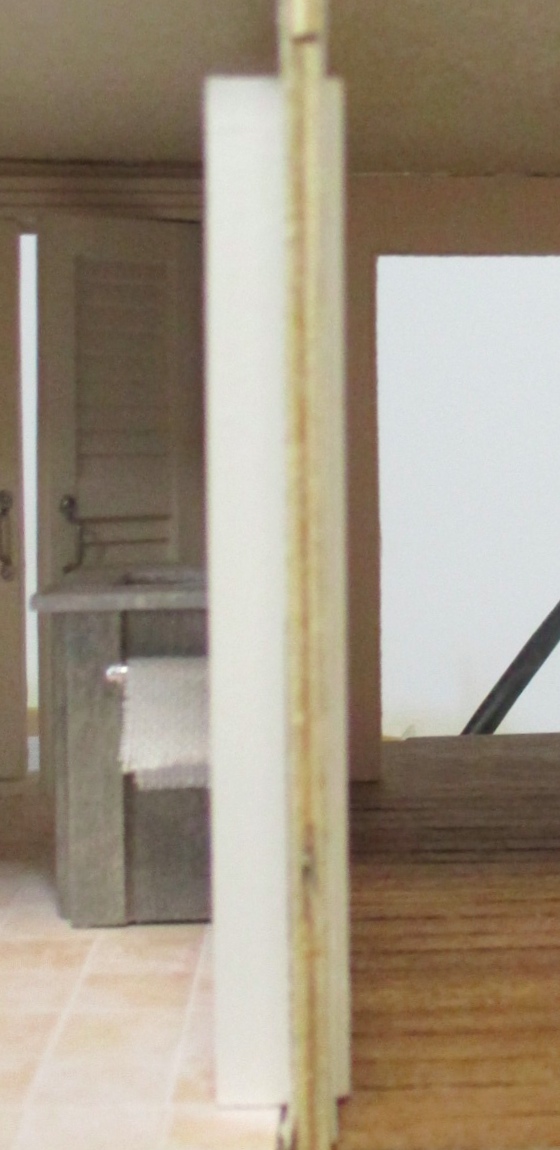
I waffled on it just long enough for the glue to dry, and then decided I couldn’t live with it and pulled the door and trim out. I managed to get the door out without too much damage (either to the door or the wall), but the trim on the bathroom side didn’t survive my attempt to remove the shims. I have plenty of 1:24 door and window casing to make new trim — it’s slightly larger than what comes with the door, but the same as what I used around the laundry closet door, so at least those will be consistent now.
Since the wall is 3/16″ thick, I went to the dollhouse store and bought some 3/32″ square basswood in order to apply shims to both sides of the door. This way the door trim will appear to be the same depth on both sides.
I started by gluing it to the door.

Even after sanding, the part of the wood where the glue had been was kind of lumpy, so the shims weren’t exactly flush. I added wood filler to mask the seams and painted.
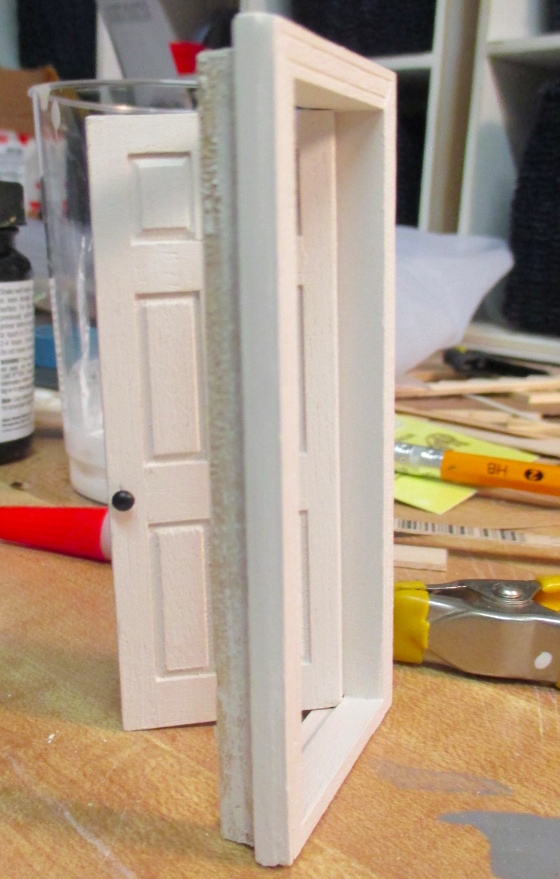
Here’s the result.
Here’s how it looks in the bathroom side.
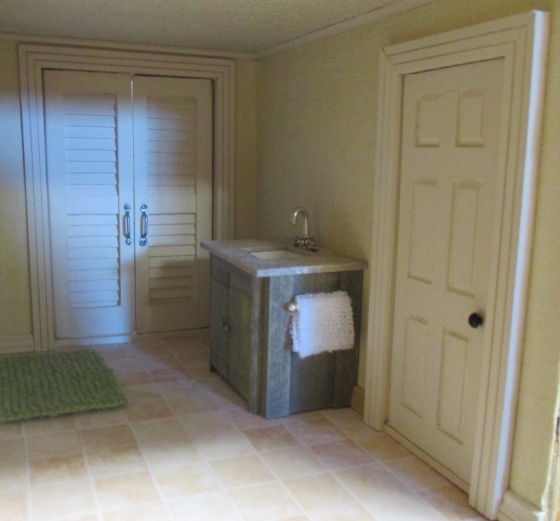
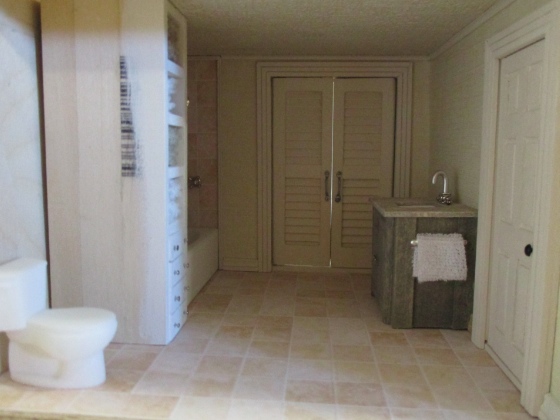
And the side by side comparison. That’s so much better!
(The baseboard is slightly crooked here due to a dried glop of glue underneath, but once I get trim on the exposed edges of the walls I don’t think it’ll be so obvious.)
Almost done! I’m planning to add a plexiglass shower door, and once that’s done I can glue in the linen closet and finish the wallpaper and trim in that corner.
 Emily is a freelance writer, miniaturist, and adventure game enthusiast.


What a nice bathroom! I want to go take a long soak in my tub now.
That’s given me some ideas for my second Fairfield doors when I get around to doing it. I haven’t finished the first one yet – must get back to it! I really appreciate the ‘how-to’s’ that you share, thank you.