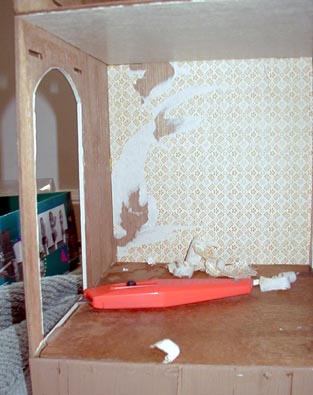
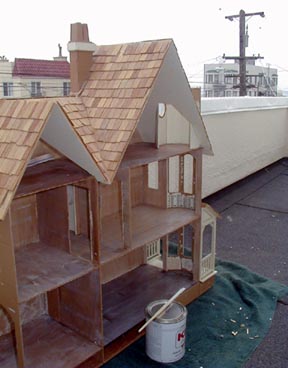
On Memorial Day weekend, I spent a lot of time crouched on the floor by the McKinley, pulling down wallpaper and trim. Good thing I have long fingernails! Some of the trim came off in tact and some broke into a thousand pieces. I can get replacement trim from Greenleaf but I may first try to salvage what I have. I discarded the trim for the doors (am going to replace them with Houseworks doors) and put the window trim in individual baggies for each room so I can find it later. I started stripping the wallpaper using a water / vinegar solution, since I’d heard that would neutralize glue, but soon found that the paper was stuck on with double-stick tape… still sticky after all these years!

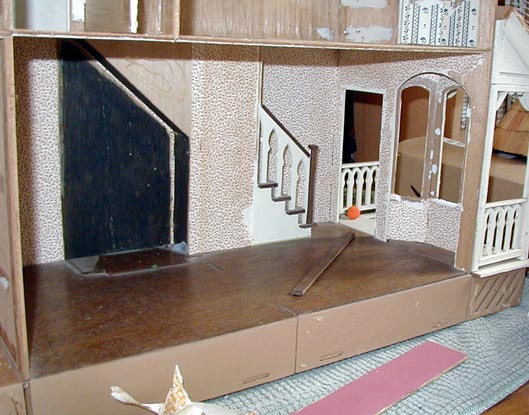
I pulled out the fireplace, and eventually the stairs, to get the living room wallpaper off. It made me wonder if there’s a better way to use the space… but I like the depth the fireplace adds to the room, so I think I will probably include it.
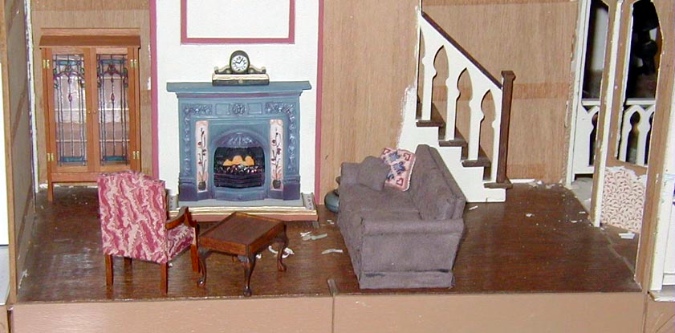
As I ripped out the paper, I spent a lot of time thinking about what will go where. And of course, I had to put in furniture and play. I put in some furniture from my other houses, just to get an idea of how to use the space.
In the living room, I’m going to put a window seat (with lots of cross-stitched pillows!) in the bay window area. I may make a couch from a 1994 Nutshell News issue, with a Daisy House sofa table behind it. Where the pink chair is, I’m hoping to put this wing chair, designed by Annelle Ferguson… but I have to make it first! I may or may not put that stained glass hutch (which I bought at a show a few years ago) in the corner. It’s kind of hard to see back there, and I really want to show it off!
I looked at the kitchen for a LONG time. It’s very small and an awkward shape because of the doorway and the bay window. I’m definitely moving the doorway to the other end of the wall (if you’re facing the wall, the door will be on the right of the oven). After a lot of playing and measuring, I finally decided on this layout.
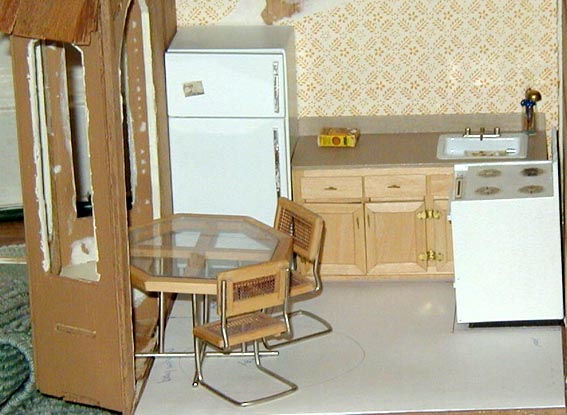
I’m going to make a fridge, sink, countertop, and upper cabinets (wrapping around the corner with a cabinet and hood over the stove) from Houseworks kits. I may bash the fridge to look kind of 1940s, based on an article in a back issue of Nutshell News. (I’d do this for no particular reason other than to challenge myself and have a fridge that looks “different”… with the triangle tub upstairs, this sure isn’t a 1940s house!) For the stove, I plan to use this 2004 Hallmark Christmas ornament (which is not being sold yet). For the table I want a pedestal table and two of these chairs. [Note from the future: “these chairs” were from The Dolls House Emporium, but the original link no longer works and I can’t remember what they were.] The bay window has a built-in bench to serve as seating on the other side of the table.
The bathroom was the first room I planned out, the night I brought the house home. I’m going to build the cabinet into a vanity and put a stand-up shower in the corner behind the toilet. I already have tiles for this room too… they’re multi-colored ones I bought last summer at a dollhouse shop in New Jersey.

(In the picture above you can see marks from the double-stick tape on the walls. I’m going to try using Goo Gone to get rid of the remaining stickiness.)
Here’s the bedroom with furniture in for placement. I am going to build a Mission-style bedroom set to go in here. Beverly’s only carried half the wood and my local hobby shop didn’t have the rest, so I have to track down some basswood before I can get started. Hopefully I’ll find it at Dollhouses, Trains, and More (which isn’t so nearby anymore now that Geoff lives in the city with me!). If not, I may try the Michael’s in San Mateo.
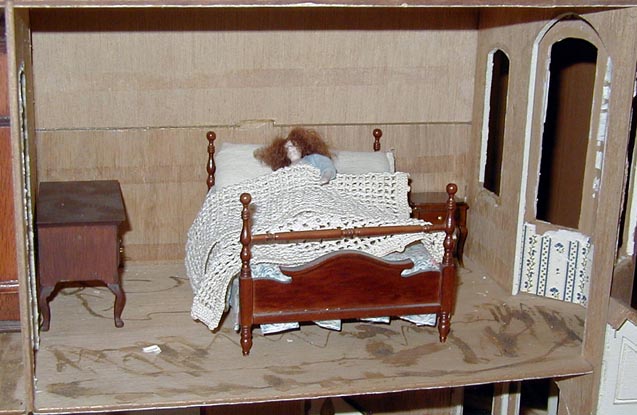
(The scary wigged lady lives in my first dollhouse… she was sleeping so peacefully, I didn’t want to disturb her!)
Before I can get started on the interior decorating, I have to figure out how to electrify this thing. I may run the tape wire along the back of the house, since it doesn’t show, and just find a way to cover up the tape wire so it isn’t exposed. (Ideally, I’d like to put some kind of removable cover over the wire so I can access it if necessary.) I have to decide what types of light fixtures I want in each room before I put in any wallpaper or flooring.
Also, I placed an order with HBS for siding, Houseworks doors, porch posts, and spindles. I haven’t decided yet what colors to use on the house. Once I do, I can start putting up siding and redoing the porch. I’d like to try using accent colors this time… something I haven’t done in the past… so I’m going to have to put a little thought into what colors I want to use.
Finally, I thought it might be fun (in a morbid way!) to see how much I’m spending on this “bargain” house. I will not include prices of anything I already own (like the porch posts and spindles leftover from my Orchid, or any furniture I already had) but I am going to include prices of all new components, furniture, and anything else. A scary experiment… So far I have spent $11.25 on basswood for the Mission bedroom furniture (only half of what I need), and $53.46 at HBS for siding, Houseworks doors, and porch components. Added to the $45 purchase price of the house, this puts my total so far at $109.71… YIKES! Okay, maybe keeping track of how much I’m spending isn’t such a good idea after all…
Update June 7: Bought two lights and a junction splice for the McKinley over the weekend, plus the additional basswood I need for the Mission-style furniture. Spent $45.82, so my total’s up to $155.53…
Update July 6: A few weeks ago I coated the walls with Kilz in anticipation of papering them. I haven’t papered them yet though. The Kilz is very smelly and needs to be done in a well ventilated area. Rather than drag the whole house downstairs to the basement, I brought it onto the balcony outside my playroom.
The Kilz seems to have gotten rid of the remaining stickiness from the double-stick tape. It also has a stain blocker that will supposedly keep wallpaper from bleeding.
I spent $12.89 on the Kilz, and $72.50 at Dolls House Emporium on lights and a stand-up shower for the bathroom. This puts my running total at $240.92…
 Emily is a freelance writer, miniaturist, and adventure game enthusiast.


I was keeping track how much I was spending on my sea side villa. I stopped counting at $500. Didn’t need evidence of how expensive the little hobby/obsession is!