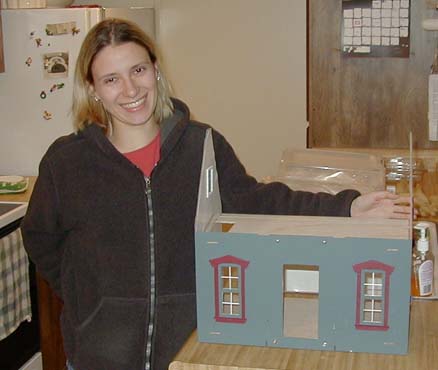
I realized that I messed something up. (Big surprise there!) To achieve this “double hung” window effect, each double window gets trim on one opening, and the other opening is supposed to be painted to look like the trim. Well, my white posterboard around the top of the inside windows doesn’t look anything like the painted white trim around the bottom of the windows. It was an easy fix though. I just removed the posterboard from that part of the windows and painted the wood white. Then I glued the blue window casings and sills onto the walls. Looks smashing, if I do say so myself.
Update, January 19: The shell has been assembled! After quite a bit of drama… but what fun would it be without the drama?
First of all, remember how the front wall was warped? Well, even after sitting under heavy books for a few weeks, it was curved in the middle. Glue wasn’t going to hold it. Geoff suggested we get some brackets and screw the front of the house to the first and second floors, as well as gluing. But the hardware store didn’t have small enough brackets, so we bought some and he cut them smaller with one of his neat tools that shoots sparks. I wish I’d gotten a picture of that, but I was too annoyed by this turn of events (and guilt-ridden because Geoff was taking time out of airplane building to help) to think that far ahead.
The brackets seemed to do the trick. The screws won’t be visible on the bottom… some are sticking out the bottom of the house (which you won’t see), and the others will be covered by the porch. Screw heads in the first floor will be covered by hardwood flooring or a carpet. On the second floor, I plan to build in a piece of furniture that covers up the brackets. This is a pretty small dollhouse, and there won’t be much room on the second floor for a full bedroom and bathroom. (Of course, living in a studio apartment has given me plenty of practice dealing with such restrictions…) I will probably turn the “window seat” of the gable into a built-in bed, which should cover up the brackets completely.
Once the house was screwed (heh heh), we fit the walls together as best we could and glopped them up with glue.
Here’s the house being glued. Drama over. Sigh of relief. Except… can you tell what’s wrong with this picture?!
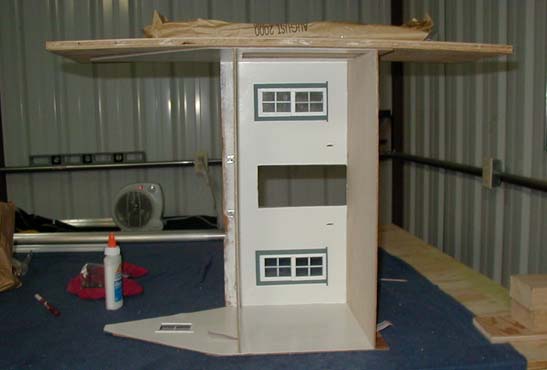
It’s actually hard to tell from the picture. I didn’t realize until we were leaving the hangar for the night… I GLUED THE WALLS ON THE WRONG SIDES! Yes, the left wall got glued onto the right side, and vice versa. This is a problem because the stairs can’t run along the same side as the French doors… nothing for the stairs to lean on.
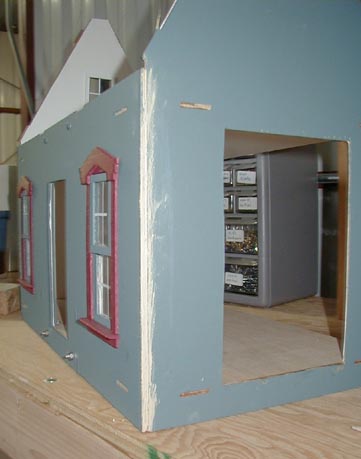
So we pried it apart, put the walls in the right places, and glopped on more glue. The only thing I’m bummed about is that there’s now a mess of glue running across the right wall, where the hole for the stairs is. I was obsessing over it all weekend. I can probably run some trim there and it’ll look okay, but in the meantime, I’m going to try to forget about it. (Sob).
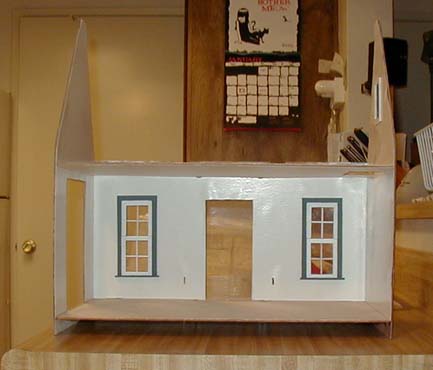
Here it is! The shell, right side up!
Those screws at the top and bottom of the wall are a result of the brackets we used to get the wall on flat. The ones at the bottom will be covered by the porch, and the ones up top will be painted blue. They will be in the shadow of the gable, so hopefully not too noticeable.
The inside. I can’t wait to start decorating! I will paint the screw heads in the ceiling white, so they will blend in better. It’s hard to see the detail of the double-hung windows in this picture, but I am pretty proud of how they turned out.
Update, January 30: I spent some time last week working on the conservatory addition. Geoff’s going to bring the camera to my place so I can take pictures (I brought the pieces home from the hangar because I didn’t want them to warp. It’s the rainy season!)
So I was flipping through an old Dollhouse Miniatures magazine and found a how-to article that shows cabinets made from Shenendoah kits made up into a center island with a built-in kitchen table. On Sunday I ordered the kits from HBS, so hopefully I can start on them within a few weeks. I’m really glad I’m adding the kitchen on to the side of the house… the conservatory is not the same style as the rest of the house, but the house itself would just be too small without it. Hopefully I will have some pictures of those components soon.
Sunday I also made a trip to Dollhouses, Trains, and More, a store in Novato. Some of their prices are much higher than the HBS catalogue, and some are much lower. I was looking for a particular style of kitchen chair. They only had one (I need 5), so the rest have been ordered. They also ordered a nice, modern-looking refrigerator for me… they had one in stock, but the handles were crooked. (This is a case where the store’s price was significantly cheaper than mail order.)
The shell seems to have glued together nicely, except that the corners didn’t really fit. I filled them with wood filler and plan to sand them down and paint them this weekend. I also cut the hardwood flooring material to fit the first floor. Geoff’s going to pick up some varnish for me at Home Depot (affectionately known as “home despot,” or more to the point, “that big lonely place that scares the crap out of me”…)
And lastly, during a trip to Needle in a Haystack, I picked up a book of oriental rug patterns in miniature. I picked one to stitch for the living room of the house. The pattern calls for wool and 18″ canvas, but I’m converting it to floss and 40-count evenweave. (The pattern isn’t a true 1:12 conversion, but stitching it on 40-count fabric will make it pretty close.) When I’ve made some decent progress on that, I’ll scan it.
Wow, I guess I’ve been busy. I’m enjoying the project more now that the house is looking like a house… the decorating is my favorite part! (It’s also the most expensive part…)
 Emily is a freelance writer, miniaturist, and adventure game enthusiast.


I am having the hardest time with the double hung windows. I can’t figure it out… help please!
Sorry, I built this house a long time ago, so I can’t really offer any help beyond the info in this post. Here’s a page that might help you: http://www.greenleafdollhouses.com/dollhouse_news/AUG2008/Dollhouse-Windows.html
Or you can head over to the Greenleaf forum (http://www.greenleafdollhouses.com/forum/) and do a search for threads about this, I know it has come up there before. Good luck!