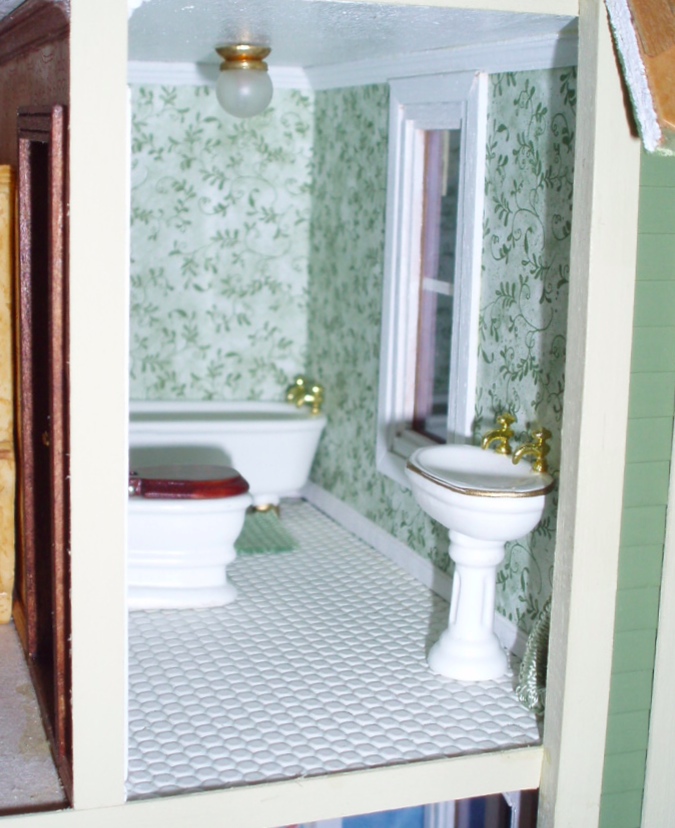
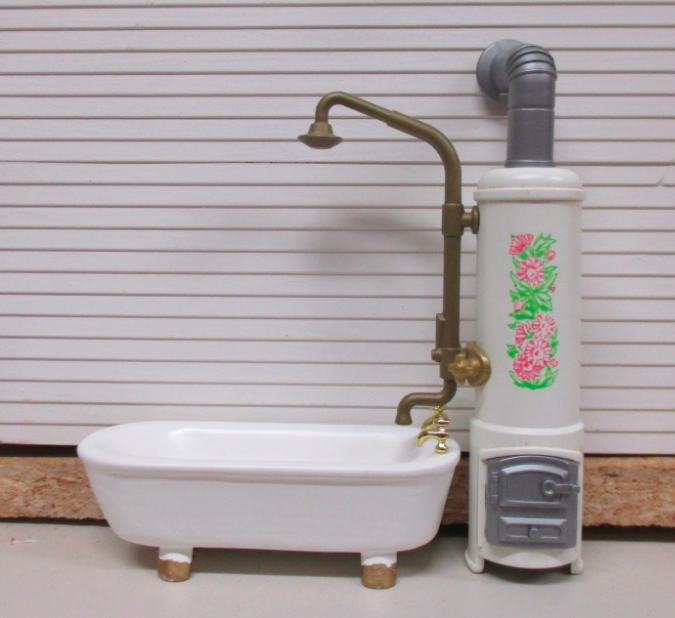
It’s been years since I did anything with the Fairfield. It sits on a table at the top of the stairs and I stop and look at it now and then, but besides adding new accessories on occasion, it doesn’t change much. I (more or less) finished the Fairfield in 2010, and all this time, have been meaning to add a shower to the bathroom but never got around to it.
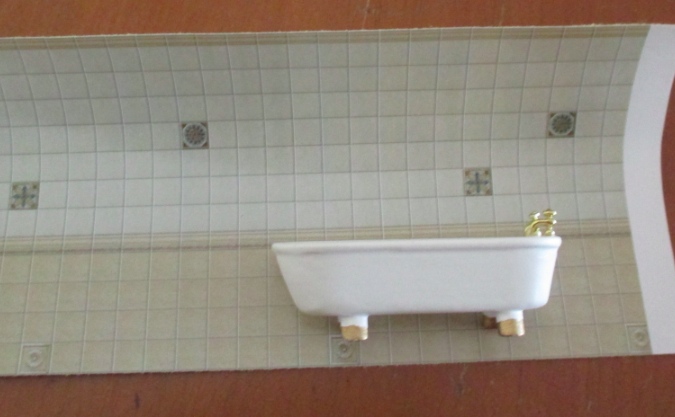
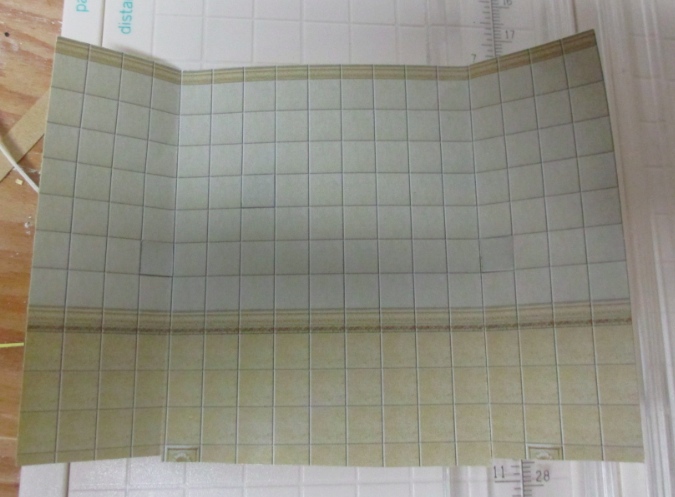
Miniatures.com recently started carrying these beige tiles that are a good size for half scale. I ordered them out of curiosity and, once they arrived, decided to use them for the Fairfield’s shower. What could go wrong?
This is a narrow room and I had a hard time getting my hand in. That’s probably why I put this off so long. I started by cutting a piece of the tile sheet and putting it in to see how it looks. I had to be careful not to knock into the light and damage it (something I have done before trying to get paper into narrow, tiny rooms).
Because the crown molding and baseboards are already in, after seeing how it fit I had to cut some tile off the bottom so it would butt up against the molding. The room isn’t square (probably due to the floor piece being warped), so that made it a bit tricky to cut the sheet just right.
I didn’t like the random non-uniform tiles, so I cut plain tiles off the rest of the sheet and covered the random ones up. In this picture I’ve done it to one tile on the left – can you spot it?!
Here it is with all of them covered. I didn’t bother with the ones at the bottom since you won’t be able to see them behind the tub.
Okay, first mistake. This is “peel and stick” tile and I thought that applying it with the sticky backing would be neater than covering it with glue, since the room is such a tight fit (didn’t want to smear glue on the light or the other walls). I was wrong. It kept sticking in the wrong places as I tried to slide it in and when I pulled it back out, it took some wallpaper with it. No turning back now…
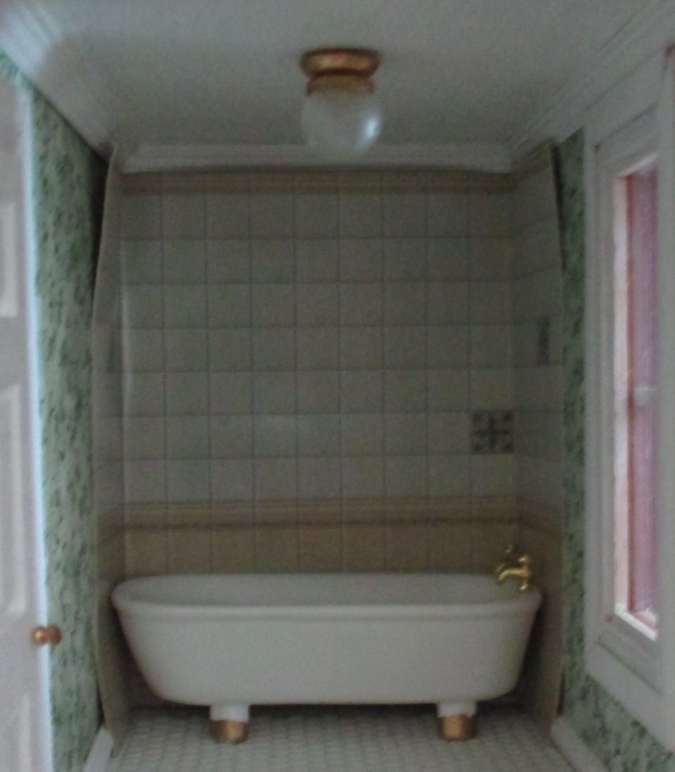
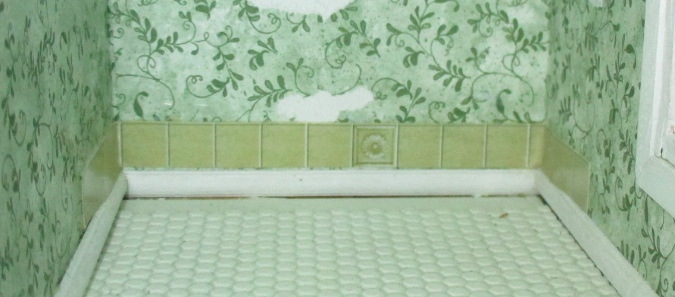
I cut a new piece of tile paper. This time, rather than trying to cut it so it would be flush against the (non square) baseboards, I applied a strip to the bottom, and then applied the rest of the tiles over it. The bottom row of tiles is half height but they’re behind the tub, so you’ll never know.
This time I used wallpaper mucilage on the back of the tile paper instead of the sticky backing. I managed not to make a horrible mess.
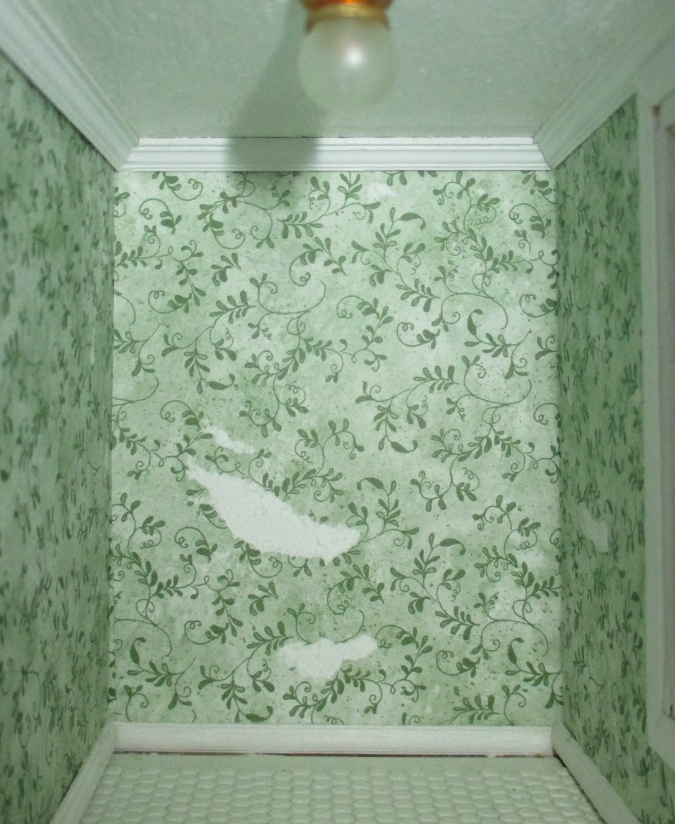
I don’t really like how “flat” these tiles look. Yeah, it’s just paper, but there’s something about the shiny finish or the printing (or both) that makes the tiles look unrealistic — more so than other paper tiles I’ve used, like in the Victorianna’s bathroom. I didn’t really see it until I’d glued it in but didn’t want to make things worse by pulling it out again.
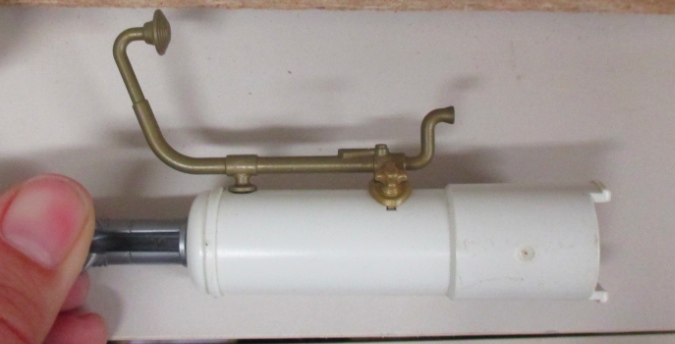
The next task was adding shower fixtures. I wasn’t looking forward to trying to glue in an individual shower head and knobs, in this tiny space. Because it’s a claw foot tub, I got the idea to add a shower pipe contraption (not sure if there’s a real name for this…) I was going to try to make one out of jewelry findings, and then discovered this Playmobil shower on eBay.
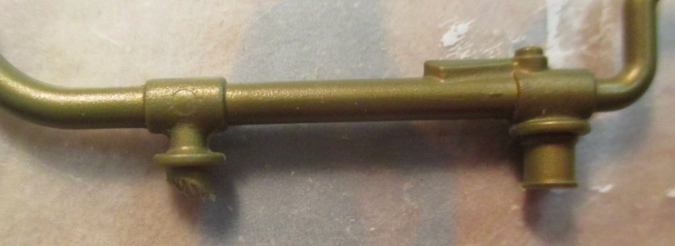
The room isn’t big enough for the water heater so I had to figure out how to remove the shower part.
Geoff came to the rescue with his band saw.
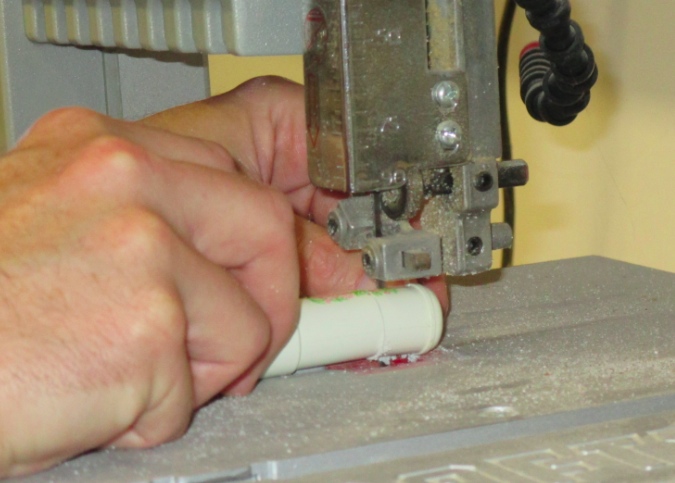
First he sliced off the back of the water heater. Then (after this picture) he carefully sliced above and below the nubs that held in the shower until he was able to wiggle the shower piece free.
Ta da! He did a perfect job.

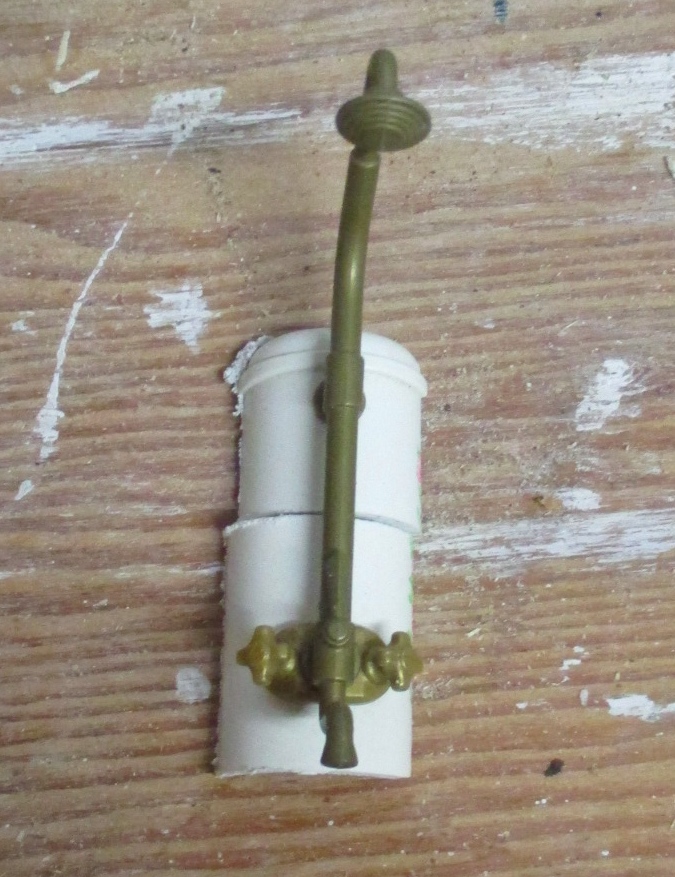
And then I messed it up. The back pieces were slightly rounded, and I wanted them to be flat to make them easier to glue to the wall. I used the disc sander, and the shower piece got caught in the crack between the sander and the platform where you hold the piece during sanding, causing the top nub to get chewed up. (This actually happened to me before with a different Playmobil thing I was trying to modify, and I even said something to Geoff about how I hoped it didn’t happen again with the shower. The universe was mocking me.)
I realized I could hide the damage by putting the taps over the top nub instead of the bottom one. Problem solved?
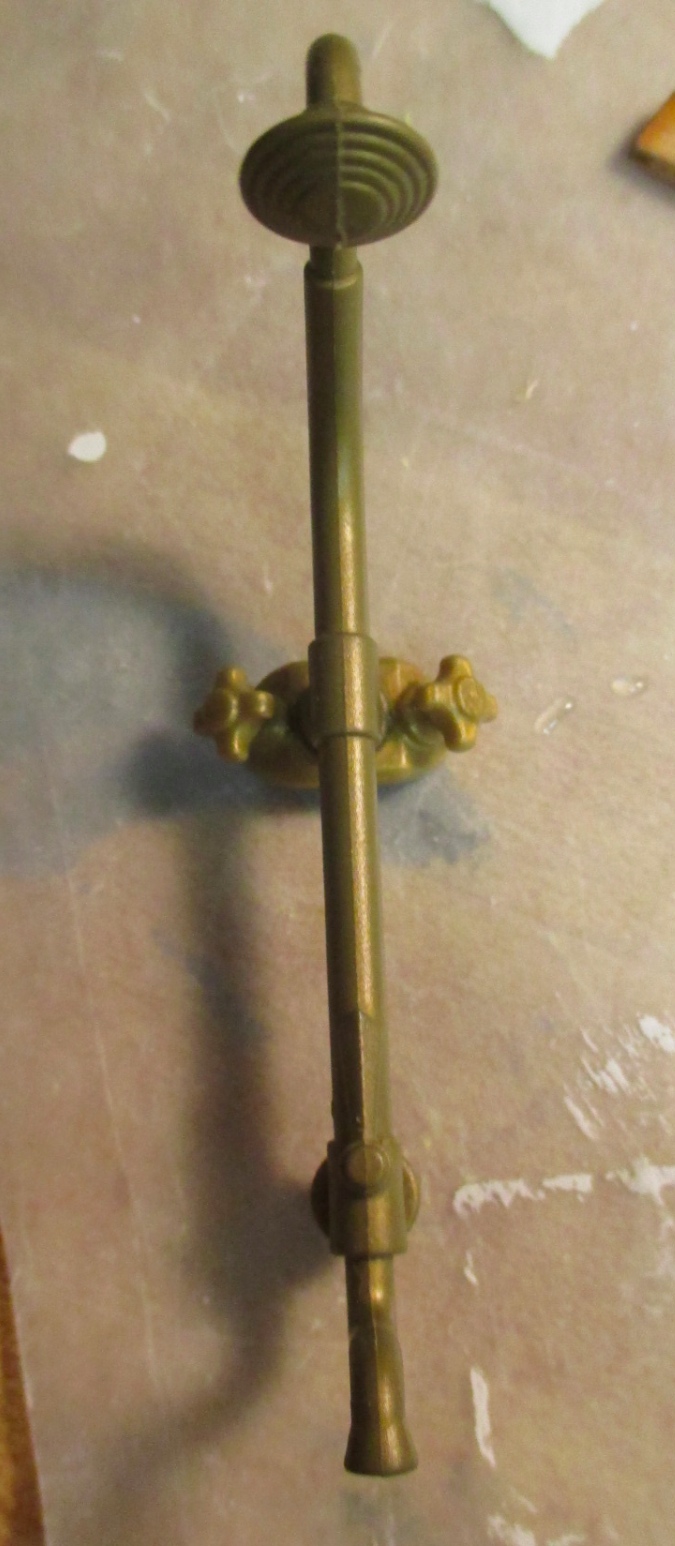
I glued in the taps, using Super Glue on the chewed-up nub and a big blob of tacky glue on the back for good measure..
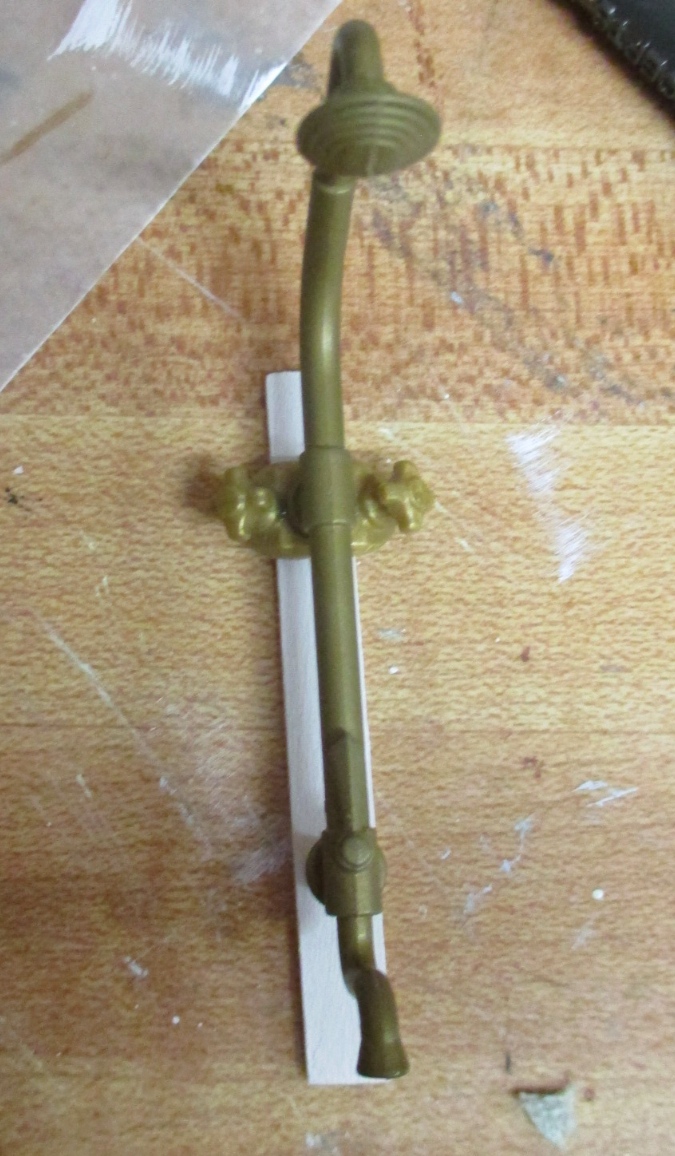
Because the taps piece is curved (from sitting on the water heater), and to make the whole thing easier to glue to the wall, I decided to glue the shower to a piece of strip wood.
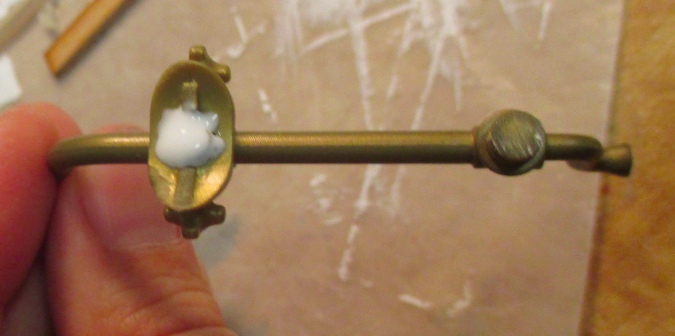
I removed the taps from the tub and covered them up with mini brads. I don’t know what that’s supposed to be, the brads were just sitting nearby and I thought they’d look cool. I also added a drain made out of a jump ring.
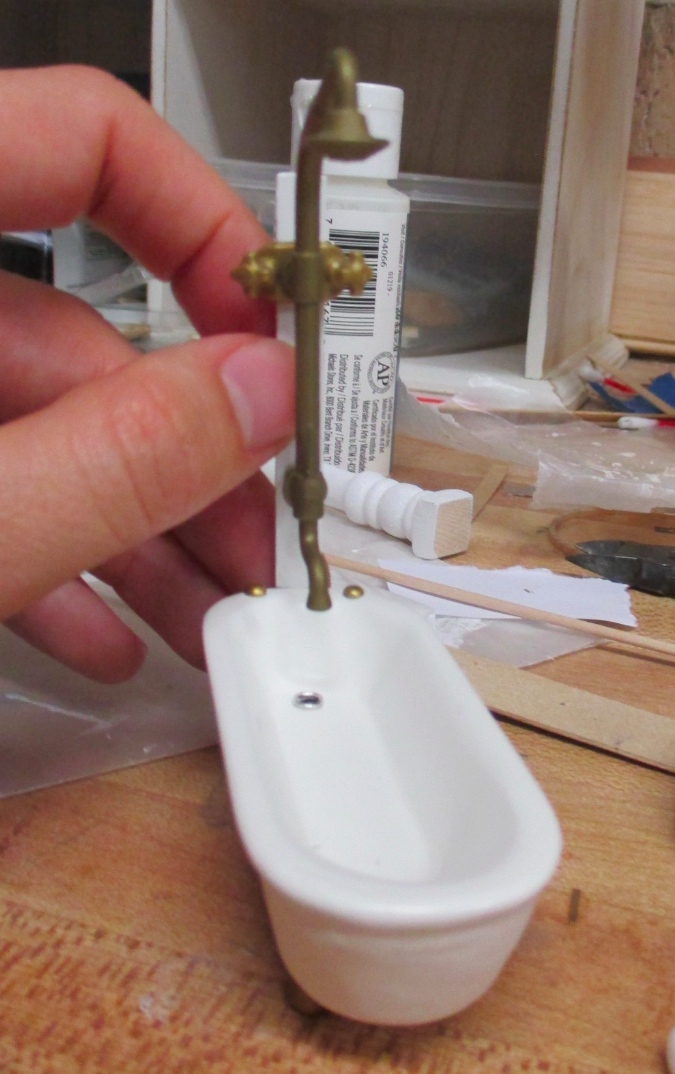
Okay, time to glue this baby in! It was harder than I thought it would be, what with the room being too small to easily get in my hand. When I finally got it in there (using tacky glue), I immediately didn’t like it. I didn’t anticipate how far forward the spigot would be. But, it was already glued in, so I decided I’d live with it.
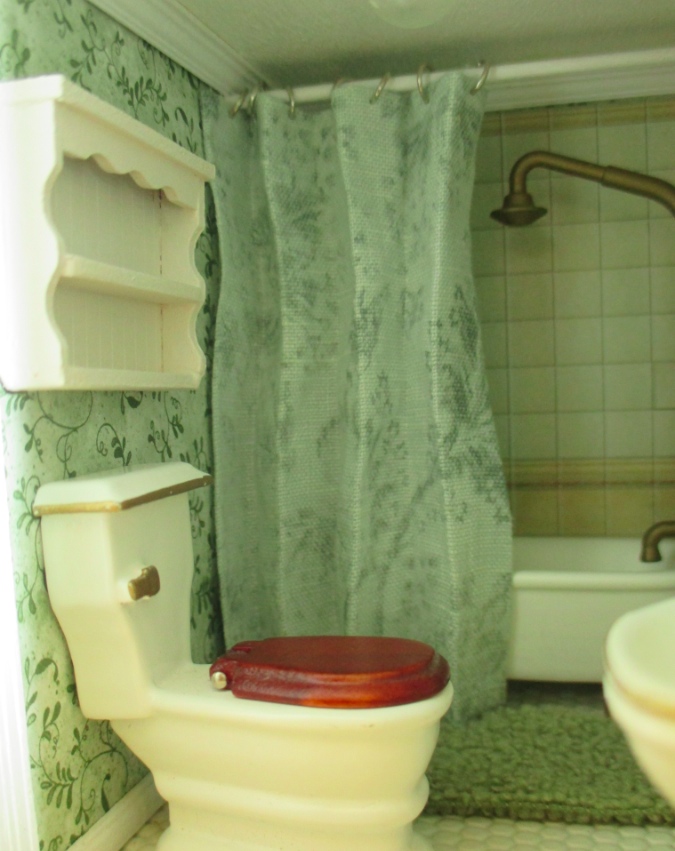
Next, the shower curtain. I recently ordered a bunch of fabric swatches from Restoration Hardware – they’re free! This one’s called Belgian Linen Paisley and the color is Light Silver Sage. I didn’t get it for this room specifically, but the color and the design complement the wallpaper nicely.
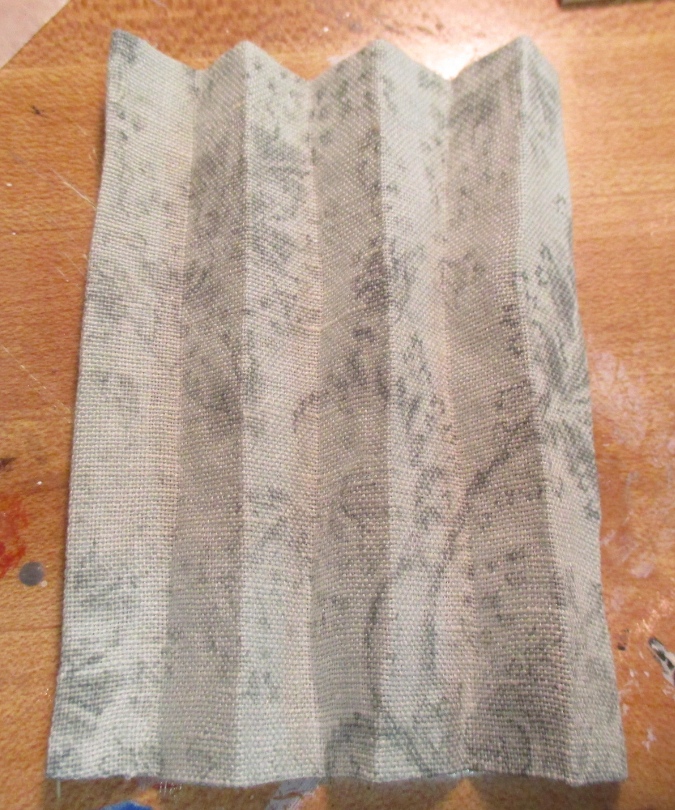
To make this, I cut the swatch to an appropriate size, folded over the edges, and glued them with Aleene’s “Stop Fraying” fabric glue — no sewing. I then folded in the pleats just by pressing hard with my fingers. If I find over time that the curtain unfolds itself, I can redo it and spray it with something to hold the shape, but for now it seems to be holding fine on its own. Finally, I poked holes in the top using my electricity pilot tool, and added the jump rings.
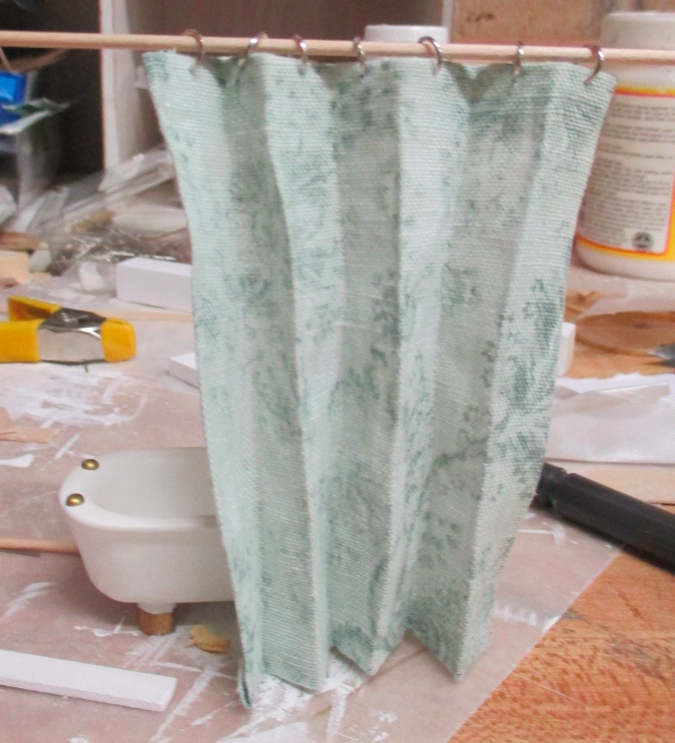
The dowel shower curtain is held in by pressure, so I can remove the curtain if necessary.
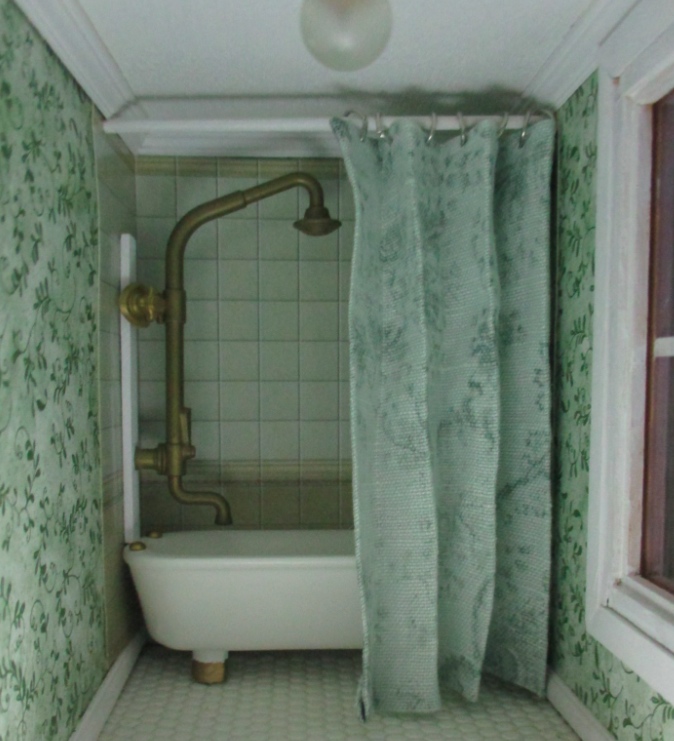
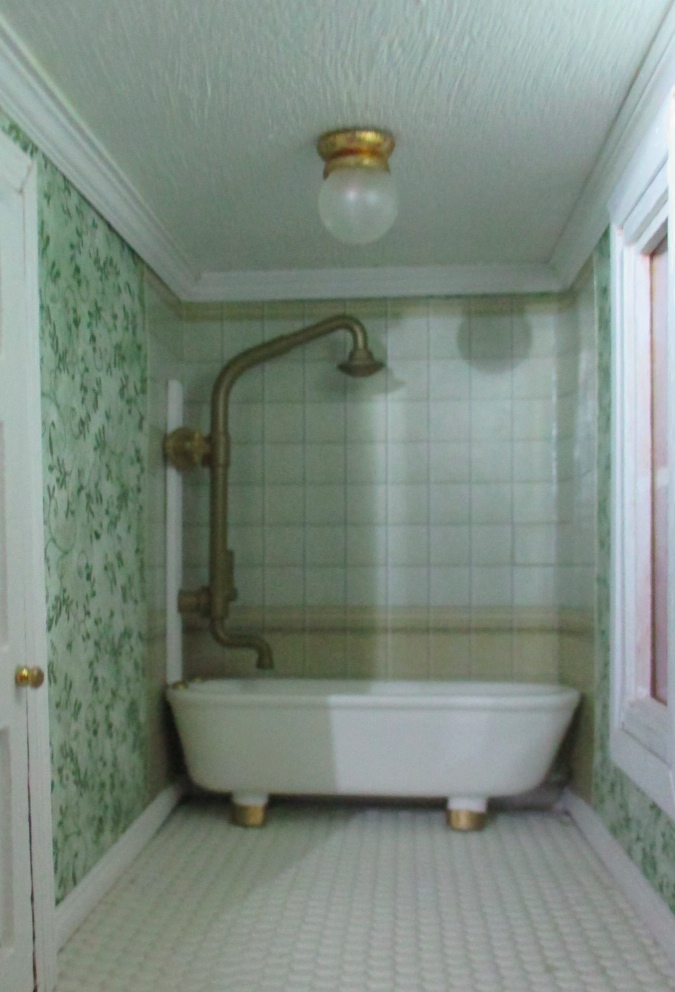
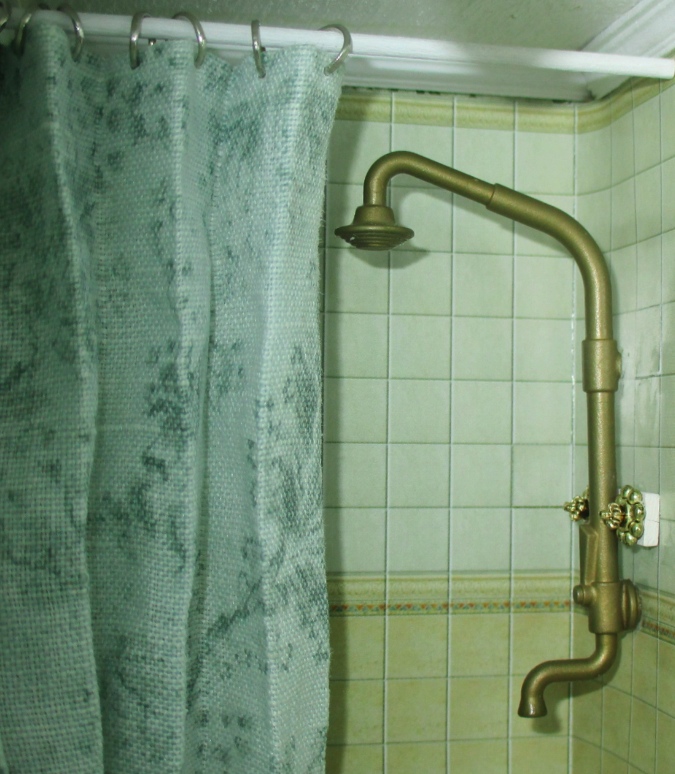
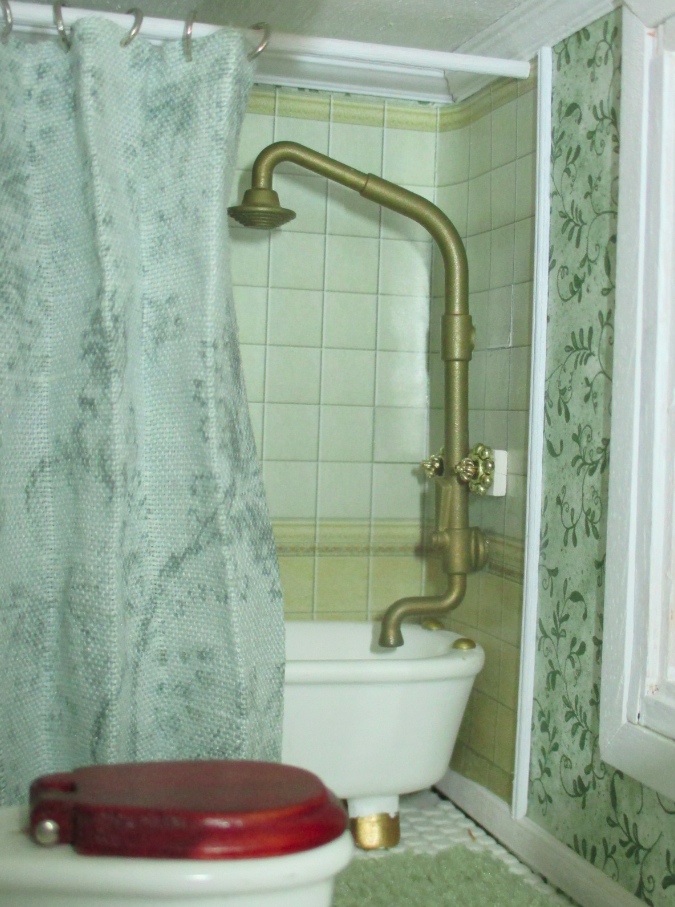
Right, so, once I got everything in and started taking pictures of the finished bathroom, I decided I *really* didn’t like the shower and could not, in fact, live with it. Of course, by now the glue had mostly dried. I ripped it out, causing a little bit of damage to the tile in the process — it’s not horrible, but you can tell glue dried there. I decided to move the shower to the other wall, so the messy part will be hidden by the curtain.
The only way to get the spigot closer to the front of the tub was to sand down the nubs completely. I cut them off with scissors and used the disc sander to flatten them (luckily without destroying anything this time!) The top nub no longer hits the wall, and I had to lose the taps, so the bottom nub is the only thing connected to the wall. I managed to get it in with Super Glue, but only after gluing it too high the first time and leaving behind a visible glue circle. Argh!
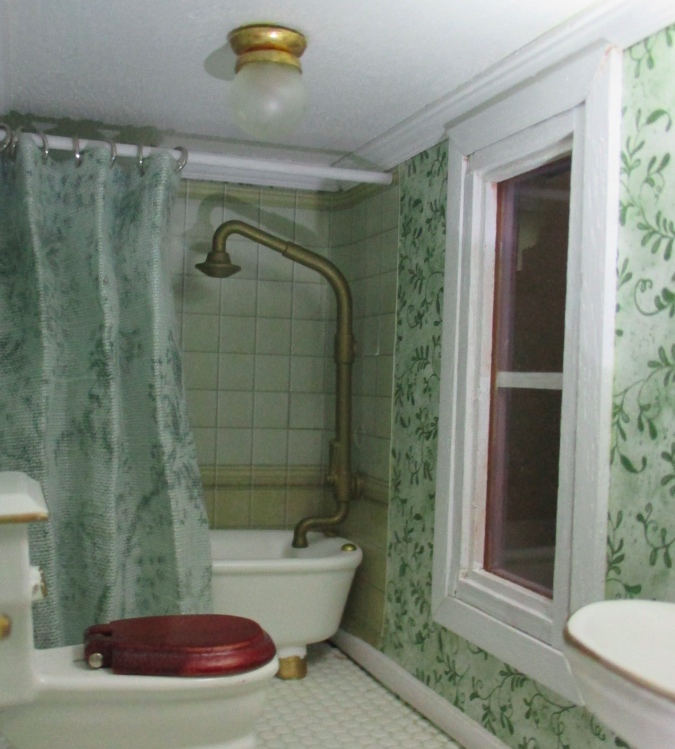
It looks weird without the taps, so I got the idea to cover up that glue circle with a set of handmade taps. These are jewelry findings from Michaels.
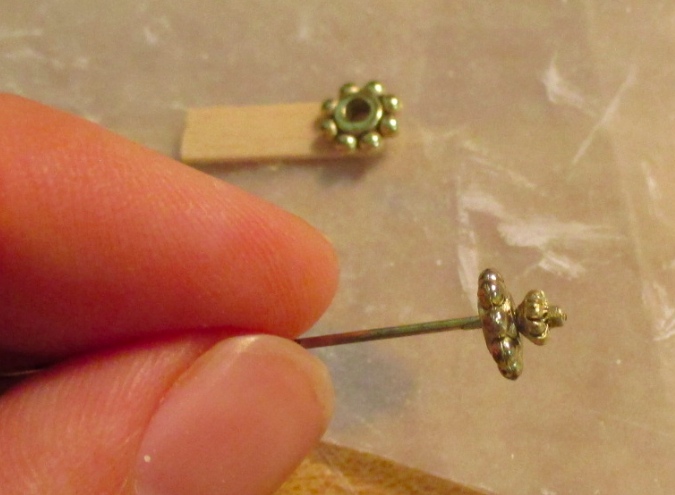
I cut a small piece of wood to act as a base. This had to be thick enough so the wood wouldn’t split when I stuck the pins through it, but thin enough to slide behind the shower piece. It took a few attempts to get it right.
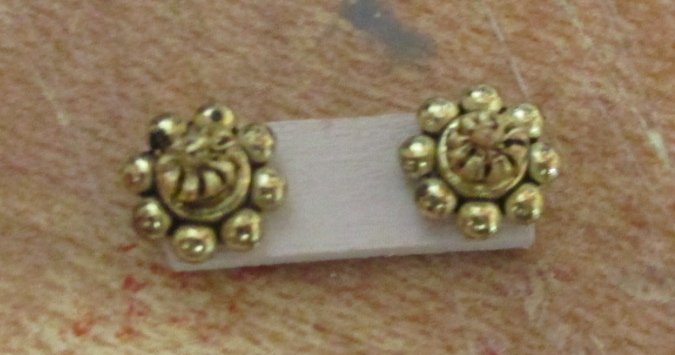
I glued this in with tacky glue, and of course managed to smear glue on the way down. It’s not as bad as it looks in this extreme close-up, I swear.
With the shower finally in, the last touch was to add this little shelf over the toilet. This is a Mini Etchers kit. It’s only held in with putty, so I can remove it to add toilet paper and other goodies at a later date.
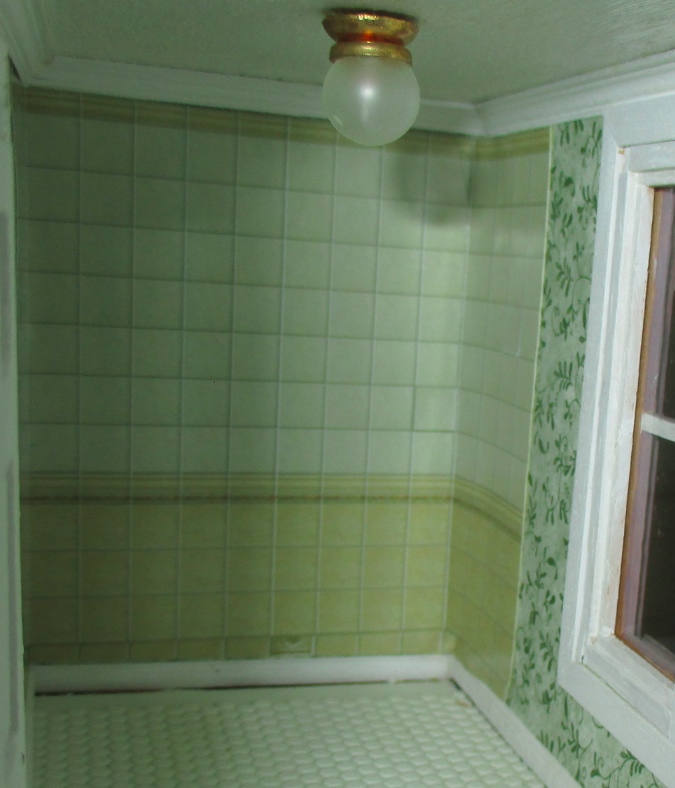
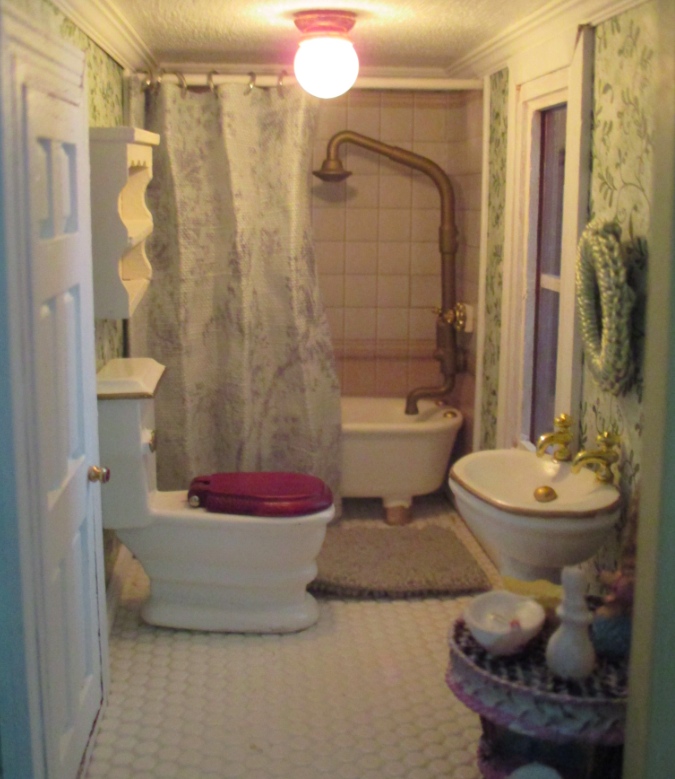
Whew, bathroom complete! Although I should probably add a piece of trim between the tile and the wallpaper to give it a neater transition. Maybe I’ll get around to it in another 5-6 years?
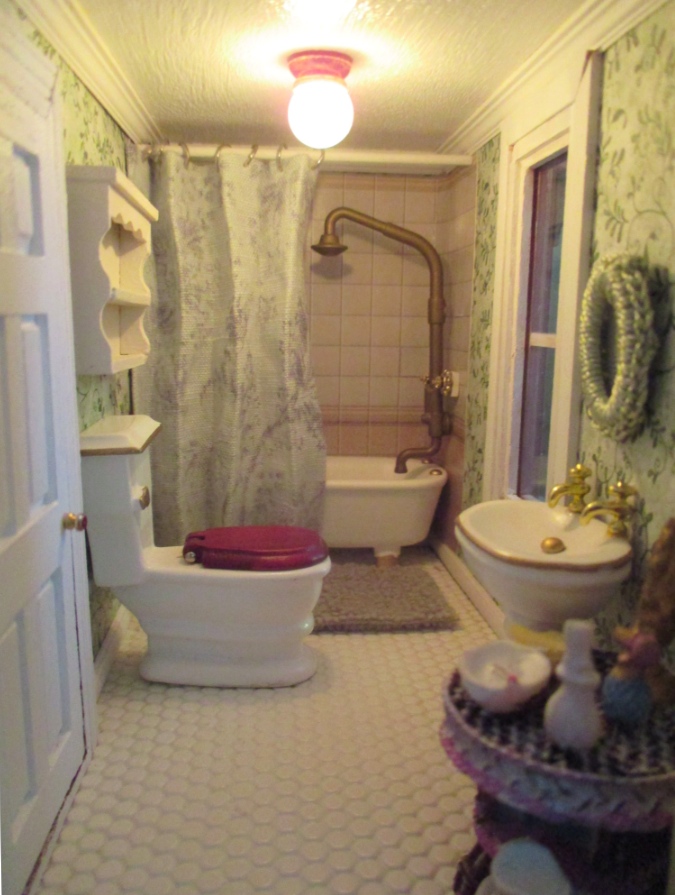
UPDATE 6/29/15: Trim added. The tiles look less fake to me, now.
 Emily is a freelance writer, miniaturist, and adventure game enthusiast.


Your ingenuity really impresses me – you come up with such clever solutions to things. Great work as always.
Aw, thank you. Sometimes I think I wouldn’t have to come up with such clever solutions if I didn’t poke at things or try to force them to work and mess them up in the first place…