Continuing with the Tomy dollhouse renovation, the first room I put back together was the living room, starting with the wrinkled wallpaper. Third time’s a charm?
First I removed the offending wallpaper. The glue had dried by this point but I got the remnants off with Goo Gone and a razor blade, like before. The lacquer thinner I used to remove the Goo Gone residue took off some of the color, but it’ll be covered up.
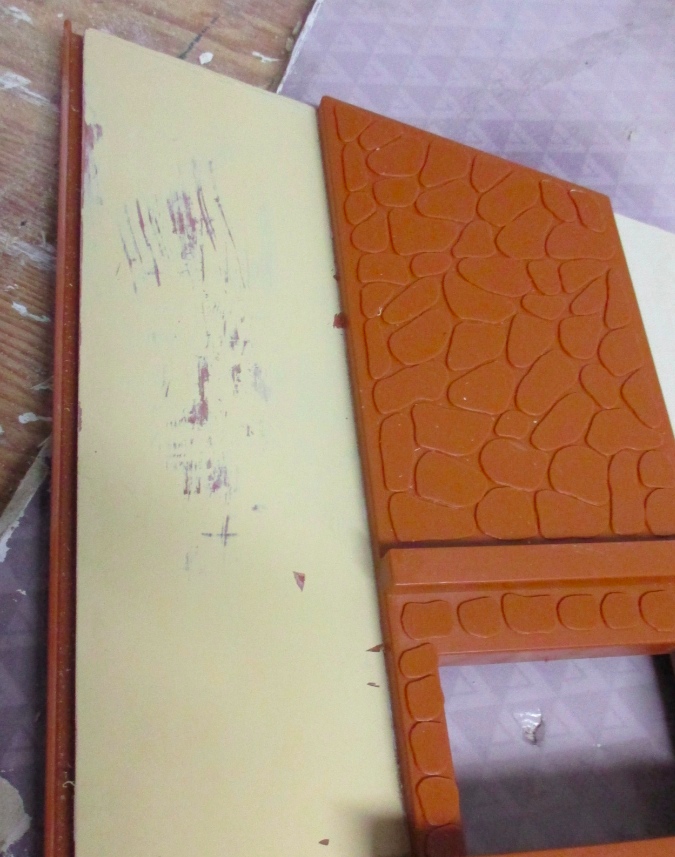
When the roof piece slides over the wall piece, the added bulk of the wallpaper makes for too tight a fit. That’s why it kept getting wrinkled; the roof piece was pushing down the top of the wallpaper. I decided to put the wall back in place first and then glue in the paper. That way I could get the top of the wallpaper exactly flush with the edge of the roof piece, without the wallpaper having to be underneath the roof piece.
I cut a new piece of wallpaper leaving plenty of excess so I could cut it to fit once the house was reassembled. Then I cut the top angle.
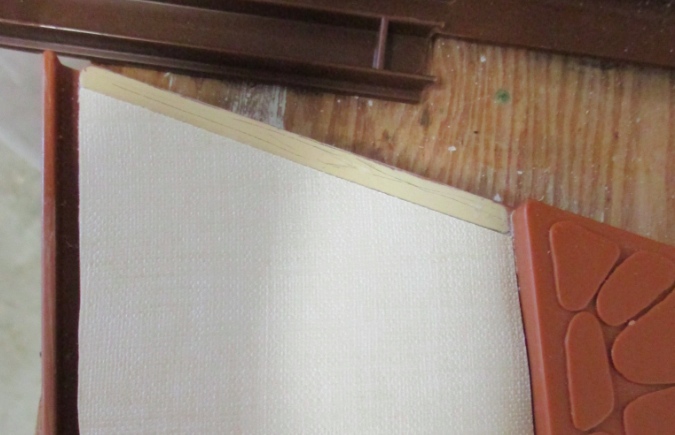
I put the house back together, lined up the top of the paper so the slanted edge butts right up against the roof edge. The bottom is able to slide beneath the floor without any issues but I needed to cut out the right corner to accommodate the fireplace, so I marked where the cut should be and did that before gluing in the paper once and for all.

Like in the rest of the house, it looked perfectly smooth initially but dried with some bubbles. I’m beyond worrying about that. C’est la vie.
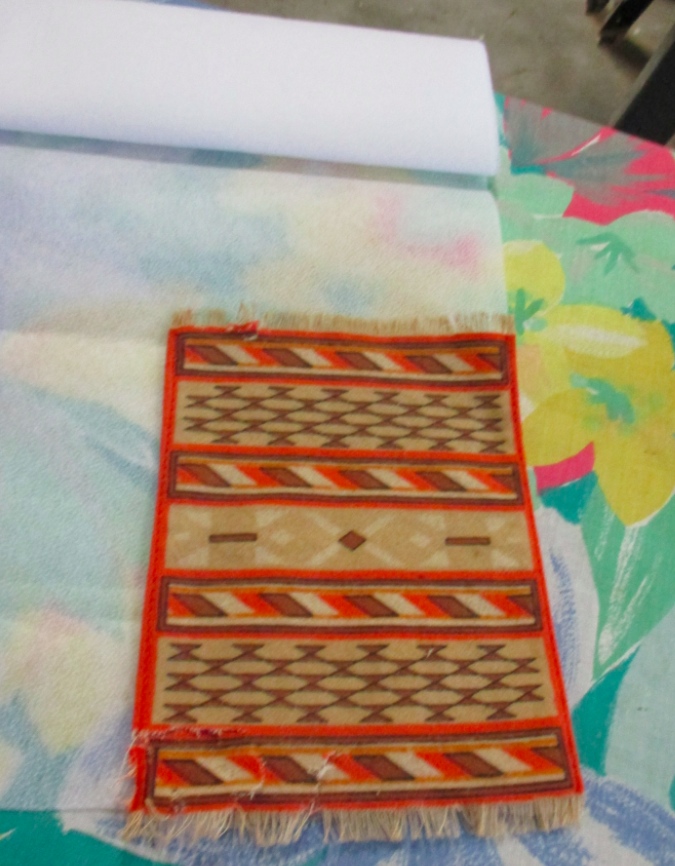
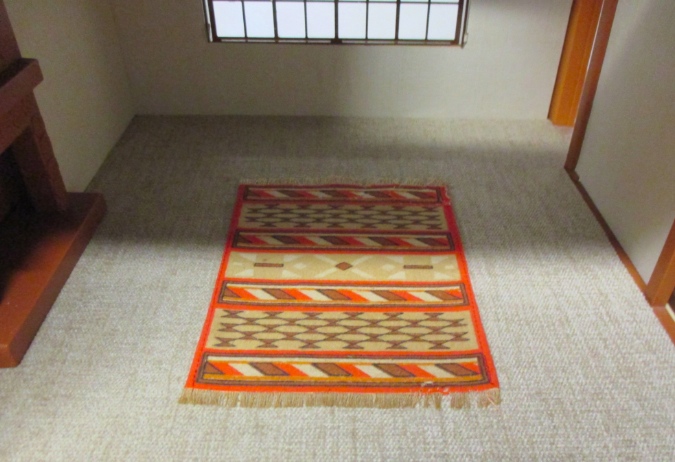
Next I repaired the living room rug, which had been nibbled by a mouse. The nibbled pieces were still connected, so I added a backing of iron-on fusible interfacing to secure the nibbled bits in place.
First I cut the interfacing to size.
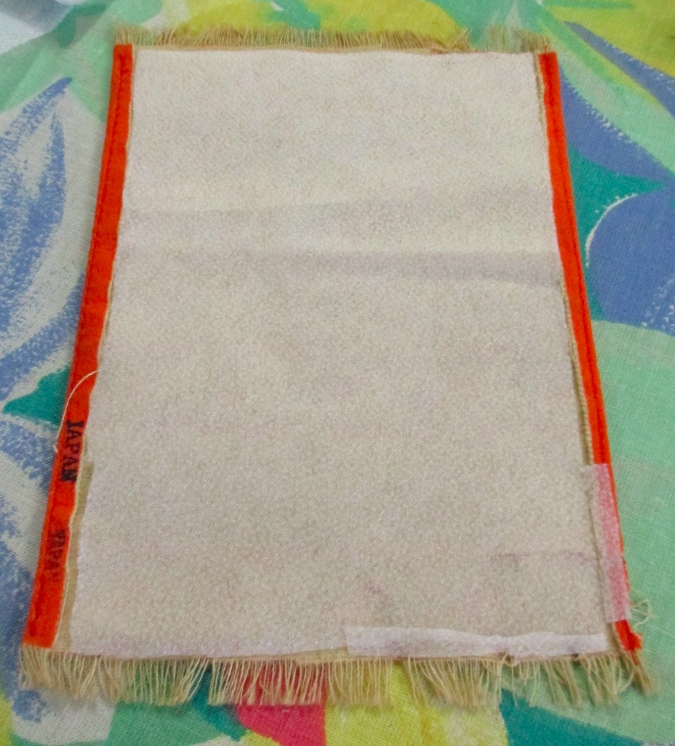
I covered the rug with a rag and held the iron on it for 15 seconds.
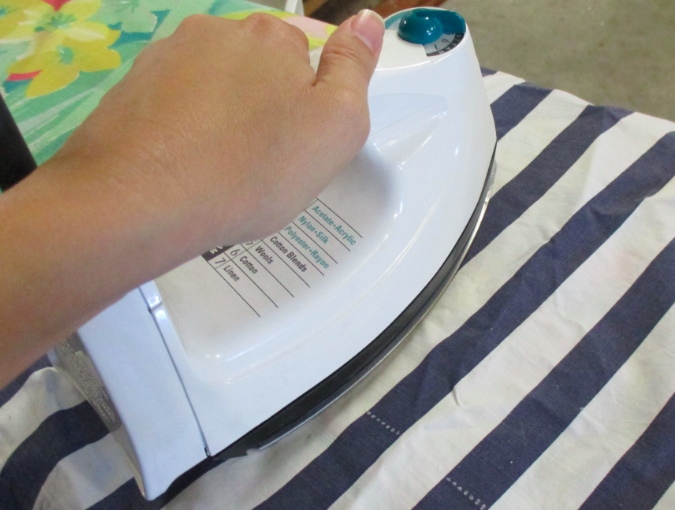
Voila! You can still see where it’s mangled, but there’s no worry of it falling apart now, and the mangled parts will be hard to see when the furniture’s in place.
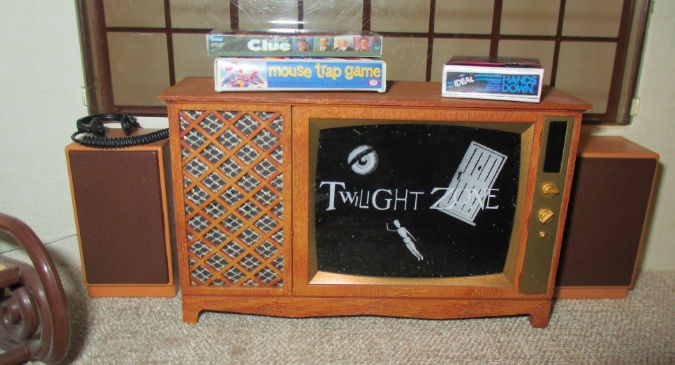
This is a 1:12 lamp that I bought for another dollhouse I haven’t finished yet. I didn’t want to cut off the wire and plug since I still hope to use it someday, so I taped them up to hide behind the TV.
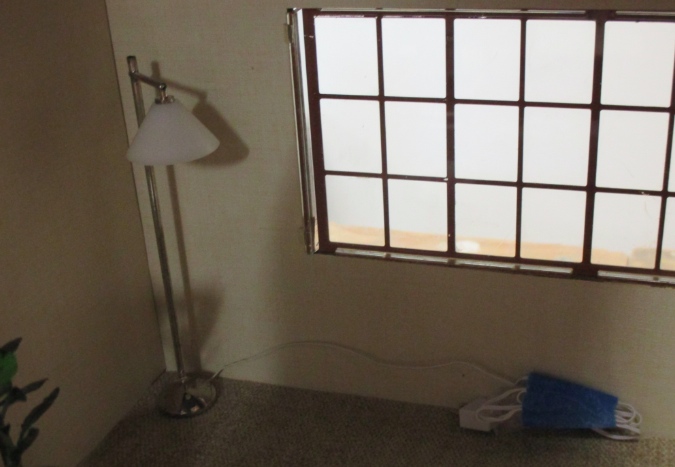
The TV, a 2009 Hallmark ornament, hides the cord nicely. The more recent Brady Bunch ornament would have been more fitting for this house, but it seemed silly to spend the money when I already had this one.
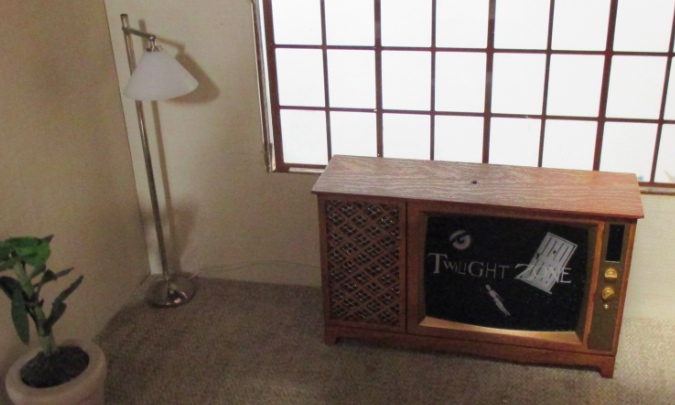
(Like Hallmark ornaments sometimes do, the Twilight Zone TV has shot up in value and now goes for $90+ on eBay. There’s also a Beverly Hillbillies ornament that’s almost identical to this one, that you can get for less than $10. Go figure.)
The TV has a battery compartment in the back so the screen lights up, but I don’t have any batteries in there right now. (The camera flash did a good job, though!) The speakers and headphones are Tomy.
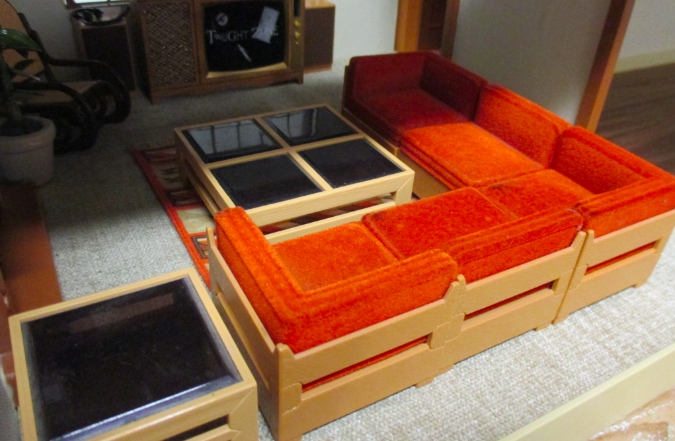
Working my way through the room, next I added the couch and tables. These are all Tomy, as is the rocking chair in the corner. The chewed up parts of the rug are covered up by the couch.
Anyone up for a board game night?
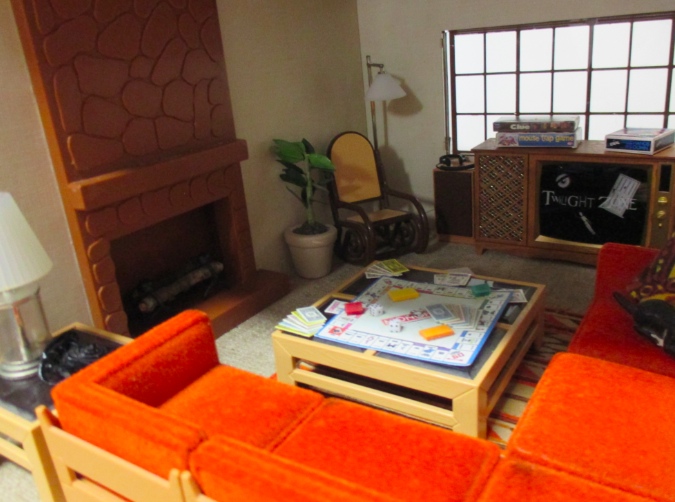
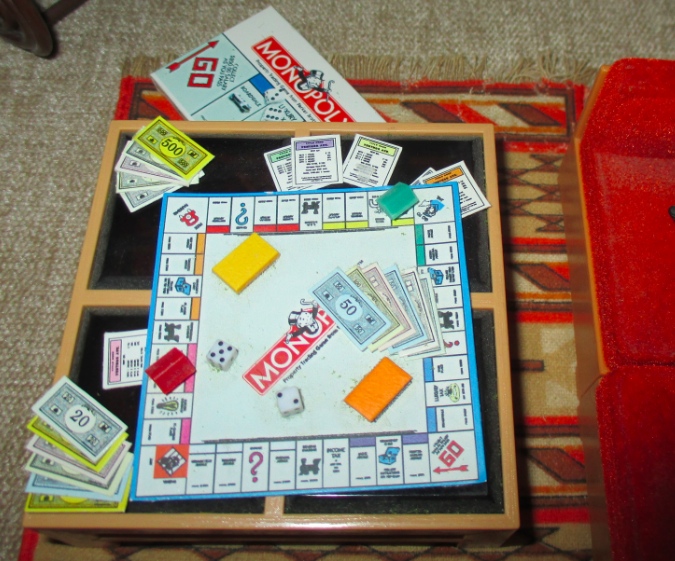
I love this Monopoly set, which is a 3D sticker set from Jolee’s boutique. I got it years and years ago and I haven’t seen one since, so sadly I don’t think they’re still available. I love how the cards and money are a few individual pieces, so they can be scattered around the table and tucked under the board.
I added a few logs to the fireplace made from a twig I picked up outside. The metal log holders (1:12 scale, probably) are just the right depth to fit in here.
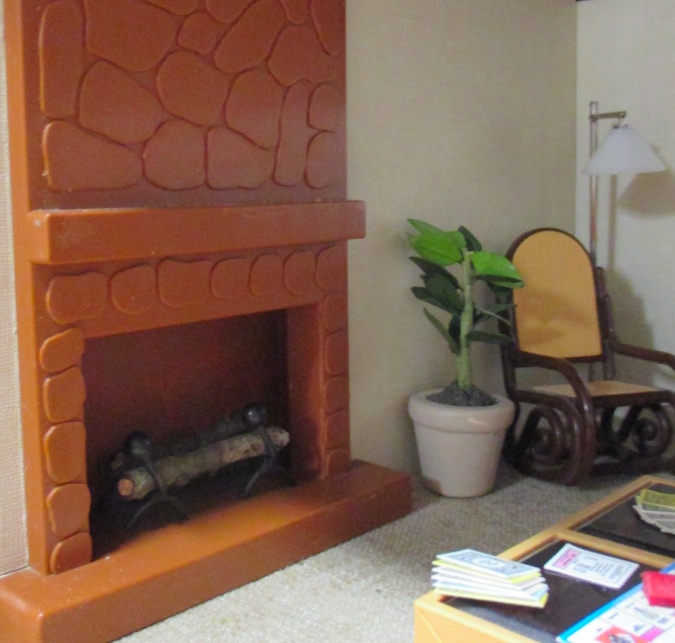
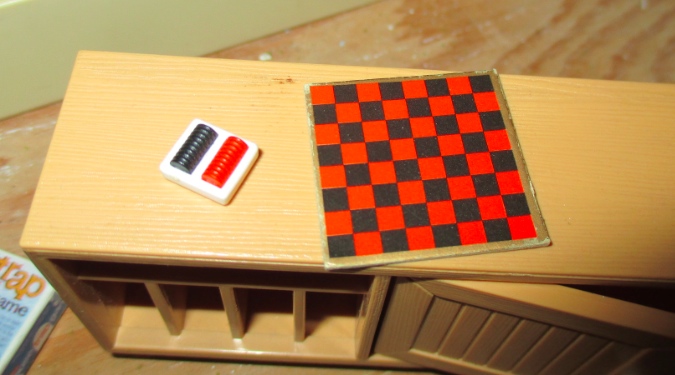
The last piece of furniture in this room is the low cabinet, made by Tomy, that holds the record player. My original Tomy checkerboard and checkers are inside the cabinet. I got these with the rest of the Tomy living room in the early 80s, it’s amazing the checkers never got lost.
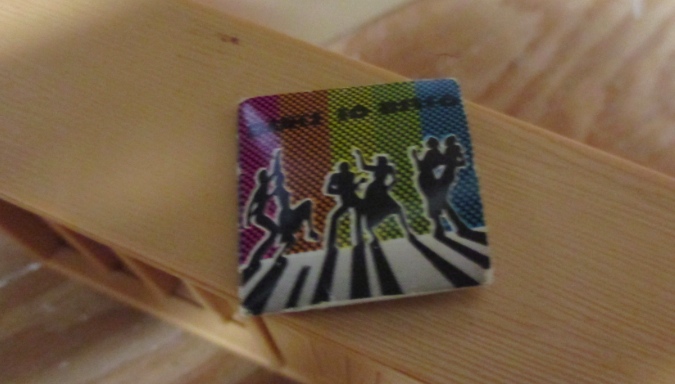
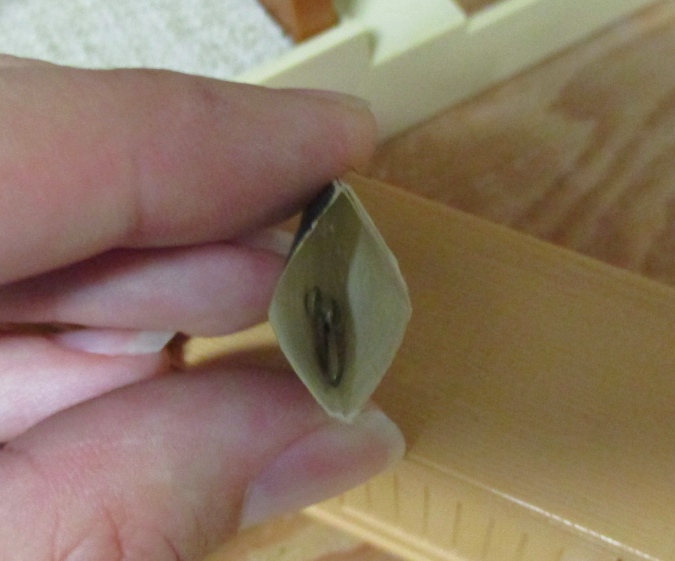
This is an original Tomy album cover that came with a batch of furniture I bought on eBay when I first redid the house.
Apparently I’ve never looked inside it before. Tiny spoons! I think these are original Tomy but am not 100% sure. I have moved them into one of the kitchen cabinets for safekeeping until that room gets set up.
These are album covers I made when I was a teenager. I cut them out of a catalog or magazine, possibly from an ad for the Columbia Record Club or equivalent. They were made basically the same way as these: glued to a piece of stiff paper with Scotch tape at the top and bottom to hold the front and back of the album cover together. They’ve held up surprisingly well over 20+ years!
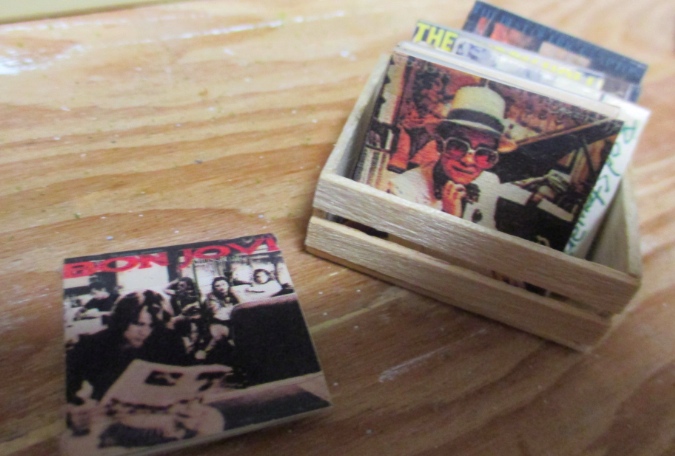
I didn’t do the math, but the album covers are surely bigger than 1:16 scale (the scale of the Tomy house). I don’t care, I think they look fine.
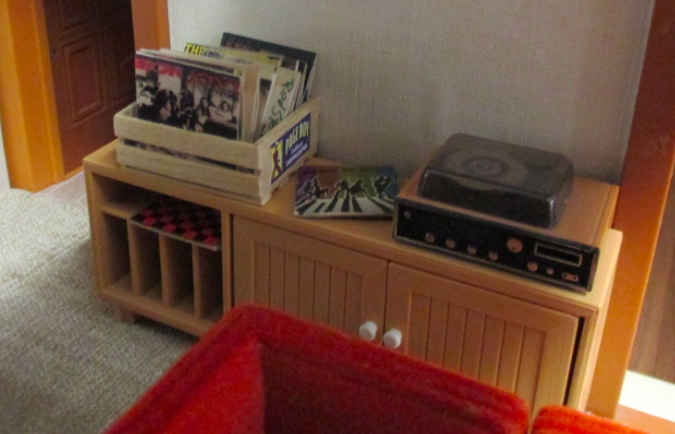
And here’s the finished room.

 Emily is a freelance writer, miniaturist, and adventure game enthusiast.


Leave a Reply