The other day I was mulling over puzzle house path ideas, but wasn’t crazy about either one. Yesterday I came up with a third option that’s a winner—”flagstones” made out of egg carton material.
I’ve heard of people using egg cartons to make miniature bricks and stones, but this is my first time trying it. It’s amazingly easy! These aren’t actually cut from an egg carton, but some other egg carton-like material that I had leftover in the hamster toy drawer (which serves no purpose now that all my hamsters have died). I think it started out as packing material that held a computer or other electronic device in its box. It has nice bumpy texture, giving the flagstones a very realistic appearance.
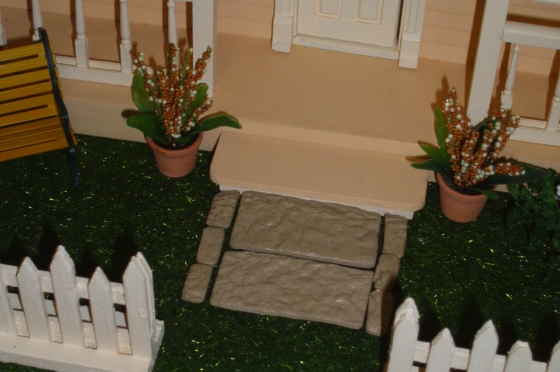
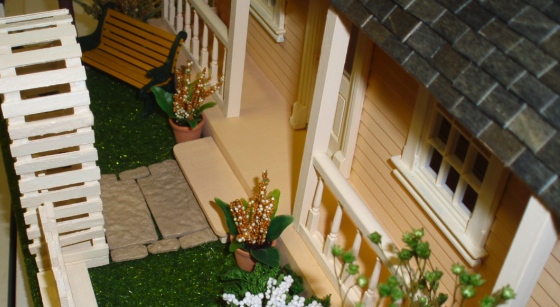
After cutting the so-called stones the way I wanted them, I painted them with Glidden’s Warm Caramel (a coordinating color to the Belgian Waffle and Sandy Feet I used for the house and trim). Then I coated them with matte varnish. They were still wet when I took these pictures, so they’re a bit shinier than the end result.
I’m close to being done with the landscaping. All of the plants have been made, and today Geoff helped me cut the trim for the edges of the base. (Home Depot only had corner trim that was a little too short or a little too tall, so we got the too-tall trim and had to cut off the edges with the big-and-scary radial arm saw.) The next step will be to glue everything down. In the meantime, I’ve posted some more pictures of the in-progress garden here.
Who would have thought this $8 puzzle house could turn into such an elaborate project…
 Emily is a freelance writer, miniaturist, and adventure game enthusiast.

