These are Sam & Max, the Freelance Police.
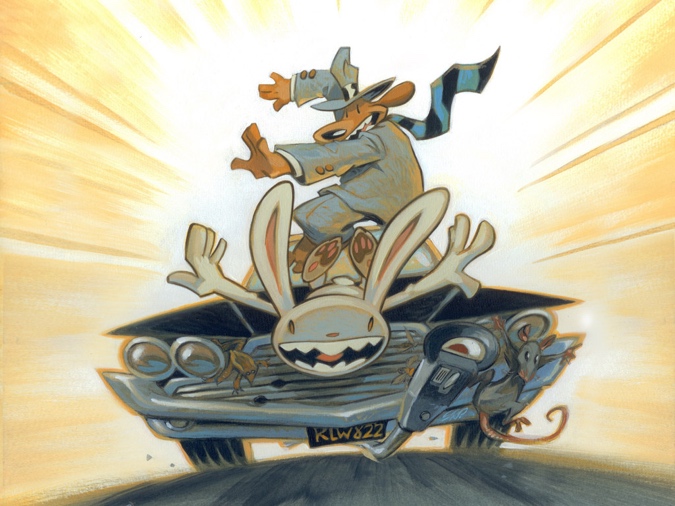
Sam & Max are a dog and rabbity-thing who fight crime in their own special way. They’re the creations of artist Steve Purcell, and have starred in comics, video games, and a short-lived animated series. I could write much more about them — but why do that here, when I already have elsewhere? Check out Parts 1, 2, 3, and 4 of The History of Sam & Max, written by yours truly back in 2007.
I first encountered Sam & Max in college, when a guy I was dating gave me a copy of the comic collection Surfin’ the Highway. Though I was a player of adventure games, at the time I had never even heard of their 1993 game Sam & Max Hit the Road. (Maybe because it was made by LucasArts; I was a fan of rival company Sierra.) Sam & Max popped back into my consciousness in the early 2000s when a sequel, Freelance Police, was canceled by LucasArts, and Steve subsequently licensed the game rights to Telltale Games, a company started by people who had been laid off from LucasArts when Freelance Police was cancelled.
When I started working at Telltale in 2006, Sam & Max became a bigger part of my life. (You can read about that here if you’re interested.) I even had Max on my business card.

I worked at Telltale for about three years, during which time we released of two seasons of Sam & Max episodic games and produced a 20th Anniversary edition of Surfin’ the Highway. (More details about the book project are archived in this blog post, sadly without the original art.) I thought about making a roombox of the Freelance Police office, but didn’t have a lot of free time (a job in the game industry will do that to you!) and just never got around to it.
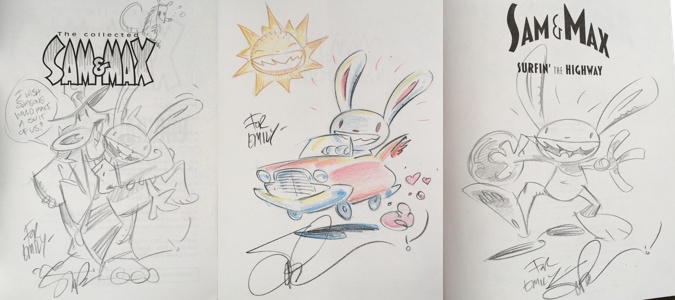
(These are sketches Steve made for me in three different copies of Surfin’ the Highway. The talk bubble in the first one says “I wish someone would make a suit of us!” in reference to the suit we unleashed on San Diego Comic-Con in 2007.)
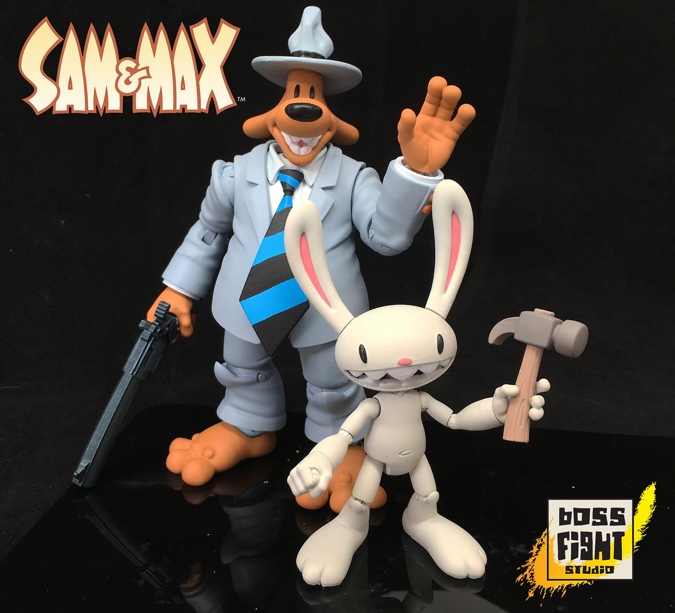
My latent idea to make a Sam & Max roombox awakened last fall when Telltale went out of business — an unexpected event that hit me hard even though I’d left the company a decade earlier. And then I learned that Boss Fight Studio is making a set of 1:12 scale Sam & Max action figures, and decided the time had come.
 Emily is a freelance writer, miniaturist, and adventure game enthusiast.

