I recently saw a fun rotating roombox on eBay — it’s divided into four sections, each decorated for one of the four seasons.
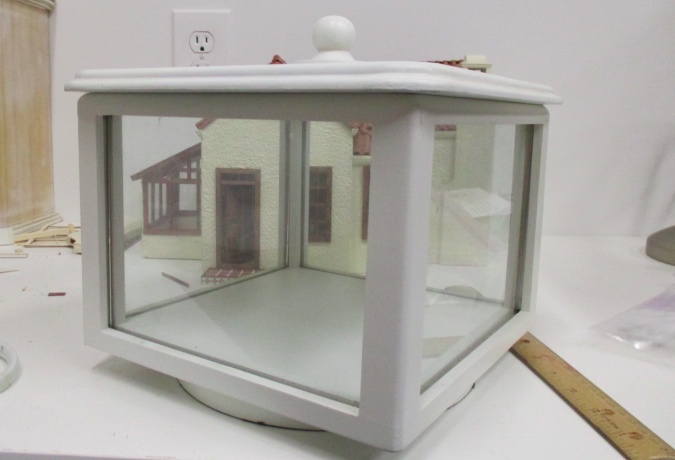
I have a similar rotating box in my stash that my mom found at a thrift shop. I think it’s supposed to be for holding photos (you put a picture behind each of the four pieces of glass, and use the center part to store loose pictures). The interior is just over 5″ tall, making it good for half scale. The lid and glass are removable, so you can access the inside through the top or the sides.
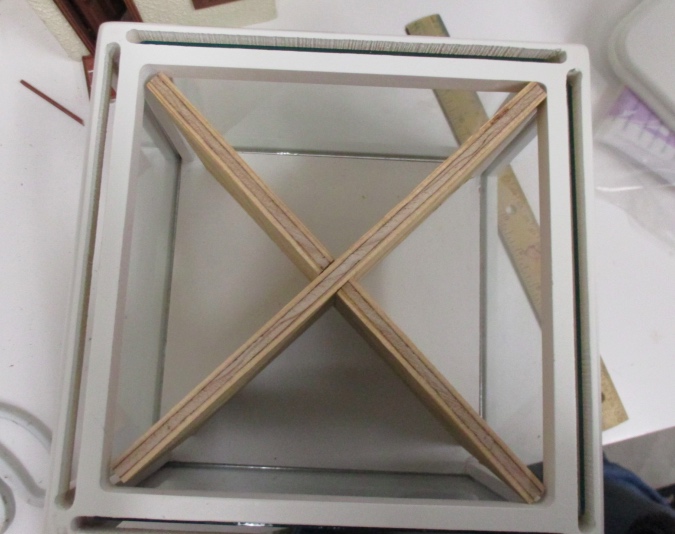
Geoff cut me two pieces of plywood with slots in the middle, so they slide together and divide the inside into four triangular sections.
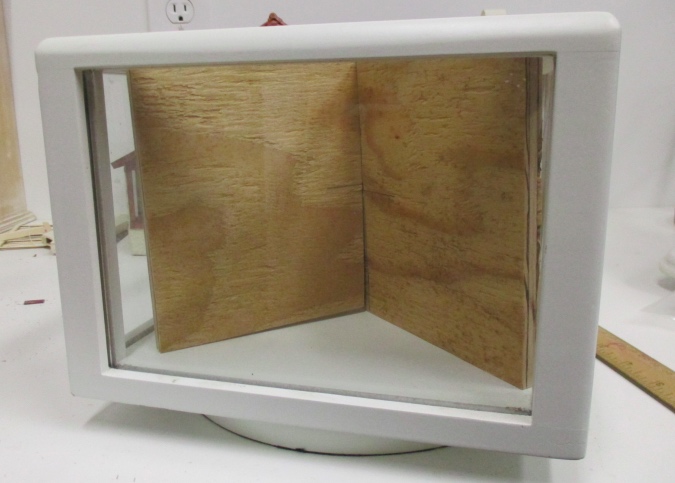
Due to the trim around the top of the box, the wood can’t extend all the way to the corners. I want to keep them removable while I do siding and painting, but after I insert them permanently I’ll add trim to the edges to cover those gaps.
Unlike the roombox on eBay, which shows four different scenes, I want to do four seasonal variations on the same scene. Each scene will have the same window, door, stoop, and path, but with different landscaping and accessories.
Here are the door and window I’ll use. The door is meant for G scale train layouts and doesn’t open, which is fine for this purpose. (I wanted something different than the same old Houseworks doors I use over and over…) The bow window provides a little ledge where seasonal items can be displayed inside the window.

Before I could do siding I needed to figure out where the door would be positioned, and that required knowing how high the stoop would be, so that’s the first thing I did. I made four frames out of quarter inch basswood.

(I bought four orange cats in different poses, so the cat can make an appearance in each scene!)
I covered the top and sides of the frames with egg carton.

Then I used a dry brush to add brown and gray shading, and sealed the egg carton with matte sealer. (You’ll find more posts about egg carton stone here.)
Next I cut a piece of posterboard to form the base of the first path, and used this as a guide to make three more. (I kind of got ahead of myself here… in retrospect I should have done the siding next, and then made the paths once I was sure of the door placement.)

I haven’t blogged about it yet, but I have been slowly covering the Victorianna’s foundation with egg carton brick (as you can see here). I referred to Otterine’s tutorial, changing the dimensions to work in half scale. I did the paths with a herringbone pattern.

Each 1:24 brick is only 1/8″ by 3/8″ — it’s hard to cut such skinny strips out of an egg carton! It’s more time consuming than egg carton stone because you have to cut a bunch of bricks first, rather than tearing the stone pieces as you go. A tip for now: I’ve found it works better to cut a 3/8″ strip and then cut that into 1/8″ pieces, rather than cutting a 1/8″ strip into 3/8″ pieces.

Not identical, but close enough!

Next I painted a base coat of Craft Smart Brick Red. There’s nothing special about this paint, I just bought it because it said brick in the name!
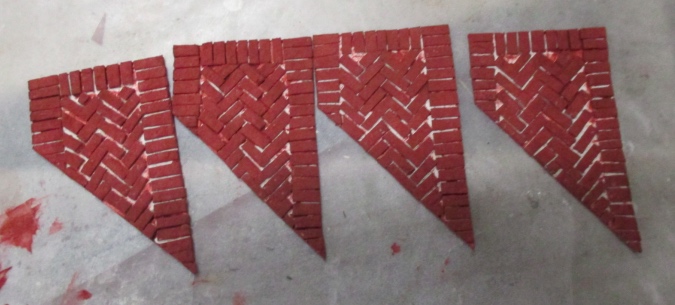
Next I did a couple of washes (brown and gray), and when those were dry I coated the paths with matte varnish and left them to dry. I didn’t mess around with color variation on these as much as I did for the brick fireplace in the Thatched Cottage… they’ll be partially covered up by landscaping and I was eager to keep moving with the project.

Next came the mortar. This is Andi Mini Brick & Stone Mortar Mix (mine came pre-mixed in a tub rather than the powder sold by Miniatures.com). I spread it with my finger, making sure to do the sides since some of them will be visible.

As soon as the mortar was spread over the whole piece, I wiped it off with a damp paper towel. Below you can see how the first one turned out, on the left. I was surprised by the splotches — I thought I must have taken some of the paint off with the paper towel and was seeing the egg carton underneath — but I actually like the realism.

Would you have guessed it’s painted egg carton?

The second one I did, below on the left, didn’t look nearly as splotchy as the first. That concerned me because the four paths were supposed to be “identical,” but I couldn’t do anything about this point, so I moved onto the third…

Okay, here we have the third (still damp) path on the left, then the second path (which *wasn’t* splotchy in the previous photo), then the first one, which I dampened again a bit before taking this picture. Turns out the splotches are dried grout stuck in the pits of the egg cartons, and they get more pronounced as the bricks dry. (Also, the paper towel had gray residue on it, not red, so I couldn’t have been wiping off paint.) This means that when all four paths are dry, they all have that same speckled / weathered look.

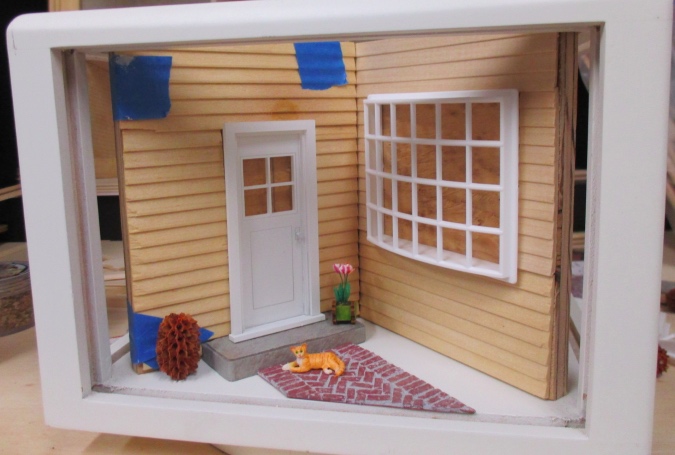
I’ll get into the siding with my next post, but here’s a sneak peek to whet your appetite…
 Emily is a freelance writer, miniaturist, and adventure game enthusiast.


Leave a Reply