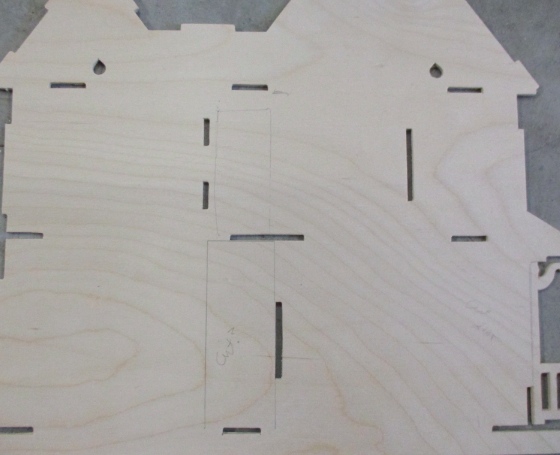
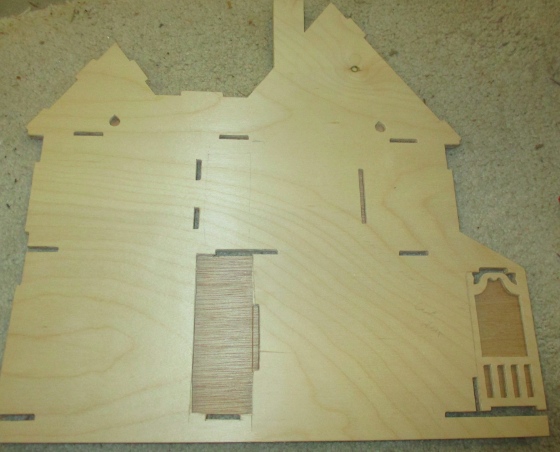
Before I can start assembling the back-to-back Victorianna, I had to figure out where I wanted to cut holes for additional windows, hallways, etc. I scrutinized the dry fit from every angle and drew in the holes I wanted. The first one I tackled is the first floor passthrough from one side of the house to the other, which will be next to the fireplace.
(Note: this wall is technically going to be in the center of the house, but I’m going to refer to it as the “back piece” since that’s what it’s supposed to be in the original kit and I have to call it something…)
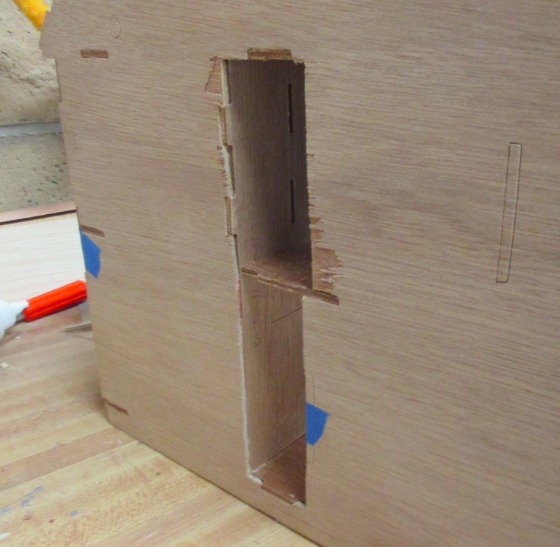
For some reason I thought this would be easy to do with a utility knife. But even after many slices, I hadn’t broken through the plywood and my hands were starting to hurt. The birch plywood is definitely stronger than I remember luan plywood being the last time I messed around with a die cut kit.
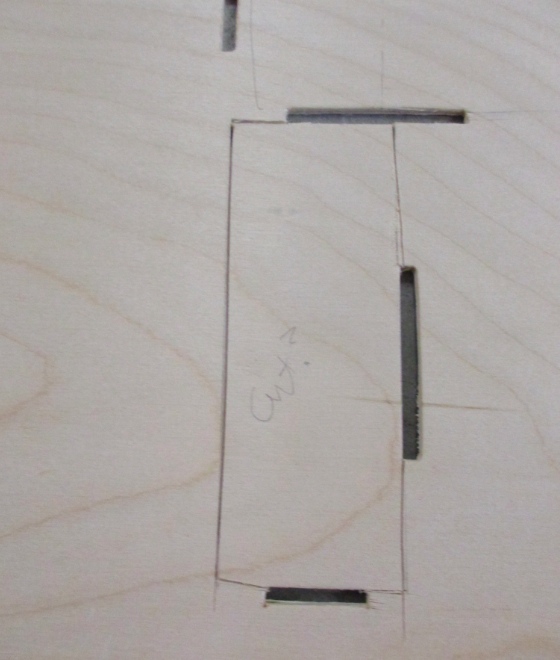
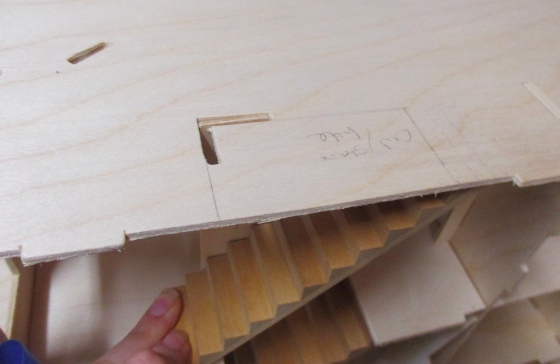
I finally managed to get the first hole cut, figuring I could clean up the edges with a file.
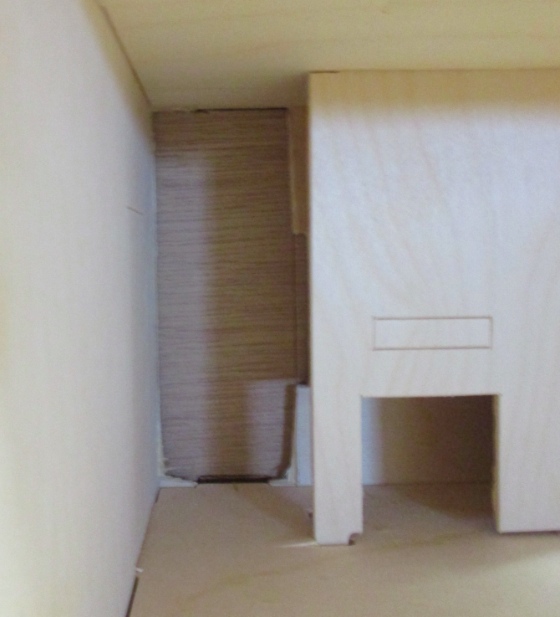
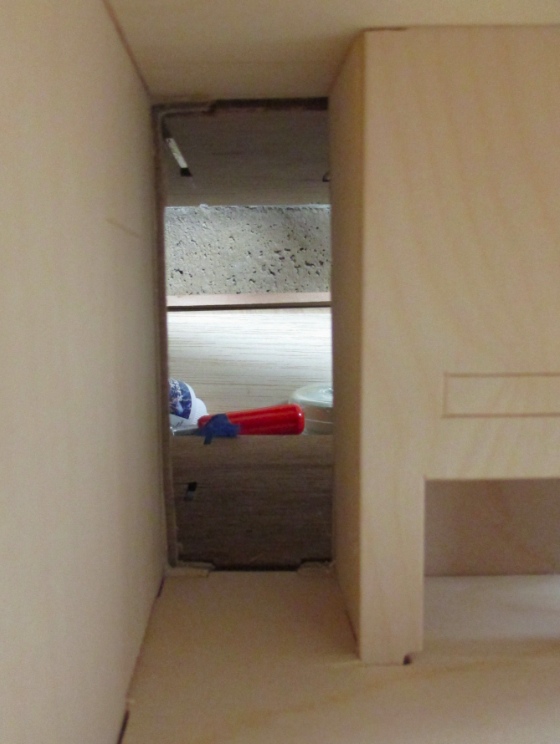
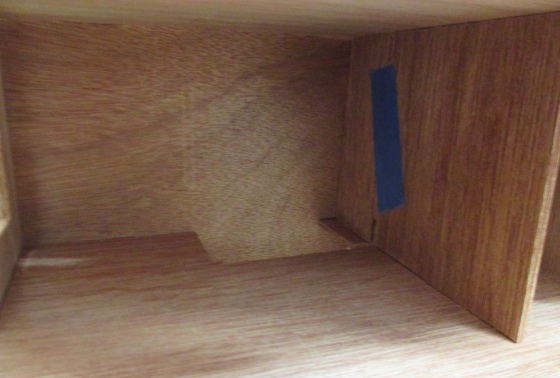
Here you can see how the hole will be positioned next to the fireplace.
I placed the birch plywood back piece on top of the luan plywood back piece and traced the hole, so it would be lined up correctly.
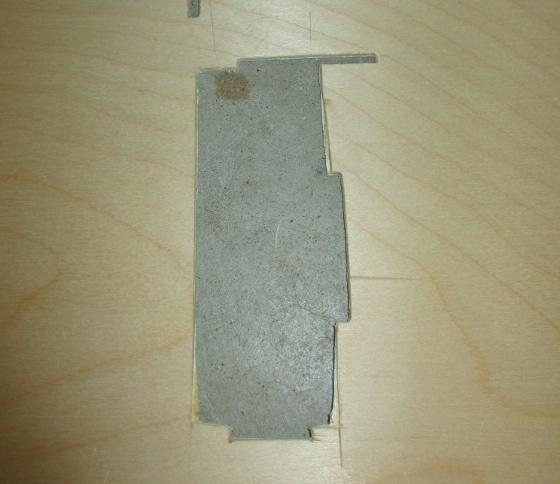
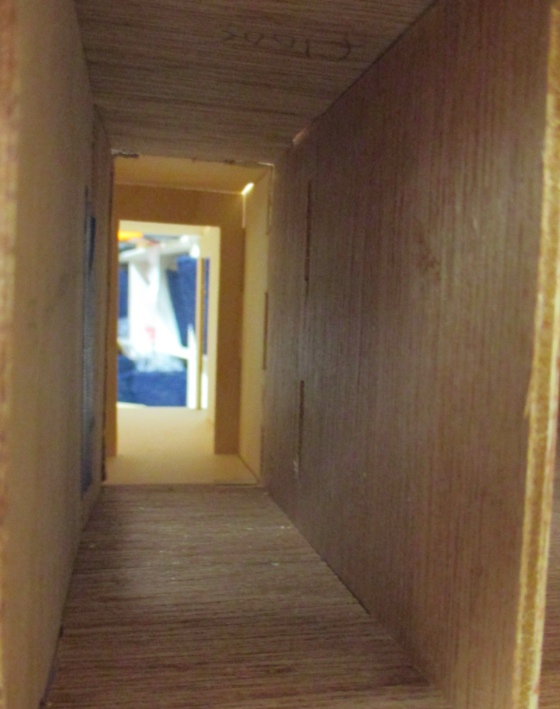
The luan plywood was a bit easier to cut, but it also splinters more easily. Besides filing the crooked edges I will need to do some clean-up with wood filler. But here’s how it looks now that you can see all the way through.
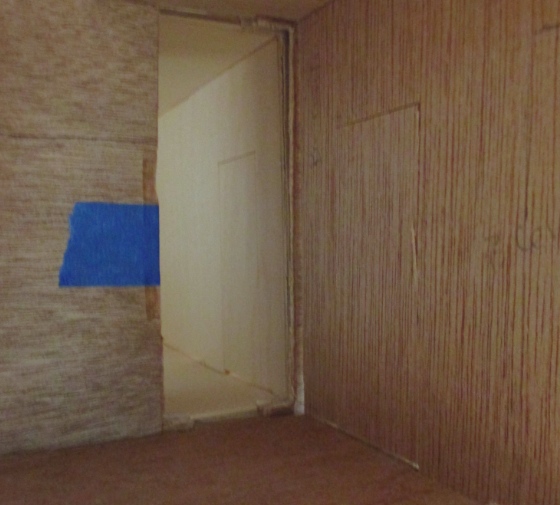
And from the living room side.
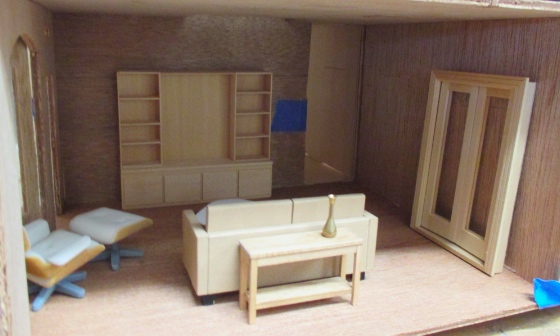
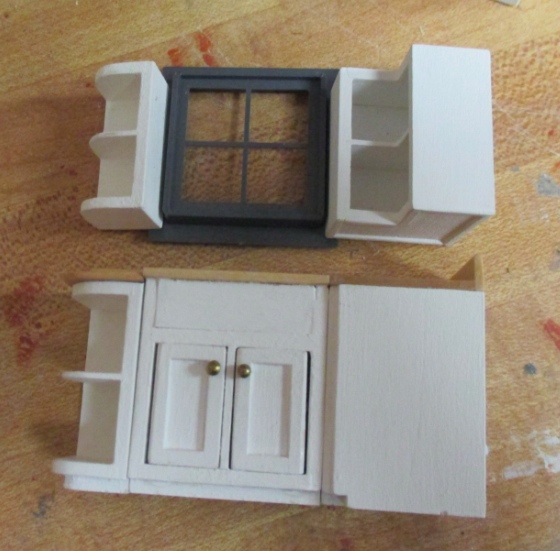
I was grumpy from cutting holes with the utility knife so I took some time out to play with furniture. Here’s what I’m thinking for the living room.
Once my hands were rested, I next cut off the porch railing that protrudes from the back pieces.
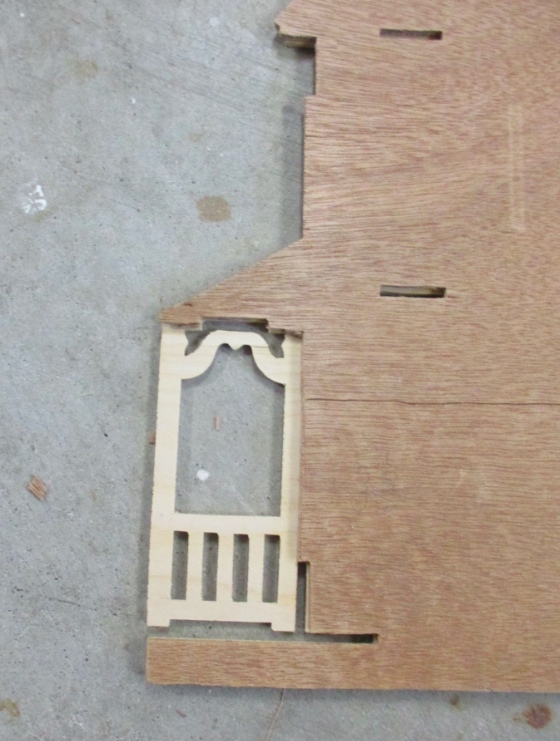
Here’s how the dry fit looks with the porch railing removed. This way the porch will run all the way across the length of the house without being broken up by a railing. (I plan to fill in the doorway and stair hole on the luan side.)
I used the utility knife to modify a wall I won’t be using, so it will fit into a bedroom wall I will be using that needs to extend farther back.
That larger wall now encloses this second floor bedroom. (The unused stair hole will be filled in.)
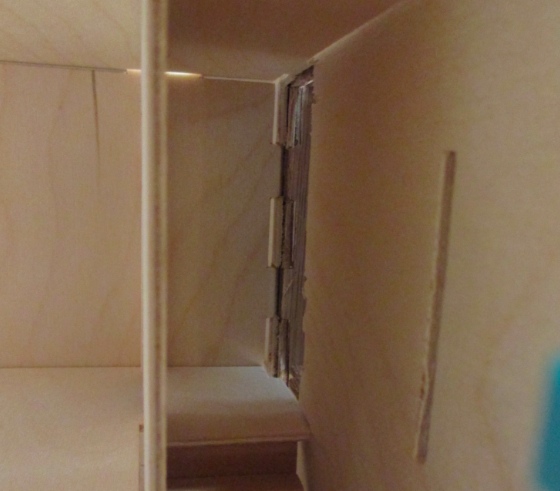
And here’s how the second floor hallway looks, with the modified wall to the left. With this in place, I traced around the walls so I’d know where to cut the passthrough hole.

And here’s that hole. The wood splintered badly but this side of the wall will be sandwiched against the other back wall, so it won’t be visible.
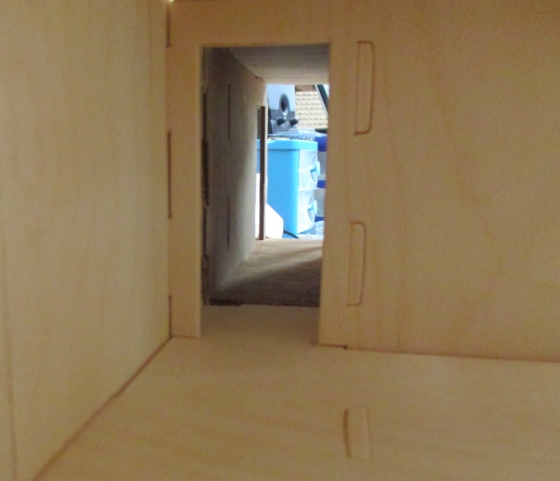
Here’s the second floor hallway, with the hole cut in both back pieces. On the birch kit side, the area at the top of the stairs is closed in by a wall with a doorway; I’m leaving that wall out on the luan side.
Here’s how it looks from the stairwell. The McKinley also has this top of the stairs area partitioned off, but in the McKinley the stairs are fake, so the wall and doorway give the illusion that there’s a stairway behind it. In the Victorianna, there is a real stairway leading up into this area.
And here’s how it looks from the other side. There’s supposed to be a wall to the right of the doorway, separating off the bedroom, but I’m leaving that out and what would normally be a bedroom will instead be an open room leading to the second floor staircase.
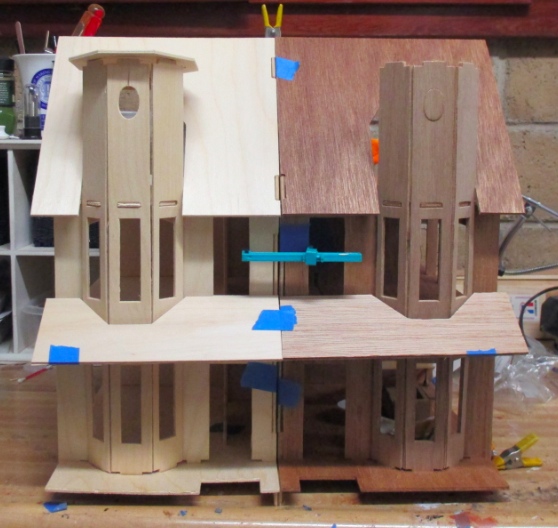
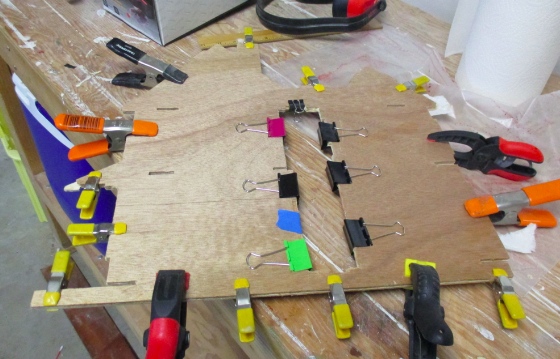
With those holes cut and the edges somewhat cleaned up, I decided to glue the two back pieces together. I’ll assemble the house from the middle out, as opposed to building both houses separately and then connecting them. Gluing the back pieces first seemed like a better plan for keeping everything square and lined up.
Lots of wood glue…
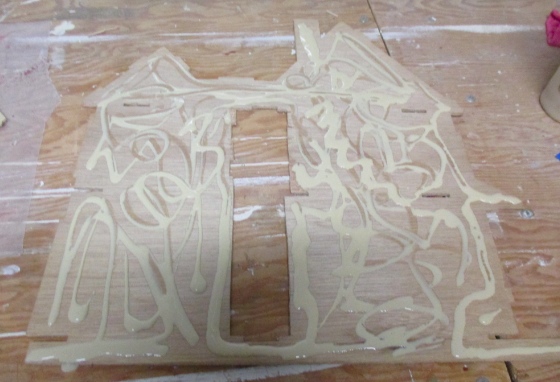
And lots of clamps!
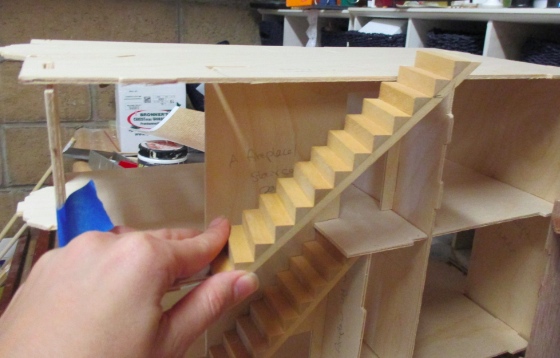
While that was drying, I went back to what was still standing of my dry fit and took advantage of the missing back wall to modify the second story staircase. The kit comes with stairs but I always get frustrated putting them together, and I had some Houseworks stairs lying around, so I decided to upgrade.
The second story ceiling is lower than the first story so two stairs had to be cut off.
I used Geoff’s life sized miter box to make the cut.

With the stairs in place, I was able to figure out where the hole in the third floor needs to be.

Like on the first floor, I’ll have the floor serve as the tread for the top step.
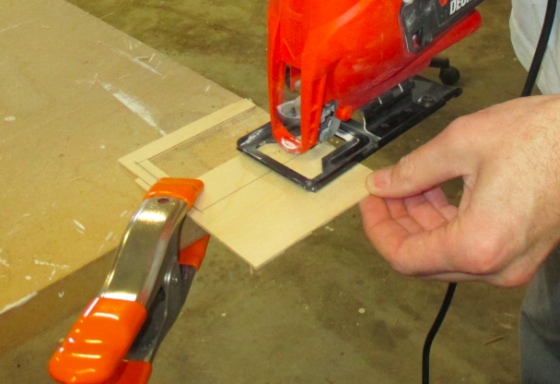
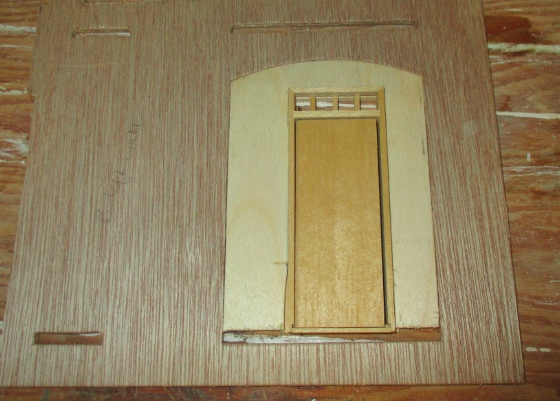
Since the utility knife was proving not to be a good way to cut holes, at this point I figured out where the rest of my cuts needed to be so Geoff could help me cut them, with power tools, in one fell swoop. For some of them, like the kitchen window, this was a bit tricky since it relied on where furniture would be placed.
I measured the fridge + cabinet above it to figure out where the top of the cabinets (and therefore the top of the window) will be. Then I laid the cabinets that go around the window on the wall to figure out the horizontal spacing. I hope I got it right…

On the second floor, as I messed around with closet ideas in the bathroom, it was bothering me that there would be a side of the closet to the left of the washer/dryer that would be inaccessible.

I stewed on this for a while before realizing I could just cut a hole in the back wall and have that inaccessible area become part of the bedroom behind it.
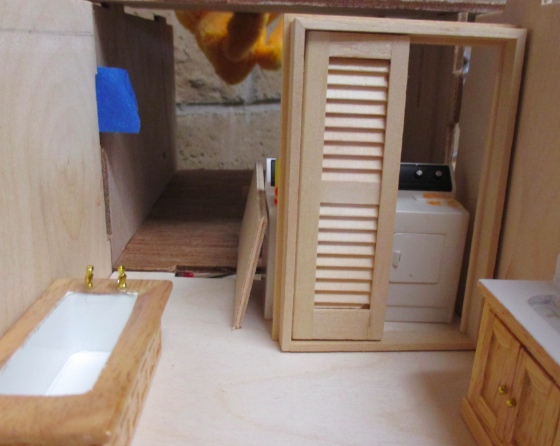
This is potentially risky: by cutting this hole, I got rid of the tab that the back walls fit into. The outside of the house will have siding and I figure that will add stability across the seam between the two back walls. On the inside I’ll need to fill in the slots that no longer have tabs to fit into, and might need to add some reinforcement across the seam.
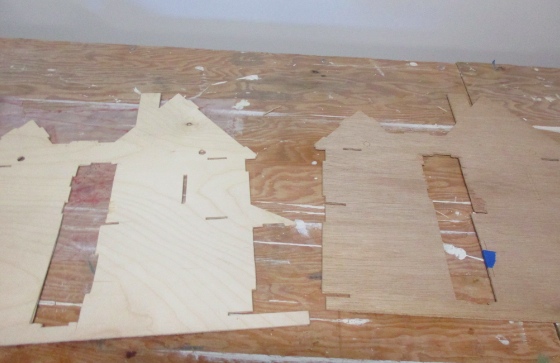
Geoff cut the rest of the holes with a jigsaw.
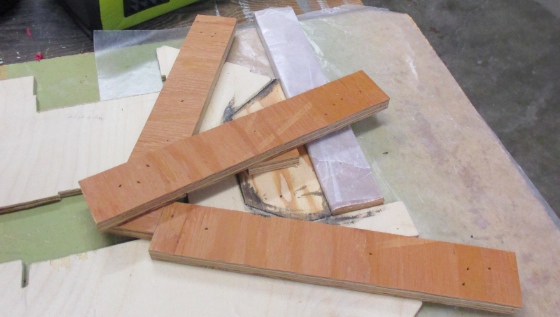
Here are all the pieces that got cut in this round. I’ve already realized there are a few more that need to be done, next time I can sweet talk him into helping…

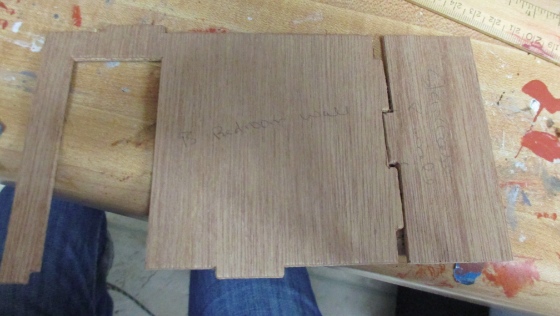
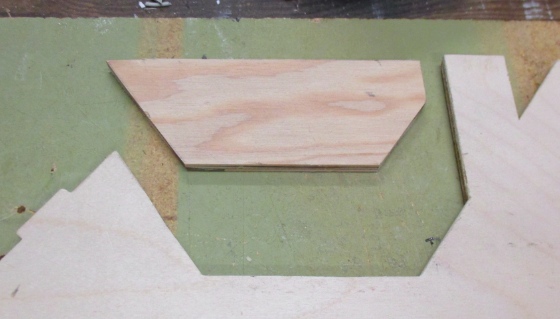
Since the birch plywood is less splintery than the luan, I’m using that to fill in some of the holes on the luan side that need to be filled in. Here’s how the back door will look, in the place that would normally be the kitchen bay window.
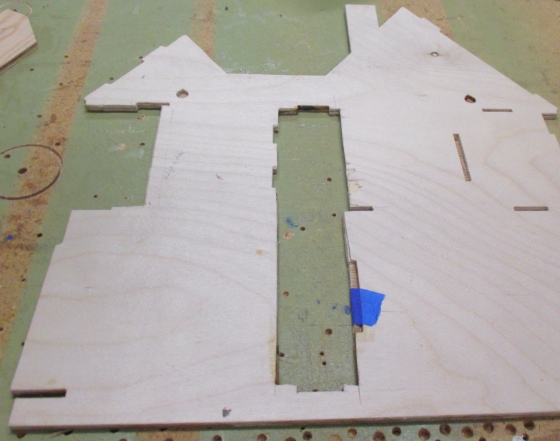
Finally, Geoff helped me make a piece to alter the roofline. I think in the McKinley, the back piece pops out from a larger piece of wood so you can modify the surrounding wood for this. But in the Victorianna the back piece is standalone, so we needed to start from scratch.
He cut off the tabs in this area, then drew the outline onto a piece of plywood. The two back pieces glued together are about 3/8″ thick so we used 3/8″ thick plywood.
My back pieces are slightly warped so he rigged up a jig to make sure the piece glues in flat.

We used JB Weld instead of wood glue, for added stability. Messy but effective!
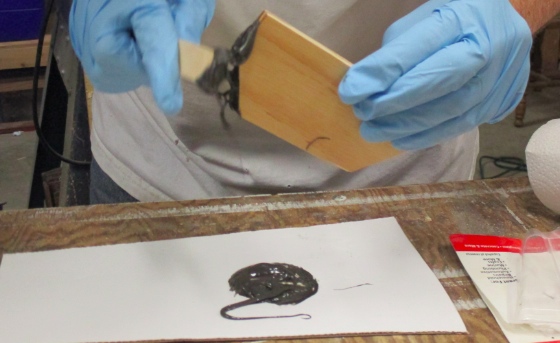
Here’s how we left it. The stuff takes 4 hours to set, so we’ll see…
 Emily is a freelance writer, miniaturist, and adventure game enthusiast.


Wow! Your mind is incredible!.
Great job! Go, go, go!
You’ve obviously given all of this a lot of thought and have lots of experience with these type of kits to have worked out how to do this – I still can’t envision how these two houses will fit together so obviously need to go back even further. When the house is completed it will be stunning! And have lots of rooms, which is great too.