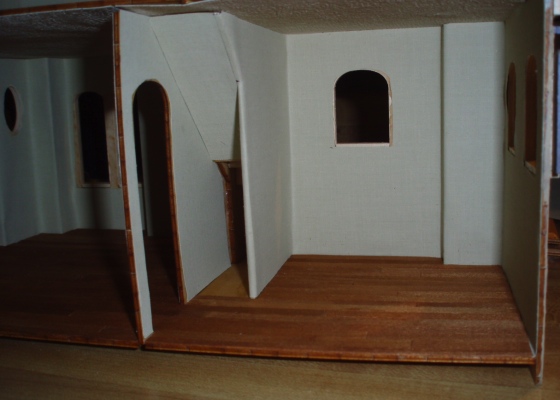
With the exterior (mostly) finished, I turned my attention to the Rosedale’s interior details, starting with hardwood floors.
I’d intended to use coffee stirrers like I did in the puzzle house but was concerned about them getting in the way of the front door, which fits right into the doorway without any extra clearance. Then I paid a visit to Peg’s Dollhouse, a quirky store in Sebastopol that was having a moving sale, and came home with a bunch of goodies including a package of LittleWonders Lumber. I’ve never seen this brand before but judging from the package it was pretty old.
The wood is nice and thin, so I decided to give it a try. I’ll probably still have to sand the door a little bit but it’s much better than the coffee stirrers would have been!
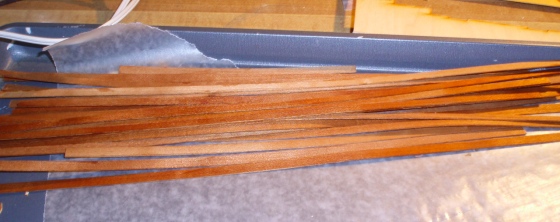
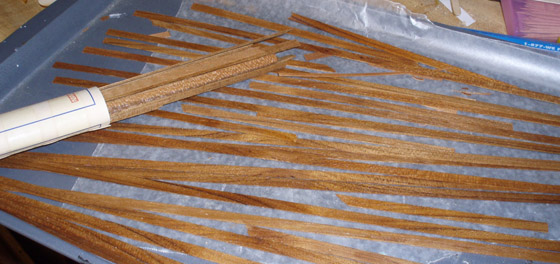
For the staggering price of $2, Peg sold me a package of teak lumber as well as some loose pieces that I initially thought were the same stuff and had just fallen out of the package. (More on this below.) I started with the loose pieces. They were already smooth and a nice reddish color, so I skipped sanding/staining and instead coated them with matte varnish to add a bit of a sheen.
The wood was easy to cut with scissors. I applied it using tacky glue. Goodbye, ugly floor crack!
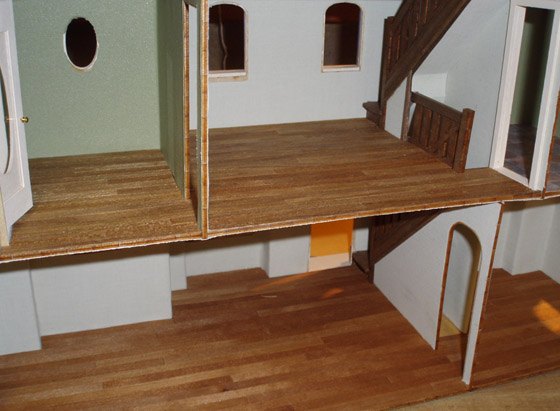
I had just enough of the loose pieces to do the entire first floor. (I’m planning to build in shelving under the stairs; that’s why the flooring stops abruptly there.)
As it turns out, it’s a good thing I had just enough of these loose pieces, because I realized when I pulled additional wood out of the package that they aren’t the same. The boards inside the package are rougher and a bit darker. Either the loose stuff was something else (possibly a different type of wood, as opposed to the teak?) or it had already been prepped. I tried coating the new wood with matte varnish but it came out very rough to the touch and I didn’t like the color. I used fine sandpaper to remove the varnish and smooth out the finish, then stained the wood with Minwax cherry and varnished again.
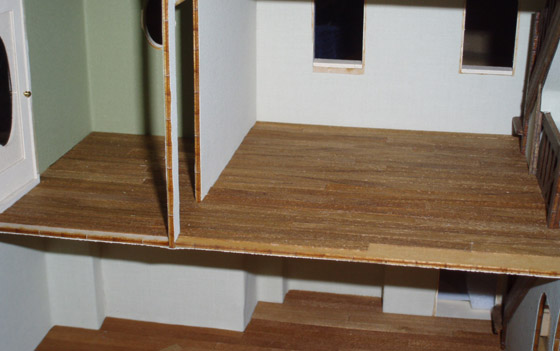
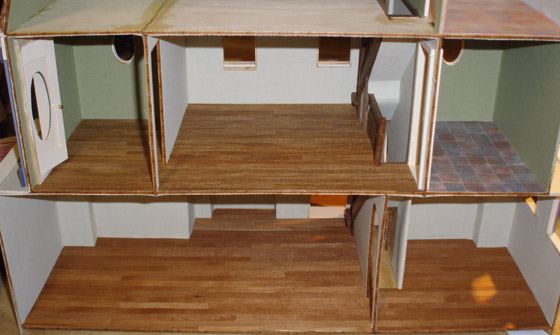
On a lighter piece of strip wood, the cherry stain looks similar to the floorboards on the first floor, but when I stained the teak floorboards they came out quite a bit darker. The grain on these boards is different as well, with dark streaks going through several of them.
It still has a nice effect and is more delicate than coffee stirrers would have been, but the second floor is noticeably different than the first floor. I guess that happens in real life houses, too.
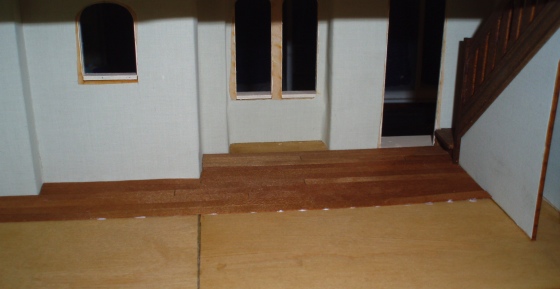
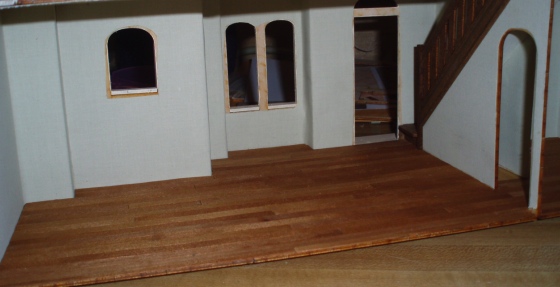
Usually I save interior trim for last, but I needed to add it to the bathroom door so I could lay the floor neatly around it. At the doorway on the other end of the room, I just ran the flooring straight through since I’m not planning to attach a door there. But this doorway leads into the bathroom, which will have different flooring and a door that opens and closes, so it needed some kind of transition.
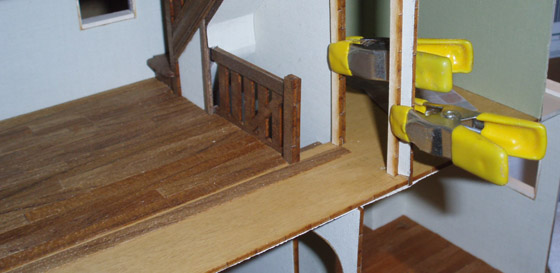
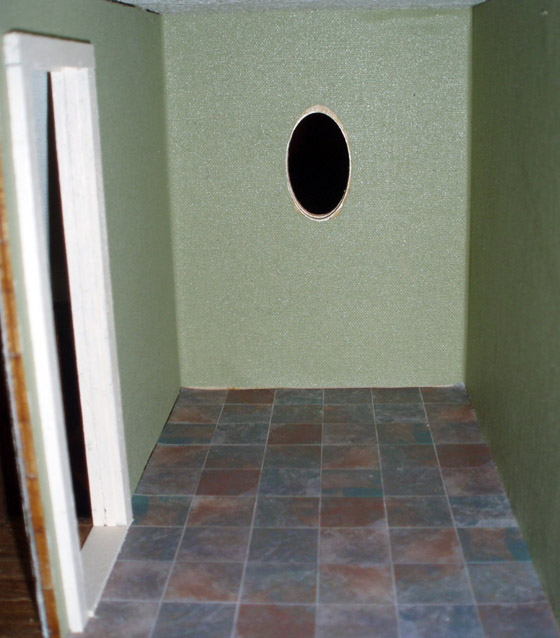
Rather than run hardwoods right up to the bathroom tiles, I created a door jamb to hide the seam between the hardwood and tile floors. First I “tiled” the bathroom floor with a printie modified from a picture of real tiles that I found online. Then I added the trim around the door and a piece of strip wood to form a jamb.
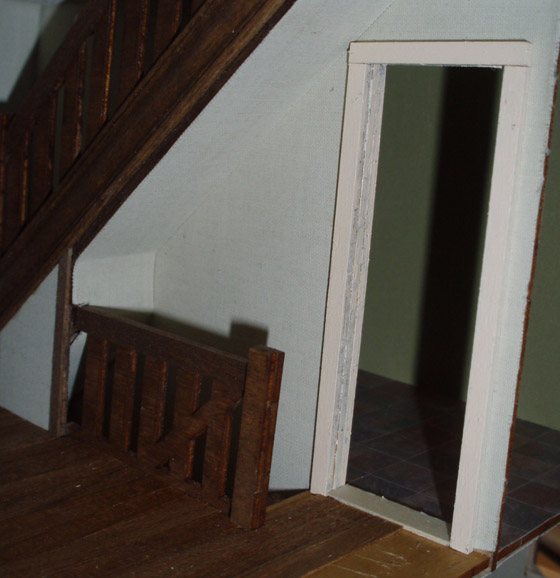
Painting the interior of the door was tough, and the three layers of wood (the wall and trim on either side) aren’t as unified as I’d like. I could smooth them out with wood filler and add another coat of paint, but the space is so tight I think that’s just going to get messy. (Even using a mirror, I had trouble painting the inside edges of the doors.) Instead I’ll probably cover the insides of the doorways with strip wood; I’ve done this in other houses and am generally happy with the result. But that can wait until later.
Here’s a better picture of the bathroom tile. The original picture was a 9-tile square I found on a flooring vendor’s website. I used Photoshop to rotate tiles and create a 3″ x 4.5″ printie to fit the space. Each tile would be 1′ in real life (which is the size of the tiles in my own bathroom).
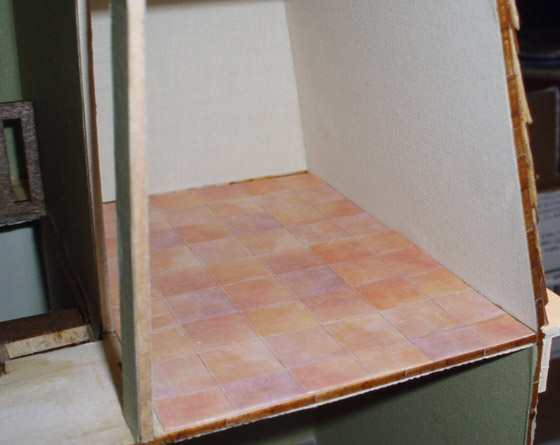
While I was at it, I did the upstairs bathroom too. Now that this is glued in, I’m thinking it might be too pink. There’s still time to change my mind…
Here’s the overall view so far. Two floors down, two to go! As you can sort of see in this picture, it’s not just the color that’s different; the texture of the first floor boards and second floor boards is somewhat different as well. Hopefully once the furniture’s in, your eye won’t be drawn to that. I’ll continue to use the cherry-stained teak flooring for the remaining floors, even though it’s not quite what I had in mind.
 Emily is a freelance writer, miniaturist, and adventure game enthusiast.


Hi Em,
What you are calling a door jamb is actually a threshold and your use of it to separate the two flooring materials is exactly why it is used in the big world. (The jamb is actually the entire frame around the door, especially the part where the door strikes when it closes.)
Different wood floors in a house of that era (even into the 1920′ and 30’s) is common. The more expensive wood like oak was used in the downstairs, public areas of the house, and a lower priced wood (then) like pine would be used in the upstairs areas. Even different grades of pine between second floor family bedrooms and third floor servants’ rooms (which were probably painted rather than stained.)
Ironically the heart-pine floors on the second floor in our real house were lower quality wood when installed but is now so unavailable that it wold cost more than twice the price of oak today.
Dad
Even looking at the last photo the differences in flooring is so minimal I only could tell there was a difference because you pointed it out LOL. It looks great and I love the printies you made, I thought it was real tile from the photo. I also like your dad’s comments, always comes up with things I didn’t know. They’re fun to read along with your blog.