Soon after painting two windows and a door for the Hillside Victorian, the lack of consistency among their pediments started to bother me. I bashed the door together and the pediment isn’t exactly the same as on the Houseworks Victorian windows, but it’s very close. However the pediment on the small window (also a Houseworks Victorian window, mind you) is different than the rest and it was sticking out like a sore thumb. I decided to bash one of the full sized windows into a small window, to make it consistent with the others.
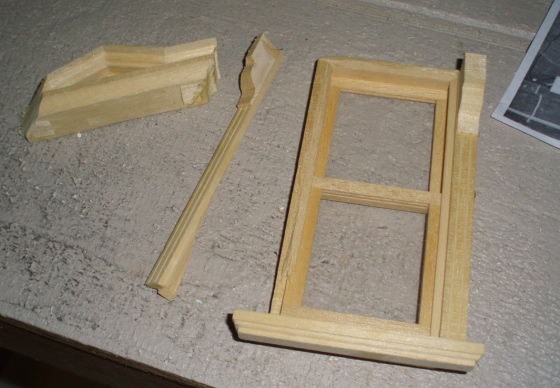
The Victorian windows Houseworks sells now come with the window sill detached and the acrylic removable for easier painting. The house came with a bunch of older style windows that don’t have these handy features, but I did have one of the newer styles, so this is what I used. Since the sill was already detached, cutting down the sides was easy. Not wanting to cut too much accidentally, I erred on the side of caution to start.
I used the disc sander to sand the sides down, checking the fit every so often. One of the sides broke off the window in the process but it was a clean break, so not a problem.
Here’s where I made a mistake. I used the original window as a guide for the height, failing to take into account the height of the interior window pane. So I ended up making the sides a tad too short.
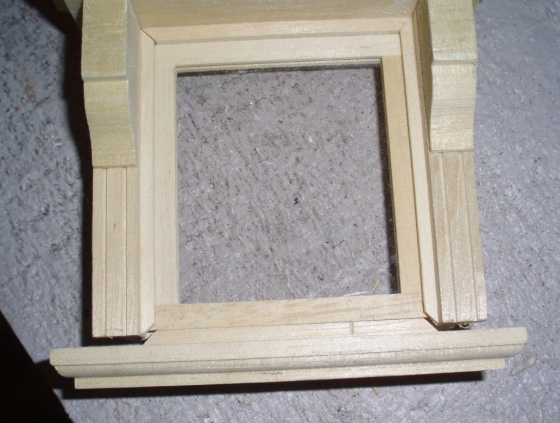
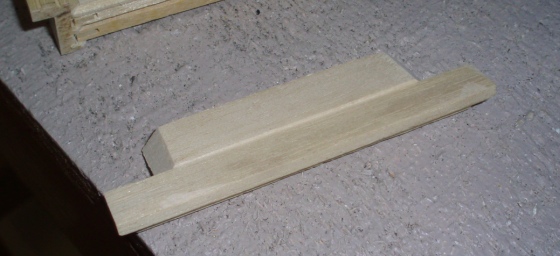
To account for this, I sanded the part of the sill that forms the interior base of the window down to almost nothing.
This allows the sill to sit flush against the edges of the window, but leaves a crack between the bottom of the window pane and interior base of the window.
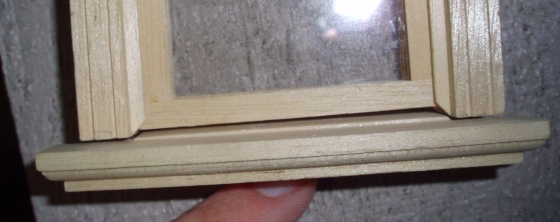
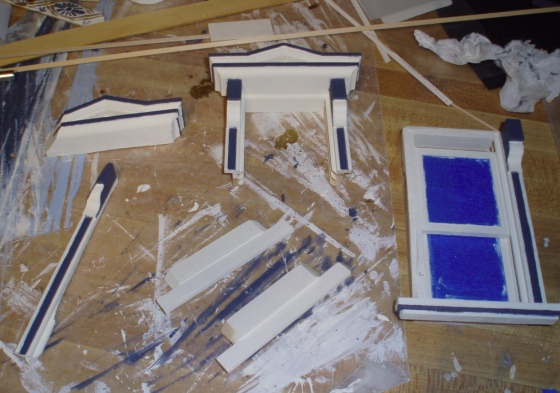
I cut one of the mullion strips that came with the window into a piece of trim to cover the gap. Not perfect, but it’ll do.
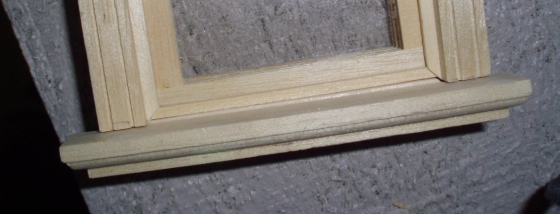
And here it is in place. Not bad looking for a Frankenwindow! Since this was originally a double-hung window, there are two interior tracks for window panes, and it would have looked funny to leave one pane out. So I decided to make it a dual-paned window. (Better for the mini heating bills!)
Before moving onto the detail painting, I tackled another window bash. One of the windows needed to be modified to fit on the porch, since the pediment bumped into the curved front part.
Lucky for me, the people I bought the house from had already pried off the pediment and cut it and the bracket to fit in this area. I cleaned up the cut parts a bit with the power sander. I also yanked the side off the window since I wasn’t able to fit the window into the hole with it in tact (the porch railing was getting in the way).
Because this was one of the older style windows, the panes don’t come out. Painting these was not fun, both because I had to carefully tape them (which took forever) and because I had to paint “around” them, sliding them into various positions to get the tracks and the wood around the panes painted. They didn’t slide too well to begin with, and now that they’re painted they’re almost impossible to slide. My teeth were clenched the entire time.

With that torture out of the way, I moved onto the detail painting for all of the pieces (plus some touch-ups on the sill belonging to the only other window I’ve finished).
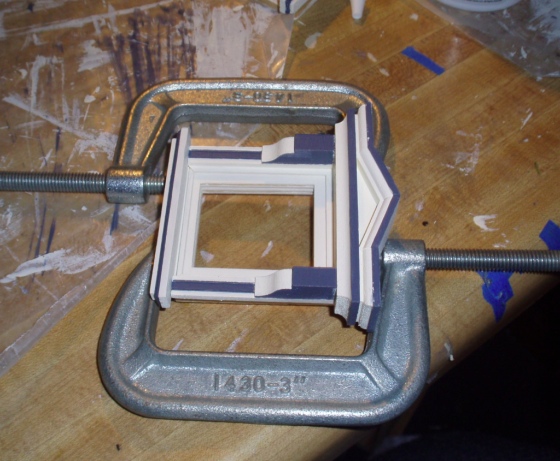
Before gluing the small window together, I carefully cleaned the acrylic, since the “dual paned” nature means there will be an area between the two panes that will be unreachable for cleaning. In spite of my best efforts, I think some dust ended up in there.
Then I attempted to clamp the window while it glued, but soon after taking this picture I picked it up and the clamps fell off. It took a few tries (accompanied by mounting frustration), but in the end, I managed to glue it. I think it would have gone together much better if I hadn’t messed up the length and then sanded down the sill to compensate…
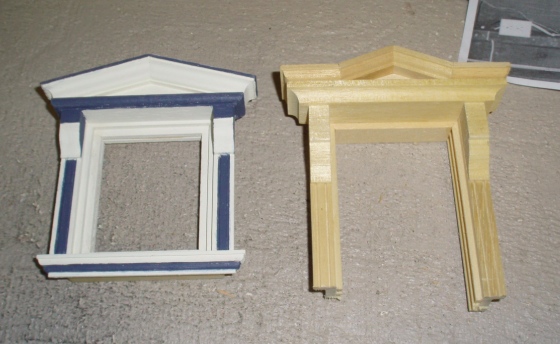
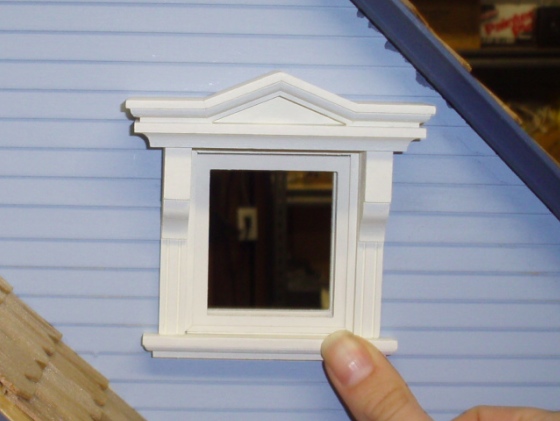
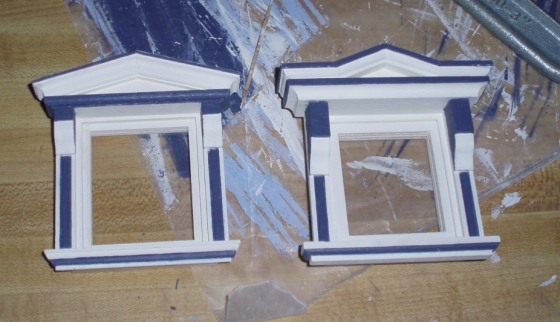
And here it is next to the original. Side by side, it’s like one of those “spot the differences” games. I still don’t get why Houseworks bills this as a Victorian window when it clearly doesn’t match…
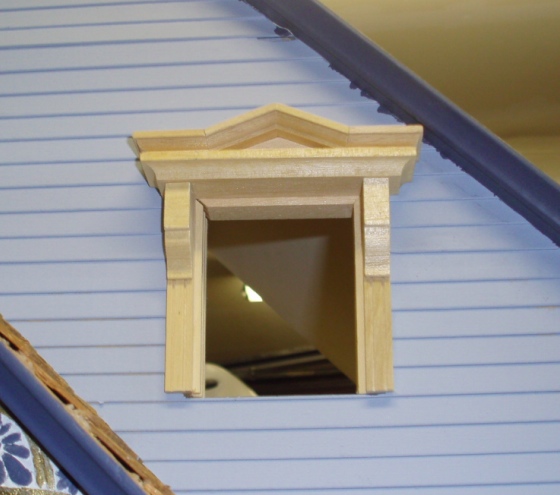
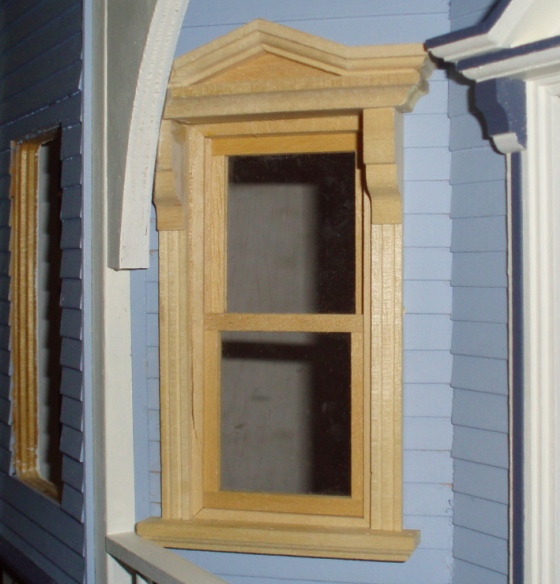
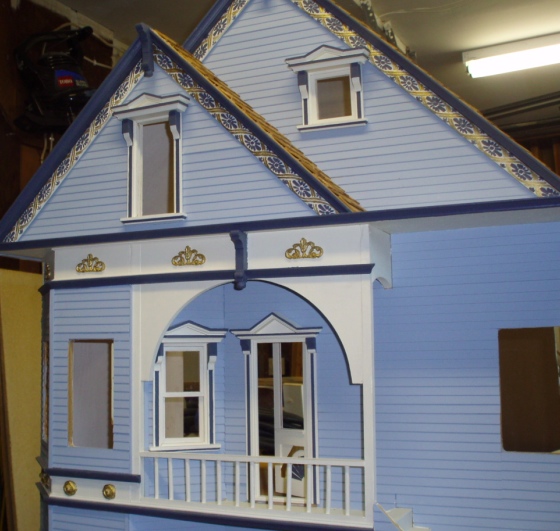
And here they are in place. Three cheers for consistency! I need to do something about the area where the small window bumps into the gable trim. Also some paint needs to be touched up, including the cut down bracket under the porch… I painted the whole side blue, but now that I’ve seen it in place I realize the bottom part needs to be white.
That’s it for windows for a little while… even though I have six more of the style without the removable acrylic, and they’re not cheap (about $9 a piece), I can’t stand the thought of having to paint them with the panes in place. So I’m going to buy new ones—it’ll be worth it to me to get the job done more easily! I’ll wait for a Miniatures.com 20% sale…
 Emily is a freelance writer, miniaturist, and adventure game enthusiast.


This is a lovely idea! :) the detail is excellent.
I can relate to the frustration of doing those older-style windows – been there, done that! Not fun at all. I am happy that on my DHE ‘Coventry Gardens’ kit I was able to disassemble the windows to paint them!! Thanks for the step-by-step photos and descriptions you give of all your projects, they are such a help. Sandie