I have this tendency, as I get close to finishing part of a dollhouse, to start messing with the thing that’s finished and totally fine the way it is. Usually I’m glad I messed with it. Occasionally I curse myself for getting ambitious and screwing it up when it was perfectly fine already. I’m not sure yet where on this spectrum the Gull Bay’s front door falls.
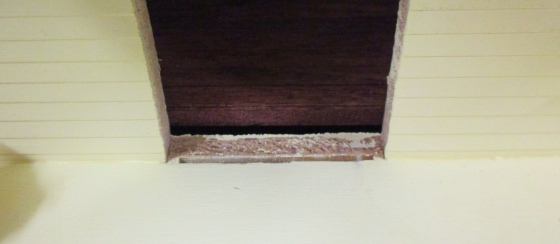
I stained the door, along with the shutters, to match the shingles. It looked good. Just one problem: the floor inside, which is part of the back side of the house that slides out, was slightly too high and the door was catching on it when I tried to open it.
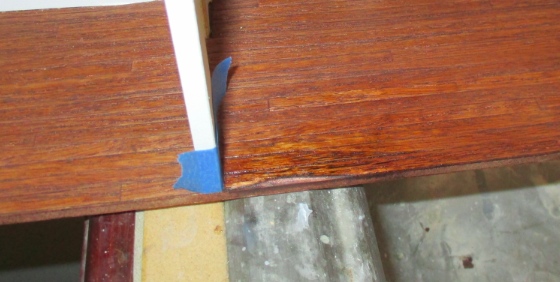
As you can see here, the back and front don’t meet up exactly — there’s a slight gap, and then the floor is slightly higher than the bottom of the door hole.
Nothing a little sanding can’t fix, right?
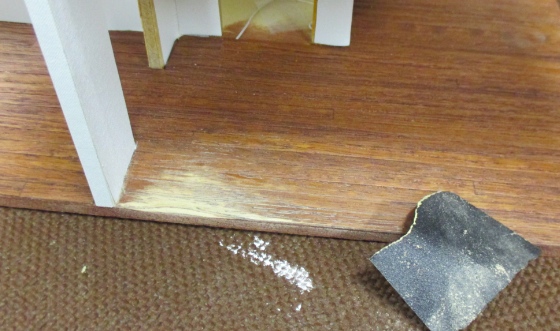
I sanded the hell out of it until the door opened easily enough. The door wasn’t glued in yet — I wanted to make sure this was taken care of first, in case I needed to position the door a certain way while gluing to ensure it would open.
I re-stained the sanded part. It looks a little wonky, but this isn’t really obvious once everything’s in place.
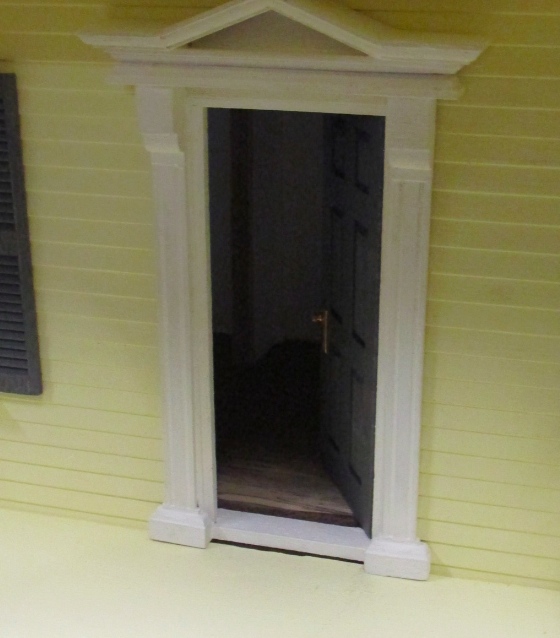
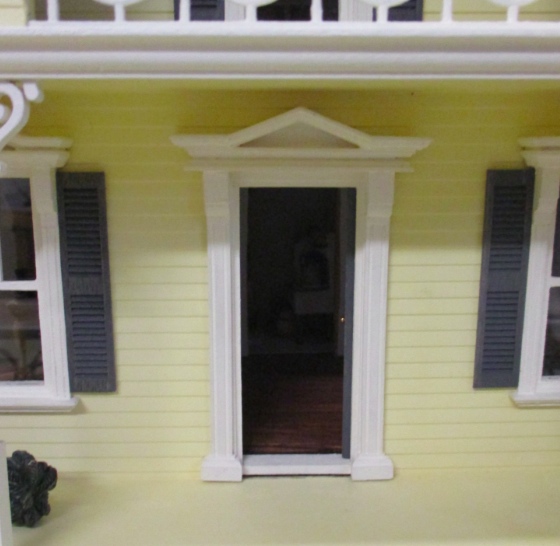
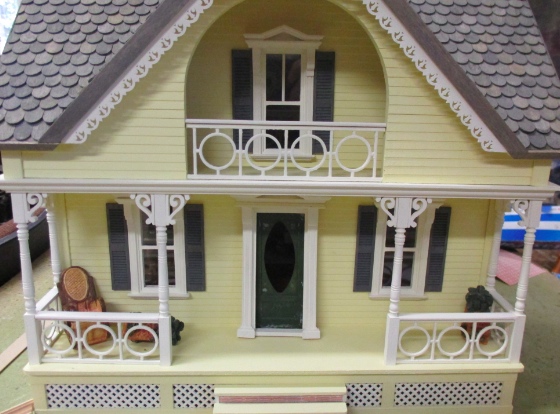
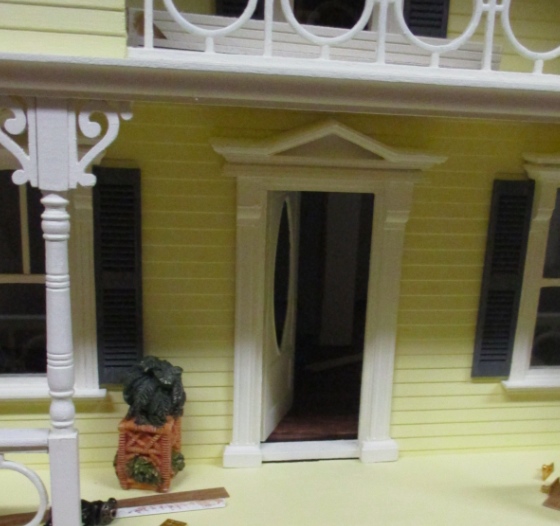
So, great, the door opens. But I was starting to realize how difficult it is to see inside the house, even with the door open. You basically get a straight shot into the kitchen and can’t see into the rest of the living room since the door opens into the room. Because this house slides together and will be displayed completely enclosed, there are very few spots where you can see in, and the front door is one of them.
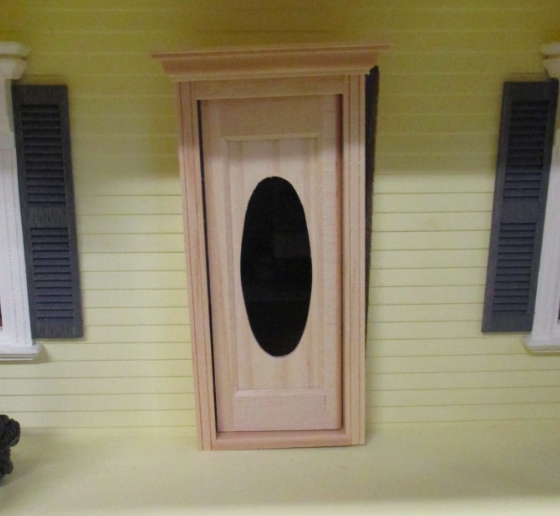
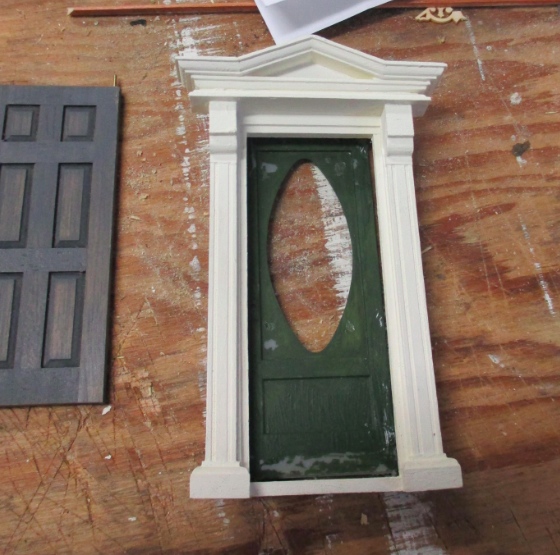
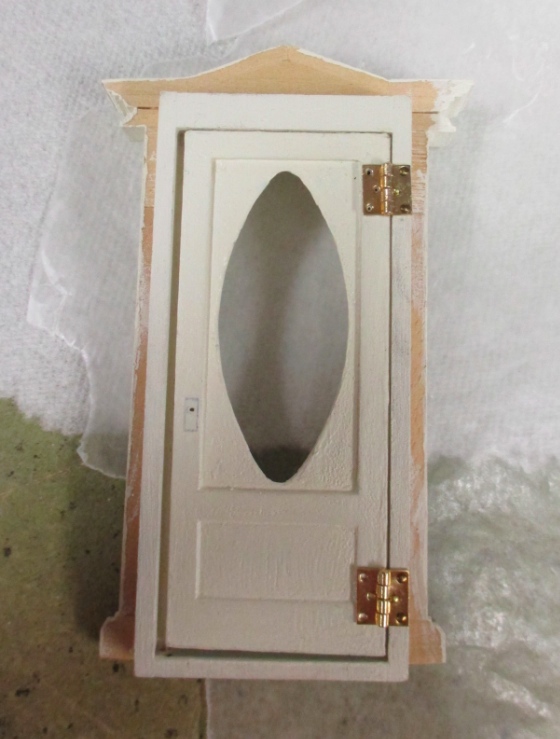
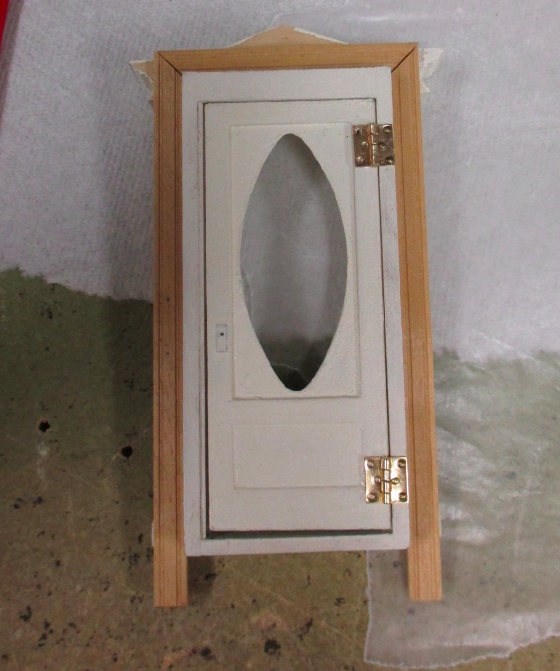
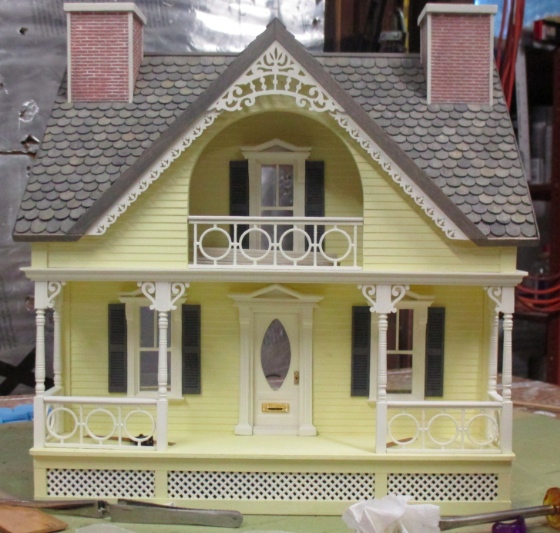
This got me thinking… maybe I should swap my door out for one with a window? I pulled out this oval door that I have for another, not yet started house, just to see how it would look. I really liked how it gives another view into the house, even with the door closed.
Now, I do like the Victorian door frame that came with the house. It’s a modified Houseworks Victorian door that has had the transom removed, and it looks great with the Victorian windows on the front of the house. So I didn’t want to get rid of that. But what about moving the oval door into the Victorian door frame?
Turns out the oval door is slightly taller than the standard door, AND slightly narrower. The height wouldn’t have been a problem since I could easily sand it down, but the width was a deal breaker.
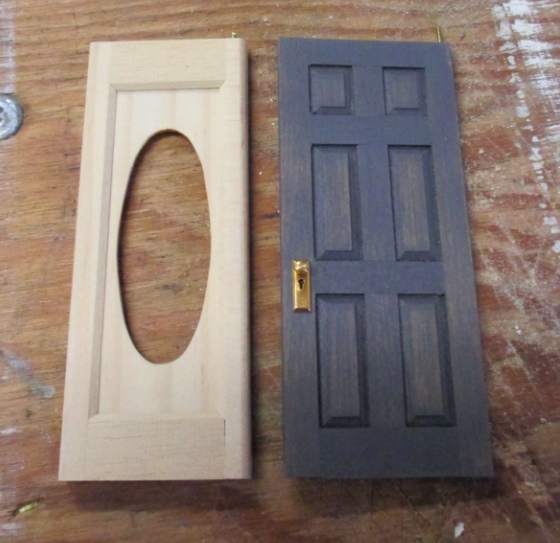
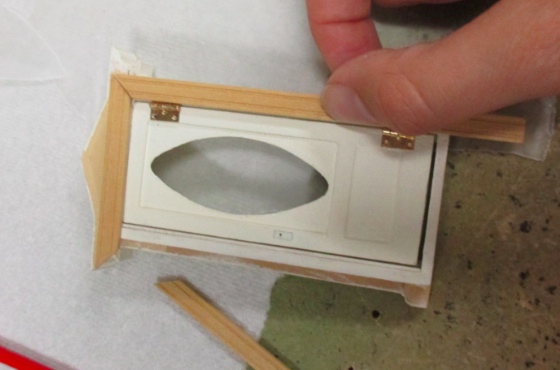
While I was futzing with the doors, trying to make the too-narrow oval door fit inside the Victorian frame by sheer willpower, it occurred to me that I recently ripped a Grandt Line door off the next house I’ll be working on, a Bill Lankford cottage that I haven’t posted pictures of here yet. It was a tad too tall — easily fixed with the disc sander — and width-wise it fit perfectly.
I really liked that this would make it easier to see into the house, but because it’s plastic, I wouldn’t be able to stain it, and I loved the look of the stained door. Window versus stain — which should win?
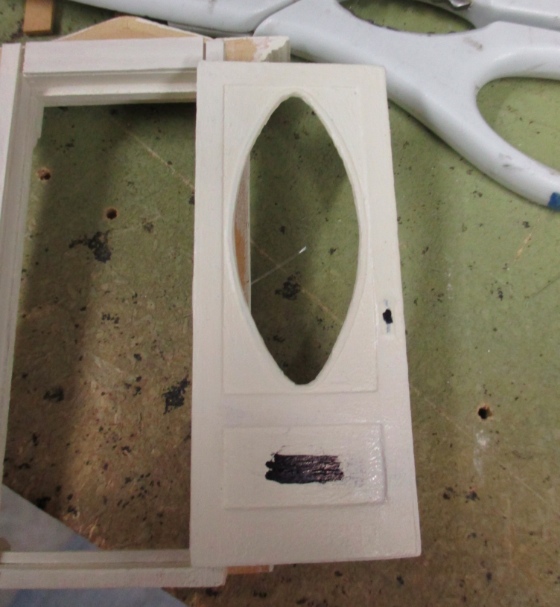
I decided to paint the door to get a better idea of how it would look, so I did that along with the crown molding.
Because my paint is lumpy and I’m impatient, even after several coats with sanding in between I ended up with a kind of gloppy finish. I went over it with matte finish and it looks similar to the railings — not too surprising since those are also plastic painted with gloppy paint. From a distance it looks fine, I’m just being picky.
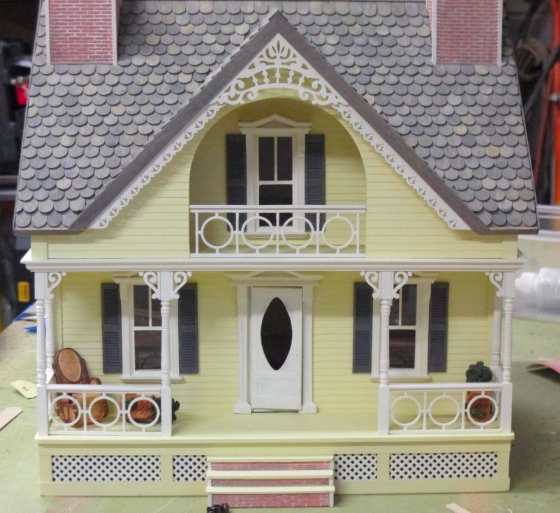
I put the painted door in place, stared at it for a while, and finally decided to move forward.
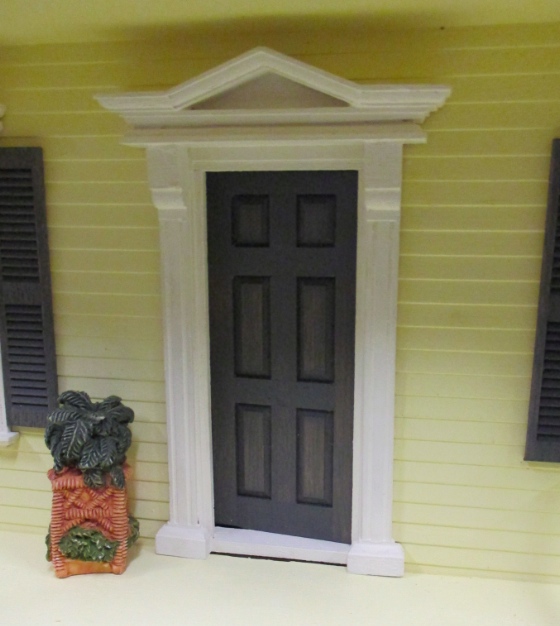
Originally the door was pin hinged. The Grandt Line door did have little nubs for pin hinging, but the door needs to be hinged on the left — the opposite side as the original door — since it has a molded-in doorknob piece on the right. I’m covering that up with a Houseworks doorknob, but it still dictates which side the doorknob goes on.
I didn’t mind that the door would be hinged on the other side, since this way the door opens up against the wall rather than opening up into the room and blocking the view of the living room. But it meant I couldn’t use the holes already in the door frame, and I wasn’t sure how to make new ones on the other side without destroying the frame.
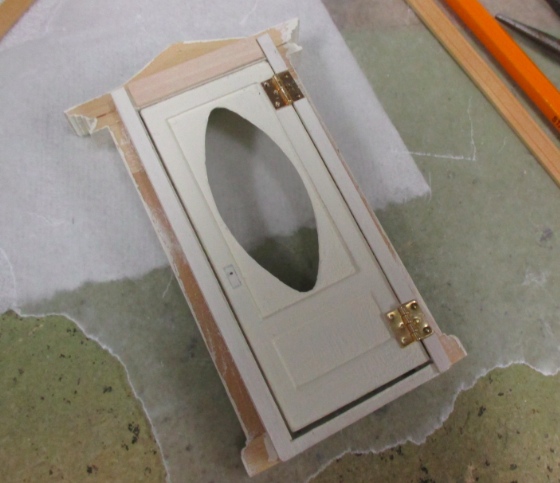
So I decided to use regular hinges. I had these lying around – they’re a tad large for half scale, but they fit. I superglued first, working the hinges as the glue dried to make sure the glue didn’t muck up the hinge, and then added brads in the nail holes. I bent a bunch of brads trying to push them into the hard plastic and ended up just putting nails on the wood door frame side, which was much easier. It’ll be very hard to see these when the house is closed up so I don’t think the lack of nails will be noticeable.
(These are actually the same hinges I used on the Rowhouse front door. As an aside: the package I have has a price tag of $1.95… not sure when I bought them, sometime within the last decade. Miniatures.com currently sells the same hinges for $7.15, marked down from $7.95. Whaaat…? When did miniature hinges get so expensive?!)
This door had the same issue as the other one, bumping into the floor. Rather than sanding the floor again, I dealt with it by sanding off enough from the bottom of the door for it to swing open easily.
This meant there was a visible crack at the bottom of the door, as well as a crack where the bottom of the door frame meets the porch (which was a problem even before I switched the doors).
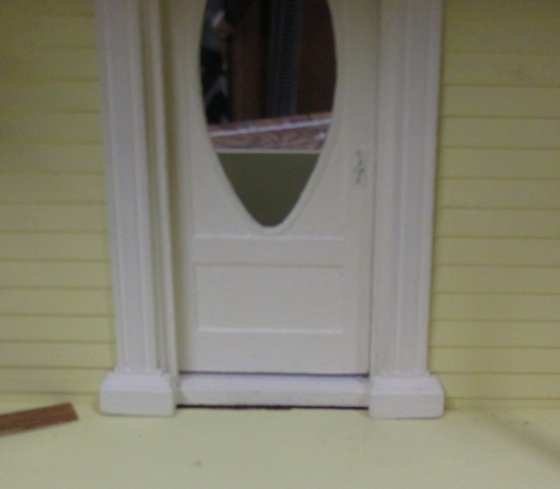
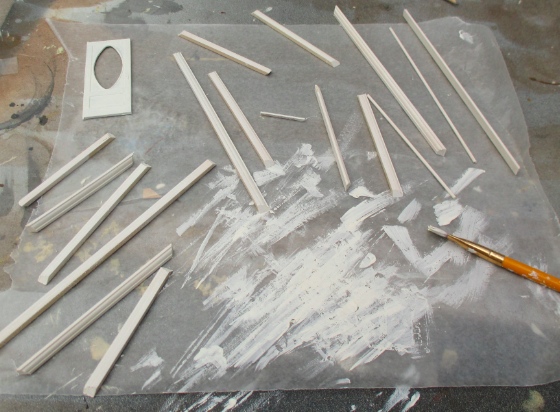
I masked both of these cracks with strip wood. The piece that butts up against the door is a piece of an unused window mullion.
Before gluing the door in, I took a look at the interior trim that came with it. This is a bit too long because it’s meant to accommodate the transom that was removed from the door frame. But it’s also meant to go *around* the door frame rather than sitting on top of it, which I didn’t like.
I decided to cut the trim so it would go on top of the door frame instead. This meant putting it over the right side of the hinges, which meant it wouldn’t sit flat against the door frame.
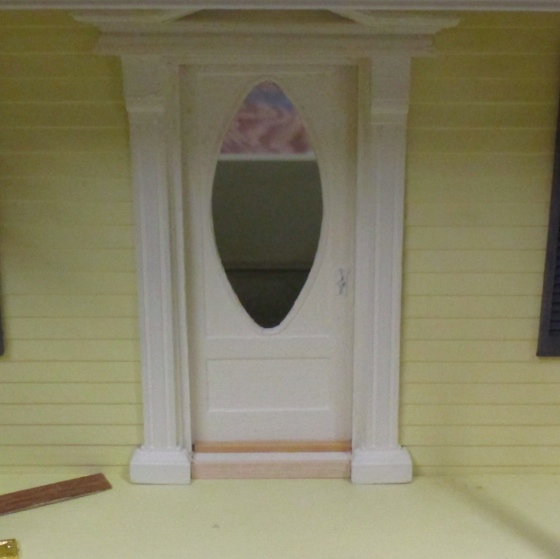
To account for the extra depth the hinges add to the frame, I added thin basswood on both sides and the top. The wood I used on the sides was already painted; the wood at the top, I painted after gluing.
While that was drying, I flipped the door open and used a Sharpie to color in the area that shows through the keyhole on the doorknob, and an area near the bottom where the mail slot would go.
About the mail slot: for a few weeks before this, I’d been obsessively looking for a mailbox I could use with this house. For some reason I felt it really needed a mailbox, and I couldn’t find any in half scale. The one 1:12 mailbox I found that didn’t look too out of scale was this one, and sorry, I’m not paying $13+ for a mass produced mailbox.
Instead I got this mail slot for $3. It says “Letters” across the top which for some reason greatly amuses me. At first I wasn’t sure if I’d use it since I really envisioned a mailbox next to the door, but it fit perfectly in the panel space at the bottom of the door so I figured what the heck.

Of course, there’s no corresponding mail slot on the other side, but since it’s so hard to see the inside I figured it wouldn’t be too much of a disconnect. (Less than there would be with a back-opening house, for sure!)
When I first saw the finished door in place, my immediate reaction was that I wasn’t sure I liked the mail slot. In fact, I wasn’t sure if I liked the cobbled-together door better than the original stained door. It’s been a couple of weeks, though, and it’s growing on me. Thoughts?
 Emily is a freelance writer, miniaturist, and adventure game enthusiast.


I like this one better and I like it in white :)
Thanks! I’m stuck with it now. :) (But I like it too, and I kept the stained door… I can always use it on another house.)
I like the white door too, I think it looks better than the stained door and the window in it goes well with the Victorian character of the house.