No pictures today, but a quick update. Over the weekend I spent some time with Geoff at the hangar. It was the first trip in a month because he’s been working weekends. I put wood filler in the “cracks” of the windows on the sides of the house that I’m not punching out.
I got some Krazy glue and used that to glue the plastic stuff to the windows. It seems to have done the trick but I’m still a little worried the plastic may be too flimsy. And finally, I put a coat of blue paint on the two side walls. All the exterior walls will probably need one more coat before I start assembling. I started painting an interior wall white, then realized it would be quicker (and probably look better) if I “paper” the walls with stiff white paper instead. This is how we did the walls and ceilings in my first dollhouse and I think it looks pretty good. Plus one of the interior walls has a big ugly knot in it that’s not going to be covered up, no matter how much paint I use. So, I’ll be making another trip to Staples in the near future…
I have decided not to do the garage for this project. My dad pointed out that the styles of the garage and the house are very different, and I realized that the garage is much taller than I thought — almost as tall as the house. Plus there was that whole issue with not getting a door in where I wanted to. So I am putting the garage on hold. The good news is, the rest of the house will be done sooner… in theory. :)
Update, Thanksgivingish: Got a lot done over the holiday weekend. The front and side walls are painted now (although they’ll probably need touching up in a few spots later) and I papered the insides of the front and side walls with white posterboard. This seemed like it would look nicer than paint. I am a little concerned about keeping the paper clean through the rest of the building process, but the paper needs to go up before I can glue in the window trim (which is what the instructions are telling me to do next). I wish the instructions made it clearer which steps are necessary at certain points, and which can be put off until later. Certainly not the clearest prose I’ve ever read. (Hey — any dollhouse manufacturers out there looking for a writer?)
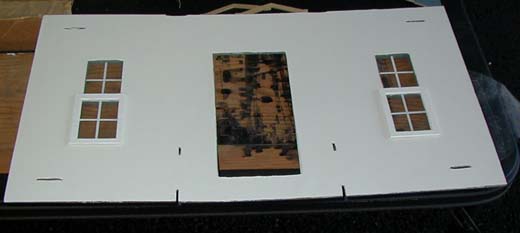
Windows and trim, all lined up and ready for gluing:

The inside of the front wall, with white trim glued onto windows. Window trim is only glued over the bottom half of the window. When complete, this will have a “double hung” effect — at least, that’s what the instructions tell me.
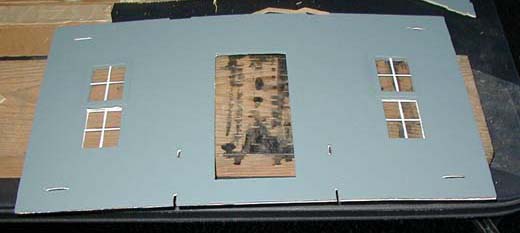
The outside of the front wall. It’s hard to tell, but I’ve glued trim to the top half of the windows — again, for the double hung effect. Also, notice how warped this wall is… literally curved in the middle. This will prove to be a problem…
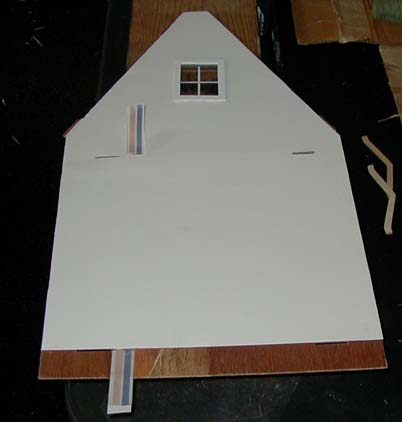
And here’s the right wall (when you’re facing the back of the house). This is the wall that the stairs will run up. The wire poking out will be for electrifying the house. It will ultimately be taped along the floor of the second story. I (err, Geoff) will drill holes so that any lights hanging from the first-floor ceiling can connect to that wire. Then when the wiring is done, I will cover the second story floor with hardwood flooring so the wires don’t show.
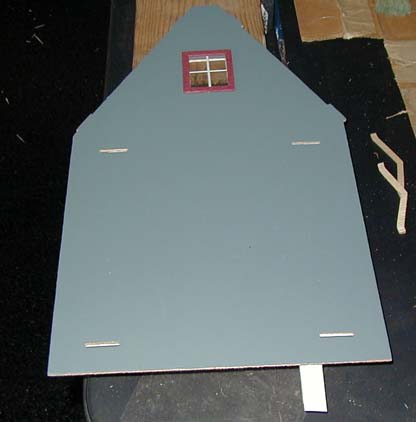
The outside of the right wall. I am only keeping the top half the window, (it was supposed to be double-hung like the ones on the front), and I went with a simpler trim than the instructions called for.
I also painted and papered the two dormers and the gable that go on the front of the house. Here they are, inside and out. I think the plain windows look classier than they would have with those flower designs… or at least, somewhat normal.
I ran out of posterboard, so had to bring the left wall home with me, along with the piece of wood that becomes the first story ceiling / second story floor. I bought some more posterboard and papered the wall and the ceiling.
 Emily is a freelance writer, miniaturist, and adventure game enthusiast.


Leave a Reply