I’m at a point with the Victorianna where I’m doing a lot of work with little noticeable progress. Case in point: a month after my last post about the porch, I’m still puttering around with it.
First of all, the siding is all on. This house was so easy to side compared to ones that have a lot of angles to worry about. I also got to use up a lot of small scrap pieces left over from other houses. I think I only used one new piece of siding, and the rest were leftovers.
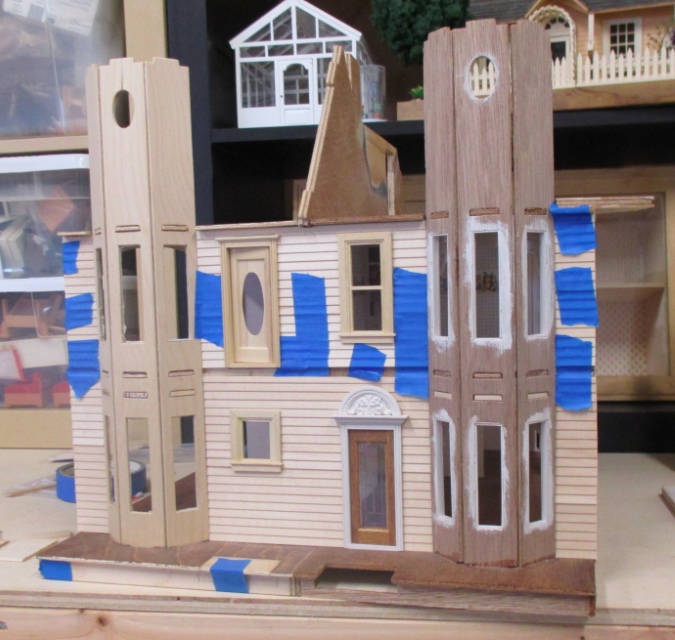
The trickiest parts were making sure the siding pieces were lined up on each side of the bay windows, and leaving enough of a gap for the porch to fit into. (It’s not glued in here, just held in place by the siding.)
I’m planning to add 1:12 crown molding to the edge of the upstairs porch (same as on the Gull Bay) and will make a railing out of 1:12 spandrel trim from Victorian Doll House Wood Works on eBay.
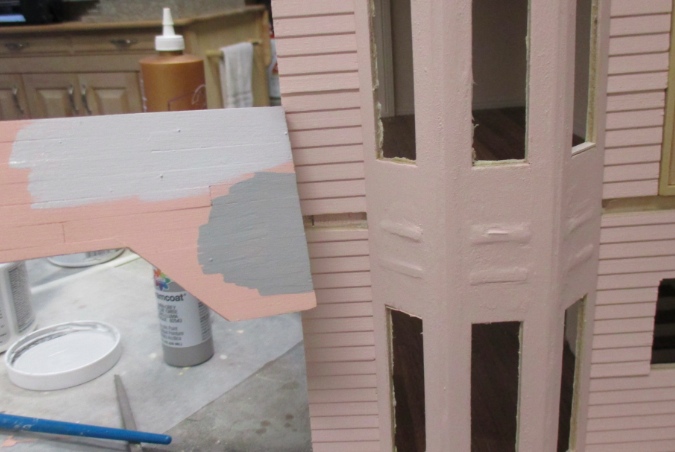
Next came paint. First I filled in the gaps between the tower pieces with wood filler, and after the first coat of paint I did a second coat of wood filler. I’m not being particularly neat with those seams or with the visible tabs because I plan to cover them up. (I probably didn’t need to paint the towers at all — I planning to cover them up with trim — but I’m still formulating ideas for how to handle them so decided to paint just in case.)
My first attempt at painting the porch was with a slightly darker pink that I’d bought to complement the house color, but it turned out not to contrast enough. I looked online for guidance on what color a Victorian porch floor should be and read that they’re usually gray or dark green to mask dirt. I tried a couple of grays off my super-organized paint shelf and decided on the darker one.
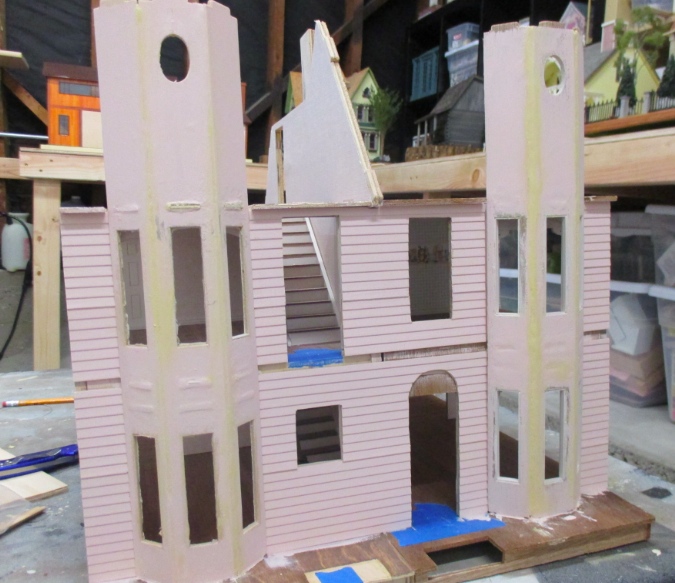
The downstairs porch didn’t have its floorboards on yet, but I painted it gray as well just to get a feel for how it would look. Then I started thinking about the step. I guess since this is supposed to be a wall-hanging house, the step is built into the porch rather than being attached to the front of it. I played around with the kit pieces and then with some pieces of scrap wood, but I just didn’t like it.

The foundation will be brick and it seemed odd to have stairs “eating into” the brick foundation. Should the risers be brick, but not the treads? Should the whole thing be brick? That was my original thought, but with only two steps, that would mean one brick step and one gray step, which seemed wacky. I also didn’t like that the built-in steps would be noticeably off center between two porch posts.

(The posts haven’t been cut down to size yet, they won’t be so tall!)
I ended up closing off the hole. Once the porch and foundation are done I’ll add a wider step to the front, so it can be centered between the porch posts. The door will still be off-center but I don’t think it’ll look as weird as if the steps had been.

The gray paint, which looked good with the pink when it was wet, dried a bluish color that was too dark. I redid it with a Glidden color named Granite.

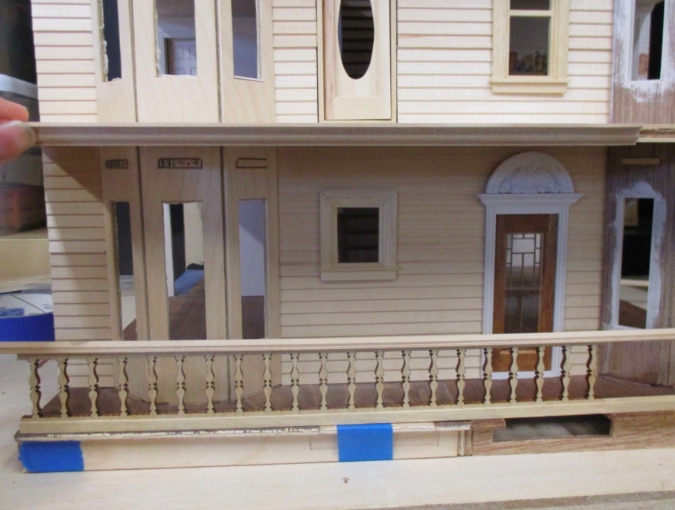
Next I added floorboards to the lower porch. I glued in all of them except for the row right next to the house, which I set in place while the glue dried on the rest of the boards, then removed so I could paint those pieces separately.

Before painting, I smoothed out the front edge with wood filler.

Here it is after two coats of Granite. This is an eggshell paint, so it has a bit of a sheen that the (flat) house and trim colors don’t. I think that’s appropriate for a porch — more durable, or something. (As if anyone’s going to be waking on this porch in muddy little shoes. The Borrowers, maybe?)
Once they were painted, I glued in the last floorboards in and painted over the seam where they met the next row of floorboards, being very careful not to get paint on the house. This is much neater than I ever could have done if I’d had to paint all the way up to the edge, even with masking tape. (Maybe someone else could do it, but when it comes to this sor tof thing, masking tape and I have never seen eye to eye…)

Moving on to the upstairs porch door: originally I’d thought about installing it backwards, so the part with the built-in trim would inside. But I’m also working on the bay window in that room and the door trim was looking funny next to the window trim. Instead I decided to try to match the trim on the front door.
This is what I started out with. The top is a little funny because I had previously sliced off the triangular pediment like so.

I used the disc sander to flatten the curved part.

Next I glued a piece of strip wood to the top of the door. Usually the exterior trim on Houseworks doors sticks up a little, to cover any gaps left by slightly too big openings. This opening actually does have a gap (which is still there even with the siding on), so adding a taller pediment takes care of that problem.

Then I put cornice trim around the top. This is the same trim I’m using for the interior bay windows, and it’s very similar to the pediment on the top of the front door.

Ta da? It looks a little top-heavy, but that could be because the door is hanging in space right now. Also I forgot to put the roof on and see how it looks with the overhang. That overhang might cover it up completely!

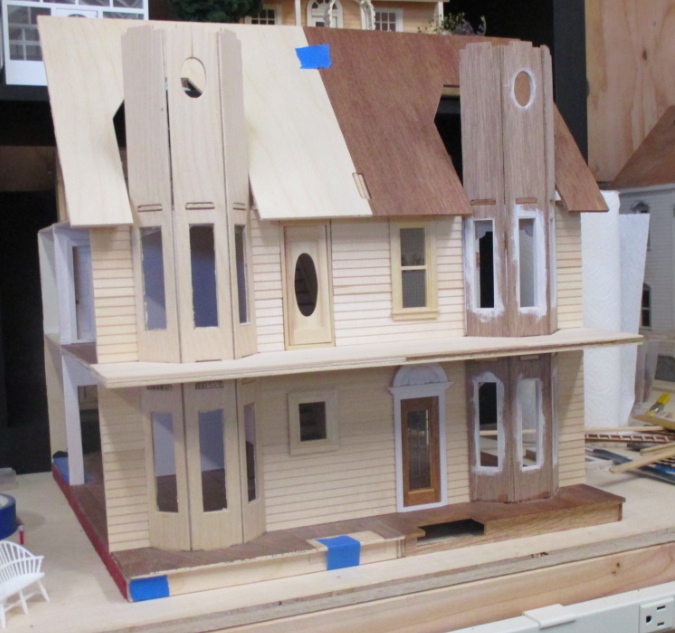
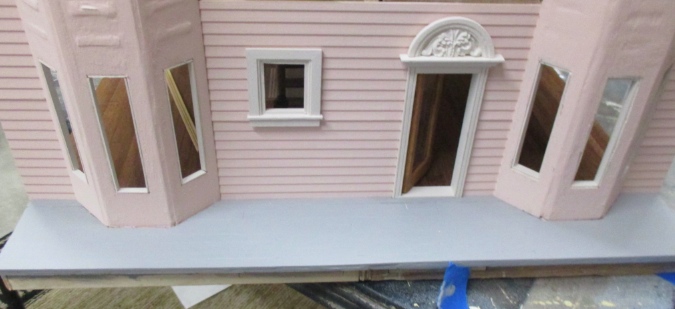
Anyway, that’s a worry for another day. Here’s the current state of the porches, after about a month of on and off work. My next task will be to figure out the trim for the outsides of the bay windows — I need to get the downstairs ones done before I can start gluing in porch pieces.

 Emily is a freelance writer, miniaturist, and adventure game enthusiast.


I think the appearance of the steps and the posts centered on the front door will be more pleasing than an offset set of wide steps (whether they are recessed into the porch or not.) You could move the right “door” post to the left (so the two door posts are centered on the door and tower is about centered between it and the end post) and do the same for the left tower. That will leave a different spacing of the posts to the left of the door(about the same distance as between the door posts) but I think the impact of the unequal spacing will be overshadowed by the “centering” of the towers and the front door between the posts and the symmetry across the front of wide space-narrow space-narrow space-wide space. And if the house ever becomes a two-family a second front door next to the original will be in a matched space for a nice aesthetic.
The amount of work you have accomplished in a month is certainly visible and the siding installation is moving along at a great pace. Seems it would have taken me that much time just to select paint colors! Glad to see that you blocked up the front porch stairs as they would look odd being off centre…far better to change the spacing between the porch posts. The second color gray selected for the porch flooring looks much better with the pale pink paint used on the siding…it’s going to be a very attractive house when done!