Continuing with the Victorianna’s spiral staircase — I wasn’t happy with how the stain turned out on the top step, so I painted it to match the landing.

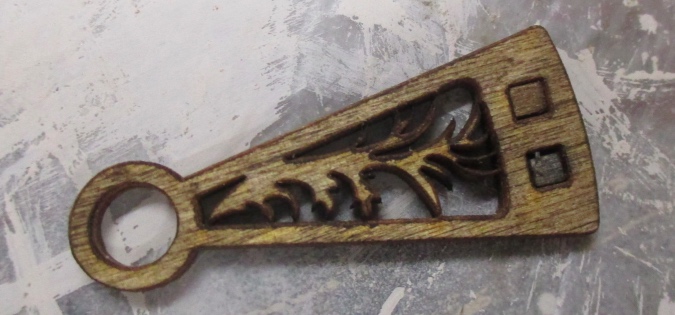
I filled in the laser cut part with wood filler. That piece needed to be “bad side up” for it to face the right direction, so the design was a mirror image of all the other steps. My inner perfectionist just couldn’t take it!

I bought some brads to fill in the holes that resulted from the railing pieces not fitting properly, but I didn’t like how they looked.

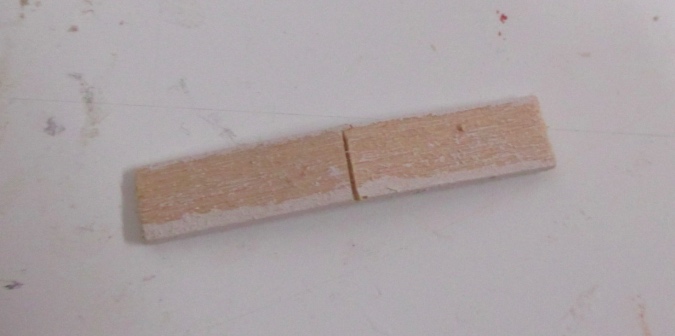
The holes are about 1/8″ square. An 1/8″ piece of strip wood wouldn’t fit — presumably that’s also why the railing pieces didn’t fit — but the next size down that I had on hand, 3/32″, was slightly too small.

By cutting the 3/32″ dowel into pieces slightly longer than 3/32″, I was able to cram them into the holes so they’d stay put. On a leftover stair I tried one stained with walnut and one with ebony, to see which looked better. I decided to stick with the walnut (the same color as the steps).
This took a surprisingly long time to do. I kept cutting the pieces slightly too short or slightly too long, or dropping them or breaking them as I tried to cram them into the holes. I inserted them from the back, then added glue to the back to keep them in place.

Next I added risers between the treads. I added a side piece on the bottom step to help stabilize it but didn’t bother with side pieces on the rest since they’ll be up against the wall. The risers are cut at a 45-degree angle where they meet the center post.

It’s surely a code violation not to have a railing, but that would have made the whole thing a lot more complicated. I may not have had a choice, since the pieces didn’t fit, but in the end I’m glad I left it off.

I lost the ball glued to the top of the post while I was filling in the holes and couldn’t find it. Luckily I had one more (it’s cut off the top of a 1:12 Centurian newel post). This time I poked a hole in the ball and the post and inserted a piece of wire to hold them together, in addition to glue. (The wire isn’t that long! I cut it down after I took the picture.)

Here’s the almost finished staircase. I haven’t added a riser to the top step yet. I want to make sure that step is positioned exactly right inside the hole, so I’ll wait until I assemble the rest of the cupola to glue that step in place and add the riser.

Next I finished up some things in the tower room to get it ready for the staircase. To insert the decorative mullion into the door, I had to sand the edges *a lot* to get it to fit. This made the tiny pieces unstable and one of them broke off. Super frustrating, since this mullion is supposed to fit this door! (I bought three for this house — the front door and both tower doors — and had the same problem with all three.)

I didn’t have any strip wood this skinny to fix the broken piece, but I did save the slats I cut off from bottoms of the the gazebo pieces. (Never throw anything away!) The thickness of these was just right. I cut one down to match the depth of the mullion pieces, and painted it.

Only half of the horizontal piece had broken off, but I cut off the other half to make it easier to fix. It’s glued in with a dab of glue at all three joints — hopefully that’ll hold.

Would you have known it was repaired if I hadn’t told you?

Next I added baseboards to the room. I was tempted to skip this since the staircase takes up most of the space in here, but in the end my desire for uniformity won out. The wallpaper in this room is stretched a bit tight over some of the joints and I was having problems with the baseboard not sitting flush against the wall.

I dealt with this by scoring the backs of the baseboard pieces enough to snap the piece but not break all the way through.
This allowed me to push the baseboard more snugly up against the sort of curved wall. It’s not perfect, but better than the alternative. Once the stairs are in everything will be so busy you shouldn’t notice this.

Here’s a view of the baseboards without the stairs in.

And with them in – just a tiny glimpse!

Here’s the view from the skylight. The left side of the room is somewhat visible from this angle, so I’m glad I went to the trouble of adding the baseboards.

That’s it for the spiral stairs! You can barely see them, but that’s true of all the staircases in this house. I love them anyway. :)

 Emily is a freelance writer, miniaturist, and adventure game enthusiast.


Breathtakingly beautiful! I love your work!
Thanks!
Your hard work has paid off in Spades, Emily, because your staircase looks like it has ALWAYS been there and the glimpse through the wonderful door at the very end is Perfect!
And thank you for the tip about scoring the baseboard to enable a better fit- this type of information is invaluable for those ( like me) who suffer from “cutting trim that fits “deficiency. :(
There IS a cure ;D
Scoring the baseboard was a lucky guess, I never tried it before! Soaking it in water and then bending it slightly might have worked too, but that would have taken a long time and I didn’t have the patience.
*swoon* That view at the end. A little peek at the staircase and that wonderful window trim through the door. These little secret places you can only glimpse are what make dollhouses special and make the viewer want to climb inside for a closer look. :)
You are building a masterpiece Emily! I love everything about this house. :)
Thanks! I love the little hidden places, too. That’s something I like about this dollhouse being a “double wide,” and also with such deep rooms — there are more opportunities for those sorts of things than in a typical back-opening dollhouse. As far as half scale houses go, the Victorianna is very spacious (much more so than its 1:12 counterpart the McKinley, which has the same footprint but only half the depth).
I love that everywhere you peek nothing is left undone! I think that is one of the things that excites me most about miniatures, especially when no detail is left out. It’s also important to remember that the camera shows so many things our naked eyes will never see. And if your photos look this amazing, especially working in half scale, I can only imagine how beautiful it looks in person. Outstanding, Emily!