This week I’ve been working on the shower, tub faucet, and trim in the Victorianna’s master bathroom. Everything was in progress at the same time so I’ve divided this post up by topic instead of showing the pictures chronologically.
Shower
To make the shower floor, I laid down a piece of beadboard (with the grooves facing the floor) and traced around the bottom of the shower. Like with the shower walls, I used the beadboard because I have a lot of it and it’s easy to cut.
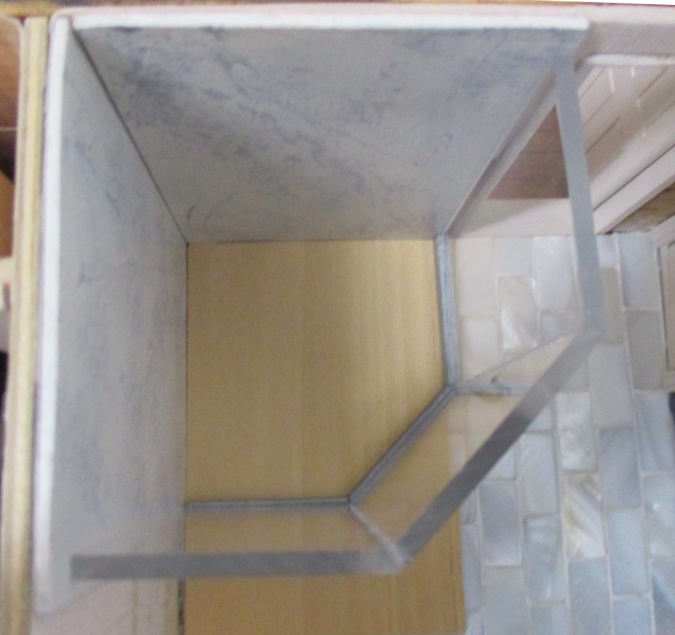
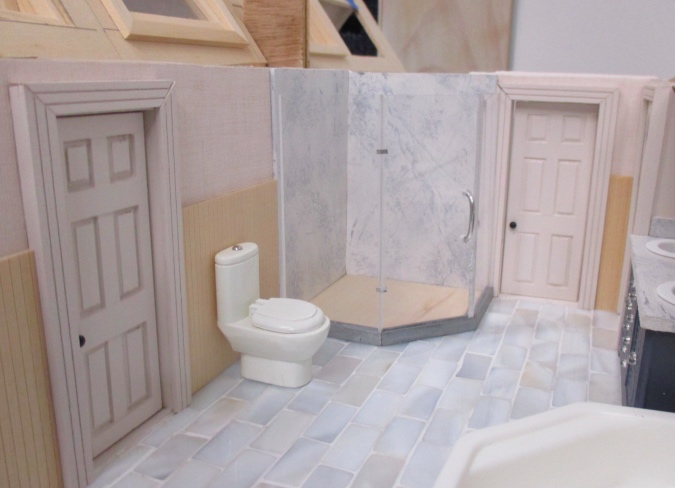
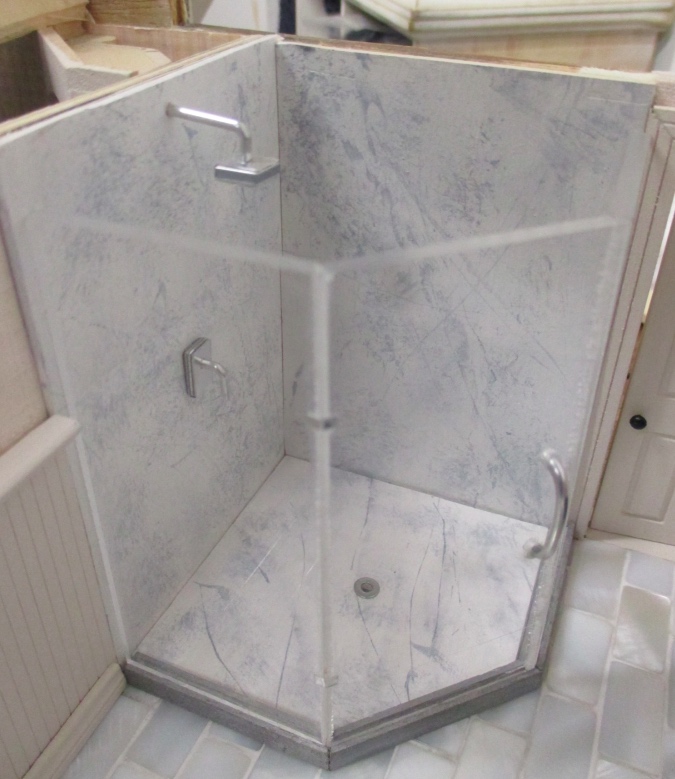
The shower floor sits on the tiles, with the shower butting up against it. The shower floor will be glued in but I don’t plan to glue in the shower, so I can have access to the inside if I need it to fix anything later. (I didn’t leave myself access behind the shower in the downstairs bathroom, and some of that tile wallpaper is turning yellow from light exposure now — no way to fix it without destroying things. Sigh.)
The shower hardware is from Elf Miniatures. It came with a washer that I initially thought was supposed to be a base for the showerhead (like in the picture on the Elf website), but the hole on the washer was slightly larger than the part of the showerhead that goes into the wall, so the shower wall would have shown through. Instead I installed the showerhead directly into the wall and used the washer as a drain.

I wasn’t sure if the handle should be pointing down or pointing sideways — on the website it’s sideways, and I almost did that, but in the horizontal position it’s off center in the base, which made me think it was supposed to be vertical. Does it look wrong?
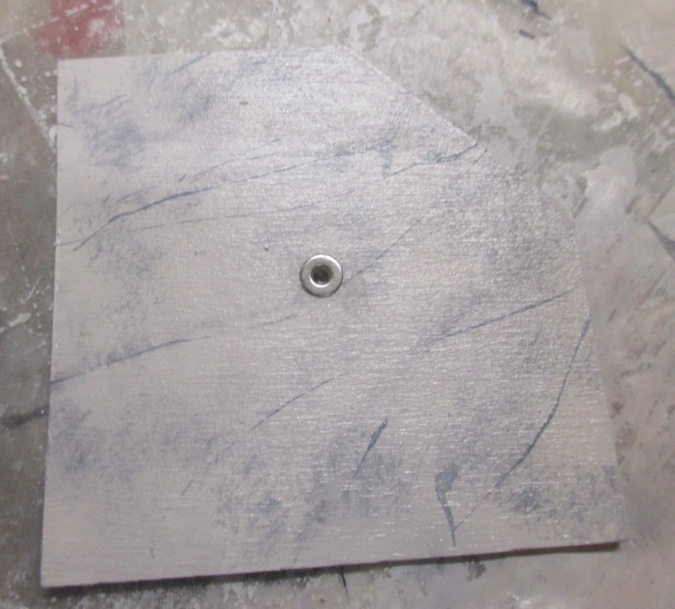
I painted the floor using the same process described in my last post, drilled a hole in the shower floor for the drain, and glued the washer over the hole.
Next I glued in the floor. The dowel is keeping the corner from popping up while the glue dried.
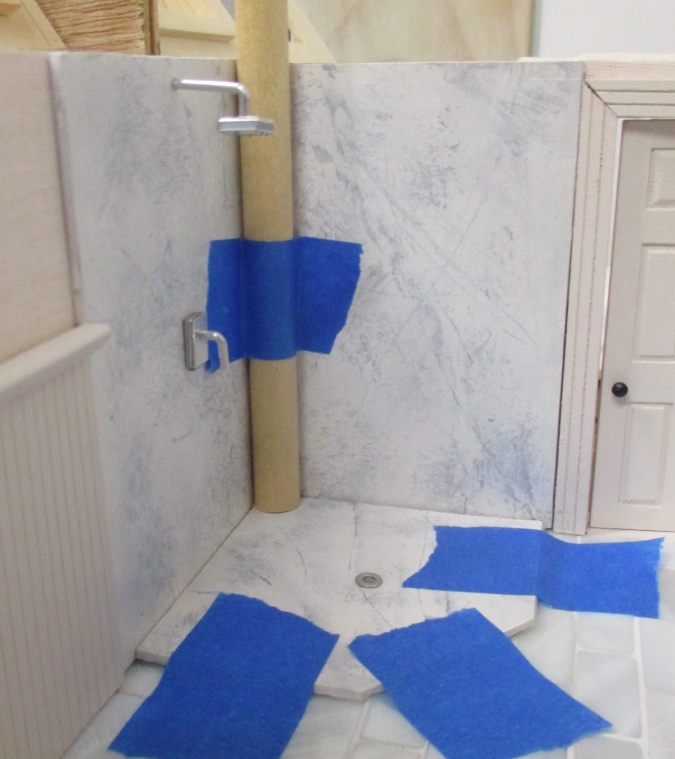
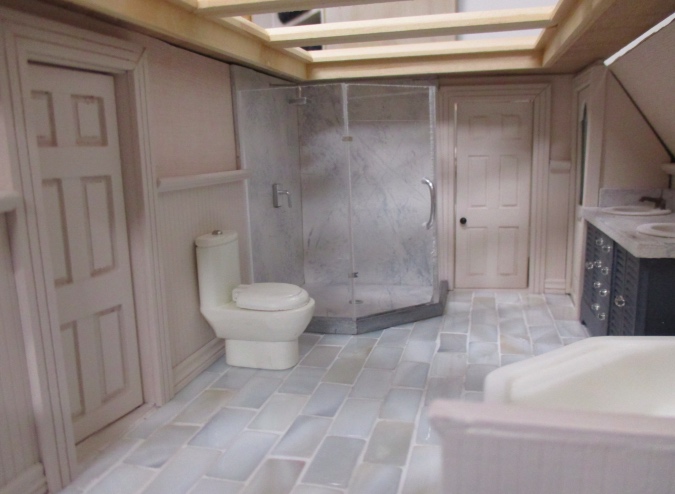
And the shower’s done! Well, almost. I also cut out and painted two triangular shelves. I want to glue some shampoo bottles and soap to the shelves before I glue the shelves to the wall, and don’t have those ready yet.
Tub faucet and taps
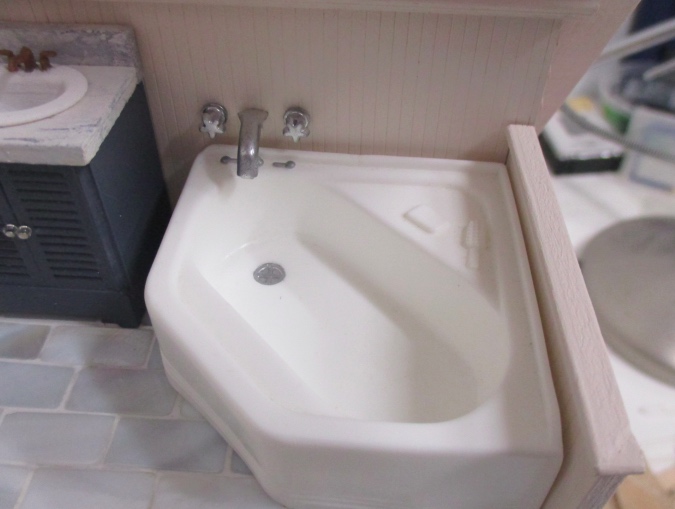
The bathtub I’m using is a resin cast of a Marx corner bathroom from Atomic Kiki. It has two little handle things and a button, painted silver, but no faucet. I spent a ton of brainpower trying to figure out what to do about this. (Seriously, I first started thinking about this last June!)
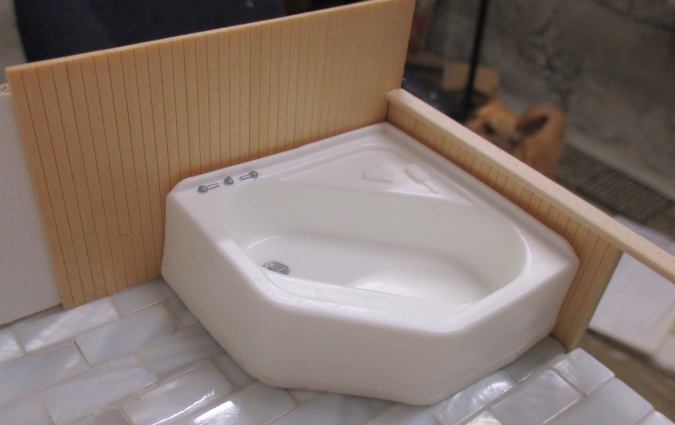
Minietchers sells a 3D printed tub faucet and taps but the faucet doesn’t protrude far enough over this tub. In the past I have used 1:12 sink faucets as 1:24 tub faucets, but those need to sit on the tub, and this tub doesn’t have enough of an edge for that. I guess I could have put one in the corner, but it seems like the faucet should be between those two handles.
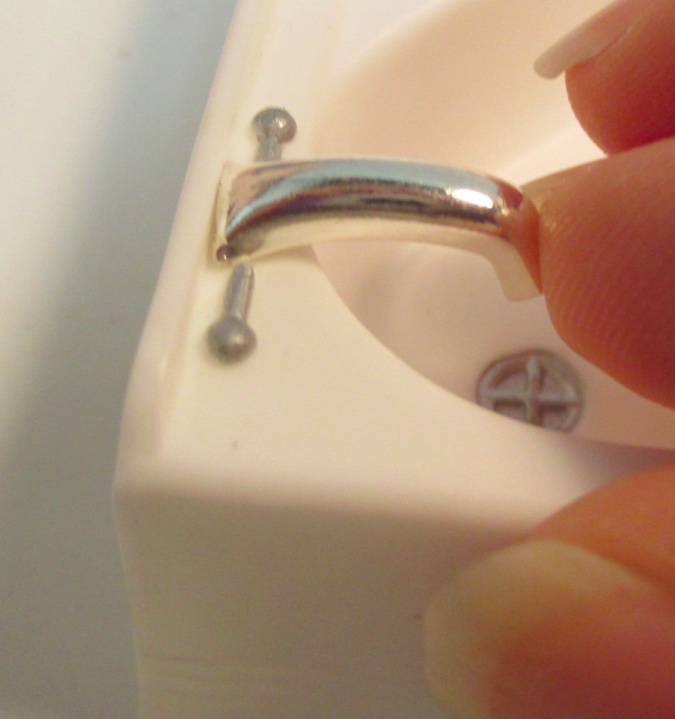
I went to Michaels and wandered the jewelry area looking for something faucet-like. How about this clasp thingie?
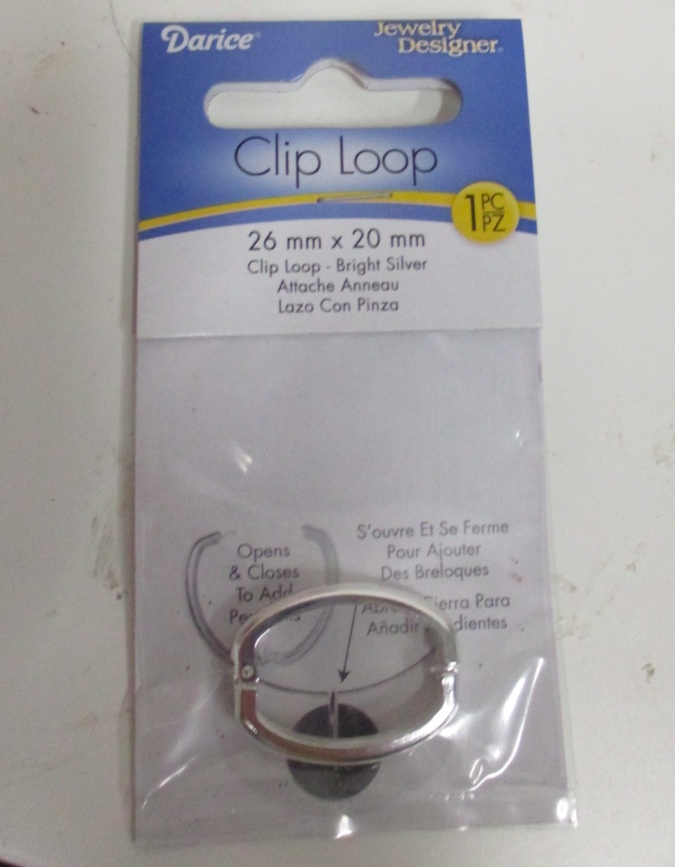
I used wire cutters to cut off a portion of the clasp. It took some mashing before I finally broke through.
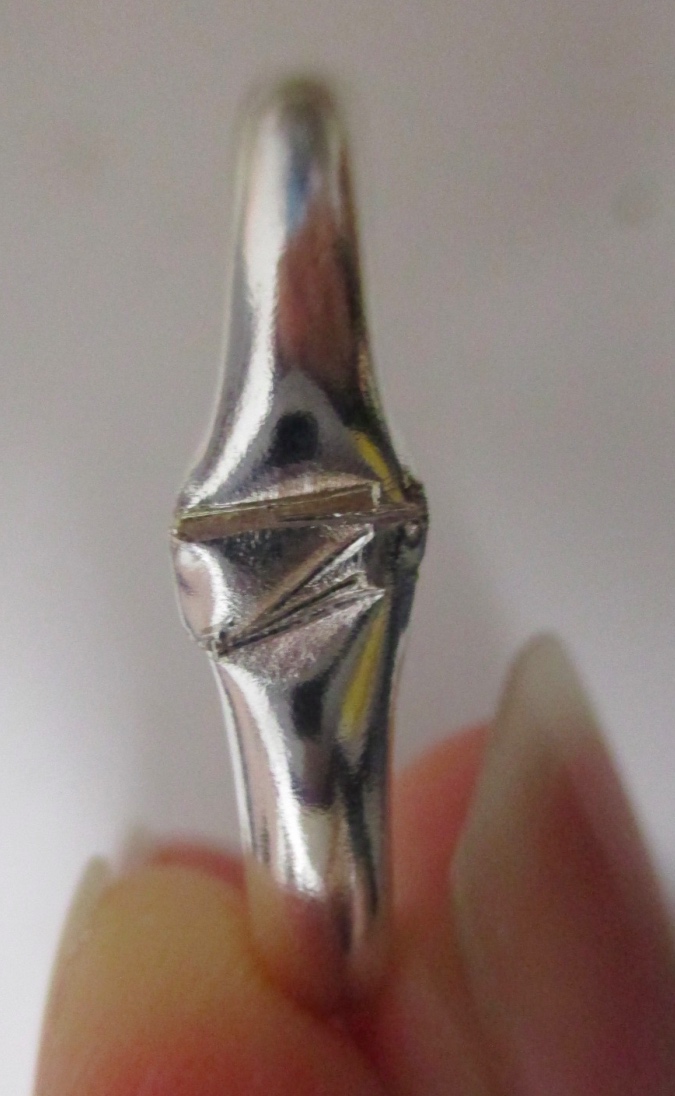
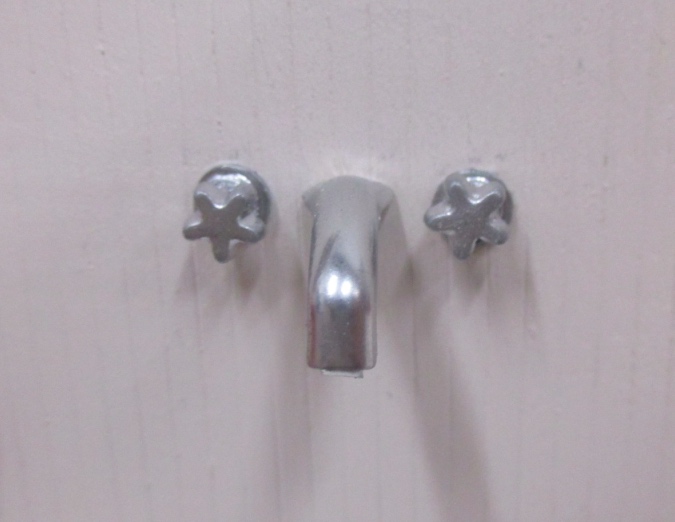
Here’s what I ended up with. Hey, that looks pretty real!
But I couldn’t figure out how to attach the faucet to the tub. The underside is hollow (sorry I didn’t take a picture, but it’s a curved piece of thin metal as opposed to a solid, thick piece of metal). There just wasn’t a big enough surface to glue.
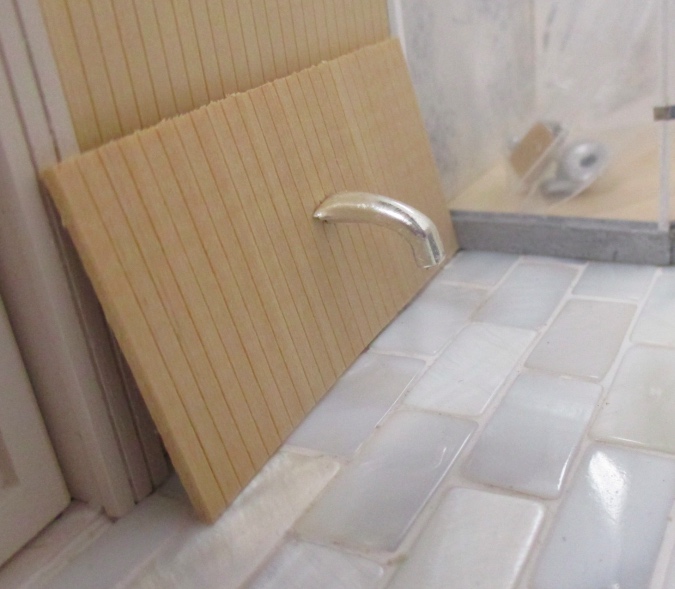
After literally months of stewing over this, it finally occurred to me to cut a small piece of aluminum sheeting and glue it to the bottom of the clasp. I used a toothpick to cup the back part of the aluminum and inserted a piece of the same wire I used for the shower door handle. This is held in with *a lot* of glue.
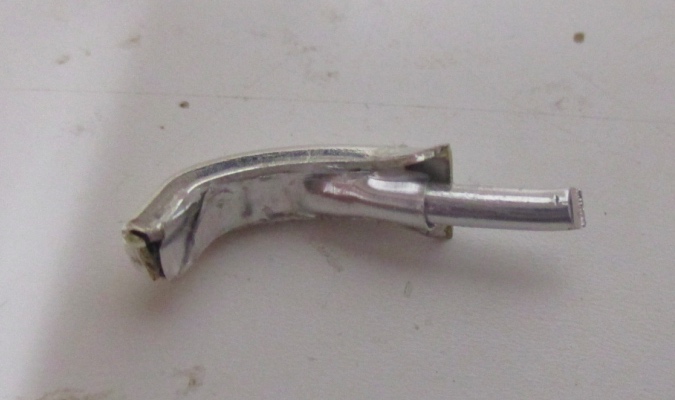
Now the faucet can be mounted through a hole in the wall. Yay!
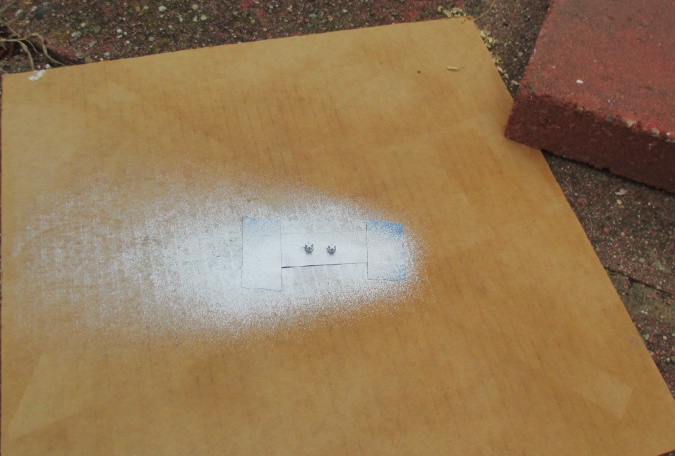
Next I needed taps. Years I ago I picked up a few packages of Chatterbox scrapbook tacks at Tuesday Morning for $0.69 each. Inserted into an eyelet, they can pass as shower taps.
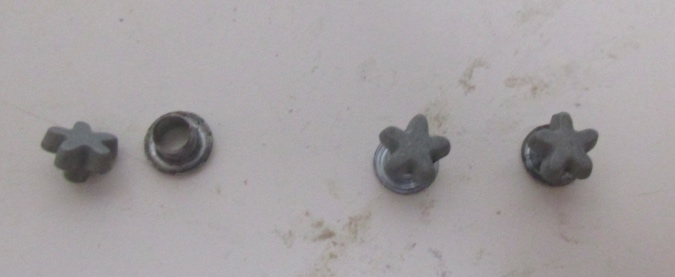
After gluing the tacks and eyelets together, I stuck them down to masking tape so they wouldn’t blow away, and took them outside to spray with chrome paint. I’ve had this can of chrome spray paint for years and I don’t think I ever used it before. No idea why — it’s so quick and comes out a nice metallic color.
But the chrome taps don’t match the faucet. My inner perfectionist couldn’t stand it. (Ignore the snap in the tub. I had been thinking of gluing it in over the drain, to make it shiny metal like the faucet, but once I decided on using these chrome-painted taps, I scrapped that idea.)
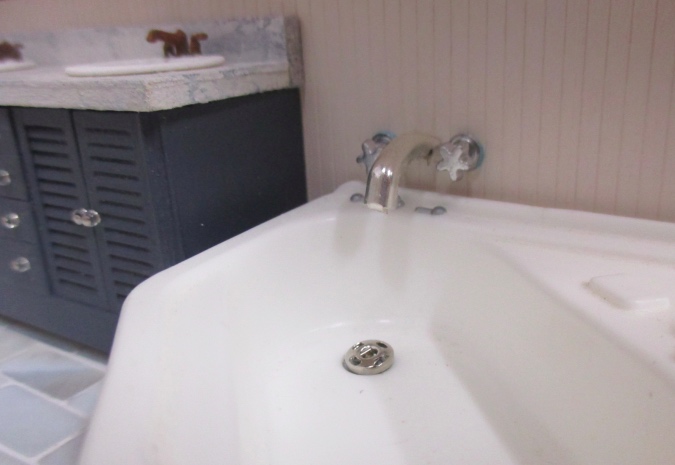
I was reluctant to cover up the real metal, but in the interest of consistency I sprayed the faucet to match the taps.
The painted silver handles on the tub are kind of pointless now, but I’m not sure what to do about them. I like the color of the resin and don’t necessarily want to paint the whole tub just to paint over those handles. Maybe I can figure out how to remove the paint, so they’ll be the same color as the rest of the tub and less obvious? Acetone?
(I also need to paint the soap and hairbrush that are “built in” to the tub. Not sure how neatly I can do that, so I’ve been putting it off.)
Trim
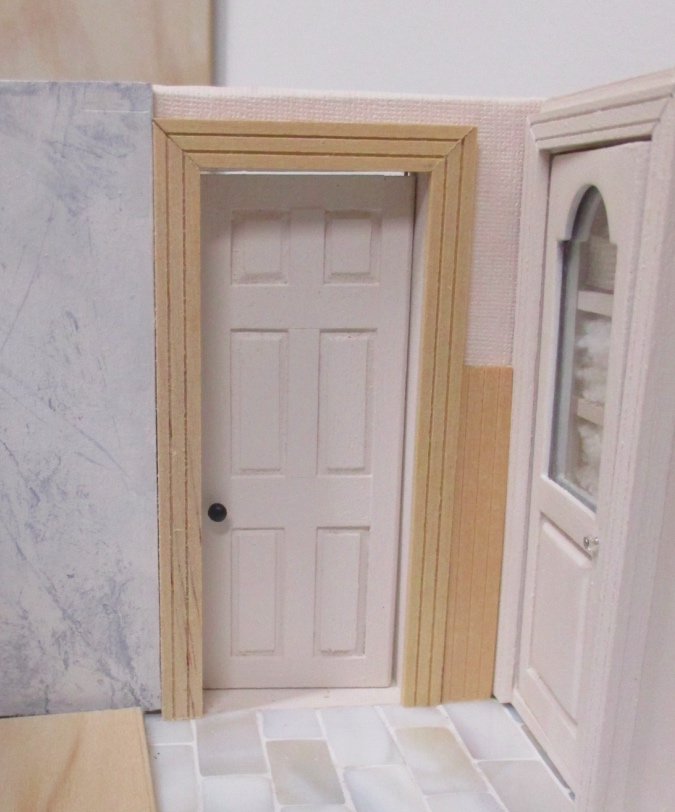
On to the trim. First I did the casing around the doors. I added shims to the door trim to compensate for the walls being thinner than the doors — I’ve covered this before, so I’ll spare you the details.
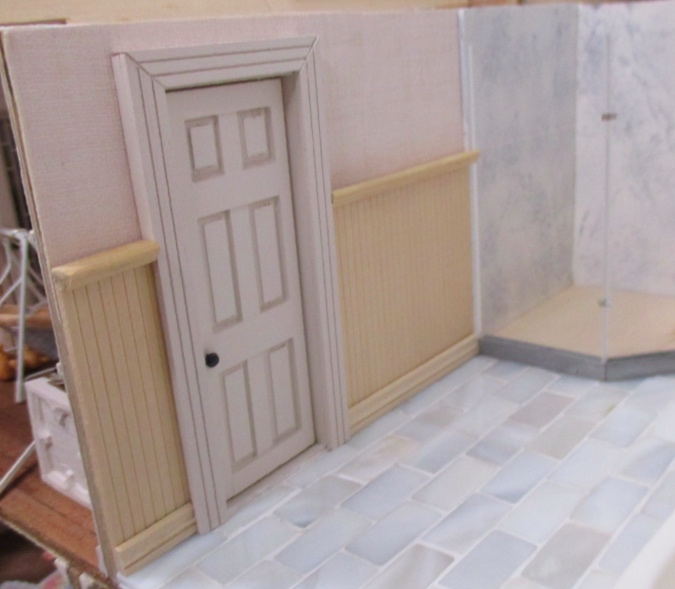
Then I prepared beadboard for the walls, with chair rail on top and baseboard at the bottom. I glued these together before installing them, so I could paint one piece per panel instead of three pieces per panel.
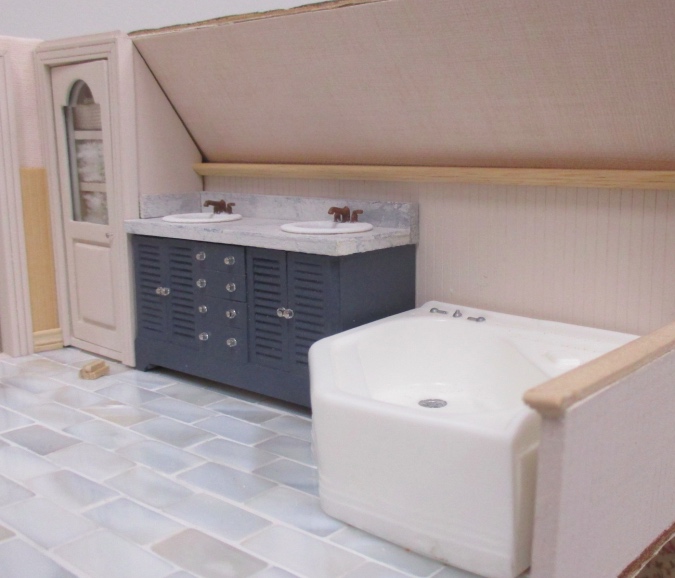
The beadboard was already installed on the tub wall. I wallpapered the area above it using one of my last remaining strips of pink wallpaper. Then I prepared chair rail pieces for these walls with returns at the ends that don’t butt up against a wall, so you see a nice mitered corner instead of a raw edge.
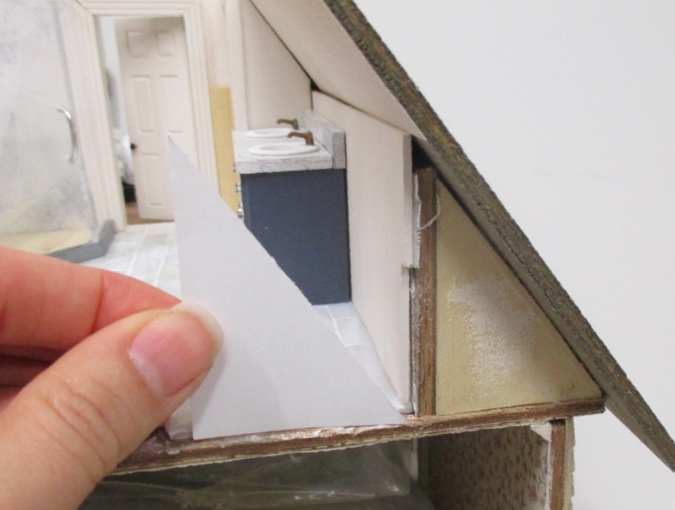
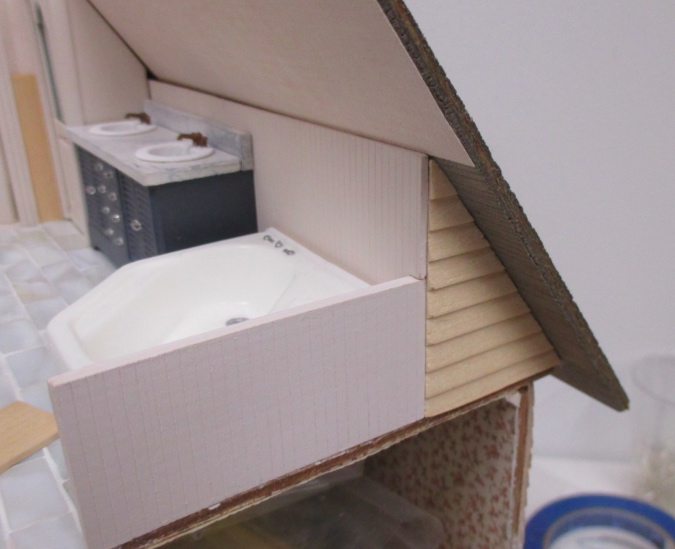
When I was holding that chair rail in place to see how it looked, I realized this triangle under the eaves needed to be covered up first, since the edge of the chair rail hooks over it. I didn’t want to extend the beadboard over there. It’s already strange to me that you can see the back of the beadboard that forms the half wall next to the tub, since that would be a wall in real life.
Instead I decided to cover up the triangle with siding. I started by folding a piece of paper under the roof overhang to make a template.
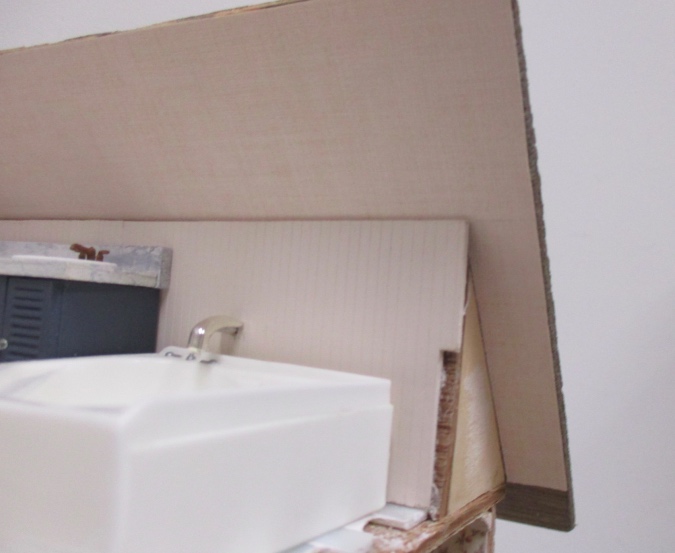
Then I cut a scrap of siding to fit. That works, but what about the bare roof beside it? The wallpaper ends in a strange place.
In theory, the wallpaper should end at the point where the floors end, and the rest should be roof colored since that’s under the eaves. But when I add the other roof pieces, which don’t intersect with the exterior walls – meaning they don’t form any eaves – the ceiling paper on those will extend all the way to the edge, and those pieces need to meet up nicely with the sloped parts of the roof. Hence the wallpaper extending all the way to the edge on the sloped ceilings. (Can’t visualize this? Here’s a picture that might help.)
I decided the neatest solution would be to add a strip of wallpaper. Thanks to the hatchmark texture on the paper, the seam is barely visible.
This is now a total paradox — wallpaper extending past the siding! Dollhouses make my head hurt sometimes.

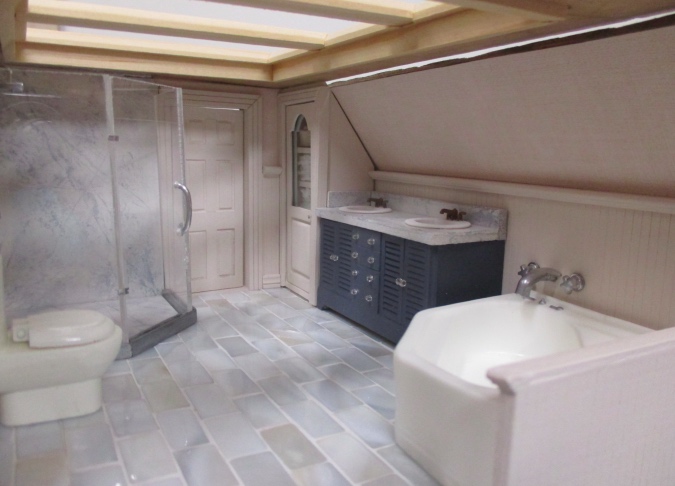
I plan to add some accessories (towels, toilet paper holder, etc.) before the roof is permanently attached, but for the most part this room is now finished. (The beadboard panels and half wall behind the tub are now glued in, but the linen closet and chair rail along the vanity wall aren’t yet.)
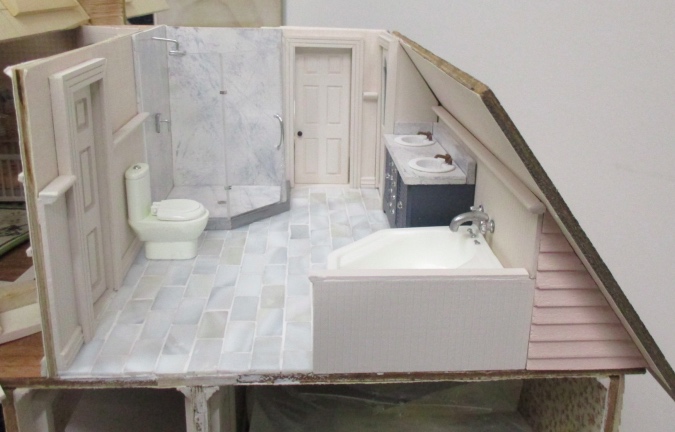
I wanted a light, bright bathroom, and I think I pulled it off! The wallpaper plus the beige beadboard is sort of overwhelmingly pink, but it’s a nice contrast to the blues in the shower, vanity, and tile without detracting from the overall tone of the house, which I’m trying to keep consistent across all of the rooms.
 Emily is a freelance writer, miniaturist, and adventure game enthusiast.


wow very impress you did a lot of creative thinking.
I like the faucet idea very much!!
Your removable shower stall enclosure and your subsequent challenges with the hardware regarding the tub taps- are Ingenious solutions, and I especially love the faucet!
The entire ambiance of the room is beginning to look and feel like a luxury spa!
Love how it looks. The tile floor picks up the pink wallpaper a bit but also the blue/grey in the vanity and marble. It all works very well together. And your fix for the tub taps and faucet is wonderful.
Truly a work of art! Your creations have been a repeated source of inspiration and amazement. Brilliant shower!
Will there be a mirror somewhere?
Yeah I want to add a mirror, but I think it will look weird on the sloped ceiling over the vanity. I have to play around with it. Maybe on the side of the linen closet or the back of one of the doors.
I love your bath taps and faucet! You could leave those painted silver handles on the tub, and pretend that they are controls for a whirlpool bath. We have one that has similar fittings. The nearly complete bathroom is looking very good!
Looks great! If all else fails, cover the stuff you don’t like with a washcloth or something. :)