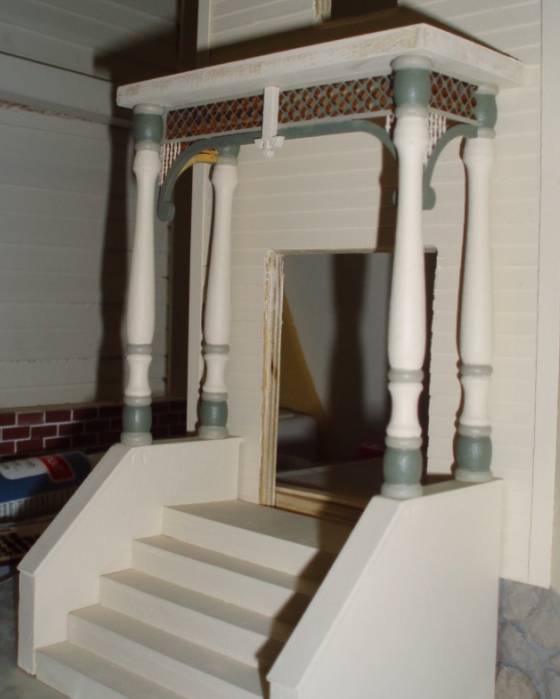
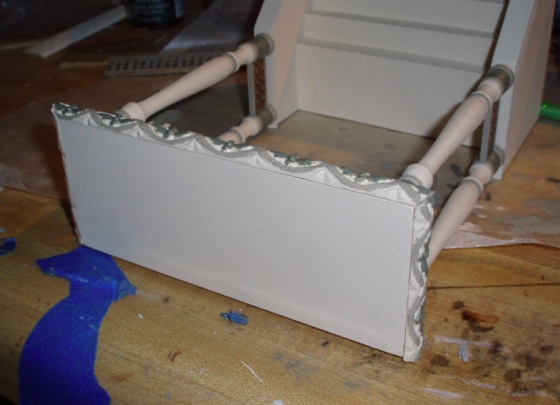
When I bought the Queen Anne rowhouse, it had pillars made out of dowels that were sort of crookedly glued onto the railings. When I pulled these off, bumpy glue spots were left behind on the railings. I sanded them but was left with not-quite-flat railings, and was concerned that the new pillars wouldn’t glue onto them nicely. So, first I glued stripwood onto the tops of the railings to make a nice flat surface.
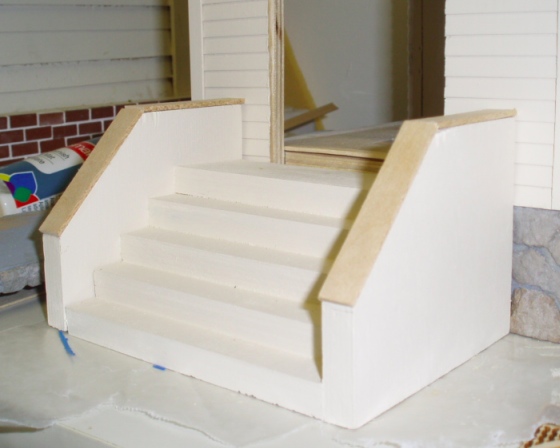
I also cut a new porch roof since the one that came with the house also had glue globs on it, and was a bit warped. Then I got to painting the porch roof and pillars.
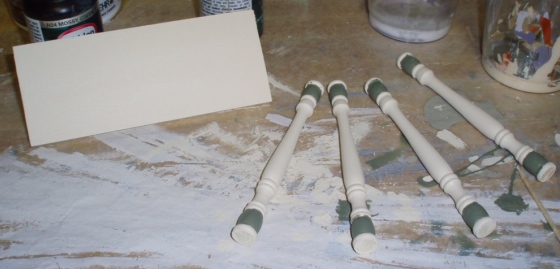
I thought about painting the railings with Olivewood, but in the end went with the same Baked Scone as the rest of the stairs. (Having the stairs and railings the same color as the house seems common on the San Francisco Victorians.) For the pillars, I did Mossy Green at the top and bottom with Olivewood accents on the “rings.”

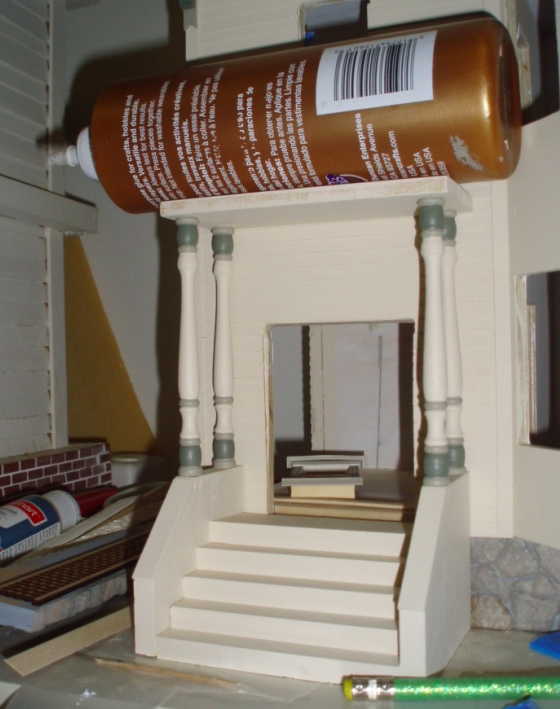
The stairs were not quite level—the left side was 1/16″ shorter than the right side and the porch roof didn’t want to glue on flat. I compensated by making the pillars on the left 1/16″ taller than on the right. I applied glue at the tops and bottoms of the pillars and weighted the roof down while it dried.
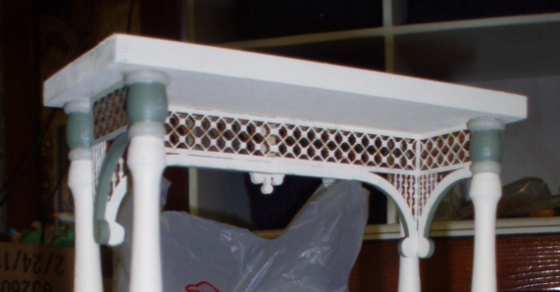
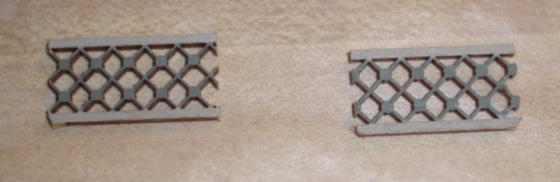
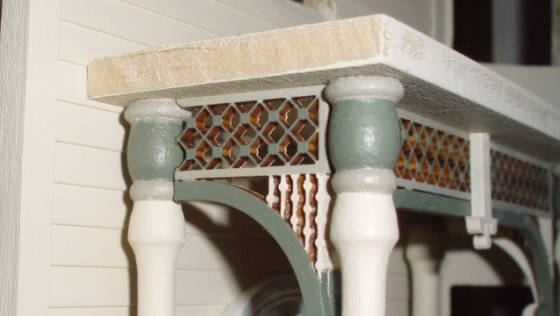
Meanwhile I painted the grilles. So far I’ve spent almost $50 in materials on this porch (amazing!) and these grilles were one of the pricey elements: two packages of 1/2″ scale Laser Tech grilles, at about $9 each. (The retail price is actually $11, my local store had them marked down.)
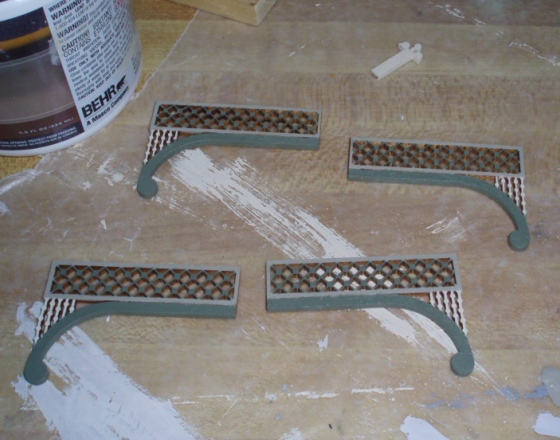
The grille is normally 4.5″ inches wide, with a piece of trim that goes in between the two pieces.
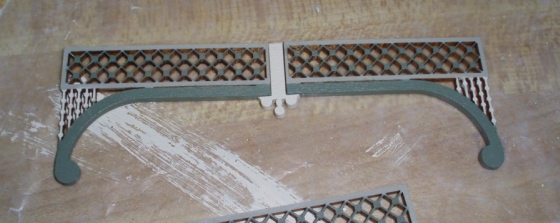
The space I needed to fill between the pillars was smaller than this, so I shaved off some of the grilles in the middle and put the trim piece on top.
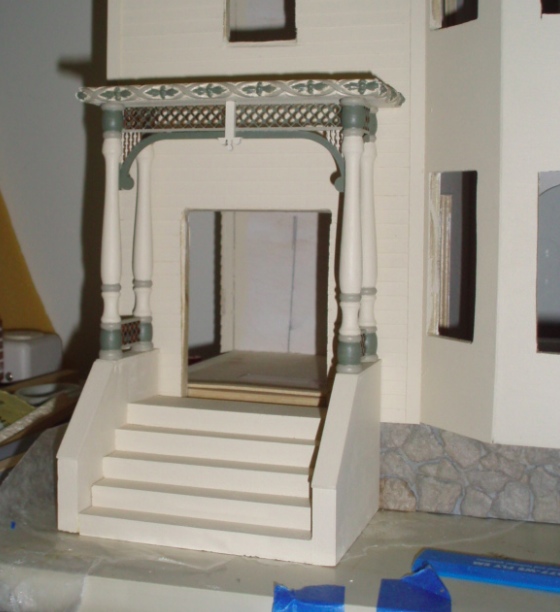
I flipped the porch over and glued on the grille pieces, just behind the pillars since the straight edges wouldn’t have met up nicely with the contours in the pillar tops.
I cut down the other two grille pieces so they’d fit on the sides.
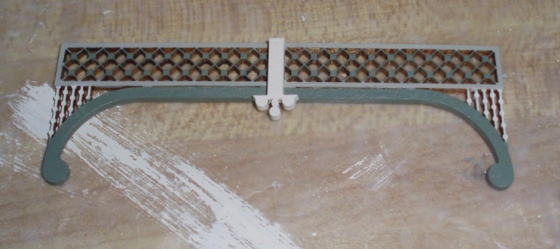
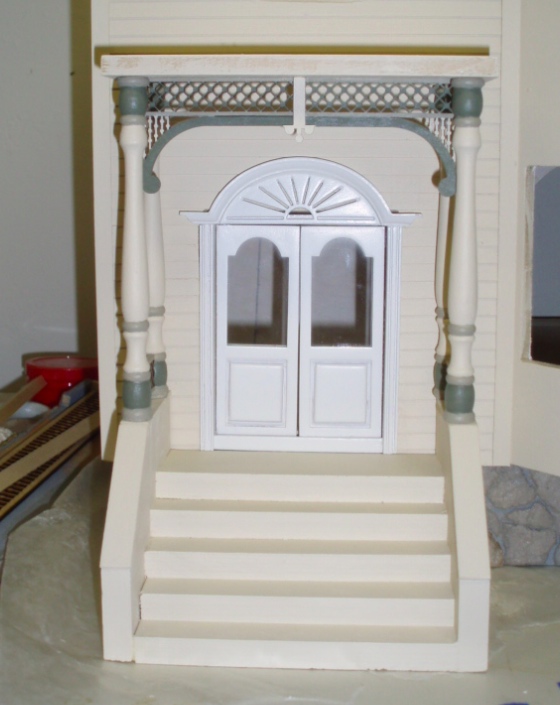
Here’s how it looks with all the grilles in. For the side pieces, I couldn’t set them just behind the pillars like I did the front pieces because they’d bump into the pieces that were already glued in, but I managed to cut the edges so they fit pretty well.
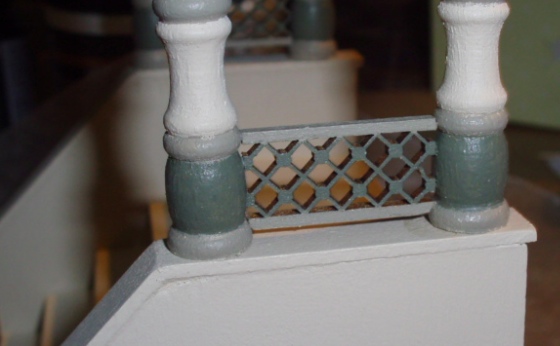
A word of warning about the little piece that goes in the middle: the ball that protrudes at the bottom is very delicate. Since I used two packages of these grilles, I had two of the center trim pieces, but only needed one of them. On the first one, the ball snapped off as I was playing with the trim to see how it would look. I was able to glue it back on but decided to use the second, unbroken piece instead. I painted it and just as I was gluing it on, the little ball snapped off… and I couldn’t find it. I hastily painted the original, re-glued piece and was able to use that (hopefully the glued-on ball will stay put!), but if I’d only had the one trim set I would have been really disappointed that the piece broke.
For some reason I had it in my head that the backs of the grilles would be impossible to see, so I left those unpainted. Once they were glued in I realized I was wrong—the backs of the side pieces were actually very easy to see. With the pieces already glued in place I painted them with Baked Scone, not very well, but well enough that it doesn’t look unfinished anymore if you happen to glimpse it.
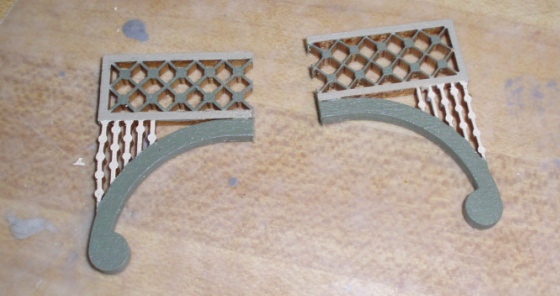
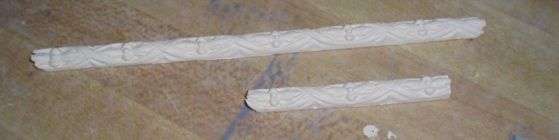
I had some grille pieces left over from the ones I cut for the sides—just long enough to use between the bottoms of the pillars on the sides.
I removed the dark green piece, painted the backs, and cut the bottoms at an angle so I could wedge them between the bottom pillars.
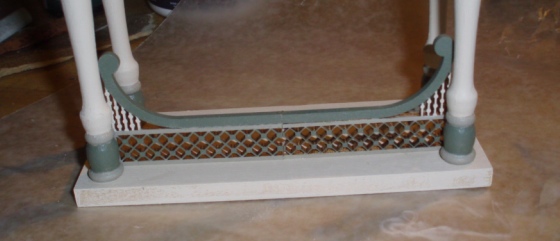
Here’s what we have so far.
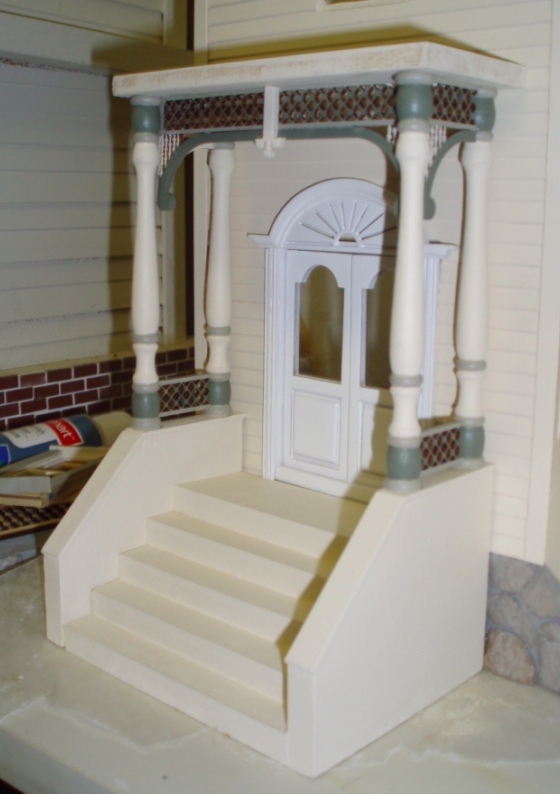
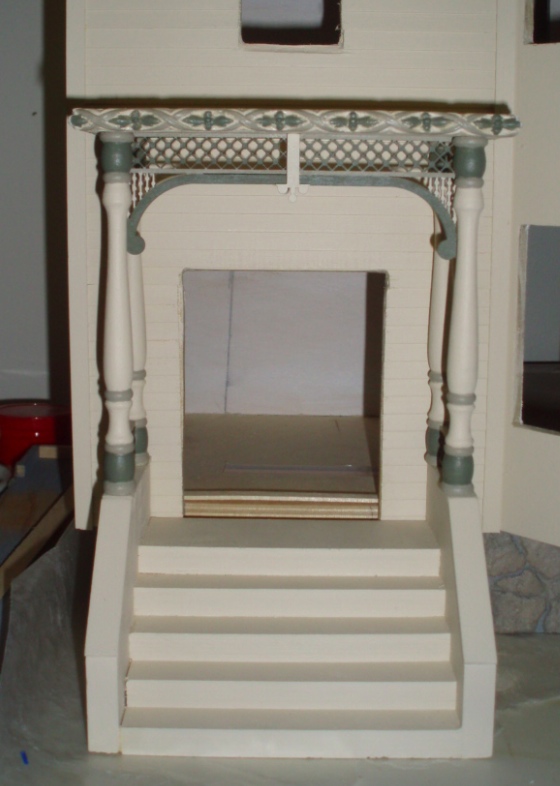
I’m undecided about this white door. Since the doors don’t come out of the frame and the glass doesn’t come out of the doors, I don’t really want to paint them. I’ve also been noticing, both in pictures and in real life, that in a lot of houses (San Fran Victorians included) the door is wood even though the windows etc. are painted different colors.
The good news: there is a walnut version of this same door that I could use instead. The bad news: it, like the white version, costs $34… considering I already bought the white door, it’s kind of silly to toss it aside and spend that much again on a new one. That’s what I get for impulse buying, I guess. I’ll wait to make the decision until I’ve finished the rest of the front of the house.
The delicate grilles held up pretty well with all my cutting. I did lose one of the diagonal pieces, in the upper left corner of this top piece, but unless you’re looking for it it’s not super noticeable.
Next up was trim for around the porch roof. I got this resin trim that’s the same height as the wood.
I painted it first with the Baked Scone, then with Mossy Green and Olivewood accents, then coated it with matte varnish to protect the paint. (I used satin varnish on the resin trim at the top of the front wall and didn’t like how shiny it came out.)
And here it is! Initially I was thrilled with how it turned out.
Then I realized that I should have centered the trim so there was a flower in the middle. The more I looked at it, the more I hated it. So after taking this picture, I yanked it off before the glue had dried. The bad news: I’ll have to buy another piece of trim and start over. The good news: I can use the pieces I already painted to dress up the bay on the side of the house instead.
Next up will be the top part of the porch… I have the pieces already, but need Geoff’s help figuring out the best way to drill a few tiny holes into some tiny pieces of wood…
 Emily is a freelance writer, miniaturist, and adventure game enthusiast.


Wow! The more I am getting into the half scale, the more I am drawn to your work. I would never have noticed the door or the trim, but now that you pointed it out – I agree. I am sure you will have an other house to put that door onto in the future, right?
Thanks!
I can probably find another use for the door eventually, or sell it. It has some imperfections… the doors don’t hang quite straight and there’s a small crack on the inside (it came that way), plus I set the house down on top of it the other day and one of the door nails popped out (oops). I can fix that, of course, but it’s not perfect so even if I sold it I wouldn’t be getting all my money back.
But that being said – I’m a perfectionist, and will probably end up with the walnut door because this white one just doesn’t feel right to me…
Love the trim idea over the porch. I’m going to incorporate that into my dollhouse’s balcony.
How on earth did you get your pillars painted so well?
Haha – patience and good luck, I guess! I painted the whole pillar with a few coats of the white first, then did the greens with a smaller brush, and finally touched up with the white (again with the small brush) where the green went outside the lines.