I have been working bit by bit on the rowhouse bathroom and plan to post a blog about it soon, but jumping ahead a bit, I wanted to show off the “etched” privacy window I made this weekend. The plexiglass in the bathroom window had a small scratch in it that I decided to cover up with translucent scrapbook paper.
I feel like there’s a special name for this paper but I can’t think of it. It’s translucent, with a white design. I got it at Michaels. (It’s on a red book in this photo so you can see the design.) The design is a bit larger than I wanted but this was my only option. I moved the window around on the paper a bit until I found a segment I liked.
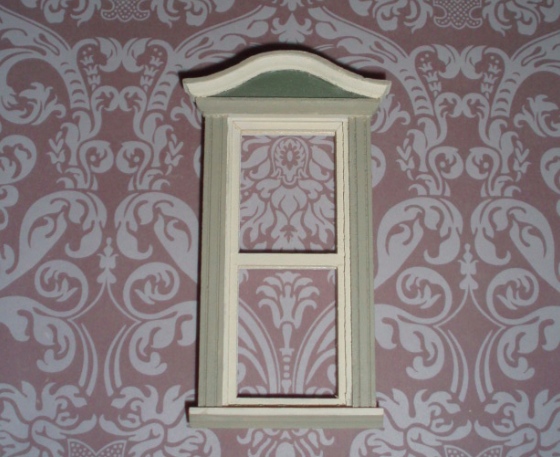
Then I cut it out and slipped it in behind the plexiglass. You can still faintly see the scratch (it’s at the top of the flower, just to left of center – more obvious in person than in the photo). But it gets the job done.
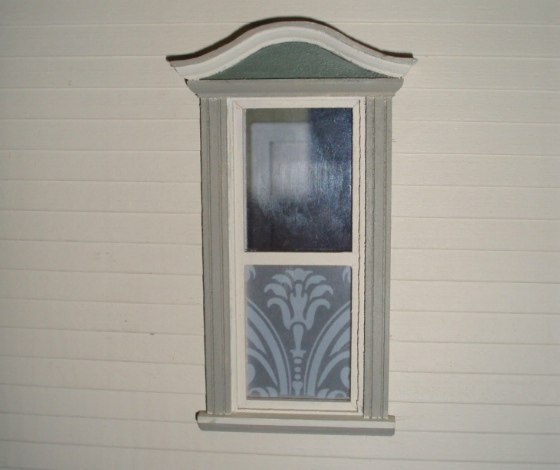
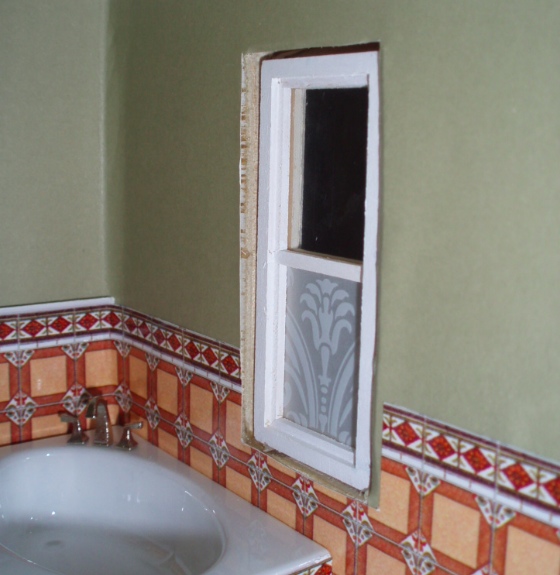
Here it is from the inside. Since the window is right over the tub, it makes sense that the bottom would be frosted.
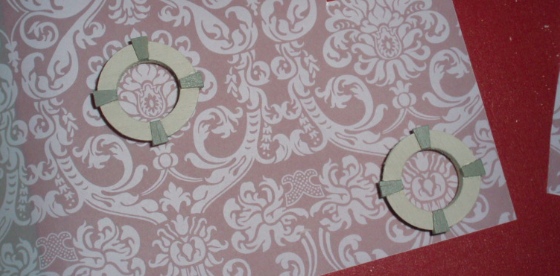
Once I saw this on the house I wished I’d done this with all the windows, but most are glued in already. I thought I could do it with the circular windows that go on the stair wall. I’d considered stained glass for those, but this would be way easier…
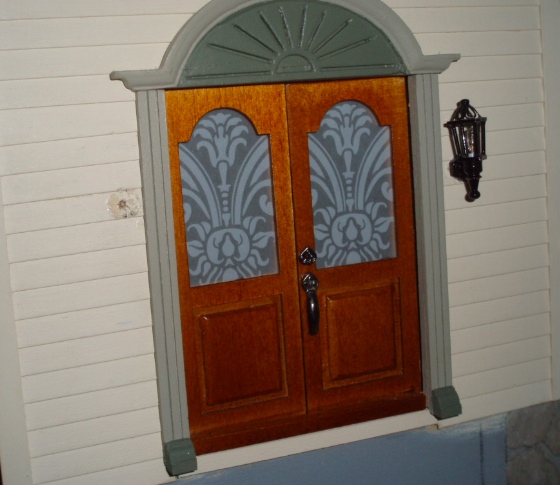
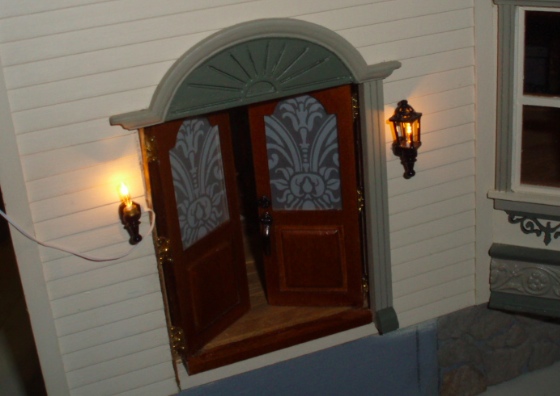
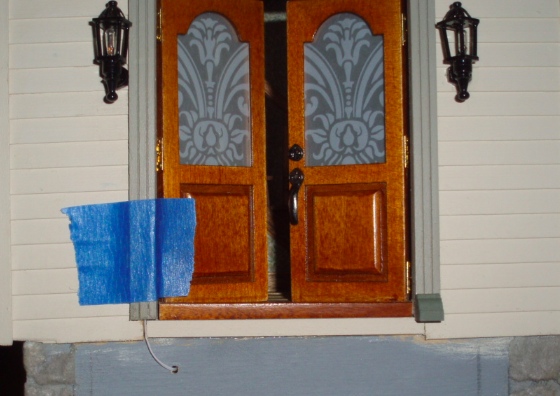
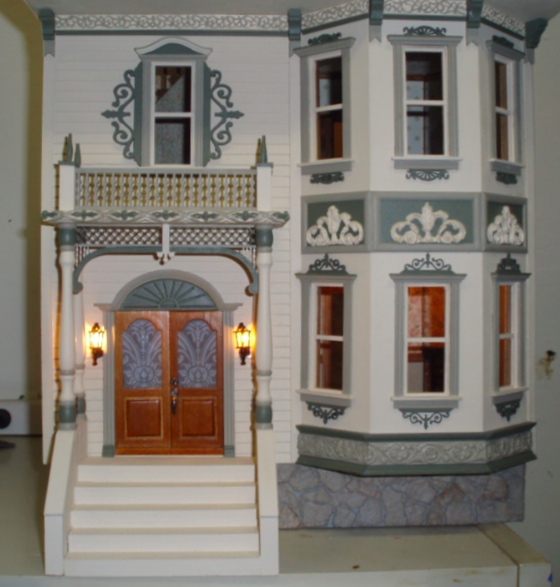
And then I thought, why not the front door? It’s always seemed weird to me that the door has two huge windows that you can look right through (isn’t that a security concern, or at least a privacy concern?!) Turns out the same section I used for the bathroom window fit nicely on the door panel.
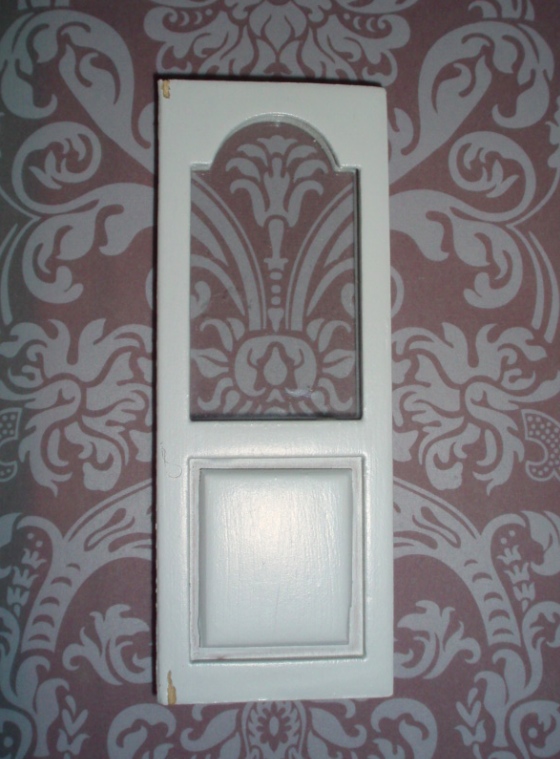
It took quite a bit of futzing to get these right. (In fact, I burned through all the available flowers and had to go back to Michaels for another few pieces of paper!) There was plenty of space around the edges of the window for me to slip the paper in, but I had to kind of tease it in and any bend or crumble turned into a visible white spot on the paper
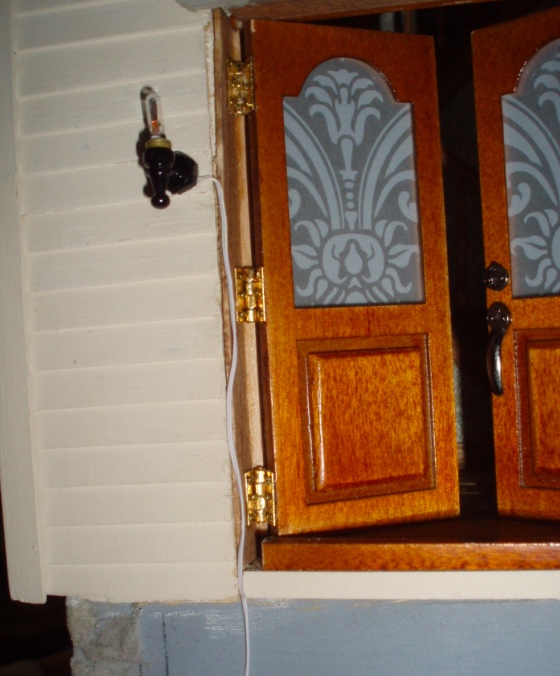
Right, so about that missing porch light. Months ago I broke the porch light to the left of the door — the skinny arm that holds the fixture to the base snapped, so that the two pieces were only held together by the wire inside the arm. I fixed it with super glue a few times but each time it came loose again the integrity was worse and finally it snapped off completely. I tried to pull more wire through the hole, hoping I could attach a new light to it, but it wouldn’t budge (not surprising, since there’s wallpaper glued over it).
Lucky for me the light sits right next to the front door trim, which could be used to hide the wire from a new light. I peeled the sticker off the back and messed around with the backing to get the wire to protrude from the side instead of the bottom.
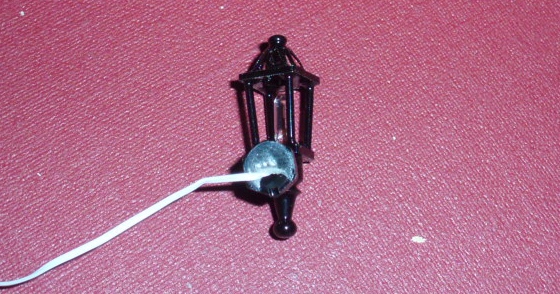
I used the Xacto knife to remove the door trim, and sanded and painted over the area where the old light had been glued. I also painted some of the wire the same color as the house, so it would blend in, but I’m not sure that was really necessary. Then I glued on the new fixture with super glue.
I had tested it before gluing, but decided to check one more time before cutting off the plug, just to make sure!
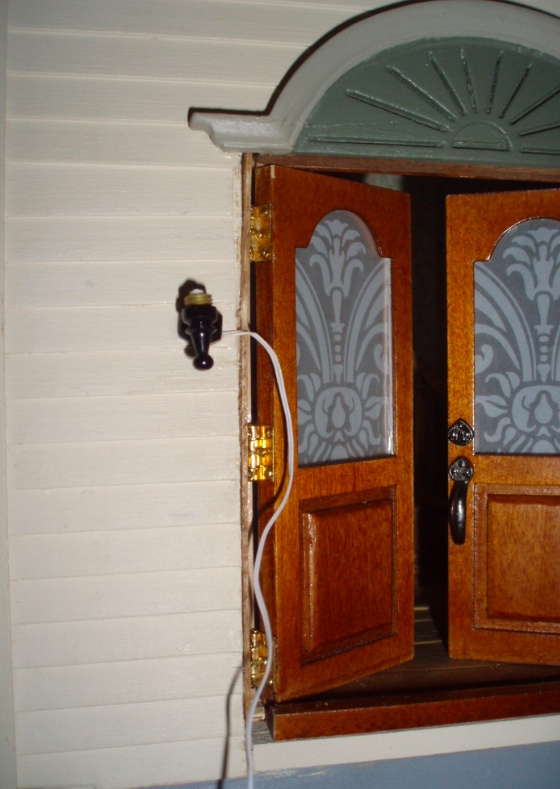
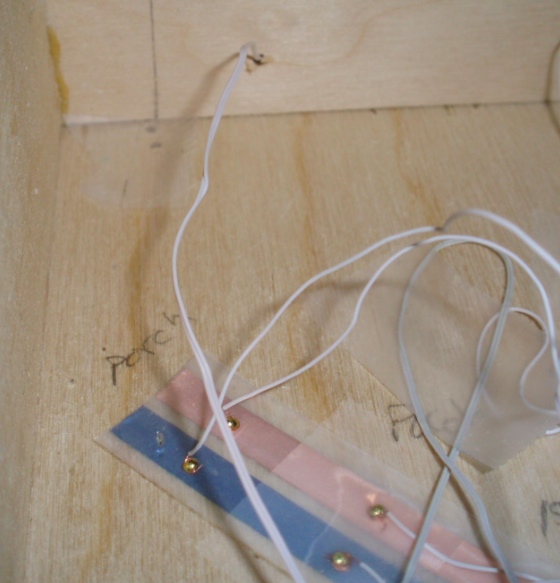
I ran the wire down the edge of the doorway. There happened to be a little seam at the bottom where the siding meets the bottom of the door frame, the perfect size for the wire to tuck right into it.
I reglued the trim on top of the wire, then drilled a hole under the door and fed the wire through.
All of my lights connect to the tapewire underneath the house, for exactly this reason — I wanted easy access if anything needed to be fixed once the wallpaper and floors were in. When the first light broke I disconnected the wire so it wouldn’t cause a short. I attached this new one into the same holes as the old one.
The new light is a tad closer to the trim than the other light, and maybe also a tad too low. When I was working on it that was bothering me, but now looking at the pictures I don’t think it’s too obvious.

And they both work! Hopefully this will be the last electricity emergency on this house. And seriously, I’m never electrifying a dollhouse again.
 Emily is a freelance writer, miniaturist, and adventure game enthusiast.


Love what you have done. Could the plastic paper insert in the windows (which I love) be called Vellum? I have lightly pink tinted vellum that I thought would work for making lampshades when I have some inspiration.
Yeah, vellum is the word I was trying to think of!
The patterned vellum is a great solution for the windows – it gives a lovely effect.