Donna Golden (jbresr on the Greenleaf forum) recently posted that she was looking for furniture to fill up half scale houses she’s donating for the holidays, and I sent her a few Town Square Miniatures sets that didn’t think I’d ever use. Most of this I’d gotten for free off Freecyle, plus there was a kitchen set I bought about ten years ago for the Fairfield when I first started doing half scale. This stuff all seems too clunky to me now, but it’s perfect for kids.
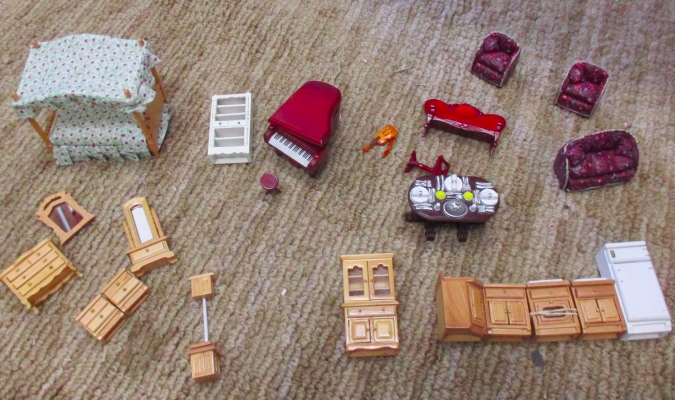
Last week Donna sent me a note to ask where I got the kitchen. The only thing she needed to finish the houses was another kitchen, and she hadn’t been able to find one anywhere. I did a search, and to my surprise I couldn’t find it either. This kitchen has been around for such a long time and was carried by Miniatures.com (among others), but it seems to have disappeared without a trace.
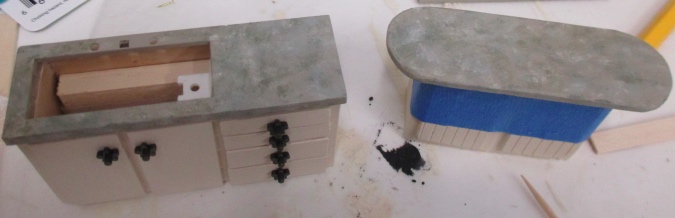
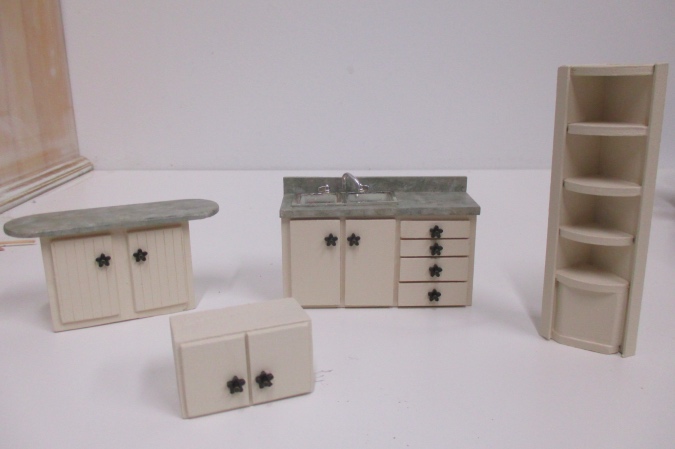
I had some mismatched kitchen pieces in my stash and offered to put together a kitchen for the donation. Here’s what I started with. The blue fridge and upper cabinet were part of a set I split up for the Artist’s Cottage. The island came from last year’s half scale Yahoo group swap. I’d scratch built the corner cabinet for my puzzle house and later replaced it with something nicer.
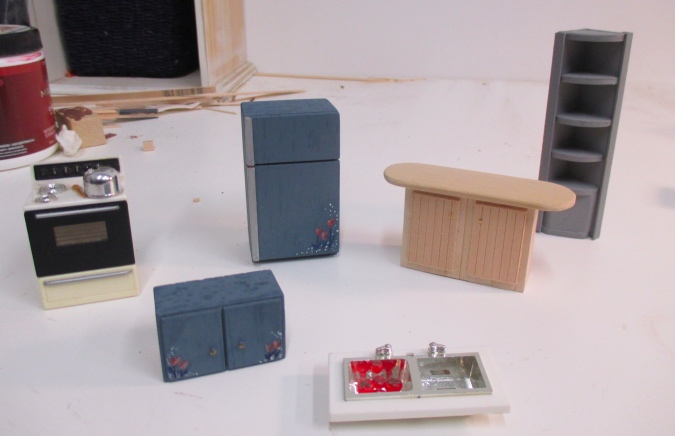
I also had a stove, sink, and dishwasher (not pictured) that are old Acme magnets. These magnets are perfect for half scale and I’ve used them in several dollhouses: the Fairfield, the Victorianna, the Rowhouse, the Artist’s Cottage. The first Acme magnets I ever bought were a batch off eBay (the only place to find them) from a seller who didn’t represent how beat up they were. That’s where this stove came from (dirty and yellowed with age), and the sink insert (broken). Some of the plastic on the dishwasher was damaged and I wasn’t even sure if I should include with the donation.
The sink comes set into a slanted triangular cabinet that couldn’t exist in reality, but it’s a nice silver double sink that I always thought I’d find a use for. That day has come!
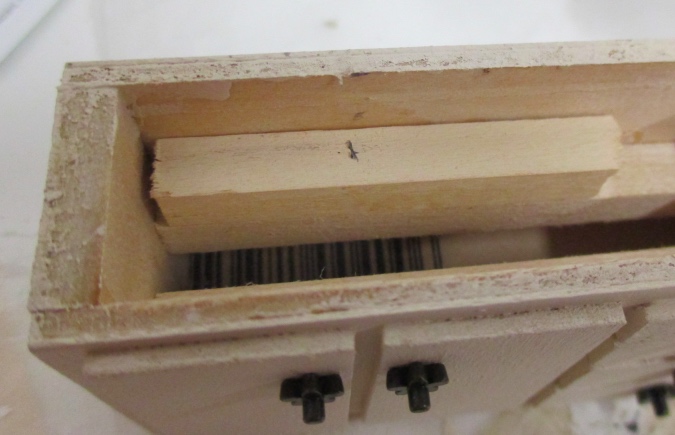
I started by pawing through my scrap wood to find pieces that would work. The cabinet needed to be about 1.5″ tall, which isn’t a size I had lying around. I ended up popping these two pieces out of one of those puzzle furniture kits from Michaels, which I doubt I’ll ever build. The long piece (3/4″) will form the sides and base of the cabinet.
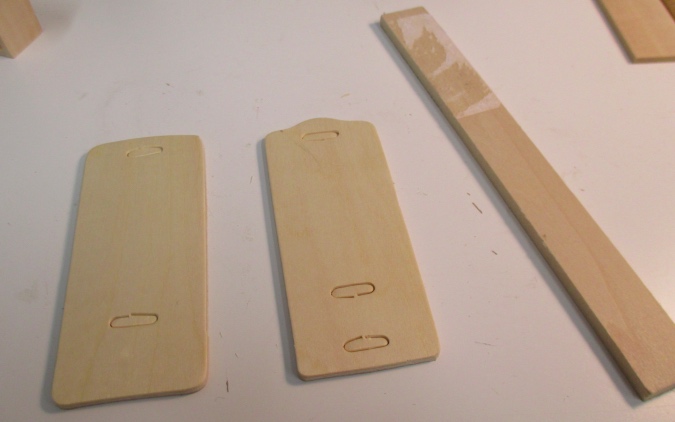
I cut down the front and back pieces to make them the same width, and then cut the side and base piece to fit with them. The whole cabinet will be about 3″ long — this is long enough to fit the sink plus some additional counter space.
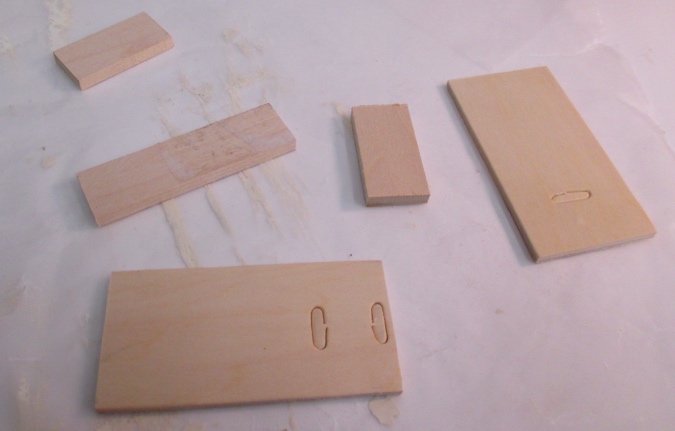
I glued the back, sides, and bottom together. The sides didn’t want to stay put so I added a support to the inside. The doors on the cabinet won’t open, so you’ll never be able to see this.
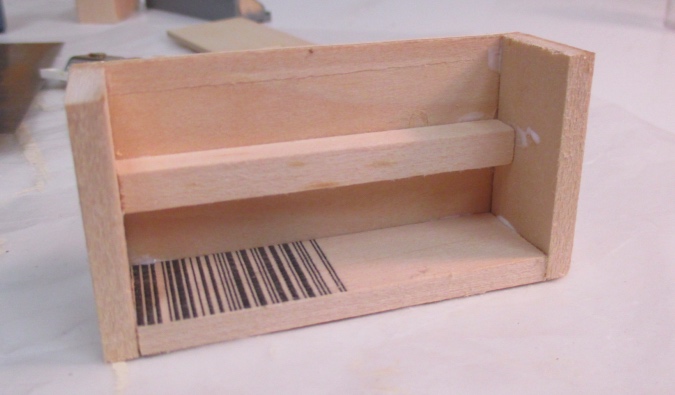
I added a second support flush with the front of the cabinet, and then glued on the front piece. My original thought was to center the sink in the cabinet.
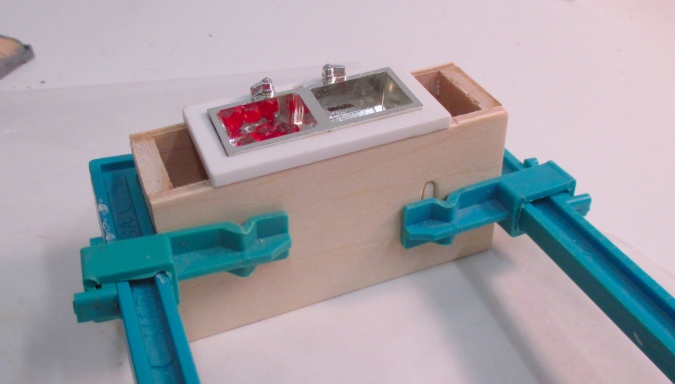
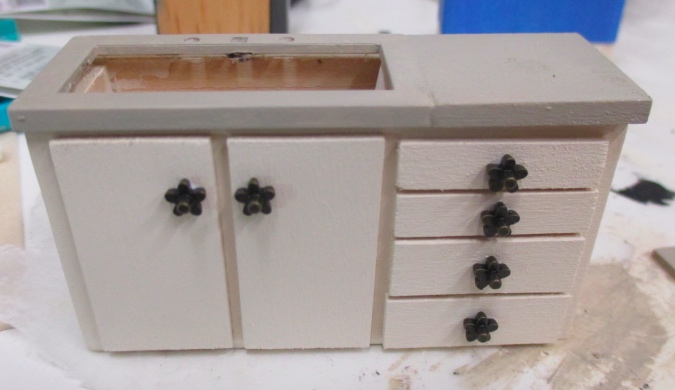
But once I started playing with doors I realized that wouldn’t work well… with doors centered under the sink, the sides of the cabinet would either be big blank spaces or very skinny doors. Instead I decided to scoot the sink over to the left and put drawers on the right. The countertop is pushed forward slightly so a backsplash piece can fit in at the back.
Rather than make a new countertop that I’d then have to cut holes into, I Frankensteined one from the original plastic piece and a piece of wood. I glued a strip of wood underneath the seam to help it hold. I covered up the seam with wood filler, then (after taking this photo) coated the whole thing with Gesso to give it a uniform texture.
Here it is after a couple of coats of paint. The seam between the two pieces is still visible, but it won’t be! The pulls are scrapbook tacks — the part that’s sticking out is supposed to snap into another piece, but I turned them around to make that part the handle.
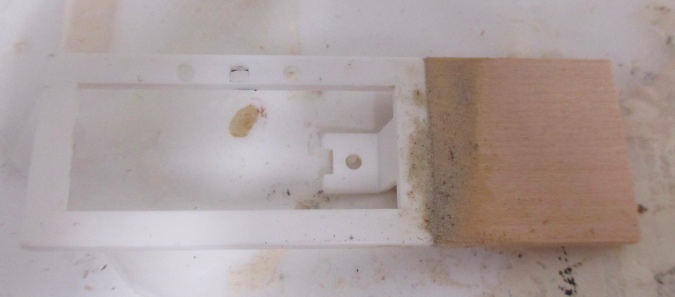
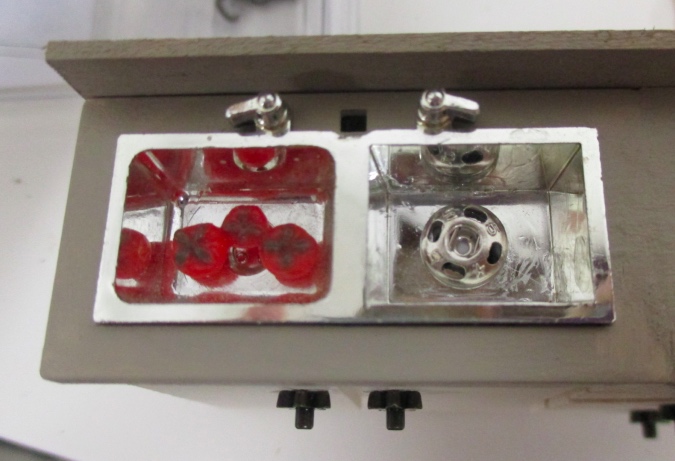
The sink is supposed to have a dish rack on the right side, which would have snapped into that rectangular hole. It’s also missing its faucet.
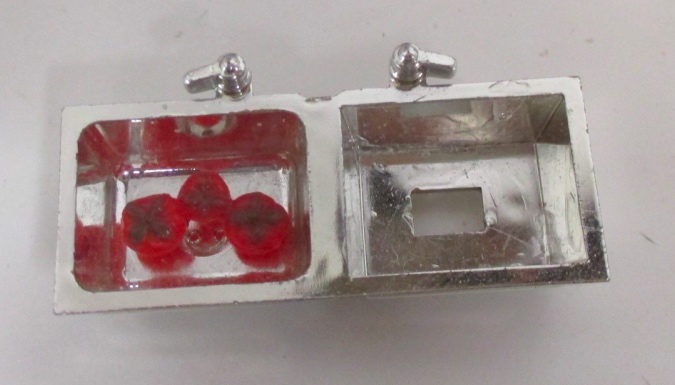
I covered up the hole with half of a snap. It sort of looks like a garbage disposal? Maybe?
Next I splotched on some complementary colors with a dry brush to give the countertops a granite effect. (I’ve posted about this many times before — if you browse the Kitchen tag you’ll find more info about the process.) There is a slightly visible line where the two countertop pieces meet, but the paint mostly hides it. When the paint was dry I coated the countertops with gloss varnish.
I made a faucet by bending a piece of 12 gauge aluminum wire. The piece of the countertop made from the magnet has a hole for this to slip into. To secure the faucet, I added another support piece inside the cabinet, that the bottom of the faucet can butt up against. Then I drew on the bottom of the faucet with Sharpie.
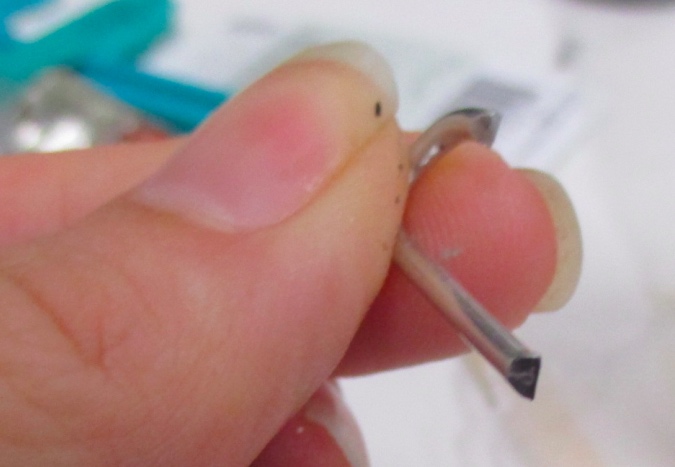
With the countertop in place, I stuck the faucet through the hole and pressed down to mark where it hits the support piece.
Next I used my micro drill to drill a hole into the support piece. This holds the faucet in place.
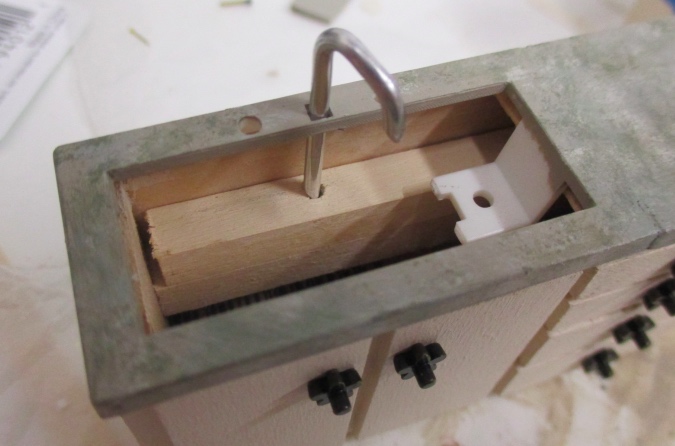
The final steps were to glue everything together: first the sink into the countertop, then the countertop onto the cabinet, and then the faucet into the hole hidden inside the cabinet. Finally I attached the backsplash, which I’d painted separately.
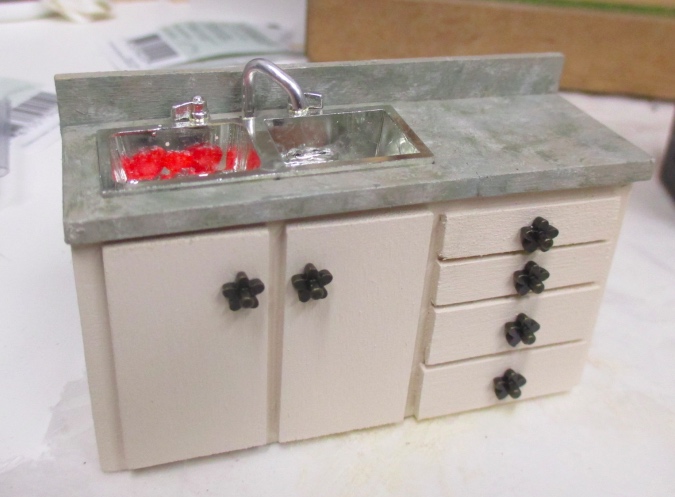
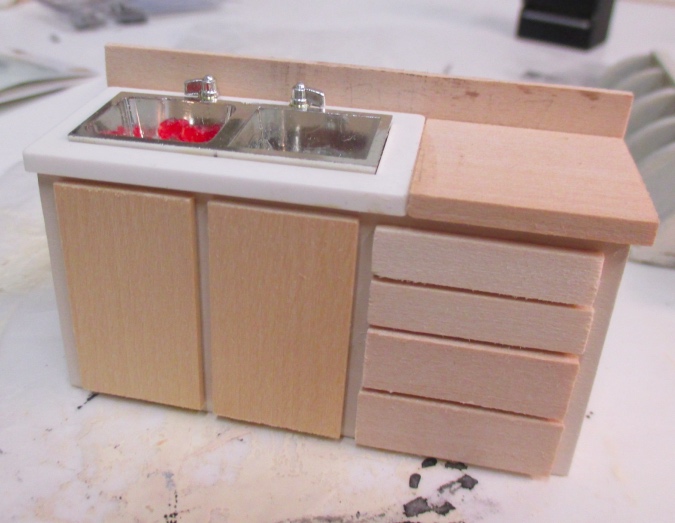
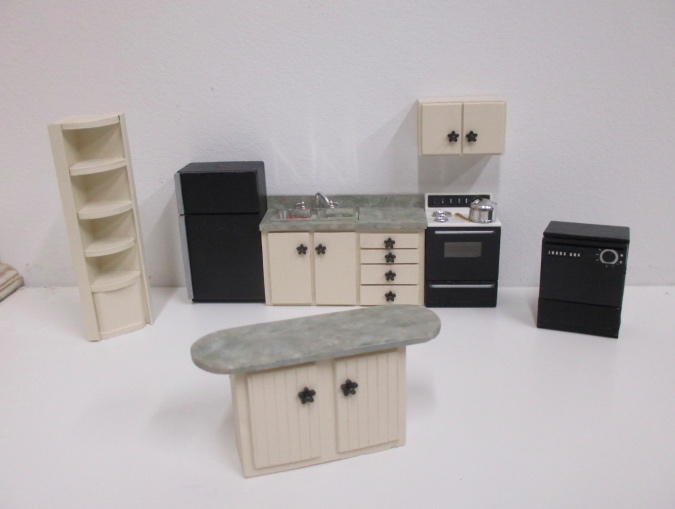
Here are the finished cabinets, painted so they match.
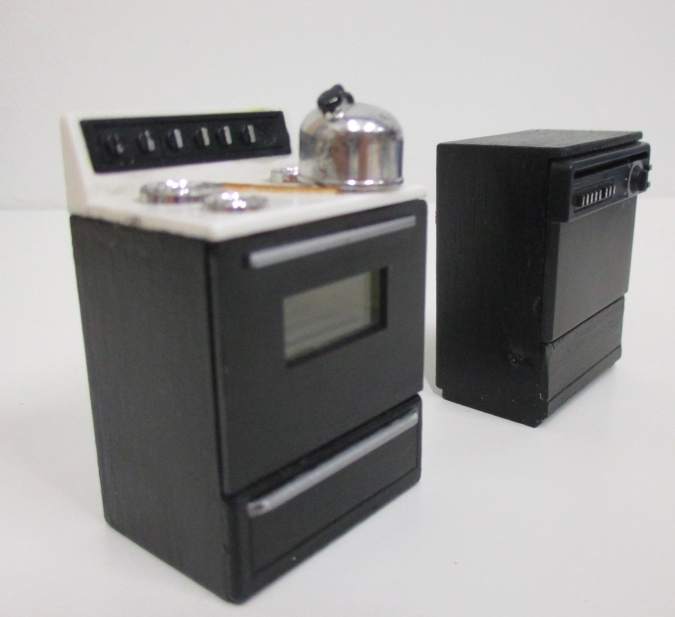
I painted the fridge, stove, and dishwasher with black paint, followed by gloss varnish. I was worried that the paint would scratch off the plastic too easily but the varnish hardened into a nice shell.
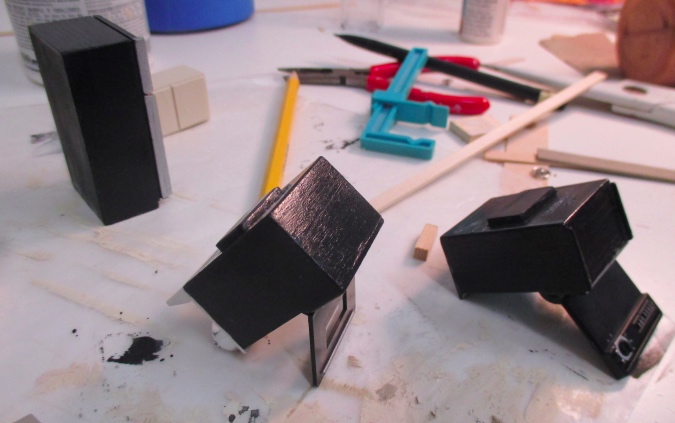
The stove and dishwasher originally had black doors and white everything else. I’d soaked them in soapy water to clean off years of dust, but the “white” plastic was still yellowed and grungy looking. Painting them black really helped, and it even covered up the dings in the dishwasher enough that I felt okay including it.
I would have liked to paint the stovetop black as well, but it would have been too hard with the stuff on top of it. (The stovetop didn’t look yellowed, though. Maybe it’s a different type of plastic?)
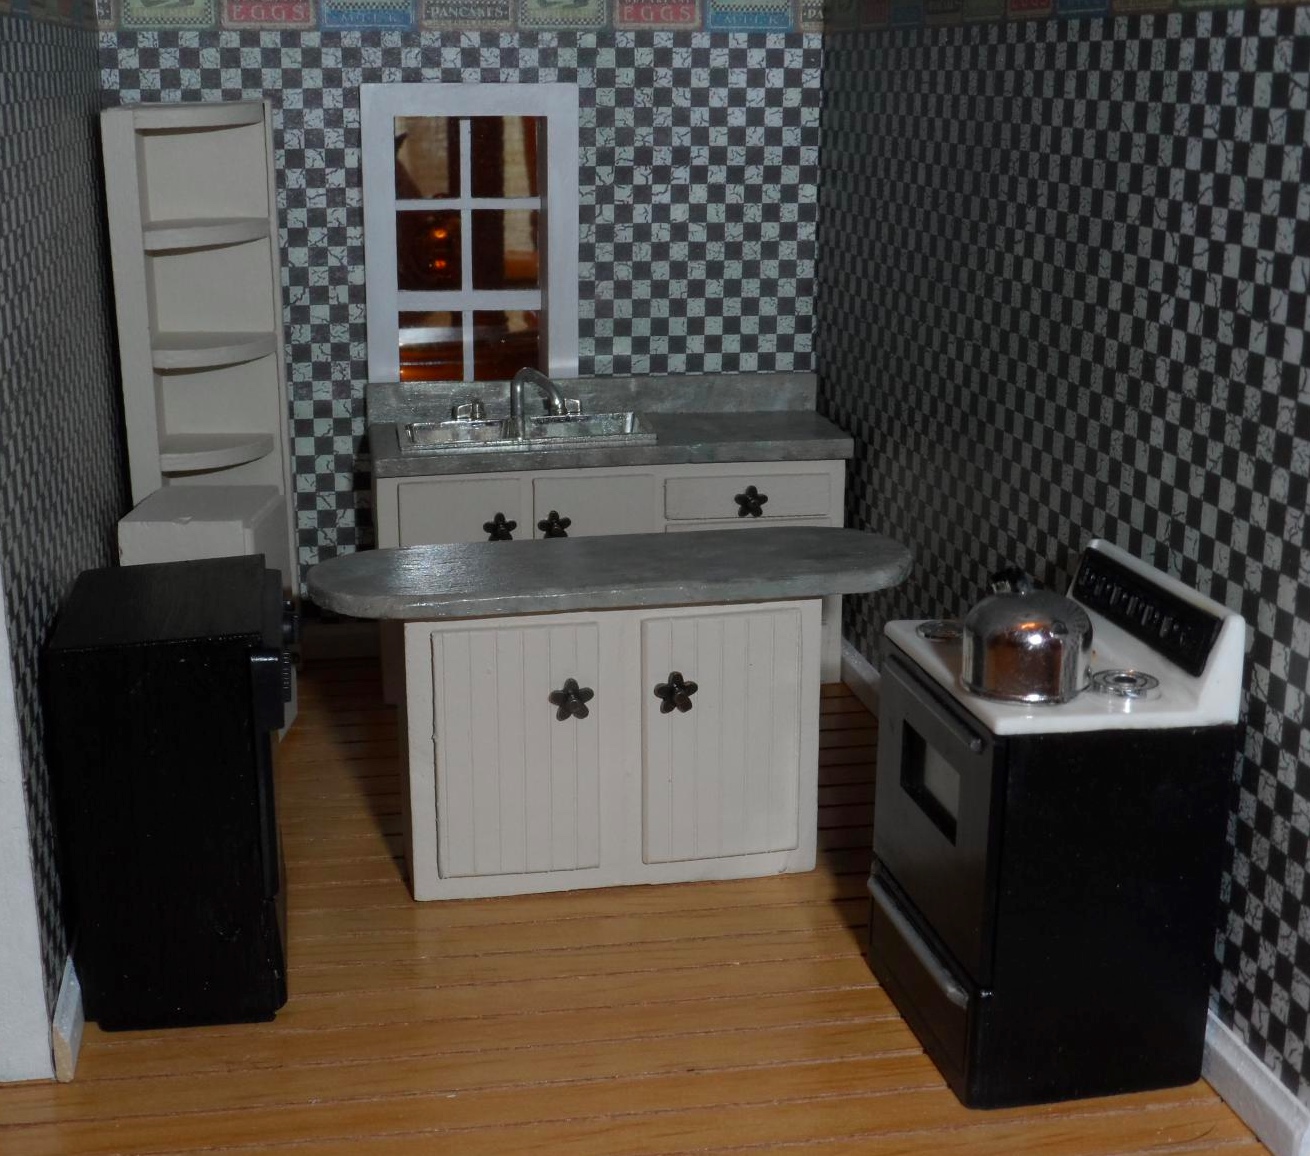
Here’s the finished set before I mailed it off to Donna.
And here’s a picture she sent back to me of some of the pieces in the dollhouse. I hadn’t even realized the kitchen had black checkered wallpaper — the appliances are a perfect match!
 Emily is a freelance writer, miniaturist, and adventure game enthusiast.


Great job, and using lots of creativity as usual!
Ha! Kismet with the black and gray wallpaper! Clever solutions to use what you had and make them look wonderful! I love it that her call for help worked out so nicely!
I think I can shed some light on the disappearance of the half inch scale kitchen you show in your photos. It, along with many other great inexpensive single items and furniture groupings, were imported by Aztec Imports in Medina OH. About 2 years ago, Aztec made a business decision to discontinue the TownSquare Miniatures line of half inch furniture sets and to pretty much get out of the half inch line entirely. I have petitioned repeatedly for this to be turned around, at least for a few of the more popular sets, such as the white and the pecan kitchens. So far zero interest, to my great disappointment. I bought up as much Town Square stuff as I could financially manage back when they were discontinuing, but now I am down to a handful of bedroom sets on my website. I remain, I believe, the only half-inch-scale-only web store, and I continue to search for more sources for half inch, but I fear we have seen the last of Aztec’s Town Square Miniatures.
Thanks for the info! That’s too bad. That furniture is some of the only kid friendly half scale stuff that I know of. It is nice to see some new Bespaq and JBM styles coming out in half scale, but of course it’s more expensive.