Every time I’ve sat down at the Mansard Victorian lately, I’ve stared at it for about fifteen minutes and then got up and walked away. I have done a little more with the electricity following my last post — I was waiting to post about it until I was a little further along — but I decided might as well post it now since I feel my attention drifting, and sometimes that can last for years. (Ack, don’t jinx it!)
When I left off, I’d made a bump-out for the kitchen and planned to run the wire for the light under ceiling paper glued to a piece of cardboard. The cardboard would also allow me to add a ceiling light to the main part of the room without drilling through the floor (see this post for an example). Both wires would stretch into the stairwell, where I would plug them in the same way as the foyer lights.
I planned to use a brass ceiling fixture that I’d painted green. The problem is, the wire on this fixture is too short to reach the stairs.
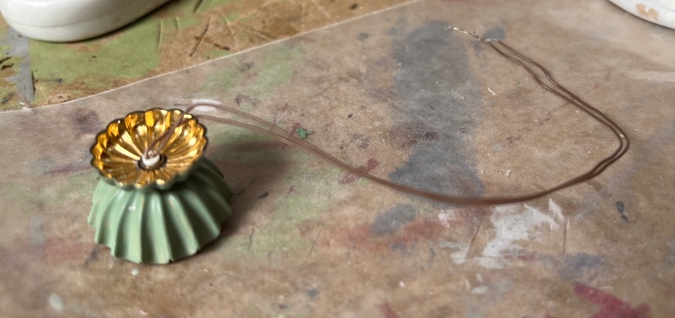
I thought about soldering it to a longer wire, but the wire is super delicate and I was concerned about the connection breaking down and being inaccessible under the ceiling paper and cardboard. (Hey, it’s happened before…) Having a connection go bad once I’m unable to reach it is exactly what I’m trying to avoid by using a power strip in this house.
The other problem is that the cardboard would make the ceiling a tad lower than the rest of the ceilings on the first floor. Since you see all the rooms at once with this house, I didn’t want that.
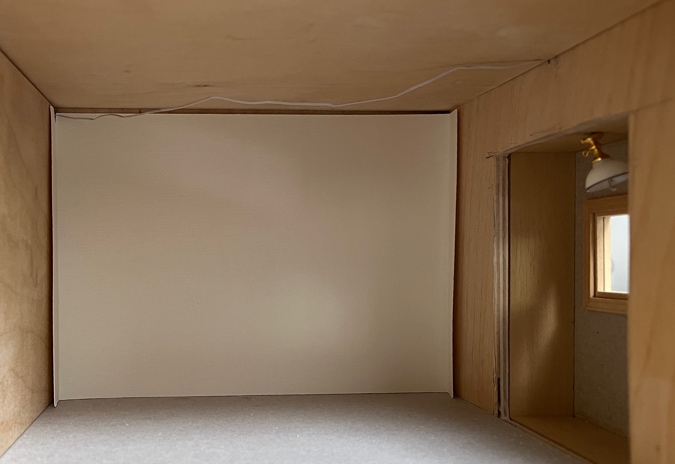
So I vetoed the cardboard ceiling, flipped the house over, and glued the paper directly to the kitchen ceiling. The blank stripe is where the wall between the kitchen and foyer will be glued in.
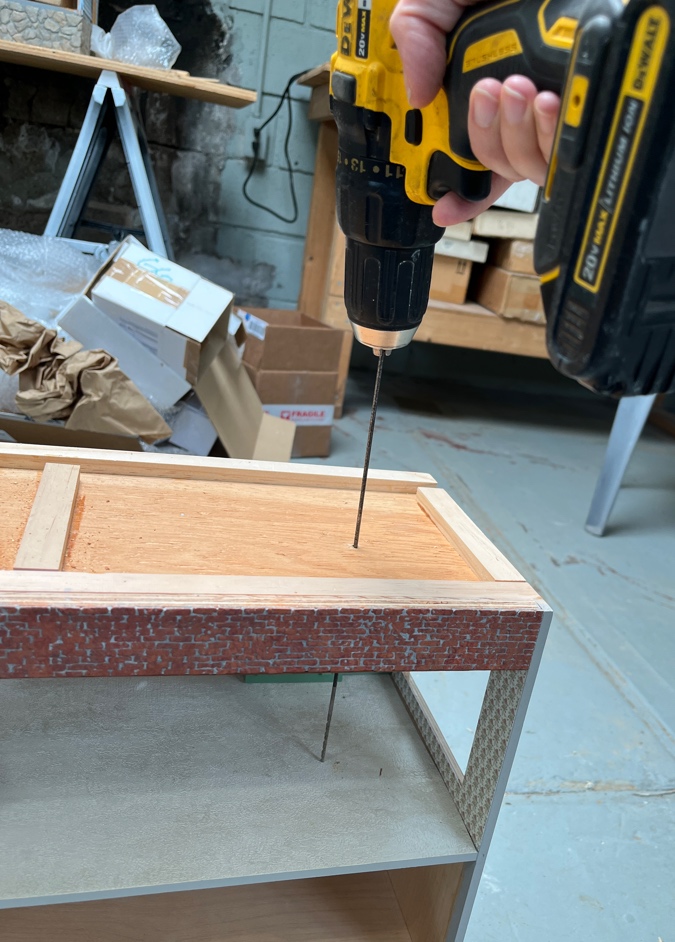
Now, how to drill into the ceiling when there’s only five inches of space between the floor and the ceiling? The drill wouldn’t fit. Years ago I solved this problem in the Queen Anne Rowhouse by using a very long drill bit and going in through the base of the house. I couldn’t find it with the rest of the drill bits so I asked Geoff to get it out for me.
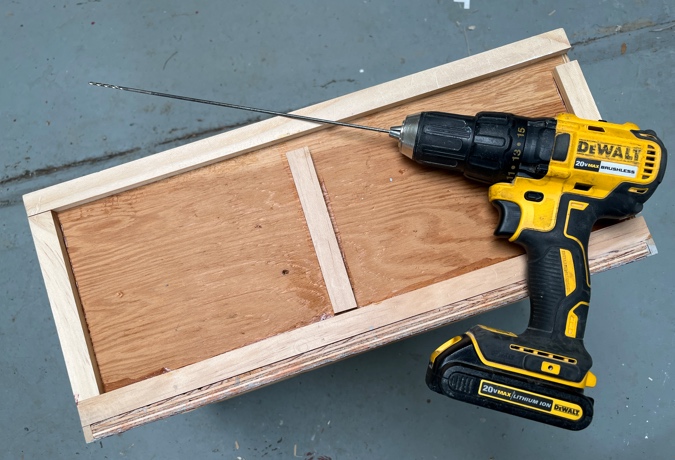
I started by using the regular drill to make a hole through the base.
Then I reached in with the long drill bit to drill a hole in the ceiling. I did this in both the kitchen and the living room.
(Side note: when I gave the drill bit back to Geoff, he asked me what I’d used him for. Then he said, “Why didn’t you use the 90-degree bit?” To which I replied, “Huh?” Apparently there is a 90-degree bit that would have allowed me to get the drill into the too-small space, without having to make a hole in the floor. Why didn’t he tell me that when I asked for the long bit in the first place?! Sigh.)
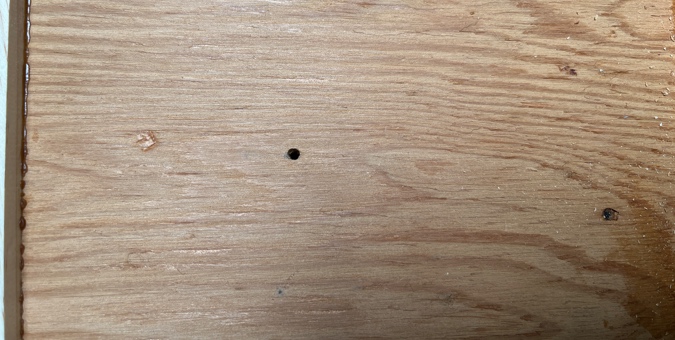
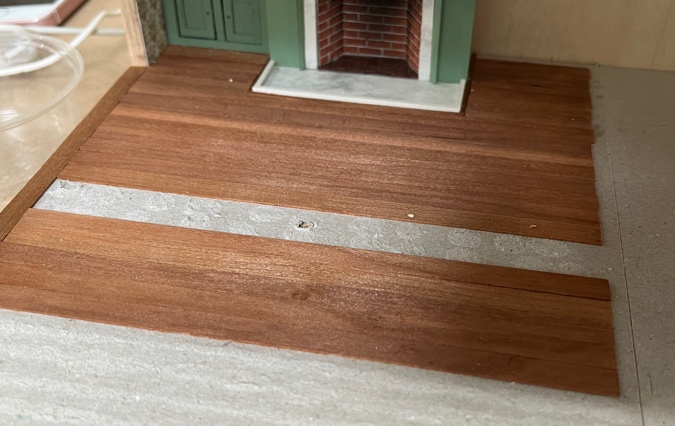
The hole in the kitchen floor will be covered up by the flooring, but since I’d already laid the floorboards in the living room, this happened.
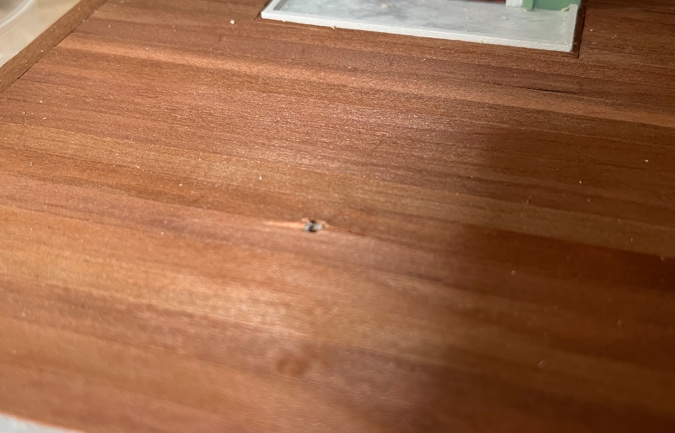
Annoyingly, the hole was right between two floorboards, so I had to pull up two of them. Still, an easy fix.
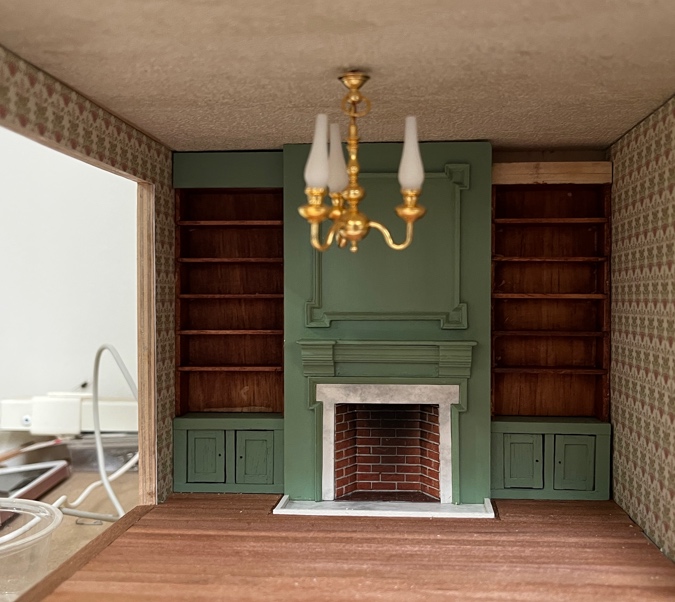
A while ago, I bought this Clare Bell brass fixture to go in the living room. The chain is too long.
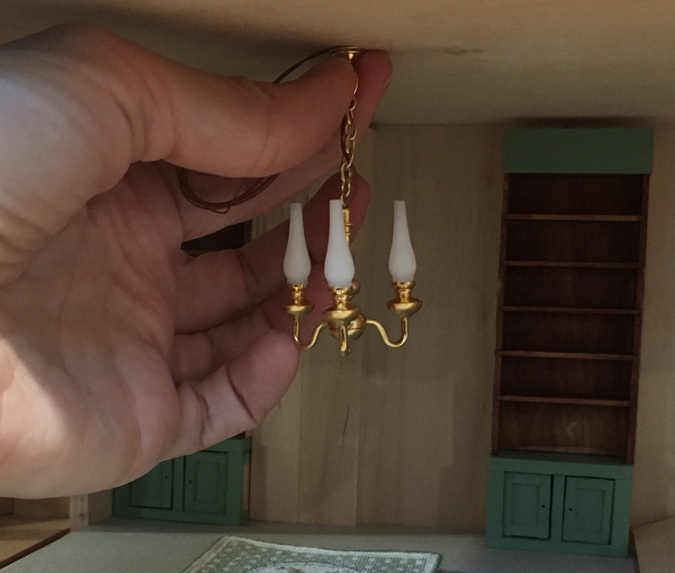
I carefully removed the chain and reattached the fixture to the ring. The ring looks a bit large, but I don’t think it’s something I can replace without breaking the light. (And this light was expensive!)
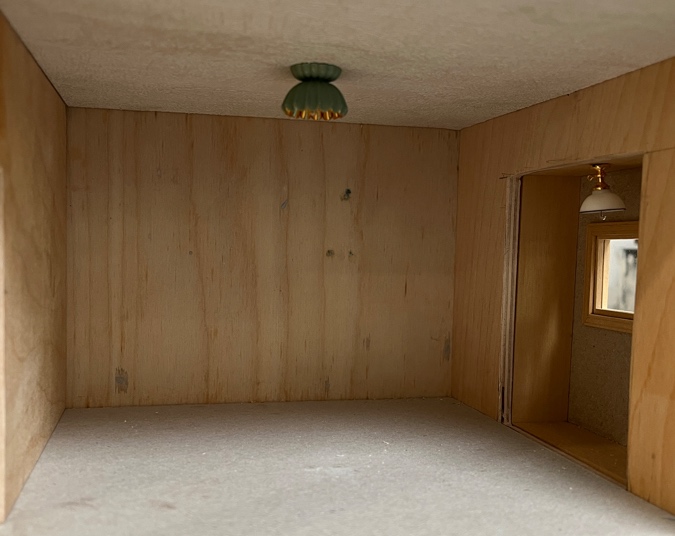
Here’s the kitchen. I’m not sure if I like that light in the bump-out — it seems like it hangs down too low. I might try to find something shorter.
None of these lights are permanently attached yet. All three of these will plug into outlets in the rooms above, but I’ll worry about that later. I have more decorating to do before I can finish them.
 Emily is a freelance writer, miniaturist, and adventure game enthusiast.


Holding a piece of scrap wood tightly on the other side when drilling will prevent splintering the wood where the drill exits.
I actually like the lower light in the bump out. If you put the sink there people need to be able to see if there’s still food sticking to the dishes.
Your lighting is so gorgeous! I’m very impressed with someone who can do this type of lighting with wiring. It adds such a nice touch to your dollhouse!