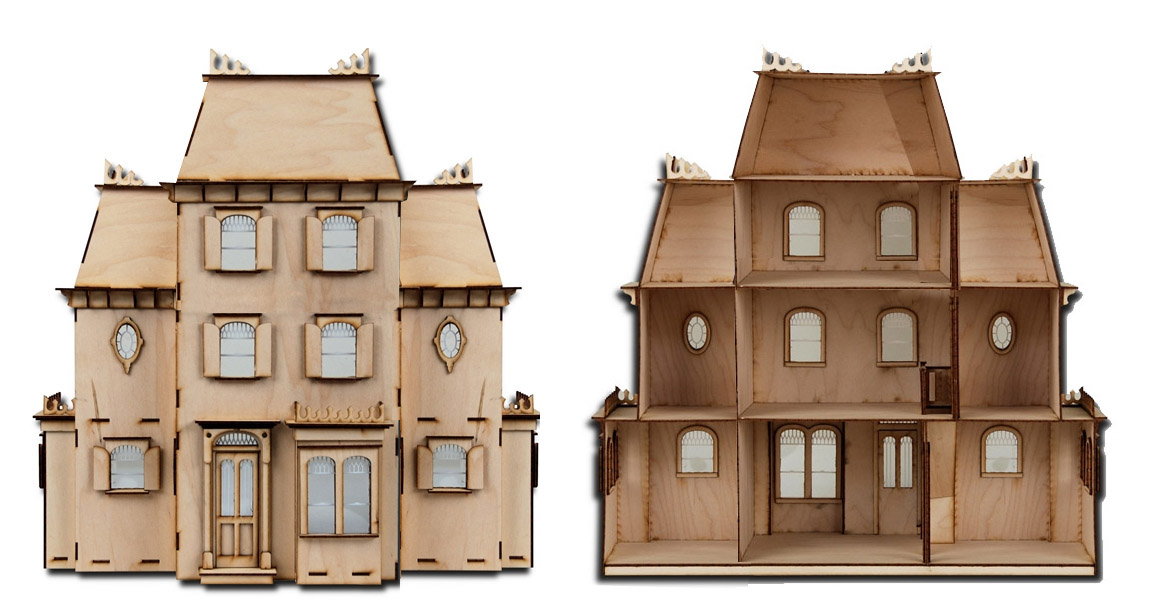
Last year Greenleaf released a slew of half scale laser cut house kits. I’ve been dying to try them out, but none of the designs really appealed to me. I’m generally not a fan of frilly houses (the Fairfield excepted) so I was eyeing the Rosedale, but I didn’t like that it only had four rooms, and though I like the simple design it almost seemed too simple and unbalanced. After some back and forth with other builders on the Greenleaf forum, I got the idea to bash two Rosedales together by adding a wing to the right side that mirrors the left, and raising the roof in the middle. The result should be something like this.
I’ve never done something like this before, and although I ordered the kits back in October, it took me this long to work up the courage to open them. Once I get into a build I tend to get lazy about documenting my progress, but I’m going to do my best to do so this time in case other people want to try it in the future. (That way you can learn from my mistakes!)
I’m not entirely sure what each room will be, but I have some ideas. I’m envisioning a French door between the living room and entry to make it like a double parlor, but am not exactly sure what furniture will go in the entry, so instead I might end up blowing out the wall between the two and having one big living room area. I generally don’t like staircases leading into bedrooms (especially when the bedroom then connects to another room), so the big room on the second floor will be a common area. As laid out in these mock-ups, the ceiling is too low in the master suite, so that will likely have to be raised a bit. The attic’s just for storage so that won’t be a big loss. I won’t add a third stairway but might put a trap door in the ceiling to give the illusion of attic access. (Hey, a trap door is all we have in our real house!)
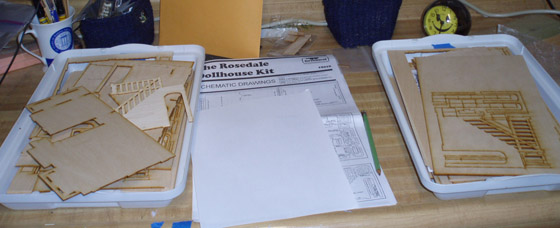
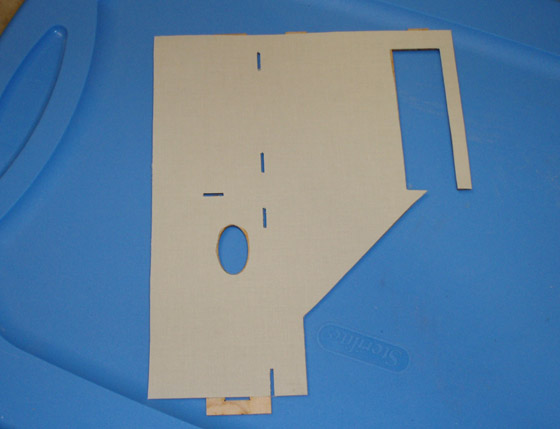
Unlike the die-cut houses, which come in a big box that can be used for storage, these pieces are just shrink wrapped together, so my first step was to place the two kits in separate bins labeled A and B. A will be the “regular” house, and I’ll use the B pieces to add the second wing and make other necessary adjustments. Like with any dollhouse kit, I started by matching up the parts to the schematic and labeling the pieces in pencil (including an A on them in case I need to know later which kit they came from). I didn’t go through and label all the Bs yet. The kits did not include a photo of the finished house, which kind of surprised me, but I stuck printouts of my mock-ups on the wall for reference.
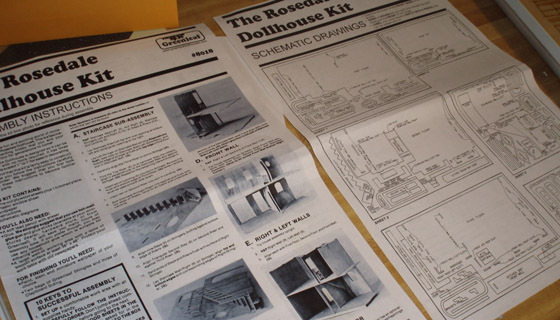
There was a die-cut, 1-inch scale Rosedale available years ago. When Greenleaf brought it back last year they introduced the half scale version for the first time. Something that has already started to bug me is that the directions and schematic are not exactly accurate—whether that’s because they’re intended for the 1-inch version, or the die cut version, or both, I’m not sure. The instructions do refer to the house as 1-inch and the pictures look like die cut plywood, so I’m pretty sure they weren’t updated. And some of the pieces are not where the schematic says they’ll be (for example, I think a foundation piece that’s referred to as being loose is actually on the same sheet as the first floor). This isn’t a horrible crime, but I could see a first time builder getting confused and even intimidated by the discrepancies.
I can’t complain too much, though, because the wood is AWESOME. I hate sanding and it’s almost completely unnecessary. The pieces pop out easily, no worrying about splinters or wood crumbling under your fingers.
Like with the Fairfield, one of the first steps is to assemble the stairs. I initially balked at this because I’m planning to add a staircase to the second floor (using the stairs from Kit B) but I hadn’t wrapped my head around exactly how that would work—how tall it should be, how the railings would meet up, and so on. Also, assembling the stairs first means wallpapering the wall they’re attached to, and I hadn’t even begun to think about interior decorating.
After poring over some photos of other people’s Rosedales to get a better idea of what’s happening with the stairs, I decided to follow the directions on this one. My plan is to put together the first staircase and then play around with the second staircase that leads up to the third floor, and possibly also gluing that in before moving on to the next part of assembly. For now, I punched out all the stair pieces from Kit A and stained them using some leftover stain from my Cypress and Fog roombox. I only have a little cup—hopefully I won’t run out because I’m not sure what brand / color it is!

On the stringers, I only stained the front edges that will be visible on either side of the risers. (EDIT 1/31: Turns out I didn’t have to. The risers are glued to the front edges of the stringers, not in between them as it appeared in the picture.) Also, here’s a case where the differences in the schematic and the kit confused me a little—the “top riser” is much, much skinnier than what’s shown in the schematic and the kit instructions. (It’s the little piece at the top left of all the risers and steps, in the photo above.) I assume that’s got something to do with the conversion to half scale. It’s where the schematic says it should be, just doesn’t look anything like you’d expect it to look from the pictures.
This morning at Ben Franklin, I found some nice scrapbook paper with a linen-like texture. I want this to be a modern house with neutral wall colors. I got four sheets of off-white that will probably be used throughout the first floor and also in the big room on the second floor, two of green that might go in the second floor bedroom and bathroom, and two of light brown, possibly for the third-floor master suite. The paper was on closeout so hopefully it’ll be enough (I already bought out all the off-white they had but there’s more of the other two so I can go back if I need to). Luckily, with half scale, two sheets is usually plenty for any room. Knock on wood.
Sometimes scrapbook paper can make iffy wallpaper but this stuff seems like it’ll work well. It’s coated and the finish actually reminds me of miniature wallpaper. This picture unfortunately doesn’t show the texture, but at least it’ll give you an idea of the color scheme.

I papered the left stair wall, leaving a bit of extra on the left side, to wrap around the corner once the house is assembled. After cutting it out, I sprayed the paper with matte finish (but since it’s coated already I’m not sure that was necessary), then glued it with my favorite Minigraphics wallpaper mucilage.
Once dry, I cut out the slots that had been covered up with an Xacto knife. (EDIT 1/31: Oops, I shouldn’t have done that! One of these vertical tabs is for a piece of the railing that won’t be used, and the other two attach on the other side of the wall and therefore need to be covered with wallpaper on this side. I ended up peeling off the paper and redoing it.)
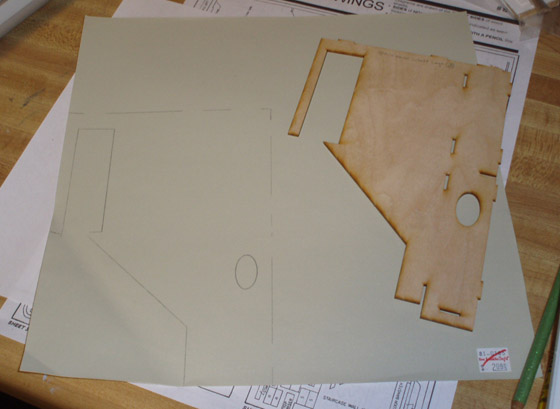
I also stained the first and second floors, using Minwax English Oak. Here’s a benefit of using two kits: the first floor in Kit A was very warped, so I swapped it with the floor in Kit B. I will still end up using part of the warped floor for the new wing, but won’t need the whole piece, so the warping shouldn’t be too much of an issue. My Fairfield’s floors were severely warped (probably my fault for painting one side and not the other) and I put it together anyway, thinking it would just straighten itself out, but it didn’t and caused me a world of hurt throughout the building process.
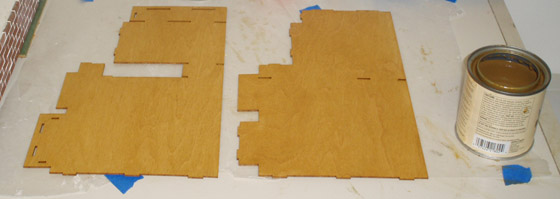
I don’t know for sure if I’ll keep the floors like this, or lay hardwoods or carpet on top of them, but at least now I have the option of leaving them as is if I choose to. Also, I made my first mistake: initially I stained the wrong side of the first floor. (Hey, it seemed like the nicer side of the wood!) I flipped it over and stained the other side and no one ever needs to know (except everyone who reads my blog). The photo above shows the proper side of the floors, after I spotted the mistake and restained.
Next up will be staircase assembly. I remember this being a real bitch with the Fairfield. Hopefully the laser cut will be easier…?
 Emily is a freelance writer, miniaturist, and adventure game enthusiast.


Hi Em,
I hope this suggestion is not too late. Consider clamping, taping or tacking (with straight pins) the two stair stringers to a block of wood that is the right width. Let the step part extend beyond the edge of the block. Then glue the risers and/or steps to the stringers letting the block of wood establish structure and square until the glue sets. Remove the block of wood and the stairs should be self supporting.
Love,
Dad
Goes to show you how closely I follow the GL forums. I’m a little annoyed at myself for missing the thread! Seems like a very complicated bash and I wish you luck on it. Looking forward to more progress pics!