This weekend I assembled some furniture kits for the Rosedale. I’ve also been plugging away at the interior trim, but I’ll wait until it’s done to post pictures… it’s not very interesting progress.
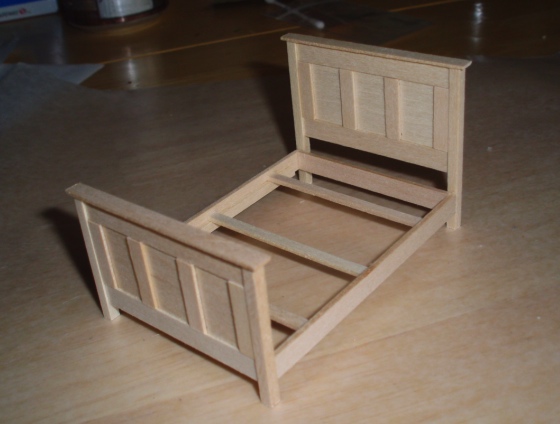
I started with the Mission style bed from Daisy House. (I happen to have this kit in 1:12 as well, but haven’t assembled it yet.) The bed went together very smoothly. I’ve built a few Daisy House kits and each time have been impressed by their detailed instructions.
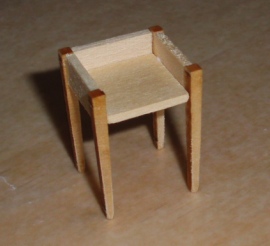
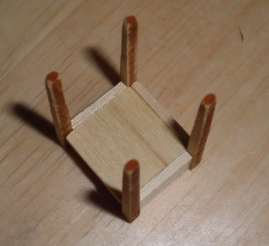
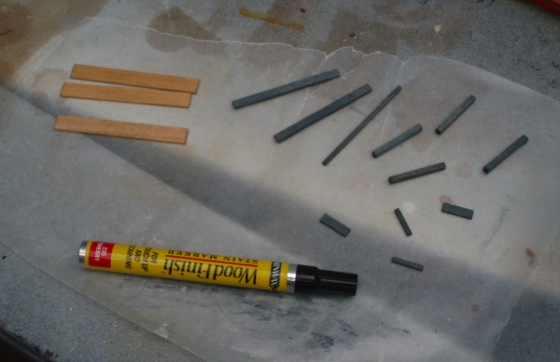
Next up was the Cassidy Creations nightstand. Unfortunately the instructions on these were pretty bad. (The same was true when I put together a bed and dresser for the puzzle house last summer.) It doesn’t include any sort of parts list so you have to read the instructions a few times just to figure out what each piece is supposed to be. And the instructions never say which edge you’re supposed to glue when you glue two pieces together, which of course can cause problems if you do it wrong. In particular I had a hard time figuring out how to attach the bottom of the table to the sides (which were already attached to the legs). I took a few pictures once I figured it out in case anyone else has this problem and needs a reference!
Here they are with a coat of black paint. I wish I’d painted the headboard and footboard before gluing the assembly together. With the headboard in particular, it was tough to get the paintbrush in to get the nooks and crannies between the panels. I need to do a second coat, finish the nightstand drawer, and make bedding. The bed kit doesn’t come with a mattress but that should be easy enough to make out of foam core or balsa.
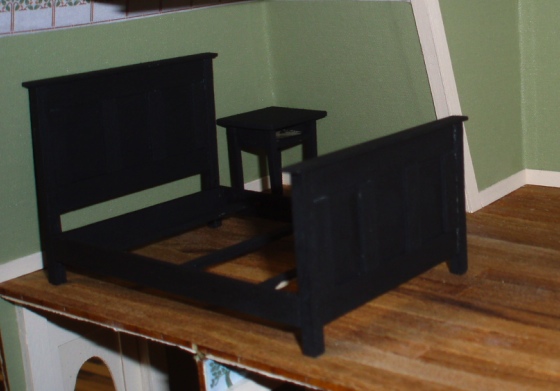
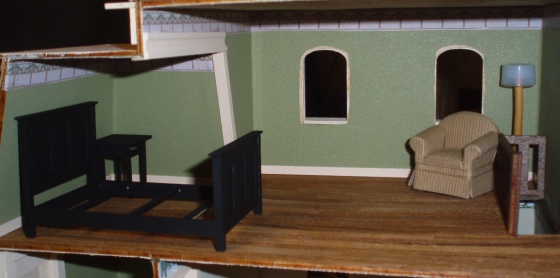
Here’s how they’ll look in the master bedroom. The chair is from Lee’s Line and I made the lamp out of a golf tee and the top of a hotel-sized lotion bottle.
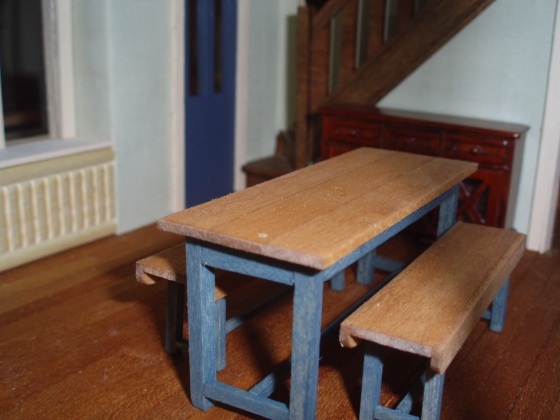
Today I worked on the Daisy House country harvest table and benches. I stained the table top and seats with Minwax Cherry, and the leg pieces with some blue Minwax stain leftover from another project.
I’d never realized from the pictures that the table top is made of three slats glued together. It makes the table look like an antique out of a farmhouse (or a replica of one…)
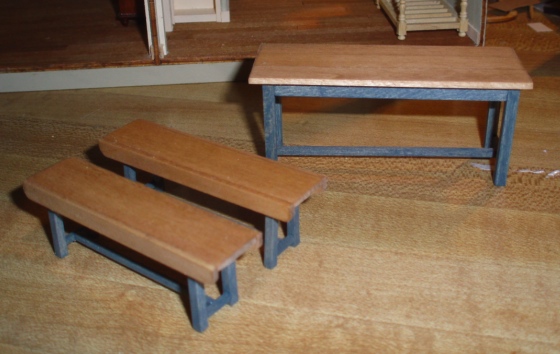
Another shot where you can see both benches. I didn’t use a jig while gluing (going against the recommendation in the instructions…) and as a result the legs on all three pieces are a little crooked. Eh, I don’t care. It’s not as if anyone will be sitting on them.
I’ve slowly-but-surely been painting the interior window trim, and I built a window seat to go into the bay window. I omitted the windowsill so the seat is flush against the bottom edge of the trim. The front is made from a piece of decorative molding I got at Michael’s on clearance. It sort of looks like beadboard. I can’t decide if the entire window seat should be trim colored (as shown below), or if I should just paint the seat and stain the front part Cherry like the table top. I might wait to make a decision until I start working on the kitchen cabinets (the pieces aren’t glued in yet).
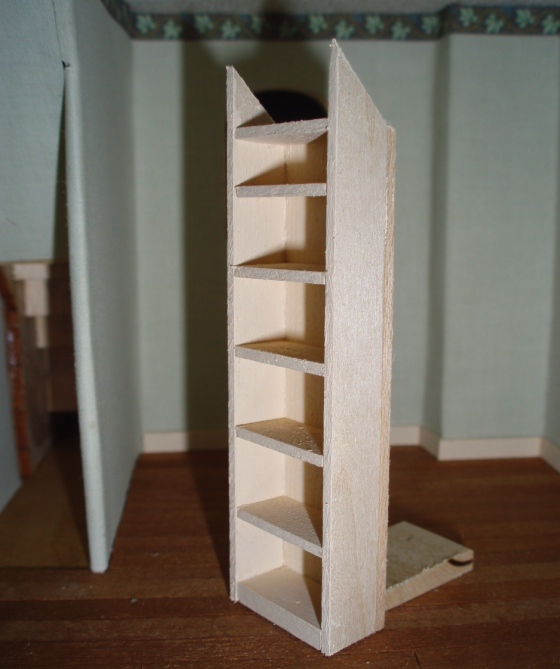
And I built shelving under the stairs in the laundry room. I opted not to add doors like in the Fairfield pantry. I like how those turned out but it was a lot of finicky work. Plus I like the idea of having linens and laundry detergent and other laundry room like junk on the shelves where you can see it.
I started by building a shelf unit with sides that came to 45-degree angles, so it could slide under the stairs. The piece sticking out the back was supposed to help with stability—I thought it would make the shelves easier to glue in place—but in the end, I’m not sure it was necessary.
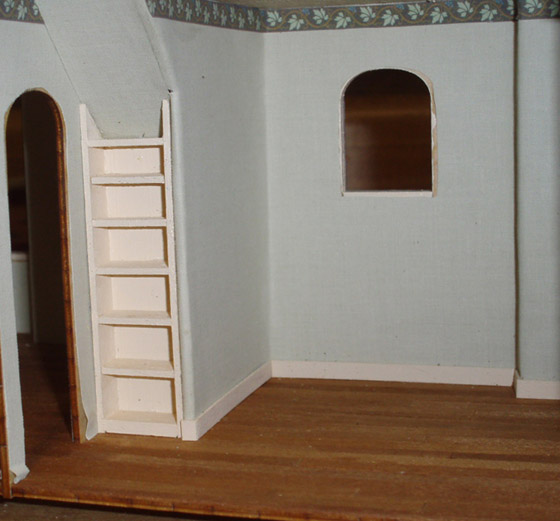
Here it is painted and sitting in place. Originally I planned to put trim over the entire right edge (covering the edge of the shelves and the wall) but it would have looked funny since there wasn’t as much space on the left that needed covering. Instead, I extended the baseboard around the corner and covered the exposed edges of the shelves (which were kind of sloppy) with strip wood just wider than the shelf walls.
This wallpaper seam was next challenge. (I didn’t really think ahead when I wallpapered this!) I glued on a narrow rectangle of the wallpaper border to make it look like it extends around the corner.
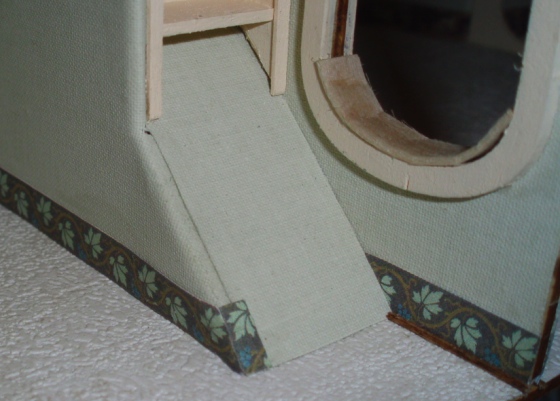
Then I extended the trim up both sides. It’s a little funky looking but way better than when you could see the seam. I might add paneling or something between the two trim pieces to give them more of a purpose.

After spending so much time on the wallpaper borders and window trim and other teeny, tiny interior details (like the wood strips I’m adding above the wallpaper borders to make the ceilings look straight, which you may have noticed in a few of these pictures), it was fun to build some furniture. I feel like I’m making progress! Next, it’s back to the teeny, tiny details…
 Emily is a freelance writer, miniaturist, and adventure game enthusiast.


Leave a Reply