With the Rosedale 99% finished and the Rowhouse done except for shingles and a few other finishing touches, I gave myself permission to move onto a new mini project. I bought the Gull Bay Cottage about a year ago on eBay. It’s a half scale house based on the Millie August “pull apart” houses that were sold in the 1980s.
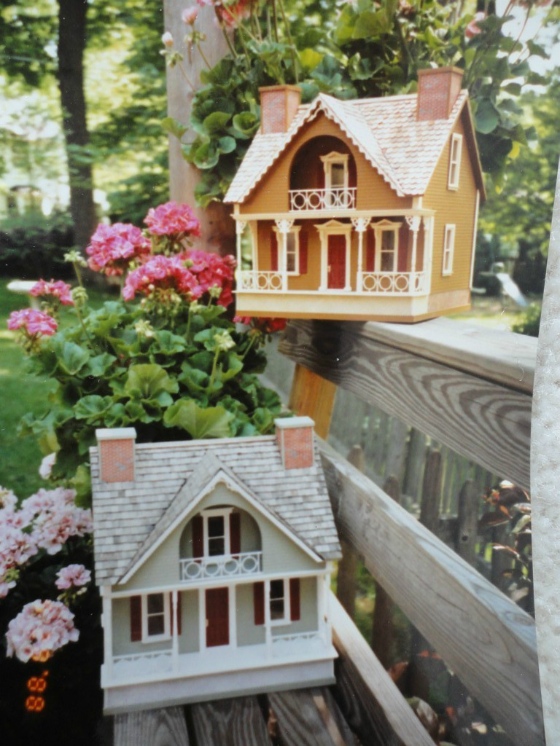
The original owner was a woman in her 80s who was downsizing her collection of “someday” projects. The house was already assembled, and very nicely sided, when I received it. It came with an instruction sheet that suggested the house would be decorated as part of a class, but mine never was (although all the windows doors etc. came included). I emailed Jackie Kerr Deiber, creator of the house, to try to get more info about it, and she wrote back:
“Gull Bay was available in the Millie August line of 1/144th scale houses made by Craft Publications. I also had it available in 1/2″ and 1/4″ scale. It could be purchased at different times in kit form, class, or exterior finished by me. It was meant to slide open so it could be also interior finished.”
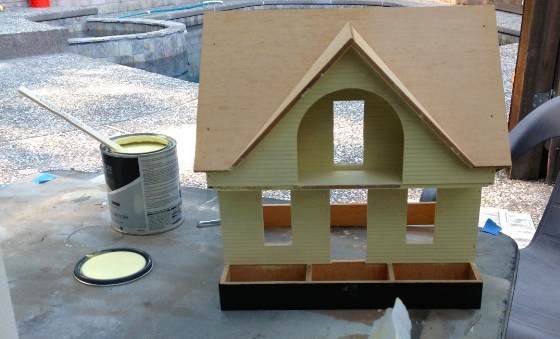
I started by painting the front half with a coat of yellow Clark & Kensington paint named “Sunny Lemon,” that I got for free at Ace Hardware a couple of years ago. It’s more subtle than I expected, almost a custard color, but that’s fine. I didn’t want something too yellow.
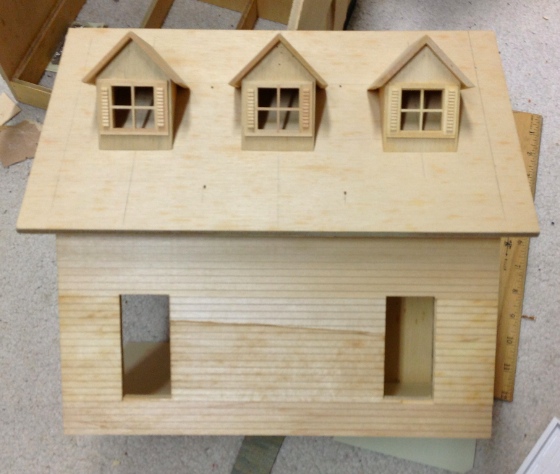
While that dried, I tackled adding dormers to the back roof. Because the house is enclosed, it’s dark inside and hard to see the furniture. By adding dormers, there will be another view into each of the upstairs rooms as well as additional holes for light to come through.
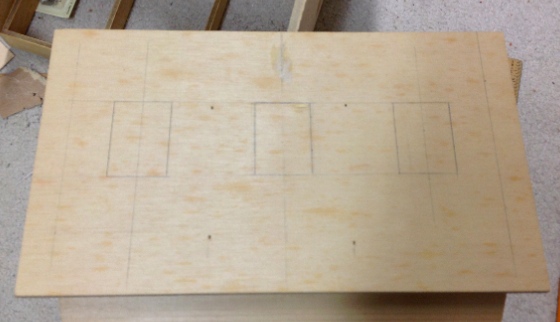
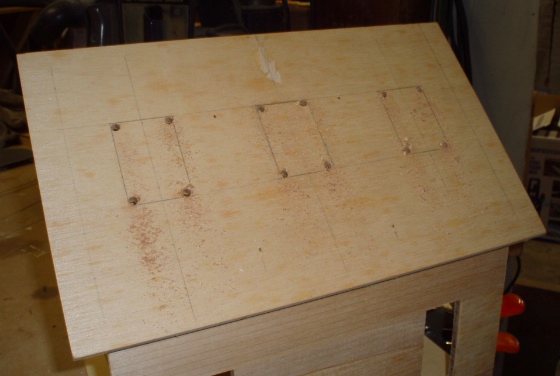
To figure out where to put these, I found the center of the roof, centered one dormer on that line, and drew the rectangle to be cut out. I drew a line across the roof at the top and the bottom of this initial rectangle so the other two would line up with the first one. I figured out the overhang of the roof (about 3/4″) and drew lines at each side of the roof to indicate where the rooms inside actually started. Then I found the center between these lines and the nails, which represented where the opposite walls started. From those center lines I was able to figure out how to place the remaining two dormers.
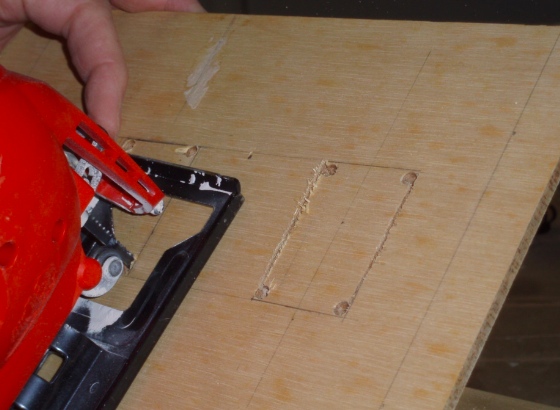
Geoff humored my power tool aversion and cut these out for me. He started by clamping the house to the workbench and drilling holes in the corners of the three rectangles.
Then he used a jigsaw to cut out the rectangles.
The lines were a bit wavy, but not bad. I used a file to clean them up a bit.
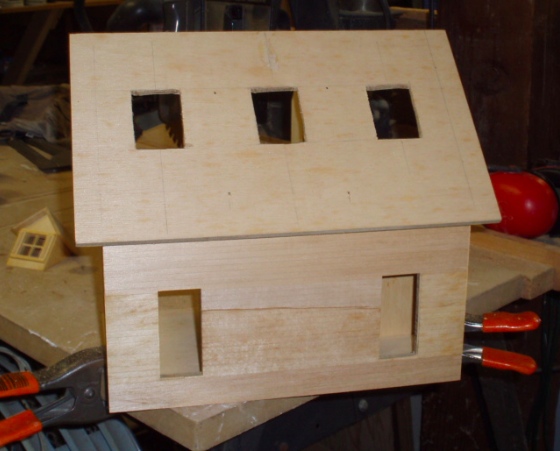
Even after filing, the holes aren’t perfectly straight. I can clean them up more if needed, but I’m planning to add trim around the holes so it probably doesn’t need to be perfect.
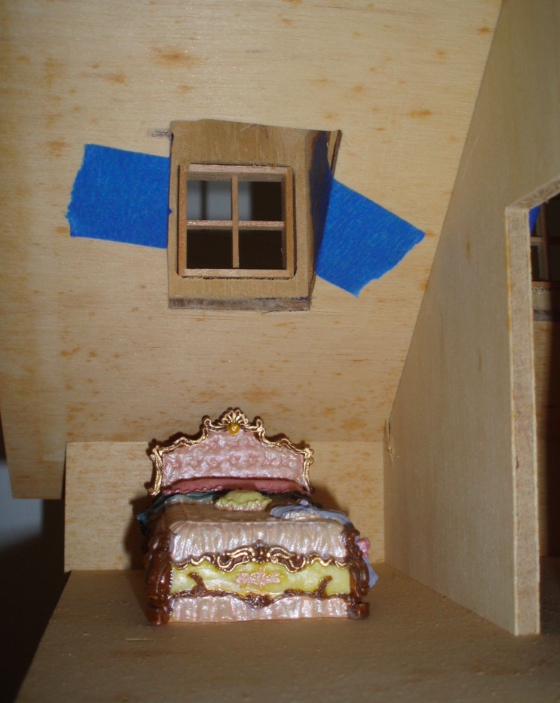
I chose to set these dormers up pretty high on the ceiling, more concerned about how they looked from the exterior than the interior. As you can see here, it’s kind of high, but these are more for providing light than for looking good on the inside.
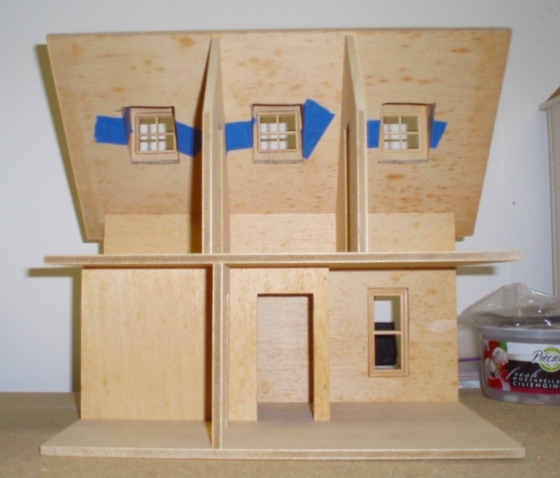
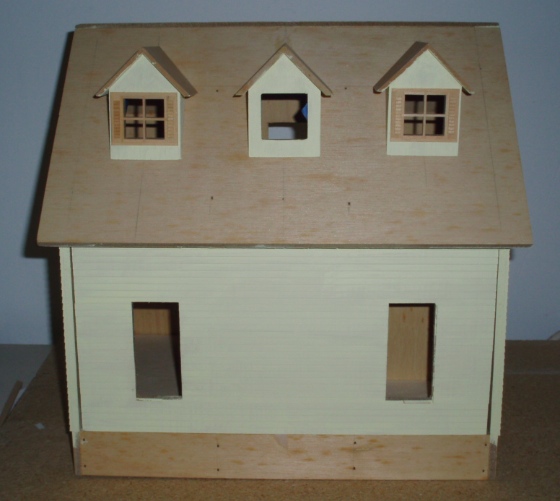
Today I did a second coat of paint on the front of the house and a first coat on the back and the dormers. Two of the dormers are old (eBay purchases) and one is newer.

I noticed while painting them that the dormers aren’t exactly the same… the newer one (center) has a chunkier roof and the older ones appear to be made from balsa, rather than basswood. I can add trim to the fronts to make the roofs look consistent, and I think once they’re completely painted the difference in wood won’t be so obvious. (They’re just taped in here, so it’s okay that they’re not exactly lined up!)
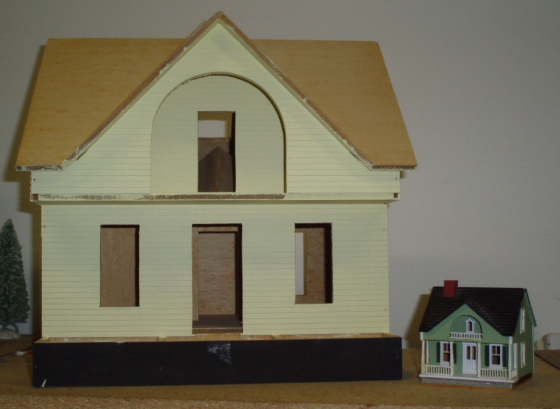
Here’s the house pictured with the 1:144 version of the house that I bought off eBay separately.
 Emily is a freelance writer, miniaturist, and adventure game enthusiast.


It’s wonderful! The 1:144 makes a nice playhouse for this one. Looking forward to seeing what else you plan to do with this house :D
Usually the inside top of the dormer cutout follows the slope of the dormer roof so there is a triangle top showing on the ceiling. If you don’t want to do that, are you planning to have a flat ceiling in the dormer? The former might let in more light.
I’ve seen pictures of dormers cut out both ways (square or triangular top) but I hadn’t considered that the triangle might let in more light. Hm… maybe I can sweet talk Geoff into getting out the jigsaw again…
You are fortunate to have such good advice as well as someone to handle the power tools for you. The dormer windows are a good idea for viewing and for letting in light.