When we last saw the Queen Anne Rowhouse, she was wearing a big green stripe that wasn’t exactly flattering. (You know what they say about horizontal stripes…) Today I turned this into three self-contained panels. This was a simple matter of cutting a few more vertical trim pieces, and cutting the corners of the horizontal pieces into 45-degree angles.
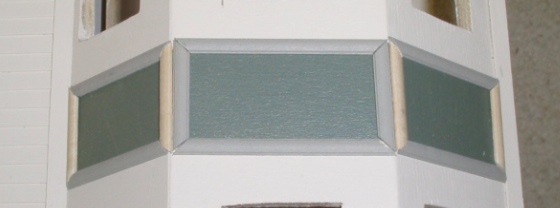
I painted the new pieces and glued them all on.

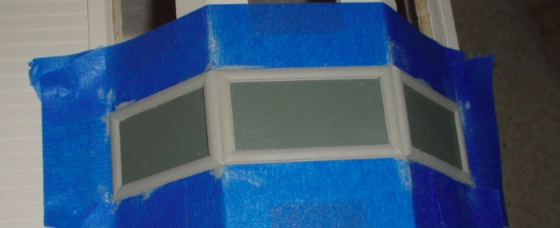
Chair rail might not have been the best choice for these, because the rounded trim didn’t meet nicely at the corners. I masked off the pieces and used wood filler to fill in the cracks at the corners, and where the panels met each other.
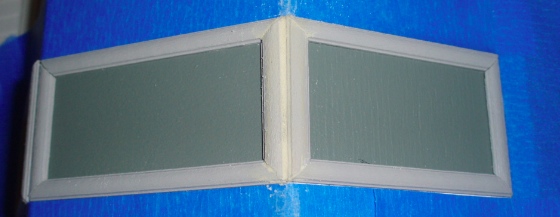
Then painted the filled parts, being careful not to get paint where it didn’t belong…
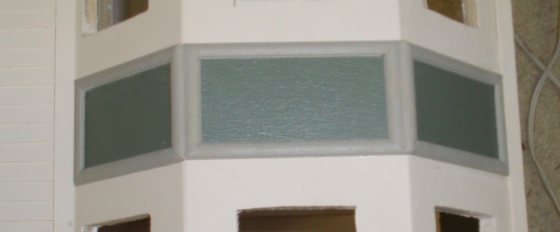
And voila, three panels! I like it!
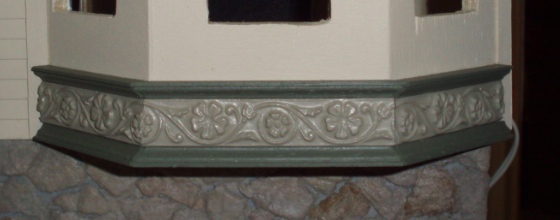
Next I moved down to the bottom of the bay. I’d cut some of the floral resin trim to go down here but it looked kind of plain and skimpy compared to the size of the panels with too much space under the windows. I also didn’t like how it was just light green, where the panels have both light and dark green… it looked unbalanced. So I decided to add trim above and below the resin molding, both to add height and to add color.
I used half scale crown molding. (Well, it was labeled “3/4-inch cornice” at the store, but it looks like half scale crown molding to me…) Here’s the basic idea.
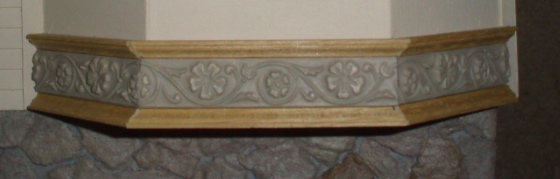
The sides of the bay meet at 45-degree angles. (Or maybe they’re 135-degree angles…?) My miter box only cuts 45-degree and 90-degree angles — meaning I can cut two pieces of molding to meet at a normal square corner — but math makes my head hurt too much for me to try to figure out how to make the pieces meet nicely, and even if I could have figured out what that angle should be, I didn’t have an easy way to cut it. Crown molding is confusing enough already (I’m always messing up which side is supposed to be straight and which side is supposed to be angled) so I decided to cheat my way out.
I realized that if one piece is cut at a 45-degree angles, the piece next to it can end with a regular 90-degree angle and they meet nicely. The only problem is that the tip of the angled piece protrudes beyond the non-angled piece.
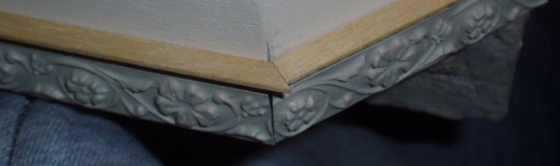
To make up for this, I glued strip wood to the backs of the side pieces.
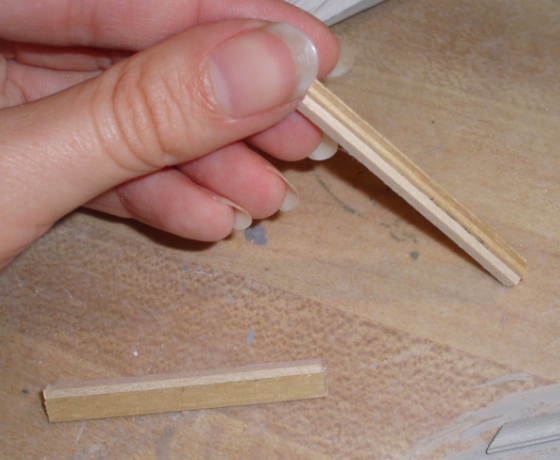
The strip wood adds enough depth that the two pieces now meet up nicely. This is probably not a Mike Holmes approved method, but hey, it works for me!
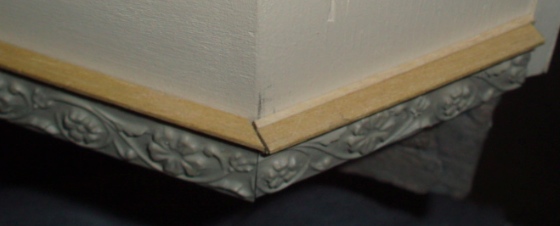
Once painted, you can’t even tell that wood was added to the backs of the side pieces. However, due to the middle pieces of cornice not being as deep as the side pieces, there’s a shadow cast above and below the middle piece of resin trim. You can’t see it at all in photos because of the flash, but it’s driving me nuts. I went so far as sanding the back of the middle resin piece using a power sander, hoping that reducing the amount it stuck out beyond the trim would help, but it didn’t seem to. Oh well. Hopefully it’ll grow on me.
Anyway, that’s a silly complaint because overall this is looking pretty gorgeous!
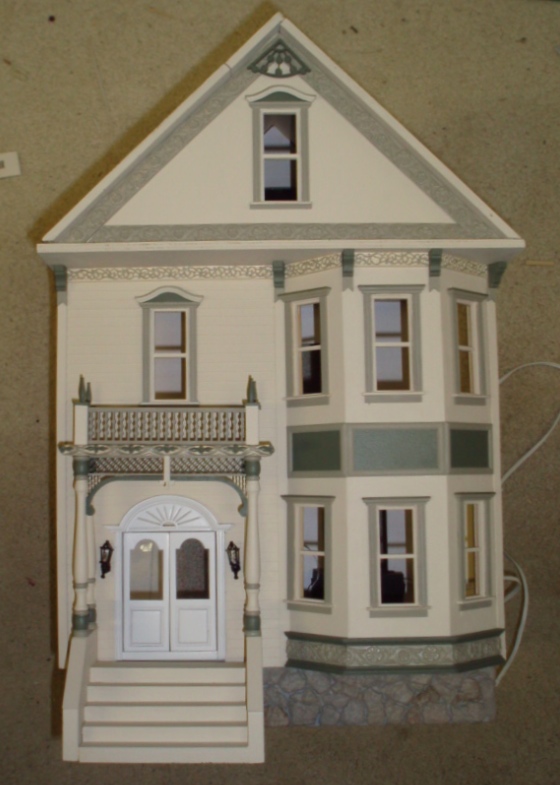
I’m still trying to decide if I should add dark green triangles on either side of the top window. I like the idea of it, just not sure if it’ll be too busy…
 Emily is a freelance writer, miniaturist, and adventure game enthusiast.


Oh! this is just so beautiful!