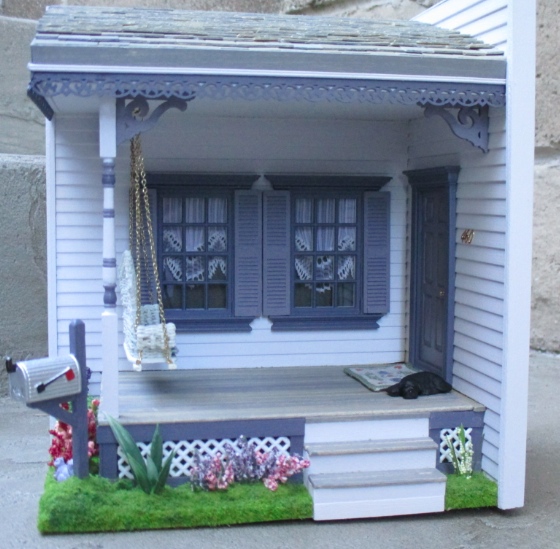
I recently bought a 1920s Back Porch Kit from a miniaturist who was clearing out her stash. This kit was made by Daffodil Miniatures & Gifts in Salt Lake City. I don’t think the company is around anymore, and the instructions don’t have a year on them so I don’t know how old this kit is.
The kit had been advertised as “partially assembled,” but the person I bought it from removed it from the original box to reduce the shipping cost, so the kit was packed in a ziploc bag when it arrived with a lot of loose pieces.
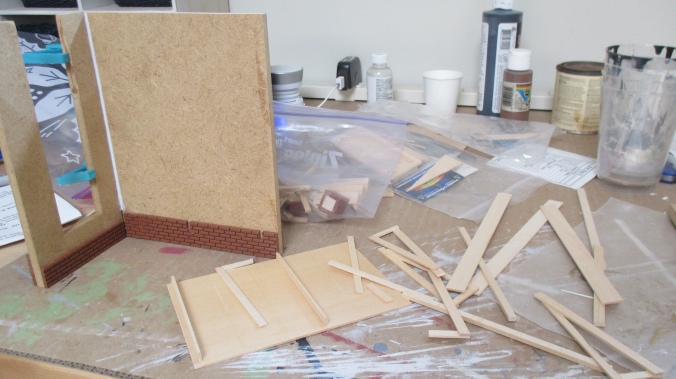
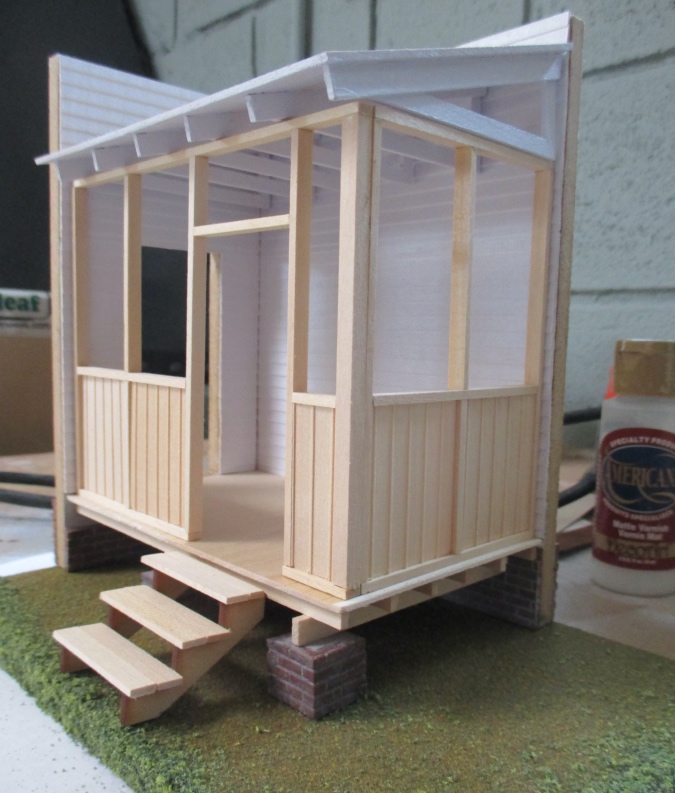
Judging from the directions, I think what I received was *less* assembled than what would have come in the original kit — particularly the walls and the roof — but I don’t know if that’s because the original builder took it apart make it flat for shipping or if the pieces had broken before that.
Either way, it took me a while to figure out how everything fit together. The instructions have a few black and white assembly pictures, but there’s no good photo of the final product. Luckily all the pieces are here, and I was able to tell from the dots of dried glue what was supposed to go where.
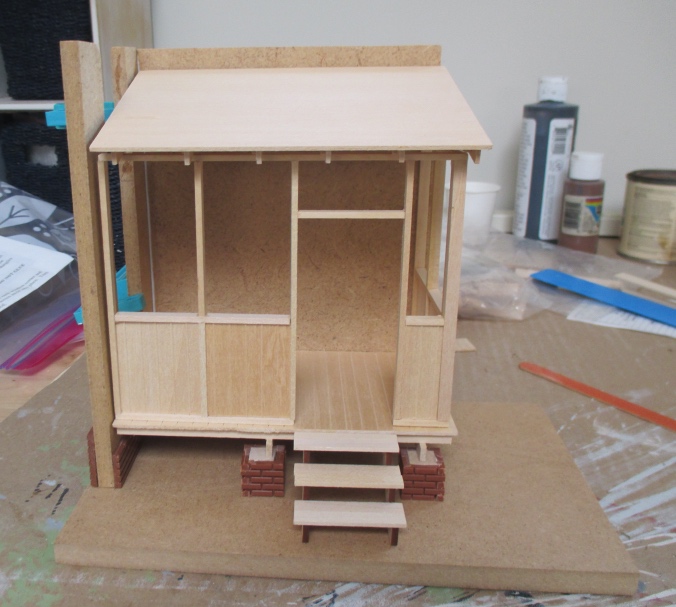
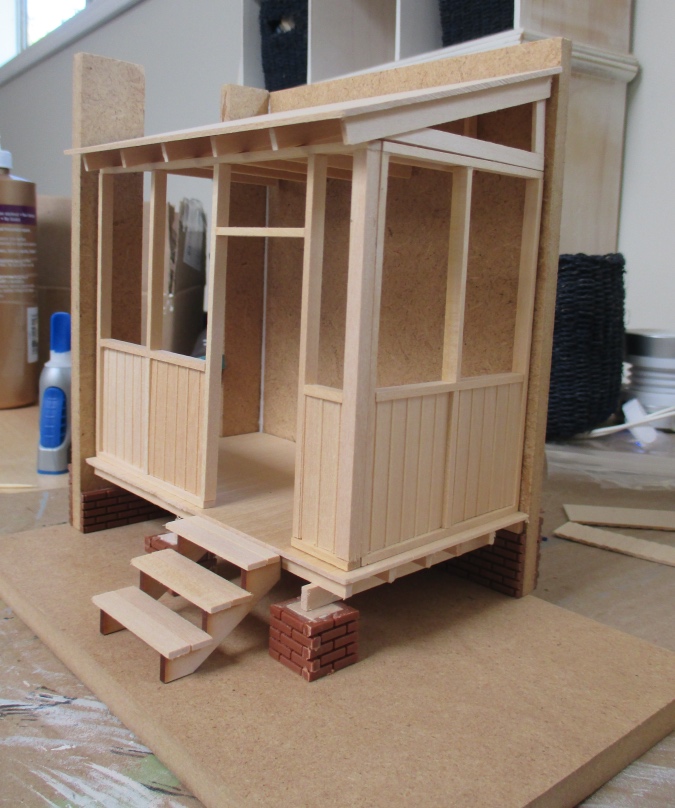
Several years ago I built a Houseworks front porch kit. The back porch faces the opposite direction, so I decided to finish it with the same colors as if the two porches are on the same house.
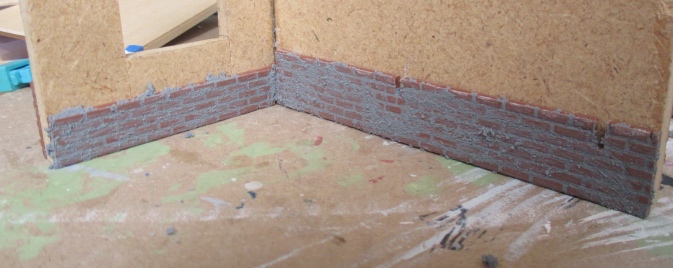
Once I figured out how the back porch fit together, the first steps were to finish the bricks and the base under the porch while they could still be accessed.
These bricks are the styrene 1:24 scale bricks from Houseworks. I used them once, on my first half scale house the Fairfield, and never again. They’re hard to cut (but thankfully that’s already been done for me!) and they’re smooth, which doesn’t look realistic.

I started by spreading Andi Mortar Mix over the bricks, then wiping it off with a damp sponge.
Unlike with egg carton bricks, where the grout gets stuck in the pits for a more textured look, the plastic bricks are totally clean after they’re wiped off. They’ll be hard to see once the porch is assembled, but I still wanted to try to make them look better.
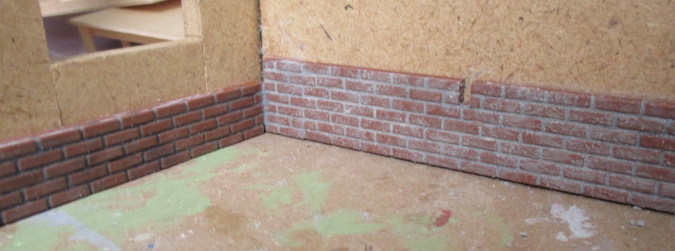
First I tried a black wash. That worked with the Fairfield’s fireplaces, but it seemed too dirty for a foundation.
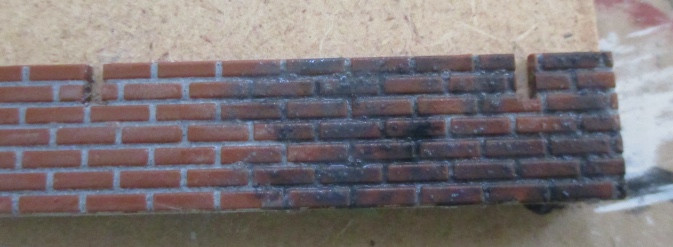
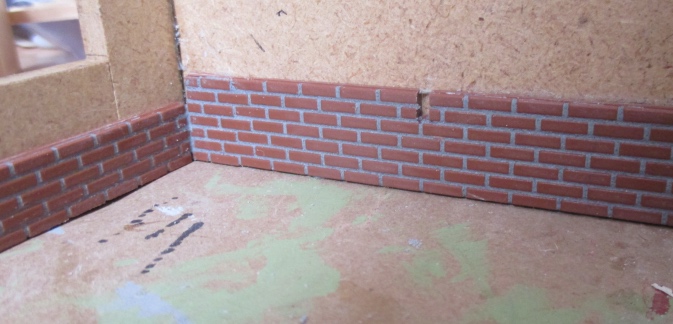
I sponged off the black wash and tried gray instead. Here you can see the black wash on the left side and the gray on the right. I liked the gray better.
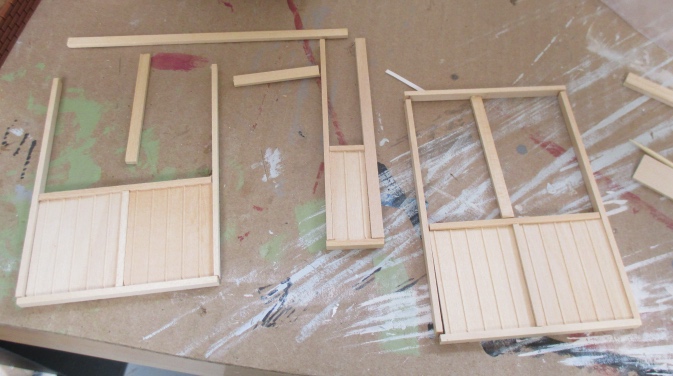
After doing the gray wash on the rest of the bricks, I glued on the siding.
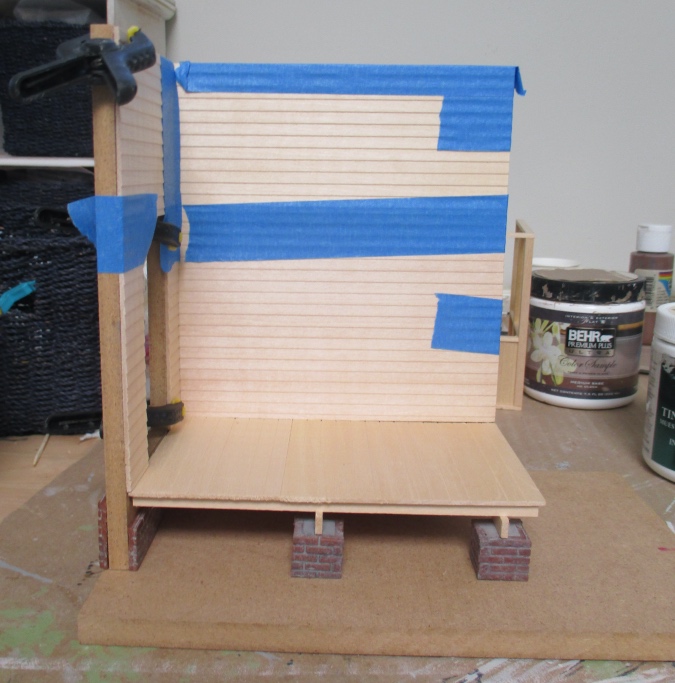
Next I had to figure out what to do with the base, since I won’t be able to reach the part under the porch once everything is glued in.
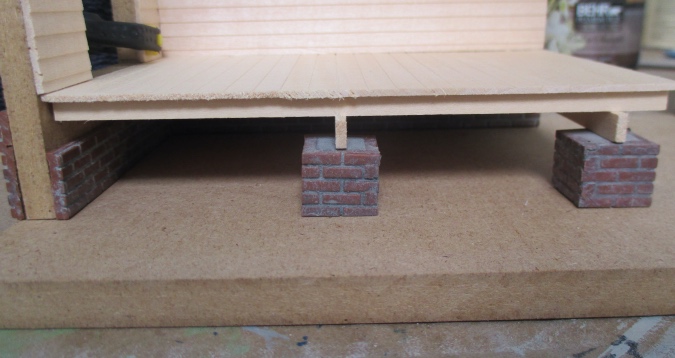
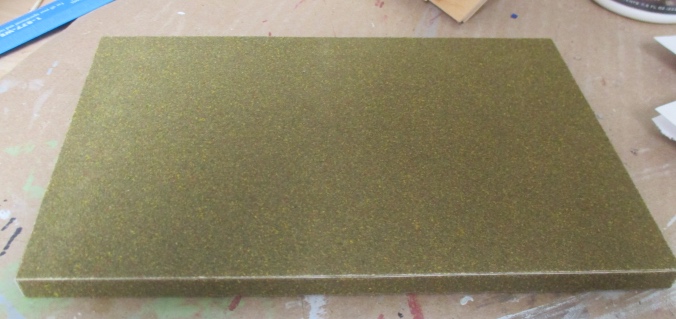
I used a grass sheet on the front porch, but it seemed weird to have lush, manicured grass extending underneath the porch.
I dug out this Woodland Scenics “summer grass” sheet left over from the Four Seasons Roombox. I’ll leave the part under the porch alone, and will add crumb grass to the rest of it.
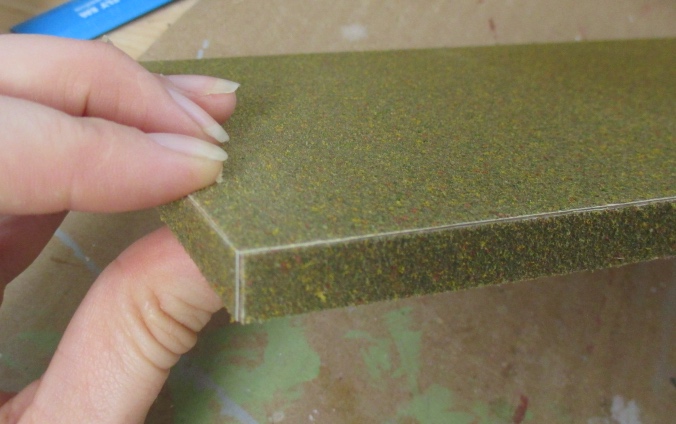
I remembered from my previous experience that folding the sheet at the corner resulted in an ugly white line. This time, rather than folding over at the corners, I glued separate strips to the edges. But there are still thin white lines where the pieces meet.
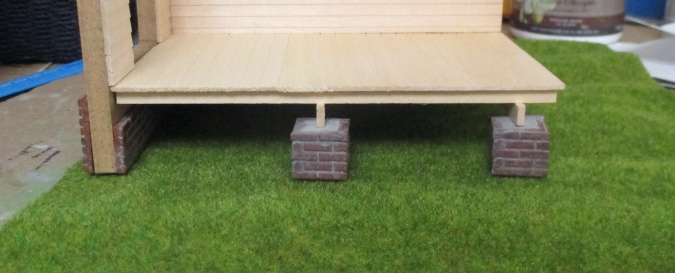
So I pulled out the crumb grass to make sure I could cover up those lines. I brushed Mod Podge over the area I wanted to cover, and then sprinkled the grass over it.
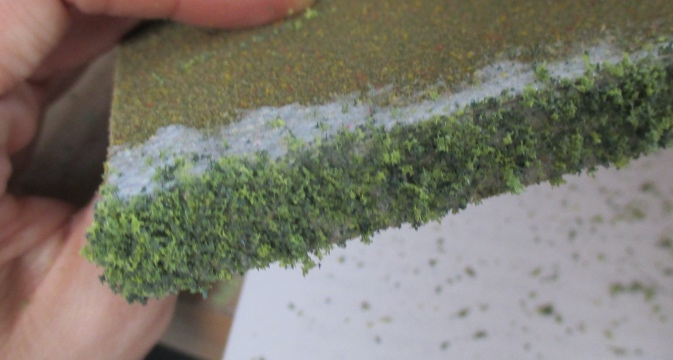
The seams are successfully disguised! I’ll hold off on doing the rest of the grass until the structure is finished.
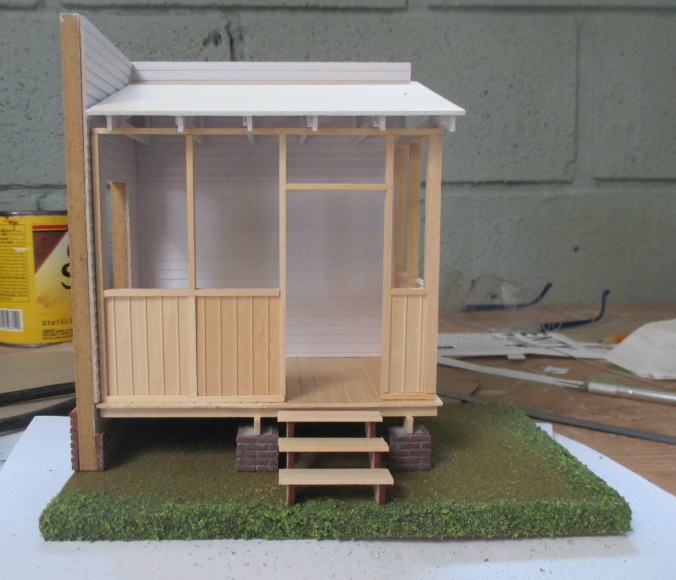
Luckily my blog post about the original porch said what paint color I used (Glidden Pearl Gray), and I had some left. This is why I always make a point of mentioning the name of the paint I use — so I can remind myself later.
More to come soon!
 Emily is a freelance writer, miniaturist, and adventure game enthusiast.


I love how this is coming out! Great idea to have the front and back porches of the same house.
I’ve never made any small projects, other than my hen house, but I can see how they can be a great learning experience when trying new products. RE bricks: I don’t have the patience to cut egg cartons, nor will I ever cut straight lines, and we have hens and I sell my excess eggs, so I use the cartons. I have used the plaster bricks from HBS on a fireplace, chimney, and backsplash and had a heck of time. So disgusted with how the chimney turned out, I made another chimney and used the kit’s powered rock to cover it and hated more. I finally glued the brick chimney in place and I now I love the rustic look with badly laid brick. I couldn’t have made a better aged brick chimney if I had tried. So I admire your masonry, even if the bricks are smooth and pretty. I always learn good things from you.
Haha I love this. Sometimes we do our best work by accident!
Very nice!
This is very similar to a porch I made in 1/4″ scale that was adapted from
1″ scale plans in a Nutshell News article by a miniaturist from Kentucky. It has been awhile since I made ‘Granny’s Porch”, but I do remember it was scratch built. I also made a ton of tulips (in 1/4″ scale) for the path in front.
I checked the MiniMagIndex and there’s a project called Grandma’s Back Porch in August 1988. I’ll check and see if I have that issue. I’d love to see pictures of your 1/4″ version!
I do have one pix of the porch–I tried to copy and paste the image, but this reply won’t allow me to do that.
1988 for the Nutshell News article. sounds about right. I might have that issue if you don’t.
I love it!