Every year, the Half Scale Yahoo Group does a swap, and I participated this year for the fourth time. It’s a fairly large affair — this year we had 39 participants — so it’s important to come up with items that don’t have too many steps and can be made relatively cheaply. The value of the swap item is supposed to be ~$5 — not that it cost that much to make, but you would pay that much for the item if you were buying it.ear
Past years, I’ve made record albums, kitchen canisters, and butcher block cutting boards. This year the theme was “accessories from all around the house” and I decided to turn my attention to the room it’s nearly impossible to find good mini accessories for: the bathroom.
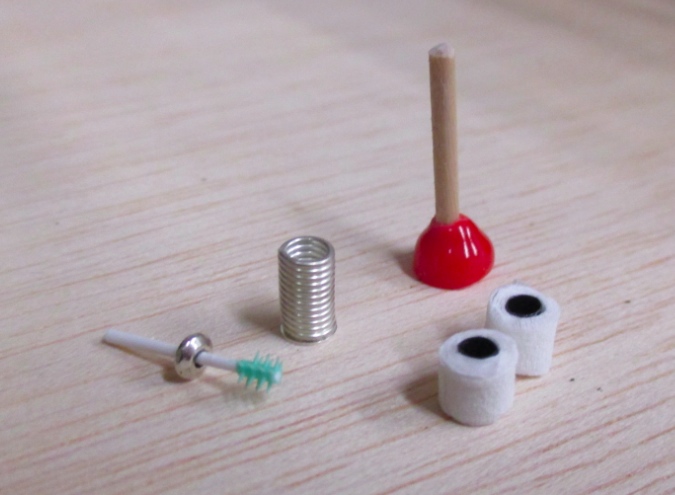
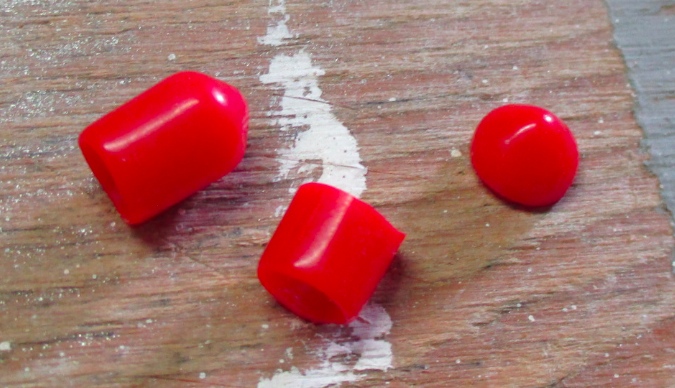
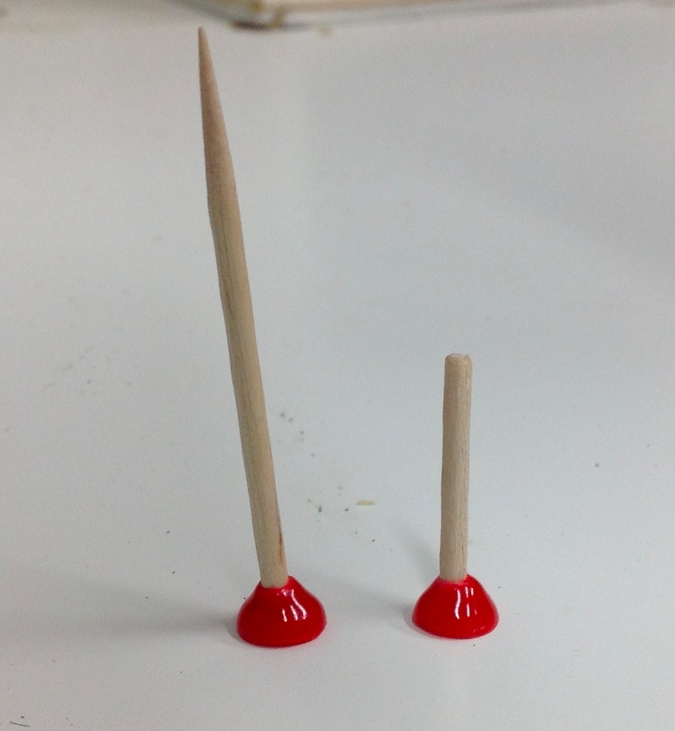
I found tutorials online for making a 1:12 scale plunger using a small suction cup, but couldn’t find any suction cups tiny enough for half scale. I looked at ear buds but even those were too big, and also kind of expensive in the volume I needed. After a long time poking around online, I don’t remember how I came across these red pipe end caps — but they’re perfect!
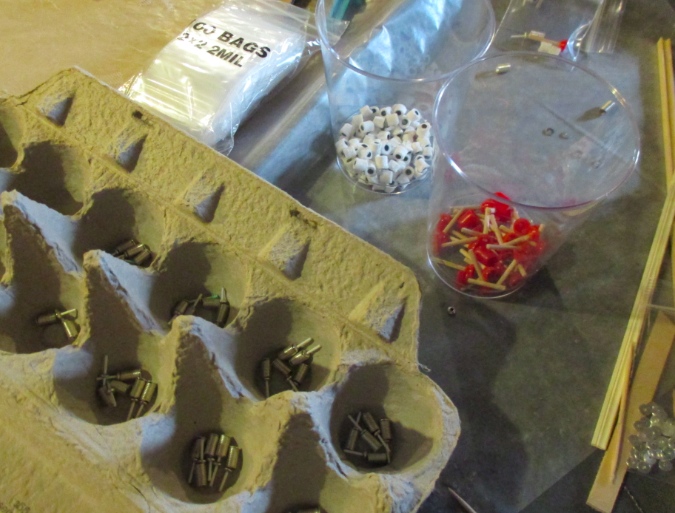
I started by cutting down the cap to end up with just the round part. I used a sharp utility knife for this and it cut easily, but I had a hard time getting straight lines. Luckily I had 100 caps and only needed 39 of them, so it was okay to mess some up.
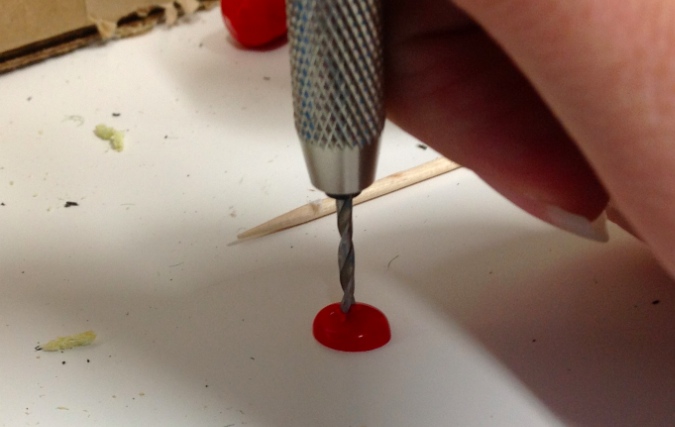
I “drilled” a hole in the cap using my micro drill. This was also hard to do in the exact center since what seemed like the center sometimes turned out not to be when the rounded cap got squished into a flat position. I don’t know what size bit this is, but it’s the same size as a toothpick.
Next I cut the top off a fancy toothpick.
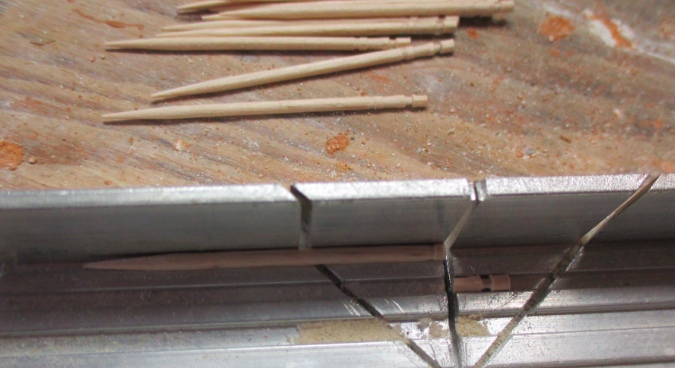
I left one ridge at the end of the toothpick, to “grab” under the hole and prevent the handle from sliding right out.
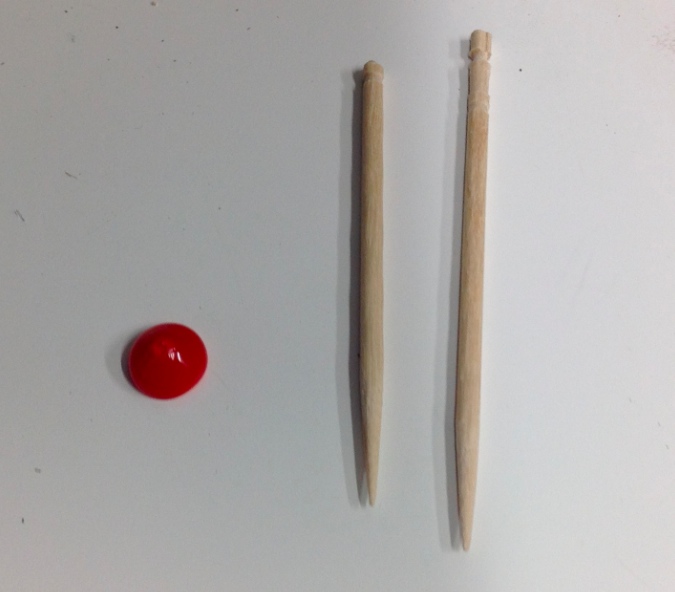
I stuck the pointy part of the toothpick up through the hole and pulled until the notch settled in the hole. I didn’t bother with glue, it’s a snug fit. Finally I cut down the top of the toothpick and sanded the top with an emery board to round it. The plunger’s finished height is 15/16″.
Next came the toilet brushes and handles. The brush is made from GUM Soft Picks. I had a 40-pack of these and one had been used, leaving me with exactly the right amount. No room for error!
To make the brush I cut off the top just below the flat part, and the bottom except for four rows of nubs. I glued on a bead to form the top of the holder. These beads are from Michaels — I brought a soft pick into the store to make sure it would fit through the hole. The holder is made from a 5mm x 10mm tube bead with a 5mm washer spacer glued to the bottom.

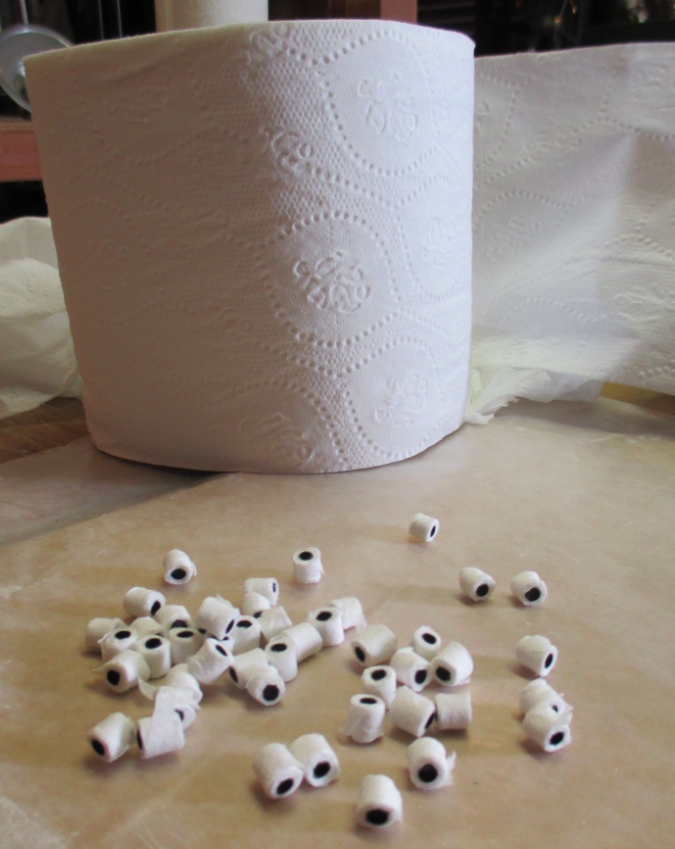
Finally, toilet paper. I bought a pack of thin plastic straws for the tubes. Brown ones would have been better but I couldn’t find any so I bought black. I definitely didn’t need a box of 1,000 of these — if I weren’t on a schedule to get the swaps done I would have just waited until I saw the right ones in a coffee shop and grabbed a handful.
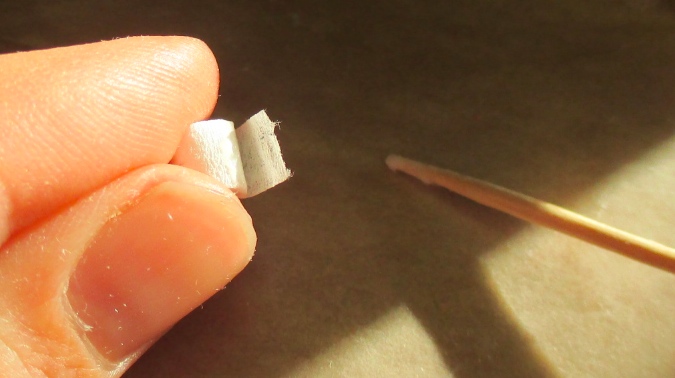
I took two squares of toilet paper (still connected to each other), separated the plies, glued the edge of one ply to a straw, and rolled.

A real life toilet paper roll is 4.5″ inches wide, which translates to 3/16″ in half scale. I held the wrapped straw up to a ruler and cut with scissors at the 3/16″ line.
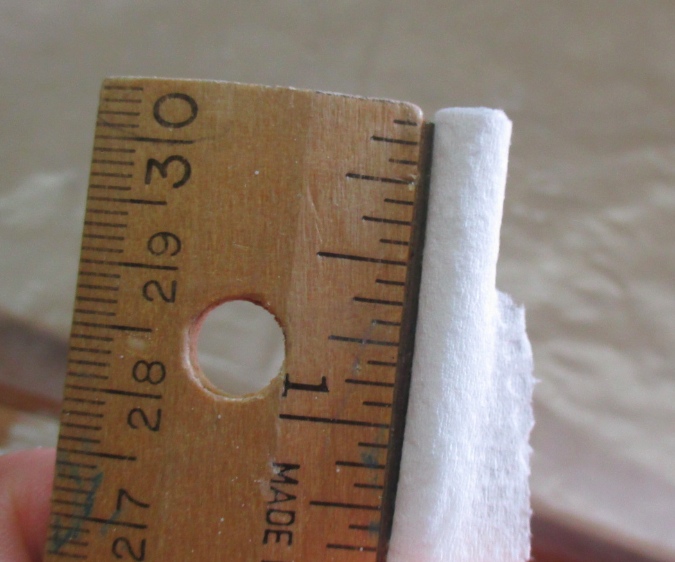
To keep the rolls from unraveling, I used a toothpick to dab glue just before the end of the paper, and stuck it down to the roll.
These added up quickly: each 5″ straw makes 26 toilet paper rolls.
With all three items finished, it was time for the assembly line. The toilet paper and plunger are pretty indestructible, but I hope the brushes made it to everyone without the glued pieces coming apart.
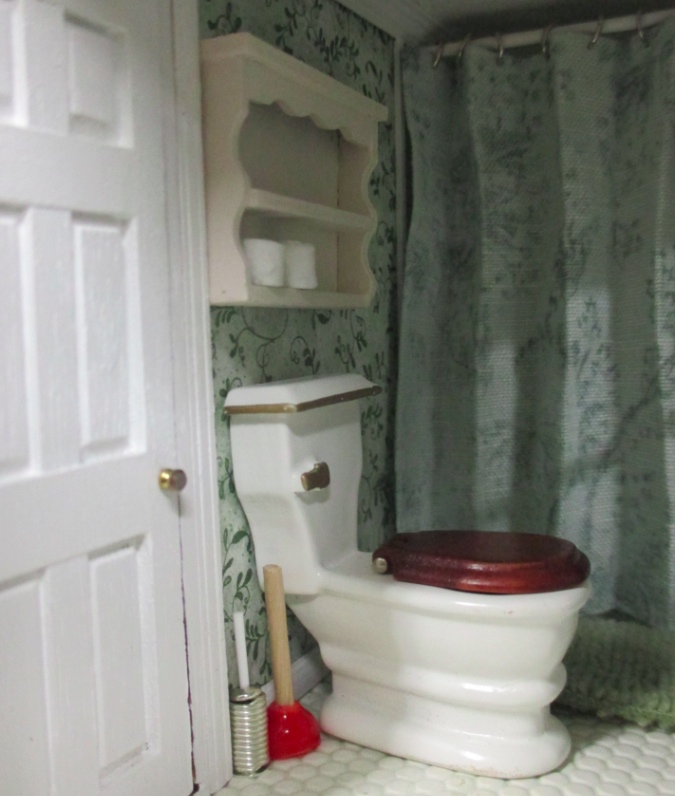
Here are the accessories in my Fairfield’s bathroom. I used up all the soft picks, but I made some extra plungers and toilet paper rolls to spread around to a few other houses.
 Emily is a freelance writer, miniaturist, and adventure game enthusiast.


Cute and clever!
Very cute, especially in person…I just stumbled on this as a mini tutorial on Pinterest and was so surprised! I was part of the swap, and loved the little bathroom pieces, so glad to know how you made the little roles. Thanks!
I was also one of the lucky recipients in this year’s halfscale swap and was delighted with these accessories – thank you, and thank you for explaining how you did them. I now appreciate them even more, and really admire your creativity in thinking how to make them.
Thank you! :)