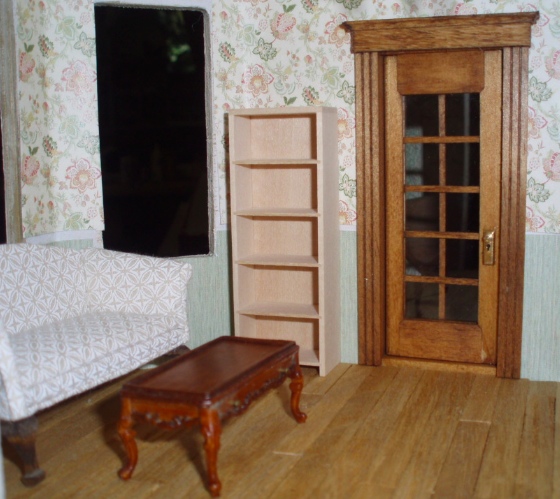
Moving right along with the rowhouse living room and office. Here’s the French door downstairs. For the headers, I haven’t been too careful about making sure they’re consistently wide. This one’s almost too short… I glued the door in before I cut it, so just had to wing it. In retrospect I probably should have made it a tad wider. Oh well.
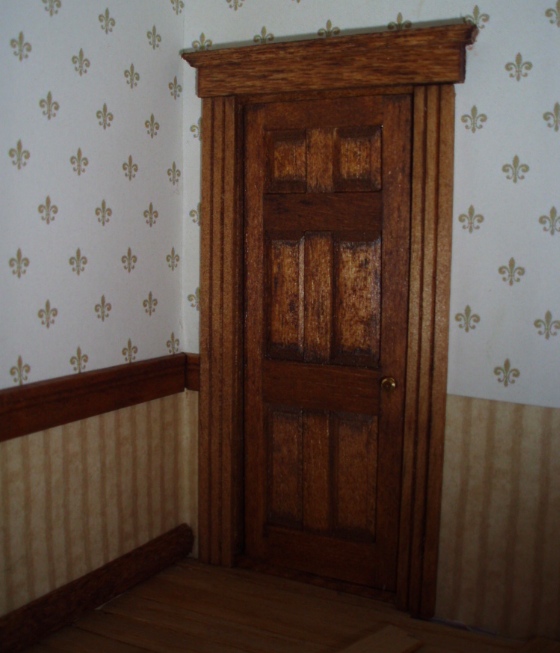
Here’s the second door in the office, which leads into the bedroom.
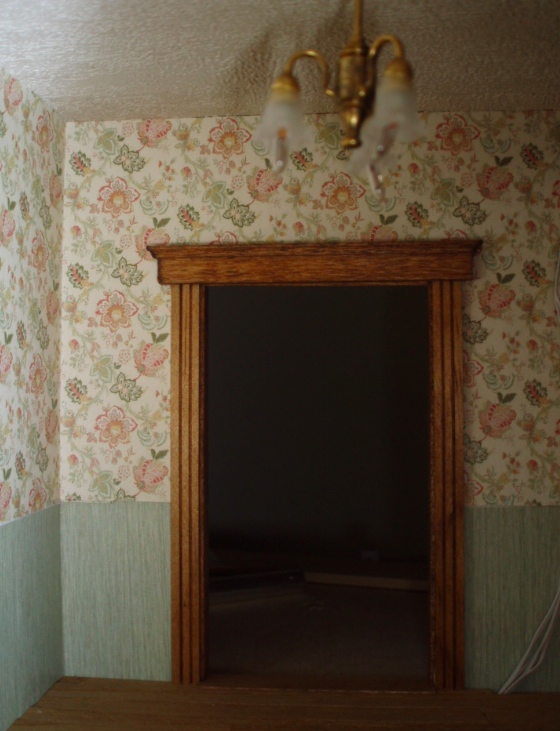
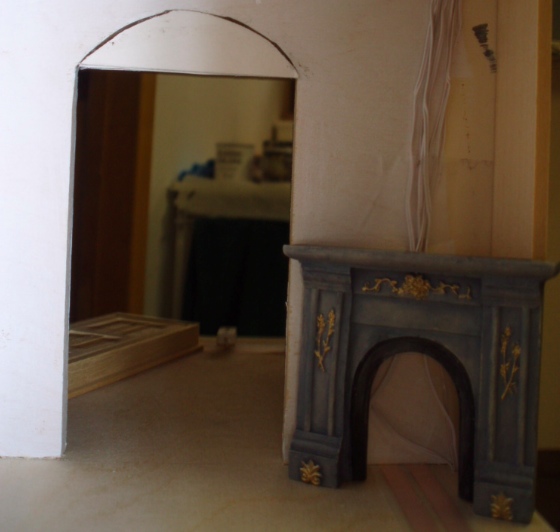
And here’s the open doorway in the living room, that leads into the kitchen. Originally this had an arched top but I filled it in with foamcore. This one’s a bit too wide, I should have cut it down but I didn’t realize until after I’d already glued the cove molding onto the top. So I left it. Hopefully I’m my own worst critic on this and no one else will notice. (Or if they do, they’ll be too polite to mention it.)
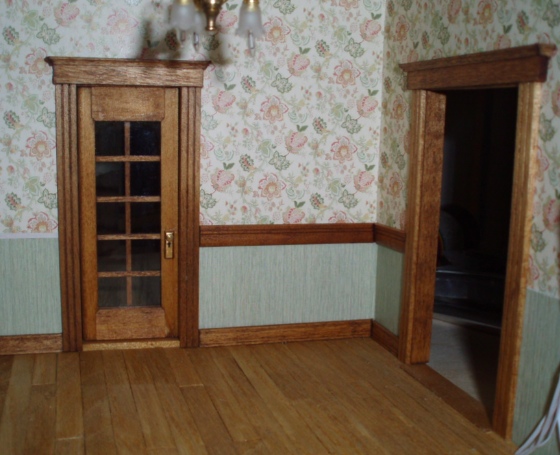
Started adding baseboards and chair rail. Also, in this picture you can see how I trimmed the inside of the kitchen doorway using thin basswood.
I’m running out of creative titles for these blog posts. This one is (mostly) about wallpapering / flooring / trim in the living room and office, which are the two rooms with bay windows. Hence the mildly clever title. You’ve been warned.
Okay, living room first. I didn’t like the arched doorway cut into the wall leading into the kitchen. This is a hand-made house, and the arch wasn’t even, and there was no way I’d find trim that would fit this door. Making arched trim for an arch I wasn’t crazy about seemed like a huge and unnecessary time suck. So, I filled in the arch with a piece of foamcore.
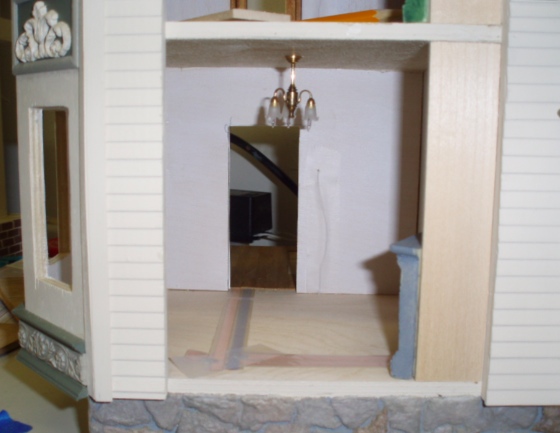
Another thing going on in these rooms is that I’m adding fireplaces to the corners. Originally I’d planned to put the fireplaces on the panel that opens, but ended up positioning the chimney on the edge of the panel to cover up a messy seam where the panel siding meets the house siding. So I decided to move the fireplaces to the corner, with the added benefit that I’ll be able to build in a little enclosure that hides all the wires running down from upstairs.
In theory, here’s how it will look when the panel’s open. That piece of wood is only 1″ wide, so it doesn’t block the view too much. (Way better than on the other side with the stairs…)
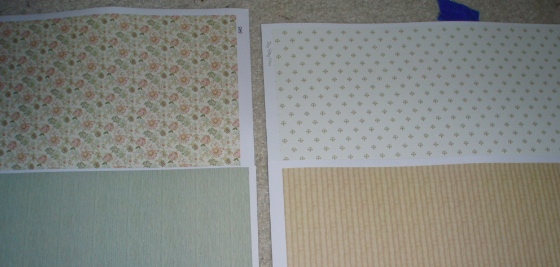
Since I ran into problems with the wallpaper mucilage discoloring my printie wallpaper, I bought paper for these rooms. These are Itsy Bitsy Minis papers and they’re actually 1:12 designs, but the print is small enough that I think they work fine for 1:24. I don’t like that Itsy Bitsy (among other companies) sells half scale wallpaper in smaller sheets, and buying the 1:12 meant I’d have more than enough with just one sheet of each. The flowers will go in the living room, and the gold medallion thingies (which are actually similar to the attic wallpaper I had to rip out) will go in the office.
“You’re so beautiful it hurts to look at you.” -Angela Chase, August 25, 1994
First of all, if Google brought you here, there is not (as far as I know) a My So-Called Life video game. That would be awesome. There is, however, a game coming out later this year named Gone Home, that any self-respecting My So-Called Life fan should check out. Adventure Gamers has just posted my early impressions of it.
Gone Home is set in June 1995, a few months after My So-Called Life went off the air, and involves the period of time between September 1994 and June as experienced by a high school freshman named Samantha Greenbriar (aka Sam). Like Angela, Sam is rebelling and figuring out who she is. Red hair dye is involved. So is music—some of the same bands Angela listened to, even. (Buffalo Tom!!) This is a game that captures what it was like to be a teen girl in the mid-90s in a way I never expected, seeing as the team behind it previously worked on first-person shooters.
In Gone Home, you play as Sam’s older sister Katie, returning to the family’s house in Portland after a year in Europe. No one is home and Sam left a note on the front door pleading with Katie not to try to find out where she is. (Reverse psychology at work…) Throughout the house, clues are scattered that tell the story of what happened to Sam during that year—including her growing friendship with a senior named Lonnie, who’s sort of like Rayanne Graff and Jordan Catalano rolled into one.
(MSCL similarities aside, Gone Home also reminds me a bit of the YA novel Thirteen Reasons Why. Worth a read for anyone who has a soft spot for this type of drama.)
As a former teenager who maybe never completely recovered from those years, discovering a game that authentically tells a teenager’s story, set in 1995 (the year I turned 17), is—to put it mildly—surprising. Video games aren’t particularly good at representing “women’s stories.” (By that I mean stories that explore what it’s like to be a woman and resonate deeply with women—the equivalent of “women’s fiction,” which is a phrase I hate, but a genre I love whatever you call it.) My first novel (not yet published *cough*) was a young adult novel set in the summer of 1996. I have two My So-Called Life DVD box sets AND the original VHS tapes from when the show was on the air, and I’ve rewatched the entire seasons more times than I have fingers and toes to count on. In fact, any authentic show or movie about teens in high school—I’m there. If it’s about girls and set in the mid-nineties, all the better.
I guess I’m sort of shaken to realize that there are other people who feel the same way. People who work in the video game industry, no less.
Anyway, the game’s not out yet and I’ve so far only played the first half of an early build, but as you might pick up from my preview, I’m pretty excited. I won’t go so far as to say this game will open up all new possibilities for the types of stories video games can tell because, well, almost twenty years after MSCL was canceled after only 19 episodes, there hasn’t been another show on TV quite like it. But I sure am glad this game exists, and I hope it’ll get some attention not only in gaming circles, but also among lapsed teens who consider Angela Chase an old friend.


 Emily is a freelance writer, miniaturist, and adventure game enthusiast.

