Just as my idea to bash a changing table into kitchen base cabinets came from staring at the nursery furniture on the Mansard Victorian’s second floor, I got an idea for the uppers when I was staring at the bedroom.

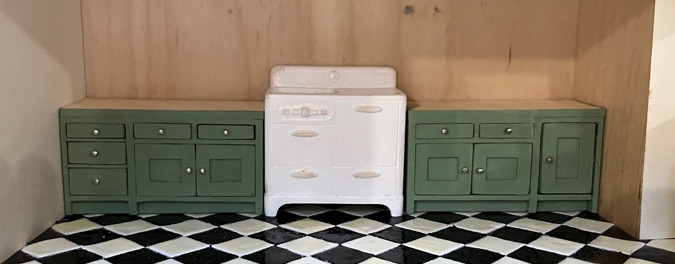
As a reminder, here’s how the cabinets look so far.
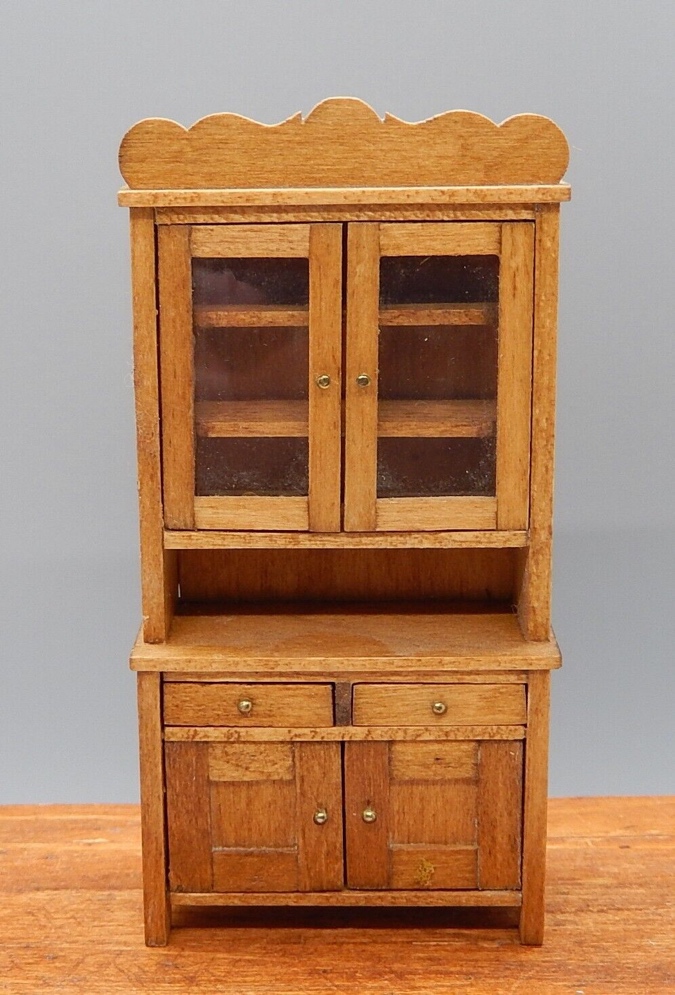
I made these out of the bottom portion of Cassidy Creations kitchen cupboard kits, bashed together with parts of a changing table. Here’s what the kitchen cupboard looks like if you build it like you’re supposed to. (This picture is not my cabinet, but one that sold recently on eBay.)
And here’s my inspiration photo.
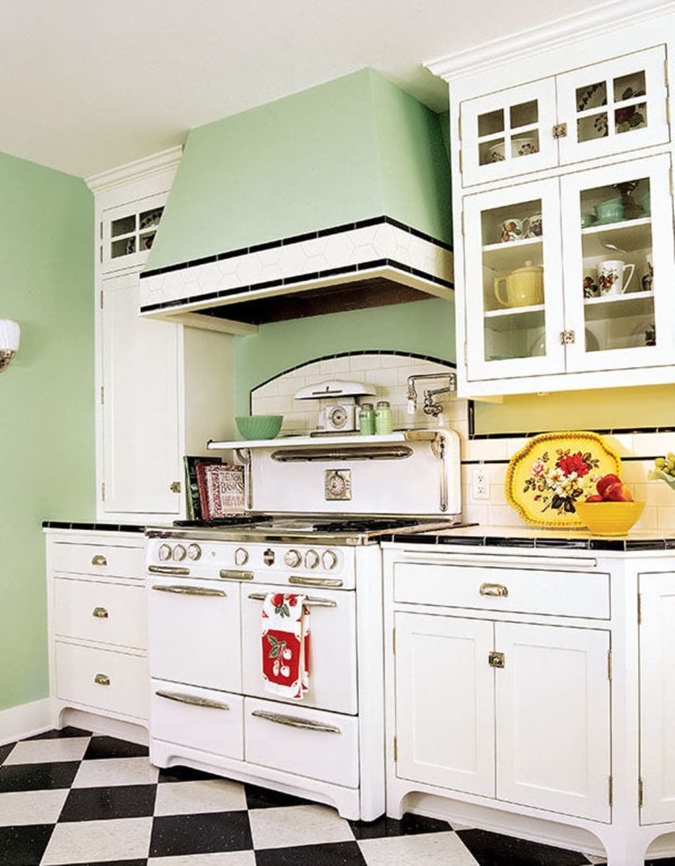
I like the tall cabinet on the left. Geoff and I are redoing our kitchen right now (mostly him!), and we’re going to have tall cabinets like that in our pantry area. Here’s an early render from the kitchen designer we’re working with.

The inspiration photo and my own kitchen remodel were both on my mind as I thought about how to tackle the Mansard Victorian’s uppers. I can use the upper portion of the Cassidy Creations kitchen cupboard over the larger base cabinets, but I need something else to go at the ends, over the portions made from the changing table parts.
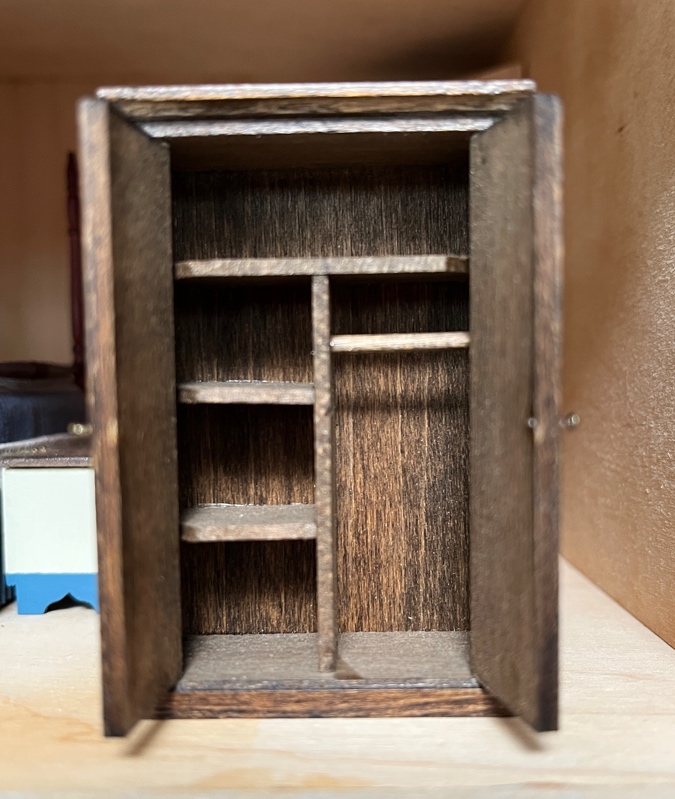
And I just kept staring at this wardrobe…

Hmm…

Is this crazy? We’re about to find out!
This wardrobe is an assembled Cassidy Creations kit I got in a furniture lot on eBay. I have another of these made by Pam Junk and painted by Cheryl Hollis, and yet another that I built myself for the Queen Anne Rowhouse. So I had no qualms about pulling the unbuilt one out of my stash to pilfer it for parts.
Here are the pieces I had to work with.
I used one of the wardrobe’s 3/4″ wide side pieces to create the back of the cabinet, and created two new side pieces by cutting 3/4″ strip wood down to 5/8″ (the same depth as the upper part of the kitchen cupboard kit). I cut the wardrobe’s top piece (which has pre-drilled holes for the doors) in half to create a top and bottom.

Inside the cabinet, I used the two small shelves that came with the wardrobe kit, and half of the wide shelf. Since I had reduced the side pieces from 3/4″ to 5/8″, also had to cut 1/8″ off the back of each shelf.
The upper portion of the kitchen cupboard has “glass” doors that are shorter than the back piece, to leave an open space above the countertop. The pieces for these doors are routed to hold the plastic.
I stared at these a long time thinking about how I could recreate them to make a door for the new skinny cabinet. I didn’t have the right wood and also don’t know how to route the wood like this (nor did I care to figure it out).

I decided instead to create paneled doors like on the lowers. This way I can create taller doors for the cabinets I bash out of the kitchen cupboard kit — the same height as the back piece — and I can make a matching door for the new skinny cabinet.
I stared at the inspiration kitchen some more. (Lots of staring going on!) I really like the little glass cabinets at the top. And now that I’m not using those routed pieces as they were intended, how about…

By cutting the long pieces down, I had enough left over to create a third glass door to go over the tall cabinet (shown here on the back of the cabinet I’d already built).

Now that I had a plan, I could assemble the upper portion of the kitchen cupboard kit. Once again, only one corner of the top and bottom pieces had pre-drilled holes, and there needed to be holes in both corners.
When I built the lowers, I made holes using the pilot punch and it split the wood, which made pin-hinging difficult. This time I used the micro drill.

Here’s the assembled cabinet. The only changes I made to the kitchen cupboard portion were leaving off the left side wall, and attaching the bottom to the base of the back piece rather than leaving that extra space.

Here it is so far.

I’d intended to use the wardrobe doors in the tall cabinet, but they’re not tall enough. That’s okay; I have extra 3/4″ strip wood to make new ones.

But there’s another problem: because the wardrobe kit doesn’t have paneled doors, this 3/4″ x 1/16″ door is flush with the front of the cabinet. Once I add the paneling, they’ll be too thick. I could have cut more off the backs of the shelves if I’d realized in time.
(To make things confusing, the assembled wardrobe that gave me the idea for this bash *does* have paneled doors. The kit doesn’t come that way, so the builder must have added the trim.)
Luckily I was able to scrounge up just enough 3/4″ x 1/32″ wood to make new, thinner doors.

I glued strips of 1/8″ x 1/32″ wood to these to make the panels. The front of the paneled door is now flush with the front edges of the cabinets.

Next I painted. I still need to add the little cabinets to the top, but I want to assemble the “glass” doors first so I can use them as spacers.
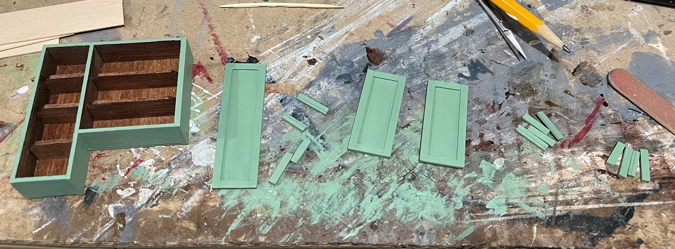
The standard amount of space between a countertop and upper cabinets is 18″, which translates to 3/4″ in half scale. Through no effort on my part, this works out exactly right. It was meant to be!

Once the glass cabinets are added, they’ll almost reach the ceiling.

There’s so much green now that I think I need to change the color of the light. Maybe shiny black “enamel” will look good?
 Emily is a freelance writer, miniaturist, and adventure game enthusiast.


Your cupboard “bashing” is so amazing!! I’m endlessly delighted by your skills! I love the green light, but I’m sure black enamel would look nice too. I’m still in awe of the flooring!
Thank you! :)
It looks fabulous! you really do design the nicest kitchens. Maybe white for the ceiling light? Or do you think that would blend in with the ceiling too much? Then black or silver?
Thanks! I do think white would blend in too much. I was thinking shiny black might tie everything together. I’ll wait to do it though. To be honest I’m not crazy about this light, but I already had it. It started out as shiny brass. Maybe I should look for something else. I want it to have a replaceable bulb and there aren’t many options out there.
Phenomenal!
Thanks!
Black would look good, but if you want it to look period correct, I would think it should be white. The cabinets are looking great & I love the green! Whatever you choose will look fab!
Thank you! I think white would blend in with the ceiling too much, at least for this fixture. If I could find something with a white shade and a black base, that might be better. I’ll keep looking.
I love this!!! I have so MANYYYYY old hand me down china cabinet type pieces. For such a long time dollhouse furnishings were all Victorian. Using parts to re-create NEW is so FUN, inventive and inspiring. And I like your example that so much can be done withOut fancy equipment!!!
Thank you! I like bashing because you can turn it into something one-of-a-kind. We don’t have many options in half scale so we have to improvise. :)